Sign In
Upload
Manuals
Brands
Analyticon Manuals
Measuring Instruments
Hemolyzer 5
Analyticon Hemolyzer 5 Manuals
Manuals and User Guides for Analyticon Hemolyzer 5. We have
1
Analyticon Hemolyzer 5 manual available for free PDF download: Service Manual
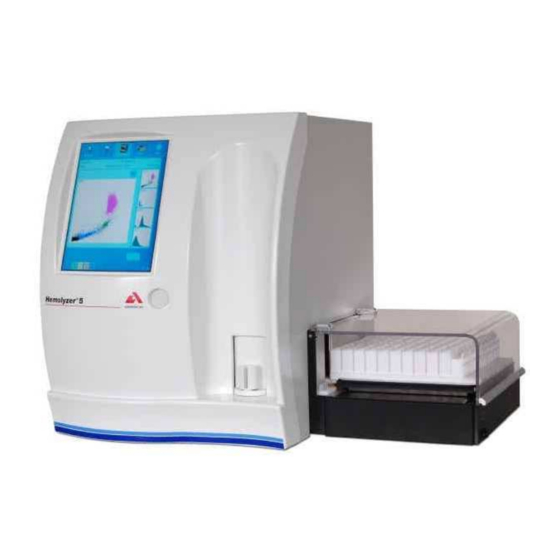
Analyticon Hemolyzer 5 Service Manual (172 pages)
Brand:
Analyticon
| Category:
Measuring Instruments
| Size: 6 MB
Table of Contents
Table of Contents
4
Tab L L E of Tabe of Contents Contents
4
Introduction
9
Ho Should Read this Manual
9
For Your for Your Safet Safety
10
Anual
10
P Precautions
10
Actors
11
Equirements
12
Uggested on - - Line Ups
12
Emolyzer 5
13
Equirements
13
Isposal
14
Ituations
14
Structure of the Analyzer
15
Omponents Located on the Front Panel
15
Surface
15
Start Button Start Button and LE and Leds Ds
16
Omponents Accessible after Opening the Front Omponents Accessible after Opening the Front Panel Panel
16
Shear Va Shear Valve Assembly Lve Assembly
16
Sample Sample Rotor
16
Rotor
16
Main Dilutors
17
Dilutor Opto Se Dilutor Opto Se Nsor Boards
18
Nsor Boards
18
Tube Tube Organizer
18
Organizer
18
Unit
18
Laser Head
19
Sample Injector
20
Laserdiode Laserdiode Driver Driver Board Board
21
Pin Photodiode an Pin Photodiode an D Amplifier (OPT D Amplifier (OPT Sensor_2V1)
21
Eft Side
22
Valve Boards
22
Wbc/Baso
23
Counting Chamber with Electrodes Counting Chamber with Electrodes and Measuring and Measuring Aperture Aperture
23
Head
24
Cell Coun Cell Counter Ter Amplifier Amplifier Board Board
25
Pressure Sensor Boar Pressure Sensor Board
26
Reagent and Reagent and Vacuum Vacuum Buffers Buffers
27
Board
28
Opening the Opening the Valve Assembly Valve Assembly Plate
28
Plate
28
Vacuum Vacuum Buffer
28
Buffer
28
Pneumatic and Power Pneumatic and Power Boards (PP Boards (PPB1 and PPB B1 and PPB 2) 2)
29
Pump Pump Assembly
30
Assembly
30
Ight Side
31
XY XY Unit
31
Unit
31
Xyropto Board
32
Sampling Needle
32
Blood Sensor
32
Wash Head Wash Head
33
Processor Unit (L S-DACQ Board with Processor Unit (L S-DACQ Board with Dimmboard)
33
Mini-ITX PC Mot Her Board (in Mini-ITX PC Mot Her Board (in Hardware Block)
38
Electronic Block Diagram
39
Lock
39
Nit
41
Mplifier Board
43
Optical Head
44
Operation of the Fluidic System
45
The Reagent System
45
Flow Diagram of Measurement
46
Initialization of the Fluidic System
48
Reagents Priming
48
Piercing Process
48
Sampling Process
48
Needle Washing Processes
49
Diluting Processes
49
Lysing Process
49
Rbc Counting Process
50
Wbc/Baso Counting
50
Wbc 4D Iff Counting
50
Chamber Draining Processes
51
Cleaning ( Rinsing ) Processes
51
Standby Process
51
Wake up Process
52
Shutdown Process
52
Adjustments
53
Xy Unit Mechanical Adjustments
53
XY Horizontal Movement
53
Greasing the Horizontal Rods
53
Set Opto Flags for Horizontal Movement
54
XY Vertical Adjustment
56
Basic Operation
56
Adjusting the Needle's Vertical Position
57
Washing Head Settings
57
Needle Setting
58
Handmade Setting
58
Software Made Setting
59
Shear Valve Mechanical Setting
59
Shear Valve Lower Disc Position Setting
60
Shear Valve Upper Disc Setting
60
Setting the Opto Sensors of the Shear Valve
62
Amplifier Offset Setting
63
Blood Sensor Calibration
64
Sample Position Setting
66
Pressure Sensor Adjustment
67
Set Serial Number
68
Wbc Preheater
68
Setting Laser Values
68
Calibration Procedure of Optical Heads
68
Short Guide for Laser Values
72
Verification Procedures
75
Self-Test
75
Hemolyzer 5 Self-Test Guide
76
General Information
76
Electronic Self-Test Parameters
76
Pneumatic Self-Test Parameters
78
Error Messages
80
Service Menu
86
Service Functions
87
Test Functions
88
Low Level File Management
88
Low Level Reboot (Dimmboard)
88
Pneumatical System - Initialize
88
Network Management
89
RAW Data Saving Mode
89
Export RAW Files
89
Windows Control Status
89
TCU Fill/Drain
89
Flow Cell Fill/Drain
89
Blood Sensor Status
89
Reset Statistics
89
Hard Drive Maintenance
89
Show Advanced DB View
89
Small Sample Mode
90
Pre-Diluted Mode
90
Monitoring
90
Service Testing
90
Service Calibration
91
Enable Scatter Calibration
91
Backup Calibration
91
Restore Calibration
91
Load Calibration
91
Accept User Factors
92
Back
92
Accept
92
Stress Measure
92
Auto Alignment
93
AS (Auto-Sampler)
93
Go to Pos
93
Reset
93
Repeat Last Command
93
Go to Mixer
93
Load to Sampling Position
93
Set up Barcode Reader
94
Adjustments
94
Multiuser Settings
95
MDA View
95
Software Upgrade
96
Refresh Data
96
Change High Level Software
96
Change Low Level Software
96
Change Low Level Boot
96
Change LSDACQ Firmware
96
Change Optical Head Firmware
96
Change TCU Software
96
Change Autosampler Software
96
Reagent Lock
97
QC Wizard
98
Printer Installation
98
Factory Settings
98
Service Mode off
98
Software Systems
99
General Sw Installation Guide
99
Install Operating System Windows 2.0 Install Using Pendrive
101
Installing a Printer
105
Installation
106
Check the Delivery
106
Prepare for Initial Installation
106
Select a Suitable Location
106
Make any Special Arrangements
106
Gather Your Peripherals Devices
107
Performing the Installation
107
Move the 'Hemolyzer 5' to the Selected Location
107
Visual Inspection
107
Remove the Protective Card from T He Shear Valve
107
Connect the Optional Auto-Sampler
108
Connect the Reagents
108
Connect the Power Cord
109
Verify the 'Hemolyzer 5' Computer Operation
110
Connect Peripherals
110
How to Install a Printer
111
Initializing the Optional Autosampler
111
Using the Settings Menu
113
Set up a Laboratory Information System (LIS)
113
Set up a Serial LIS Connection
114
Set up an Ethernet LIS Connection
115
Running Blank Samples and Blood Samples for the First Time
115
Checklist for Installing Hemolyzer 5 Hematology Analyzer
116
Troubleshooting
118
Troubleshooting Checklist for Hemolyzer 5 Hematology Analyzer
118
Visual Inspection
118
Powering up the System
119
Checking the Software Adjustments
119
Checking the Hardware Adjustments
120
Run a Self-Test
121
Run Blank Measurements
121
Run Control Measurements
122
Mechanical Problems
123
General Guidelines to Overcome Motor or Moving Part Related Problems
123
Sample Rotor (SR or BOB) Failures
124
SR Gives Grinding Noise and / or SW Displays SR Error Messages
124
SR Error Appears During Initialization Process
124
The SR Does Not Turn into the Analyzer Even with Open Front Panel
124
Needle Mechanics, Vertical Motor (Mvert) Problems
124
The Needle Carriage Keeps Dropping Back (Down) at Initialization
124
Mvert Cannot Reach the Optosensor (up or Down)
124
Shear Valve (SV) Related Errors
125
Error at the First Startup
125
Grinding Noise after SV Cleaning, (after SV Reinstallation)
125
Leakage
125
Dilutor Errors
126
Dilutor Is Making Noise
126
Dilutor Is Leaking
126
A Tube Comes off of a Valve
126
Priming Problems
126
The Analyzer Would Not Prime Liquids
126
Electronics Related Problems
127
Touch Screen / Display Errors
127
No Image on Display
127
Touch Sensitive Surface Not Working
127
Touch (Click) Is Inaccurate
127
Screen Image Is Not Normal, some Parts of the Software Screen Is Not Visible
127
Communication Errors
128
The Analyzer Does Not Power on
128
I 2 C Errors Displayed at Startup
129
Useful Information and Tips
129
High PLT Background
129
Fast Starting up and Shutting down
129
Removing Bubbles from the Flow Cell
129
Removing the Dimmboard
130
Listen the Sounds of the Instrument
130
Replacing Small Diameter Tubes
130
Swapping the Pumps
130
Draining the Reservoirs
130
Maintenance
131
User Maintenance
131
Daily Maintenance
131
Weekly Maintenance
131
Shear Valve Cleaning
131
Cleaning the Wash Head
131
Preventive Maintenance
131
Flow Cell Cleaning
137
Removal and Replacement Procedures
140
Opening the Instrument
140
Shear Valve Assembly
141
Xy Unit
142
Sample Rotor
145
Dilutors
146
Syringe Replacement
146
Tcu Module
147
Valve Block
148
Pre -Amplifier Board
149
Pump Assembly
149
Hardware Module
151
Laser Head Assembly
152
Reinstalling the Laser Head
155
Measuring Block
155
Aperture Removal
155
WBC Aperture Removal
156
Measuring Chamber Removal
156
HGB Head Removal
157
Display Unit
157
In Chamber Position
159
In Needle Position
160
Tubings
161
Appendix
172
Recommended Kit of Tools
172
Ow to Send Rp Files to Assessment of Analyzer Performance
172
Advertisement
Advertisement
Related Products
Analyticon Hemolyzer 5 NG
Analyticon Urilyzer 500 Pro
Analyticon Combi Scan 100
Analyticon combi scan 500
Analyticon Urilyzer 100 Pro
Analyticon Categories
Measuring Instruments
More Analyticon Manuals
Login
Sign In
OR
Sign in with Facebook
Sign in with Google
Upload manual
Upload from disk
Upload from URL