Sign In
Upload
Manuals
Brands
Analog way Manuals
Projector Accessories
AQL-RS2
Analog way AQL-RS2 Manuals
Manuals and User Guides for Analog way AQL-RS2. We have
2
Analog way AQL-RS2 manuals available for free PDF download: User Manual
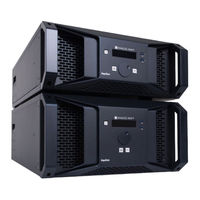
Analog way AQL-RS2 User Manual (149 pages)
Brand:
Analog way
| Category:
Projector Accessories
| Size: 9 MB
Table of Contents
Table of Contents
3
1 Disclaimer
10
Copyrights
10
Warranty
10
Liability
10
Force Majeure
10
2 Terms and Definition
11
3 Hardware Specifications
12
General Safety Instructions
12
English
12
French
13
Italian
14
German
15
Spanish
17
Symbols on Product Identification and Warning Labels
18
Environmental Specifications for All Livepremier Models
19
UPS Compatibility
20
Package Contents
20
Rack Mount Information
20
4 Introducing Livepremier
21
Livepremier - Modular Architecture
21
Supported Formats and Rates
21
Front Panel
22
Livepremier Rear Panels
22
Input / Output Cards
23
Available Cards
23
Change an Input / Output Card
24
Fixed Parts
24
Optional Control Card with Displayport Multiviewer Outputs
25
USB and Sync Ports
25
Framelock
25
Gpio
25
Dante Audio Connectors
25
Power Supply Units (PSU)
26
Livepremier Accessories
27
HDMI 2.0 over Fiber Extenders - Transmitter and Receiver
27
Rack-Mountable Power Tray for Optical Extenders
27
Precautions When Mounting a Livepremier Unit
27
Power on and off
29
Start the Livepremier
29
Power off
29
Forced Shutdown
29
Firmware Update
29
5 Using the Web RCS
30
Run the Web RCS
30
Web RCS Requirements
30
Default Network Settings
31
Connection
31
Login Page
31
Livepremier Simulator
31
General Tips
32
Web Browser Features
32
Mobile Version
32
Section Buttons (Copy, Paste and Reset)
32
Setting a Number Value
32
Search Bar
33
Alarms and Notifications
33
Standby / Restart
33
Device Overview
34
Back Panel
34
Device Status
34
Dashboard
36
Firmware
36
Remote Access
37
Remote Control
39
Save / Reset / Load Configuration
39
Save the Current Configuration
40
Reset a Configuration
40
Load a Configuration
40
Device Control Synchronization
41
Web RCS Synchronization
41
RC400T Synchronization
41
6 Livepremier Concepts
42
What Is "Capacity
42
Standard Formats Capacity
42
Elements Using Capacity
42
Content and Layer Compatibility
43
Screen Layers
44
Screen Sources
44
Mixing Layers
44
Split Layers
44
Aux Screens and aux Layers
45
Aux Layers Quantity and Capacity
45
Aux Layers Limitations
45
Screen / aux Screen Comparison
46
Livepremier Processing
47
Vpus and Scaling Engines
47
Self-Rearrangement
48
A VPU Can Support both Capacities at the same Time
49
Scaling Engine Boundary
49
Combined Vpus
50
Optimized Mode
50
Cut & Fill Resources
51
How Many Vpus Per Model
51
Ipus
51
HDR Conversion
52
Livepremier Latency
52
7 Preconfig Menu
53
Preconfig > System
53
Vertical Rate
53
Framelock Input Settings
54
Framelock Output Settings
54
Color Processing
54
Quick HDCP
55
Preconfig > Multiviewers
55
Multiviewers Quantity
55
Set a DPH104 for a Multiviewer DP Output
55
Preconfig > Outputs
56
Output Group
56
Output Capacity - the 4-4 Rule
57
Set an Output Group for a Screen
58
Set a DPH104 Output for a Screen
58
Set an Output for an aux Screen
58
Output Cloning and aux Output Duplicate
59
Creating Screens
60
Create an aux Screen
61
Rename a Screen
62
Preconfig > Canvas
62
Tree View
63
Set Output Rotation
63
Patterns
65
Grid Canvas
66
Free Canvas
67
Advanced Output Settings (in Preconfig > Canvas)
69
Preconfig > Inputs
70
Input Group
70
Set an Input Group
70
Set Four 3G-SDI Inputs for 2SI Format
71
Set an NDI Input
71
Preconfig > Images
72
Image Slots
72
Set Images Preset Capacity
72
Preconfig > Backgrounds
72
Background Sets
72
Background Set for a Screen with One Output Group
73
Background Set for a Screen with Multiple Output Groups
73
Reset a Background Set
73
Remove a Source from All Background Sets
73
Preconfig > Avoip
74
Ip/Sdi
74
Sdvoe
75
Dante
75
8 Multiviewers
76
Multiviewers Settings
76
Multiviewers Format
76
Multiviewers Signal
76
Multiviewers Adjustment (Image Correction)
77
Multiviewers Pattern
77
9 Outputs
78
Outputs Main Screen
78
Output Settings
78
Output Format
79
Output Signal
79
Output Adjustment (Manual Image Correction)
80
Output Adjustment Using Correction LUT
80
Output Pattern
81
10 Inputs
82
Inputs Main Screen
82
Input Settings
82
Input Signal
83
Input Aspect
84
Input Keying
84
Input Adjustment (Manual Image Correction)
87
Input Adjustment Using LUT Correction
87
Input Pattern
87
Input NDI Source
87
11 Images and Library
88
Library
88
Image Formats
88
Image Specifications
88
Transfer Images from the Computer to the Unit
89
Capture a Video Signal into an Image File
89
Download an Image File from the Unit
89
Delete an Image File from the Unit
89
Manage Image Library from the Front Panel
90
Images
90
Images Main Screen
90
Image Slots Settings
90
Downscale to Capacity
90
Assign an Imported Image to an Image Slot
91
Assign a Timer to an Image Slot
91
Image Signal
91
Image Aspect
92
2 Formats and EDID
93
Formats
93
Create a Custom Format
93
Edit a Custom Format
93
Delete a Custom Format
93
Edid
94
EDID Bank
94
Save an EDID from Inputs and Outputs
94
Replace an Input EDID with an EDID from the Bank
94
Set a Template Format for an EDID
94
Set a Custom Format for an EDID
95
Export an EDID to Computer
95
Import an EDID from Computer
95
Delete a Custom EDID
95
AW EDID Editor
95
3 LUT Libraries
96
Creating a Crematte 3D LUT Using a Livepremier Live Input
96
Importing a LUT
96
Using a LUT
97
Export a LUT to Computer
97
Delete a LUT
97
4 Audio, Timers and GPIO
98
Audio
98
Audio Routing
98
Default Audio Routing
99
Advanced Audio Routing (Single Channel)
99
Timers
100
Create a Timer
100
Control Counter Timers in Live Menus
100
Use Timers in Screens and Aux. Screens
101
Gpio
101
Pins Table and GPIO Connection
101
On/Off Switch Pins
102
Set GPIO in the Web RCS
103
15 Screens / aux
104
Screens Menu Interface
104
Program and Preview
104
Views
104
Sources - Left Panel
106
Layer Selection
106
Screen Layout Editor
107
PGM and PRW Buttons - Screen Controls
107
Bottom Bar Buttons
108
Transitions - Right Panel
109
Layer Properties
109
Layer Selection and Tools
110
Layer Position and Size
110
Layer Source
111
Cut & Fill Effect
112
Set Layer Opacity
113
Set Layer Crop and Aspect
113
Set Layer Mask
113
Set Layer Border
114
Set Layer Smooth Border
114
Set Layer Shadow
114
Set Layer Color Filter
114
Set Layer Horizontal and Vertical Flip
114
Layer Transition
115
Set Layer Transition Effect
115
Set Layer Transition Timing
115
Set Layer Transition Speed
115
Aux Screens
116
Aux Layers Limitations
116
6 Memories
117
Memories Tab
117
Master Memories
118
Save a Master Memory from Current Screens
118
Save a Master Memory from Existing Screen Memories
119
Load a Master Memory
119
Load a Master Memory at Startup
119
Edit a Master Memory
120
Screen Memories
120
Save a Screen Memory
120
Load a Screen Memory
121
Edit a Screen Memory
121
Quick Overwrite or Revert
121
Layer Memories
122
Save a Layer Memory
122
Load a Layer Memory
122
Edit a Layer Memory
122
Rename a Memory
123
Change the Color of a Memory Slot
123
Reorder Memories
123
Delete a Memory
123
7 Multiviewers
124
Tips and Recommendations
124
Multiviewers Menu Interface
124
Sources - Left Panel
125
Widget Selection
126
Multiviewer Layout Editor
127
Bottom Bar Buttons
127
Widget Properties
128
Widget Position and Size
128
Widget Source - Assign Content to a Widget
129
Multiviewers Memories
129
Save a Multiviewer Memory
129
Load a Multiviewer Memory
129
Load a Multiviewer Memory at Startup
130
Edit a Multiviewer Memory
130
Rename a Memory
130
Change the Color of a Memory Slot
130
Reorder Memories
130
8 User Maintenance and Troubleshooting
131
User Maintenance - Air Filter
131
Troubleshooting
131
Appendices
132
Contact Information
148
Advertisement
Analog way AQL-RS2 User Manual (121 pages)
Brand:
Analog way
| Category:
Projector Accessories
| Size: 9 MB
Table of Contents
Table of Contents
3
1 Disclaimer
9
Copyrights
9
Warranty
9
Liability
9
Force Majeure
9
2 Terms and Definition
10
3 Hardware Specifications
11
Safety Instructions
11
English
11
French
12
Italian
13
German
14
Spanish
15
Environmental Specifications for All Livepremier Models
16
UPS Compatibility
16
Package Contents
16
Rack Mount Information
16
4 Introducing Livepremier
17
Livepremier - Modular Architecture
17
Front Panel
18
Livepremier Rear Panels
18
Input / Output Cards
19
Available Cards
19
Change an Input / Output Card
19
Fixed Parts
20
USB and Sync Ports
20
Framelock
20
Gpio
20
Dante Audio Connectors
20
Power Supply Units
21
Livepremier Accessories
21
Power on and off
22
Start the Livepremier
22
Power off
22
Forced Shutdown
22
Precautions When Mounting a Livepremier Unit
23
5 Using the Web RCS
24
Run the Web RCS
24
Web RCS Requirements
24
Default Network Settings
25
Connection
25
Login Page
25
Livepremier Simulator
25
General Tips
26
Web Browser Features
26
Mobile Version
26
Section Buttons (Copy, Paste and Reset)
26
Set a Number Value
26
Search Bar
27
Alarms and Notifications
27
Back Panel Shortcuts
27
Standby / Restart
27
Dashboard - System Settings
28
Dashboard - Device
28
Dashboard - Firmware / Hardware (Firmware Update)
29
Dashboard - Network
30
Dashboard - Cooling
30
Dashboard - Power
30
Dashboard - Security
30
Save / Load Configuration
32
Save the Current Configuration in a Slot
33
Load a Configuration from a Slot
33
Export a Configuration to the Computer
34
Import a Configuration
34
Reset Configuration
34
6 Livepremier Concepts
35
What Is "Capacity
35
Standard Formats Capacity
35
Elements Using Capacity
35
Content and Layer Compatibility
36
Screen Layers
37
Screen Sources
37
Mixing Layers
37
Split Layers
37
Aux Screens and Aux Layers
38
Aux Layers Quantity and Capacity
38
Aux Layers Limitations
38
Livepremier Processing
39
Vpus and Scaling Engines
39
Self-Rearrangement
40
A VPU Can Support both Capacities at the same Time
41
Scaling Engine Boundary
41
Combined Vpus
42
Optimized Mode
42
Cut & Fill Resources
43
How Many Vpus Per Model
43
Ipus
43
HDR Conversion
44
Livepremier Latency
44
7 Preconfig Menu
45
Preconfig > System
45
Vertical Rate
45
Framelock Input Settings
46
Framelock Output Settings
46
Color Processing
46
Quick HDCP
46
Multiviewers Quantity
47
Preconfig > Screens / Aux Screens
47
Output Group
48
Output Capacity - the 4-4 Rule
48
Set an Output Group for a Screen
49
Set a DPH104 Output for a Screen
49
Set an Output for an Aux Screen
49
Create a Screen
50
Create an Aux Screen
50
Rename a Screen
51
Preconfig > Canvas
51
Tree View
52
Set Output Rotation
52
Patterns
54
Grid Canvas
55
Free Canvas
56
Advanced Output Settings (in Preconfig > Canvas)
58
Preconfig > Inputs
59
Input Group
59
Set an Input Group
59
Set Four 3G-SDI Inputs for 2SI Format
59
Preconfig > Images
60
Image Slots
60
Set Images Preset Capacity
60
Preconfig > Backgrounds
61
Background Sets
61
Background Set for a Screen with One Output Group
61
Background Set for a Screen with Multiple Output Groups
61
Reset a Background Set
61
Remove a Source from All Background Sets
61
8 Multiviewers
62
Multiviewers Settings
62
Multiviewers Signal
62
Multiviewers Pattern
63
Multiviewers Adjustment (Image Correction)
63
9 Outputs
64
Outputs Main Screen
64
Output Settings
64
Output Group Format
64
Output Group Pattern
65
Output Signal
65
Output Adjustment (Image Correction)
66
10 Inputs
67
Inputs Main Screen
67
Input Settings
67
Input Group Signal
68
Input Group Pattern
68
Input Group Adjustment (Image Correction)
69
Input Group Aspect
69
Input Keying
70
11 Images and Library
71
Library
71
Image Formats
71
Image Specifications
71
Transfer Images from the Computer to the Unit
72
Download an Image File from the Unit
72
Delete an Image File from the Unit
72
Manage Library from the Front Panel
72
Images
73
Images Main Screen
73
Image Slots Settings
73
Downscale to Capacity
73
Assign an Imported Image to an Image Slot
73
Assign a Timer to an Image Slot
74
Image Signal
74
Image Aspect
75
2 Formats and EDID
76
Formats
76
Create a Custom Format
76
Edit a Custom Format
76
Delete a Custom Format
76
Edid
77
EDID Bank
77
Save an EDID from Inputs and Outputs
77
Replace an Input EDID with an EDID from the Bank
77
Set a Template Format for an EDID
77
Set a Custom Format for an EDID
78
Export an EDID to Computer
78
Import an EDID from Computer
78
Delete a Custom EDID
78
3 Audio and Extras
79
Audio
79
Reboot or Reset the Dante Audio Card
79
Audio Routing
79
Default Audio Routing
80
Advanced Audio Routing (Single Channel)
80
Timers
81
Create a Timer
81
Control Counter Timers in Live Menus
81
Use Timers in Screens and Aux. Screens
82
Gpio
82
Pins Table and GPIO Connection
82
On/Off Switch Pins
83
Set GPIO in the Web RCS
84
14 Screens / Aux
85
Screens Menu Interface
85
Program and Preview
85
Views
85
Sources - Left Panel
87
Layer Selection
87
Screen Layout Editor
88
PGM and PRW Buttons - Screen Controls
88
Bottom Bar Buttons
89
Transitions - Right Panel
90
Layer Properties
91
Layer Position and Size
91
Layer Source
92
Cut & Fill Effect
93
Set Layer Opacity
94
Set Layer Crop and Aspect
94
Set Layer Border
94
Set Layer Smooth Border
95
Set Layer Shadow
95
Set Layer Color Filter
95
Set Layer Horizontal and Vertical Flip
95
Layer Transition
96
Set Layer Transition Effect
96
Set Layer Transition Timing
96
Set Layer Transition Speed
96
Aux Screens
97
Aux Layers Limitations
97
5 Memories
98
Memories Tab
98
Master Memories
99
Save a Master Memory from Current Screens
99
Save a Master Memory from Existing Screen Memories
100
Load a Master Memory
100
Load a Master Memory at Startup
100
Edit a Master Memory
101
Screen Memories
101
Save a Screen Memory
101
Load a Screen Memory
101
Edit a Screen Memory
102
Quick Overwrite or Revert
102
Layer Memories
102
Save a Layer Memory
102
Load a Layer Memory
103
Edit a Layer Memory
103
Rename a Memory
103
Change the Color of a Memory Slot
103
Reorder Memories
104
Delete a Memory
104
6 Multiviewers
105
Tips and Recommendations
105
Multiviewers Menu Interface
105
Sources - Left Panel
106
Widget Selection
107
Multiviewer Layout Editor
108
Bottom Bar Buttons
108
Widget Properties
109
Widget Position and Size
109
Widget Source - Assign Content to a Widget
110
Multiviewers Memories
110
Save a Multiviewer Memory
110
Load a Multiviewer Memory
110
Load a Multiviewer Memory at Startup
110
Edit a Multiviewer Memory
111
Rename a Memory
111
Change the Color of a Memory Slot
111
Reorder Memories
111
7 User Maintenance and Troubleshooting
112
User Maintenance - Air Filter
112
Troubleshooting
112
Appendices
113
Appendix A. RC400T
113
Appendix B. Other Livepremier Control Options
119
Contact Information
120
Advertisement
Related Products
Analog way AQL-RS-ALPHA
Analog way AQL-RS1
Analog way AQL-RS3
Analog way AQL-RS4
Analog way AQL-C
Analog way LivePremier AQL-RS5
Analog way LivePremier AQL-RS6
Analog way Aquilon RS alpha
Analog way Aquilon C
Analog way LiveCore ASC1602
Analog way Categories
Switch
Media Converter
Server
Projector Accessories
Matrix Switcher
More Analog way Manuals
Login
Sign In
OR
Sign in with Facebook
Sign in with Google
Upload manual
Upload from disk
Upload from URL