Sign In
Upload
Manuals
Brands
Amulet Hotkey Manuals
Extender
DXR-H4 SFP
User Manuals: Amulet Hotkey DXR-H4 SFP Extender Host
Manuals and User Guides for Amulet Hotkey DXR-H4 SFP Extender Host. We have
1
Amulet Hotkey DXR-H4 SFP Extender Host manual available for free PDF download: User Manual
Amulet Hotkey DXR-H4 SFP User Manual (44 pages)
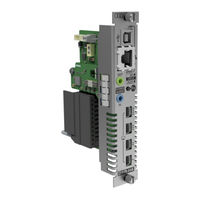
Quad Display KVM Extender Host Card
Brand:
Amulet Hotkey
| Category:
Extender
| Size: 3 MB
Table of Contents
Table of Contents
4
1 Before You Start
9
Rack Mount Chassis
9
Personality Modules
9
SFP Modules
9
Cabling
9
USB Devices
9
Audio
10
Front and Rear Audio
10
Connecting to DXZ4 Zero Client Audio
10
Cooling
10
Blanking Plates
10
IP and MAC Addresses
10
Other Models
10
Terminology
10
2 Your DXR-H4 Host Card at a Glance
11
Front Panel Features
11
Figure 1: Front Panel Features
11
Personality Module Features
12
Figure 2: Rear Panel Features (RJ45 Model)
12
Status LED Descriptions
13
Front Panel Status Leds
13
Rear Panel Status Leds
13
Key
13
Power LED
13
Figure 3: Status Leds on the Front Panel
13
Figure 4: Status Leds on the Rear Panel (SFP Model Shown)
13
Table
13
Table 2: Power.led.indications.for.split.dxip.rack
13
LINK Status LED
14
Pcoip Status LED
14
SPEED Status LED
14
SYS Status LED
14
Table 3: Sys.led.standby.indications
14
Table 4:. S Ys.led.indications.when.card.is
14
Table 5: Pcoip.led.standby.indications
14
Table 6:. P Coip.led.indications.when.card.is
14
Table 7: Speed.status.led.indication
14
Table 8: Link.status.led.indication
14
Button Operation
15
Enable the Management Interface
15
Power
15
Warning Alarm
15
3 Set up the DXR-H4
17
Turn the Power off
17
STEP 1: Prepare the PC, Workstation or Servers
17
STEP 2: Install the Personality Module
17
Figure 5: Install the Personality Module
17
STEP 3: Connect the Personality Module to the Host Computer
18
STEP 4: Connect the DXR-H4 to the Network
18
Figure 6: Cabling for the DXR-H4 (RJ45 Variant Shown)
18
Figure 7: Example SFP Modules
18
STEP 4: Install the DXR-H4 Card into the Rack
19
STEP 5: Change the Default IP Address
19
Figure 8: Install the DXR-H4 Host Card
19
STEP 6: Connect a Zero Client to the DXR-H4
20
Connect to a DXR-H4 Using SLP Discovery
20
STEP 7: Change the Default Password
20
Setup Complete
20
How to Power down the DXR-H4
20
Further Reading
20
Figure 9: The.zero.client.osd.discovers.and.lists.the.first.10. Available Pcoip Hosts Discovered
20
Table 9: Operational.indications
20
4 Introduction to Pcoip
21
What Is Pcoip
21
Host Rendering
21
Figure 10: Typical Pcoip Set
21
Multi-Codec Display Processing
22
Dynamically Adapts to Network Conditions
22
About Pcoip Hosts
22
Host Function
22
Host Types
22
About Pcoip Zero Clients
22
Functionality
22
Data Handling
22
Benefits of Pcoip Zero Clients
22
Increased Security
22
Cost Savings
23
Pcoip Management Tools
23
Pcoip Management Console
23
Figure 11: Pcoip Management Console Home Page
23
Table 10: Zero Client Management Tools
23
Administrative Web Interface (AWI)
24
On Screen Display (OSD)
24
Figure 12: Administrative.web.interface
24
Figure 13: OSD Connect Screen
24
5 Set up a Pcoip Session
25
Power up the Zero Client
25
Types of Pcoip Session
25
Auto Detect
25
Connect Directly to a Specified Host
25
Connect to a Choice of Hosts Using SLP
25
Discovery
25
Figure 14: Session.selection.drop.down.list
25
Figure 15: Direct.to.host.connection.type
25
Pcoip Connection Manager
26
Pcoip Connection Manager + Auto-Logon
26
Connect Using Vmware View
26
Connect with View Connection Server and Auto-Logon
26
Figure 16: The.zero.client.osd.discovers.and.lists.the.first.10. Available Pcoip Hosts Discovered
26
Figure 17: View.connection.server.selection
26
Connect Using a Connection Broker
27
Set an Automatic Connection
27
Figure 18: Connection.management.interface.selection
27
Figure 19: Osd.automatic.connection.screen
27
Connect to a Soft Client
28
Disconnect from a Host PC or Virtual Desktop
28
Further Information
28
Figure 20: Disconnect.option.on.the.osd
28
6 Manage the Network
29
Dual IP Configuration
29
Find the DXR-H4 MAC Addresses
29
Discover the IP Addresses
29
Use the DHCP Server to Identify the IP Addresses
29
Use DOS Command Window to Identify the IP Addresses
29
Use a TFTP Window to Identify the IP Addresses
29
Figure 21: Schematic.showing.ip.routing
29
Figure 22: Location.of.both.mac.addresses.on.the.unit
29
How to Change the IP Address
30
Consider Network Bandwidth Requirements
30
Factors Affecting Bandwidth
30
What Happens When Available Bandwidth Is Exceeded
30
Table 11: Pcoip Bandwidth Requirements
30
Choose a Connection Broker if Required
31
Role of the Connection Broker
31
Specify the Connection Broker
31
Using the Connection Broker
31
7 Firmware Updates
33
Connect to the Correct IP Address
33
Manage the DXR-H4
33
Teradici Administrative Web Interface (AWI)
33
Amulet Hotkey Management Interface (MI)
33
Enable the Connection to the Management
33
Interface
33
Login to the Management Interfaces
33
To Login with the AWI
33
To Login with the Amulet Hotkey Management
33
Figure 24: Awi.home.screen
34
Interface
34
SSH Client
34
Management Interface Login
34
Management Interface Screen
34
Check the DXR-H4 Firmware
35
Check the Amulet Hotkey Firmware Versions
35
Check the Teradici Firmware
35
Keep Firmware up to Date
35
Update the DXR-H4 Firmware
35
Update the Amulet Hotkey Firmware
35
Update the Teradici Firmware
35
Awi.hardware.and.firmware.version.information
35
Firmware Upload Window
35
Successful Upload Window
35
8 Additional Information
37
Fix Temporal Dithering Issues
37
Disable Temporal Dithering on Macs
37
Disable Temporal Dithering on a Windows PC or
37
Workstation
37
Localcursor Function and Hotkey Disconnect
37
Enable the Localcursor Function
37
Disable the Localcursor Function
37
Use the Hotkey Disconnect Function
38
How to Review Teradici Soft Client Logs on a PC
38
How to Collect Soft Client Logs on an Apple Mac
38
Display Log Files with the Macos Console
38
Display Log Files with a Macos Terminal Window
38
How to Reset the DXR-H4 at the Dxip Rack
38
Factory Reset
38
Insert Jumper into the Reset Port
38
Re-Enable Host Driver Function after a Factory Reset
39
Forced Reboot
39
How to Reset the DXR-H4 Remotely
39
Reset the Teradici Processor Remotely
39
Restart the DXR-H4 Remotely
39
Host.driver.function.screen
39
The Reset Screen
39
Factory Reset the DXR-H4 Remotely
40
How to Put the DXR-H4 into Standby
40
Put the DXR-H4 into Standby Locally
40
Put the DXR-H4 into Standby Remotely
40
How to Remove the DXR-H4 from the Dxip Rack
41
Disable the Management Interface
41
Additional Functionality
41
9 Technical Specifications
43
Warranty
43
Technology
43
Video,.Technology.and.network.specifications
43
Environment
44
Environmental.specifications
44
Advertisement
Advertisement
Related Products
Amulet Hotkey DXR-H4
Amulet Hotkey DXT-H4
Amulet Hotkey DXT-H4 SFP
Amulet Hotkey DXZ4-AM
Amulet Hotkey DXZC-C
Amulet Hotkey DXZC-EMC
Amulet Hotkey DXZC series
Amulet Hotkey DXZ4-M
Amulet Hotkey DXM630
Amulet Hotkey DXM520
Amulet Hotkey Categories
Extender
Server
Video Card
PCI Card
Switch
More Amulet Hotkey Manuals
Login
Sign In
OR
Sign in with Facebook
Sign in with Google
Upload manual
Upload from disk
Upload from URL