Sign In
Upload
Manuals
Brands
AGI Manuals
Farm Equipment
UCX3
AGI UCX3 Manuals
Manuals and User Guides for AGI UCX3. We have
1
AGI UCX3 manual available for free PDF download: Assembly Manual
AGI UCX3 Assembly Manual (122 pages)
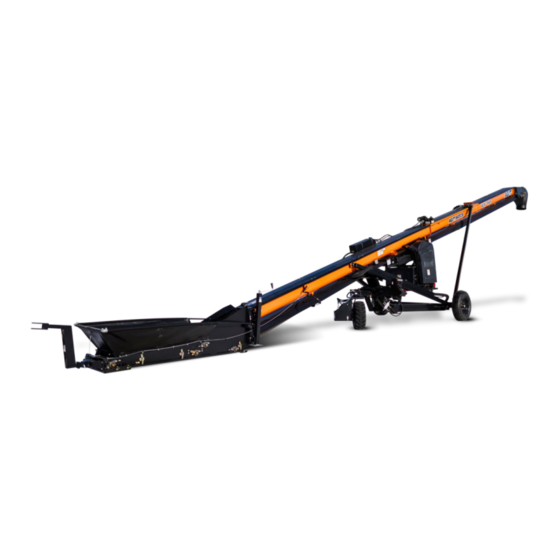
S-Drive Field Loader Portable Grain Belt Conveyor
Brand:
AGI
| Category:
Farm Equipment
| Size: 23 MB
Table of Contents
Table of Contents
3
Safety
5
Safety Alert Symbol and Signal Words
5
General Safety Information
5
Moving Conveyor Belt Safety
5
Rotating Parts Safety
6
Drives and Lockout Safety
6
Gas Engine Safety
6
Hydraulic Power Safety
7
Tire Safety
8
Battery Safety
8
Hand Winch Safety
9
Hydraulic Winch Safety
9
Personal Protective Equipment
10
Safety Equipment
10
Safety Decals
10
Decal Installation/Replacement
11
Safety Decal Locations and Details
11
Features
16
Assembly
17
Assembly Safety
17
Check Shipment
17
Required Tools
18
Before You Begin
18
Tighten the Hydraulic Fittings and Bolt
18
Assemble the Remainder of the S-Drive
19
Assemble the U-Trough Sections
20
Install the Hydraulic Winch
23
Install the U-Trough Covers
25
Place the Brand and Model Decal
26
Place the Serial Number Decal
28
Install the Spout Roller
28
Attach the Spout Scraper
30
Install the Track Slider
31
Attach the S-Drive
33
Attach the Pinch Drive Front Guard
34
Install the Weather Guards
35
Install the Belt
37
Install the Under-Mount Drive
44
Install the Frame
45
Install the Motor
48
Install the Hydraulic Pump and Clutch
49
Install the Gearbox, Motor Pulley, Motor Pulley Belt, and Clutch Stop
52
Install the Drain Hose Clamps, Drain Hose, and Muffler
55
Install the Crossbrace, Motor Guard, Fuel Tank Mount, and Stabilizers
56
Install the Torsion Idler
60
Install the Drive Pulleys, Drive Belt, and Torsion Idler
61
Install the Battery
65
Install the Guards
66
Attach the Hopper Seals
70
Align the Conveyor Belt
71
Adjust the Interior Trough Guide Blocks
72
Install the Remaining U-Trough Covers
72
Adjust the Rollers
73
Install the Collapsible Hopper Cloth
74
Straighten the Hopper Seals and Position the Flashing
75
Install the Hopper Springs
76
Assemble the Upper Hopper Cloth Frame
77
Install the Hopper Cloth Onto the Hopper Springs
78
Secure the Front Lower Hopper Cloth Frame to the Hopper
79
Secure the Side Lower Hopper Cloth Frame and Uprights to the Hopper
81
Tighten the Lower Hopper Cloth Frame Bolts
85
Install the Split Loom
85
Attach the Hopper Underside Covers
86
Attach the S-Drive Bottom and Take-Up Side Guards
87
Install the Weather Guard Mount Bars
89
Install the Collapsible Hopper Cloth Controls
91
Attach the Angle Indicator
94
Attach the Hitch
95
Attach the Spout Brush
96
Install the Spout Cap and Hood
97
Adjust the Hopper and Spout Scraper
99
Install the Wheels
100
Assemble the A-Frame
101
Install the U-Trough Lift Cable
103
Align the Winch
104
Install the Tank Kit and the Primer Bulb
104
Install the Low Emission Tank (for USA Only)
105
Install the Tank (for Outside USA)
106
Install the Primer Bulb
107
Install the Gas Drive Control Box
109
Install the Tachometer
109
Connect the Gas Drive Control Box Wiring
110
Install the Manual Container
116
Attach the Jack
117
Appendix
118
Bolt Torque
118
Fittings Torque Values
119
Specifications
121
Advertisement
Advertisement
Related Products
AGI UCX3 1549
AGI MILLTEC UCCA-50
AGI MILLTEC UCCB-100
AGI MILLTEC UCCC-150
AGI MILLTEC UCCD-200
AGI MILLTEC UCCF-300
AGI MILLTEC UICB-100
AGI MILLTEC UICF-300
AGI Westfield UX410
AGI MILLTEC UICC-150
AGI Categories
Farm Equipment
Tools
Fan
Accessories
Industrial Equipment
More AGI Manuals
Login
Sign In
OR
Sign in with Facebook
Sign in with Google
Upload manual
Upload from disk
Upload from URL