
Related Manuals for Gefen Pro GEF-HDVI-2-3GSDIS

Summary of Contents for Gefen Pro GEF-HDVI-2-3GSDIS
- Page 1 HDMI and DVI 3GSDI Audio Embedder to 3GSDI Scaler GEF-HDVI-2-3GSDIS User Manual Release A2...
-
Page 2: Important Safety Instructions
HDMI and DVI to 3GSDI Scaler Important Safety Instructions GENERAL SAFETY INFORMATION Read these instructions. Keep these instructions. Heed all warnings. Follow all instructions. Do not use this product near water. Clean only with a dry cloth. Do not block any ventilation openings. Install in accordance with the manufacturer’s instructions. -
Page 3: Warranty Information
HDMI and DVI to 3GSDI Scaler Warranty Information Gefen warrants the equipment it manufactures to be free from defects in material and workmanship. If equipment fails because of such defects and Gefen is notified within two (2) years from the date of shipment, Gefen will, at its option, repair or replace the equipment, provided that the equipment has not been subjected to mechanical, electrical, or other abuse or modifications. - Page 4 HDMI and DVI to 3GSDI Scaler Contacting Gefen Technical Support Gefen, LLC c/o Customer Service 20600 Nordhoff St. Chatsworth, CA 91311 Telephone: (818) 772-9100 (800) 545-6900 Fax: (818) 772-9120 Email: support@gefenpro.com Visit us on the Web: www.gefenpro.com Technical Support Hours: 8:00 AM to 5:00 PM Monday - Friday, Pacific Time For 24 / 7 support, see the back of the product for the support number...
- Page 5 3GSDI Audio Embedder HDMI and DVI to 3GSDI Scaler Operating Notes • The built-in On-Screen Display (OSD) provides access to all features of the scaler. Use the included IR remote control unit to access the OSD. • The IR channel for both the scaler and the IR remote control unit must be the same in order for the IR remote control unit to control the OSD.
-
Page 6: Packing List
HDMI and DVI to 3GSDI Scaler Features and Packing List Features • HDMI and DVI inputs switchable via IR, RS-232, and front panel • Input Resolutions up to 1080p Full HD, 1920 x 1200, and 2K • 10-bit Deep Color •... -
Page 8: Table Of Contents
3GSDI Audio Embedder HDMI and DVI to 3GSDI Scaler Table of Contents Getting Started Panel Layout ......................2 Front Panel ....................2 Back Panel ....................3 IR Remote Control Unit ..................4 Front ......................4 Back ......................5 Installing the Battery ..................6 Setting the IR Channel .................. -
Page 11: 01 Getting Started
HDMI and DVI to 3GSDI Scaler 01 Getting Started Panel Layout ......................2 Front Panel ....................2 Back Panel ....................3 IR Remote Control Unit ..................4 Front ......................4 Back ......................5 Installing the Battery ..................6 Setting the IR Channel .................. 6 Installation ...................... -
Page 12: Panel Layout
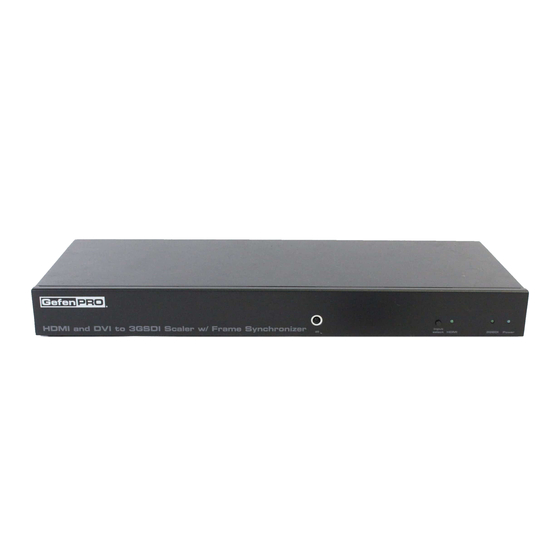
Getting Started Panel Layout Front Panel Name Description Receives IR signals from the included IR remote control unit. Input Select Press this button to switch between the DVI In and HDMI In inputs. HDMI This LED glows bright green when HDMI In is selected. -
Page 13: Back Panel
Getting Started Panel Layout Back Panel Name Description Used for updating the firmware. See the Firmware Update Procedure for more information. Genlock Connect a BNC cable between this connector and a clock or other reference. Coax Audio Out Connect a digital audio cable from this S/PDIF connector to an external amplifier. -
Page 14: Ir Remote Control Unit
Getting Started IR Remote Control Unit Front Name Description Activity indicator This LED glows bright orange when a key is pressed on the remote. Used to control features in the On-Screen A/S/D/W/ ENTER Display. See Accessing the On-Screen Display for details. MENU Displays / hides the On-Screen Display SOURCE... -
Page 15: Back
Getting Started IR Remote Control Unit Back (shown with cover removed) Name Description DIP switch bank Use these DIP switches to set the IR channel of the remote. See Setting the IR Channel for details. Primary battery slot Holds the battery for operating the remote. (shown without battery) Use only 3V CR2032-type batteries. -
Page 16: Installing The Battery
Getting Started IR Remote Control Unit Installing the Battery The IR remote control unit ships with two batteries. Only one battery is required for operation. The second battery is a spare. Use only 3V CR2032-type batteries. Remove the back cover the IR Remote Control unit. Insert the included battery into the primary battery slot. -
Page 17: Installation
S/PDIF CABLE DB-9 CABLE 0 0 : 0 0 : Clock Generator DVI Source HDMI Source Scaler Audio Processor RS-232 Controller 3G-SDI Display GEF-HDVI-2-3GSDIS WARNING: This product should always be connected to a grounded electrical AC outlet. page | 7... -
Page 19: Operating The Hdmi And Dvi To 3Gsdi Scaler
HDMI and DVI to 3GSDI Scaler 02 Operating the HDMI and DVI to 3GSDI Scaler The On-Screen Display ..................10 Accessing the On-Screen Display ............... 10 Moving Around in the OSD ................. 11 General Menu ..................... 12 Patterns Menu ..................... 13 Output Menu .................... -
Page 20: The On-Screen Display
Using the HDMI and DVI to 3GSDI Scaler The On-Screen Display Accessing the On-Screen Display The HDMI and DVI to 3GSDI Scaler uses a built-in OSD (On-Screen Display) to manage and control all scaler features. To access the OSD, point the included IR remote control unit at the IR sensor on the front panel of the scaler and press the MENU button. -
Page 21: Moving Around In The Osd
Using the HDMI and DVI to 3GSDI Scaler The On-Screen Display Moving Around in the OSD A / D Use the buttons on the IR remote control unit to move left and right between each S / W of the tabs. Once the desired menu is selected, press the buttons to access each feature within the menu. -
Page 22: General Menu
Using the HDMI and DVI to 3GSDI Scaler The On-Screen Display General Menu General ► Language Sets the language of the OSD. Select the desired language and press the ENTER key. Options Description English Sets the OSD in English (default) French Localizes the OSD in French General ►... -
Page 23: Patterns Menu
Using the HDMI and DVI to 3GSDI Scaler The On-Screen Display Patterns Menu Patterns ► Color Bars Produces a color bar pattern, similar to a standard SMPTE bar pattern used for color calibration. After selecting this option, press the ENTER button to enable / disable the color bar pattern. -
Page 24: Output Menu
Using the HDMI and DVI to 3GSDI Scaler The On-Screen Display Output Menu Output ► Output Format Selects the output resolution. See Supported Video and Graphic Formats for a list of available output formats. Output ► Link Configuration Selects the link configuration in respect to color space. When using dual link SDI or HD-SDI input, YCbCr or RGB can be selected. - Page 25 Using the HDMI and DVI to 3GSDI Scaler The On-Screen Display Output ► Genlock Reference This option enables or disabled the automatic genlock mode. Options Description Disables Genlock Video Input Use video input as reference clock Ref Input Use clock attached to Ref In Output ►...
-
Page 26: Input Menu
Using the HDMI and DVI to 3GSDI Scaler The On-Screen Display Input Menu Input ► Input Video Format Selects the resolution and timing of the input format. By default, this is set to Auto Detect which automatically senses the resolution and timing of the input signal. The available resolutions under this menu are in SD and HD format. - Page 27 Using the HDMI and DVI to 3GSDI Scaler The On-Screen Display Input ► Clean Aperture Allows adjustment of the input signal position. The clean aperture parameters allow an area within the production aperture to be defined. The minimum clean aperture size is 0 pixels by 0 lines.
- Page 28 Using the HDMI and DVI to 3GSDI Scaler The On-Screen Display Input ► Input Color Range The RGB output color range may be changed/set to limited (16 - 235) or to full (0 - 255). Options Description Auto Use color range of input signal 16 - 235 (Compress) Color range of input signal is limited 0 - 255 (Pass-Through)
-
Page 29: Picture Menu
Using the HDMI and DVI to 3GSDI Scaler The On-Screen Display Picture Menu Picture ► Image Color Allows individual adjustment of the Red, Green, and Blue color components, brightness, and black level (RGB/Y Output Offset) of the image. Contrast and Brightness values: [Range: 0 ... - Page 30 Using the HDMI and DVI to 3GSDI Scaler The On-Screen Display Picture ► Gamma Correction Adjusts the Gamma coefficient. Two predefined tables are available: Default and sRGB. The User Table setting will use the Gamma Lookup Table (LUT) currently stored in the EEPROM.
-
Page 31: Layout Menu
Using the HDMI and DVI to 3GSDI Scaler The On-Screen Display Layout Menu Layout ► Size and Position Set the size and the position of the image. Note that this option is not available in the panoramic aspect mode. Options Description Horizontal Size Sets horizontal size of the output signal... -
Page 32: Aspect Menu
Using the HDMI and DVI to 3GSDI Scaler The On-Screen Display Aspect Menu Aspect ► Full Screen Stretches the output signal to fill the display. Aspect ► Letter / Pillar Box Sets the aspect ratio to fit a letter or pillar box format. Aspect ►... - Page 33 Using the HDMI and DVI to 3GSDI Scaler The On-Screen Display Aspect ► Extract This a function allows the Scaler to zoom in on a subset of the input video signal. This feature allow you to zoom on one selected section of the input picture. Options Description Extract Size...
-
Page 35: 03 Advanced Operation
HDMI and DVI to 3GSDI Scaler 03 Advanced Operation RS-232 Configuration ..................26 RS-232 Interface ..................26 RS-232 Settings ..................26 RS-232 Commands ..................... 27 page | 25... -
Page 36: Rs-232 Configuration
Advanced Operation RS-232 Configuration RS-232 Interface DE-9 DA-15 RS-232 Controller Scaler DB-25 DC-37 Only TXD, RXD, and GND pins are used. RS-232 Settings Description Setting DD-50 115200 Baud rate Data bits None Parity Stop bits None Hardware flow control IMPORTANT: When sending RS-232 commands, a carriage return must be included at the end of the command. -
Page 37: Rs-232 Commands
Advanced Operation RS-232 Commands Command Description #aspect Sets the aspect ratio of the output signal #autolock Enables / disables automatic Genlock #blacklev Sets the black level of the output signal #bright Sets the brightness of the specified color component #cleanaper Defines an area within the production aperture #colrange Sets the color range to limited or full... - Page 38 Advanced Operation RS-232 Commands #aspect The #aspect command sets the aspect ratio of the output signal. Syntax: #aspect param1 Parameters: param1 Aspect ratio [1 ... 5] Value Description Full screen Letter / Pillar box Panoramic Extract Through Notes: If the Extract or Through mode is selected, the default values are used. To modify the parameters for Extract or Through mode refer to these commands in this manual.
- Page 39 Advanced Operation RS-232 Commands #autolock The #autolock command enables or disables the Genlock mode. The factory-default setting is 0 (disable). Syntax: #autolock param1 Parameters: Aspect ratio [0 ... 1] param1 Value Description Disable Enable #blacklev The #blacklev command sets the black level of the output signal. This is the equivalent of adjusting the RGB/Y Output Offset using the OSD.
- Page 40 Advanced Operation RS-232 Commands #bright The #bright command sets the color brightness for the specified color component. The default value for param2 (for each color component) is 50. Syntax: #bright param1 param2 Parameters: Color [0 ... 2] param1 Value Description Green Blue param2...
- Page 41 Advanced Operation RS-232 Commands #colrange The #colrange command sets the color range to limited (16 - 235) or full (0 - 255). Full color range (0 - 255) is only available for RGB 4:4:4 output link configuration. The default setting for param1 is 0. Syntax: #colrange param1 Parameters:...
- Page 42 Advanced Operation RS-232 Commands #devtype The #devtype command displays the type of device that is connected. This command is used by the update program, when updating the firmware, but can be executed for any reason. Syntax: #enhance param1 Parameters: None Example: #devtype #DEVTYPE HDMITO3GSDI...
- Page 43 Advanced Operation RS-232 Commands #edid The #edid command programs the EDID PROM with the default EDID or a custom EDID file in .bin format. Syntax: #edid param1 param2 Parameters: Value [0 ... 2] param1 Value Description Uses default EDID Upload EDID file (128 bytes) Upload EDID file (256 bytes) param2 Value...
- Page 44 Advanced Operation RS-232 Commands #extract The #extract command zooms-in on specified are of the input video signal. The default value for param1 is 100. The default value for param2 and param3 is 50. Syntax: #bright param1 param2 Parameters: Extract size [1 ...
- Page 45 Advanced Operation RS-232 Commands #gamma The #gamma command sets the gamma correction mode of the output signal. Syntax: #gamma param1 param2 Parameters: param1 Gamma setting [0 ... 3] Value Description Default sRGB Custom User table Mode [see below] param2 Notes: If the Custom mode is used, then set the gamma coefficient value in the second parameter.
- Page 46 Advanced Operation RS-232 Commands #genoffset The #genoffset command sets the genlock offset. The default value for param1 and param2 is 0. Syntax: #genoffset param1 param2 Parameters: Output lines [Vertical output resolution] param1 Output pixels [Horizontal output resolution] param2 #input The #input command sets the input timing for the source signal. See Supported Video and Graphic Formats for a list of available input formats.
- Page 47 Advanced Operation RS-232 Commands #insel The #insel command switches between the HDMI input and the DVI input. Syntax: #key param1 Parameters: param1 Value Value Description DVI In HDMI In #key The #key command emulates the same control used on the IR remote control. Either the full word or the first letter of the word can be used.
- Page 48 Advanced Operation RS-232 Commands #language The #language command sets the OSD to the specified language. Syntax: #language param1 Parameters: param1 Language [0 ... 1] Value Description English French #linkconf The #linkconf command sets the link configuration. The link configuration is set on the input.
- Page 49 Advanced Operation RS-232 Commands Notes: The following table lists the video formats which can be used when setting the link configuration Timings 1080i / 60 Hz 1080sf / 24 Hz 1080i / 59.94 Hz 1080sf / 23.98 Hz 1080i / 50 Hz 1080p / 30 Hz 1080i / 50M Hz 1080p / 29.97 Hz...
- Page 50 Advanced Operation RS-232 Commands #noisereduc The #noisereduc command sets the noise reduction value. Syntax: #noisereduc param1 Parameters: param1 Value [0 ... 100] #noisethres The #noisethres command sets the noise threshold. Syntax: #noisethres param1 Parameters: param1 Value [0 ... 100] #output The #output command sets the resolution of the output signal.
- Page 51 Advanced Operation RS-232 Commands #pattern The #pattern command displays the specified test pattern. The original output signal is masked when the test pattern is displayed. Syntax: #pattern param1 Parameters: Value [0 ... 2] param1 Value Description No pattern Color bar Cross hatch The #rb command reboots the scaler.
- Page 52 Advanced Operation RS-232 Commands #remotechan The #remotechan command sets IR channel of the scaler. The specified IR channel must match the IR channel of the included IR remote control unit. See Setting the IR Channel instructions on setting the IR channel on the IR remote control unit. Syntax: #remotechan param1 Parameters:...
- Page 53 Advanced Operation RS-232 Commands #save The #save command saves all the current parameter settings to the PROM. These parameters will be reloaded upon the next boot up. Syntax: #save Parameters: None #sizepos The #sizepos command sets the size and the position of the image. This option is not available when the Aspect Mode is set to Panoramic.
- Page 54 Advanced Operation RS-232 Commands #through The #through command defines a sub-window that is always centered on the screen. The position of the sub-window is relative to the size and position of the original output signal. Syntax: #through param1 param2 param3 param4 Parameters: Horizontal size [1 ...
-
Page 57: 04 Appendix
HDMI and DVI to 3GSDI Scaler 04 Appendix Supported Video and Graphic Formats ............... 48 Gamma Look-up Table ..................50 Mounting Plate Installation .................. 51 Fuse Replacement ....................52 Firmware Update Procedure ................54 Specifications ...................... 55... -
Page 58: Supported Video And Graphic Formats
Appendix Supported Video and Graphic Formats The following tables contains all supported input and output video / graphic formats supported by the HDMI and DVI to 3GSDI Scaler. The Value column are parameters used by the RS-232 Serial Control. Input Video / Graphic Formats Format Value Format... - Page 59 Appendix Supported Video and Graphic Formats Output Video / Graphic Formats Format Value Format Value 480i 1080sf / 25 Hz 480p / 59.94 Hz 1080sf / 29.97 Hz 576i 1080sf / 30 Hz 576p / 50 Hz 2K-p / 23.98 720p / 23.98 Hz 2K-p / 24 Hz 720p / 50 Hz...
-
Page 60: Gamma Look-Up Table
Appendix Gamma Look-up Table The Gamma Look Up Table (LUT) can be programmed using the GefenUpdater.exe program from the Gefen software package. To do this, following the instructions below: Create the Gamma LUT. Create a standard ASCII text file with the following line: GefenUpdater GAMMA filename.csv where filename.csv is the name of the Gamma LUT file. -
Page 61: Mounting Plate Installation
Appendix Mounting Plate Installation Rack mount ears are provided for installation of this unit into a 1U rack mount space. Locate the side screws on the unit. Remove the front 2 screws that are located closest to the front of the unit. Using the removed screws, screw the rack mounting bracket into the unit. -
Page 62: Fuse Replacement
Appendix Fuse Replacement The HDMI and DVI to 3GSDI Scaler contains a fuse as part of the internal power supply. This fuse can easily be replaced by using the following steps. STOP: Before installing modules and prevent the risk of possible electrical shock, unplug the AC power cord from back of the scaler. - Page 63 Appendix Fuse Replacement Remove the fuse from the C-cradle on the fuse door. Replace the fuse. Only use a 5mm x 20mm 250V / 2A fuse. ATTENTION: Do not use a fuse other than the type specified by the manufacturer. Replacement of an incorrect fuse can result in electrical fire and damage to the scaler, which will void the warranty.
-
Page 64: Firmware Update Procedure
Appendix Firmware Update Procedure The following items are required to update firmware: • GefenPRO HDMI and DVI to 3GSDI Scaler • Firmware files (downloaded from the Gefen Web site) • Computer running Windows® XP or better. • USB cable (A-B) Make sure the scaler is powered ON. -
Page 65: Specifications
Appendix Appendix Specifications Supported Formats Standards • SD-SDI (SMPTE 259M) • ED-SDI (SMPTE 344M) • HD-SDI (SMPTE 292M) • Dual-link HD-SDI (SMPTE 372M) • 3G-SDI (SMPTE 424M) Resolutions • 480i / 576i • 720p / 1080p / 1080sf / 2K-p / 2K-sf @ 23.98 Hz •... - Page 66 Appendix Specifications Operational Power Input • 100 - 240V AC (50/60 Hz) Power Consumption • 20W (max.) Physical Dimensions (W x H x D) • 17” x 1.73” x 7.7” (432mm x 44mm x 195mm) Unit Weight • 3 lbs (1.4 kg)
- Page 68 Stretch it. Switch it. Split it. Gefen’s got it. ® 20600 Nordhoff St., Chatsworth CA 91311 1-800-545-6900 818-772-9100 fax: 818-772-9120 www.gefenpro.com support@gefenpro.com This product uses UL or CE listed power supplies.
Need help?
Do you have a question about the GEF-HDVI-2-3GSDIS and is the answer not in the manual?
Questions and answers