DURKOPP ADLER 867-M Premium Operating Instructions Manual
Hide thumbs
Also See for 867-M Premium:
- Service instruction (174 pages) ,
- Service instructions manual (174 pages) ,
- Additional instructions (12 pages)
Table of Contents
Advertisement
Quick Links
Download this manual
See also:
Service Instructions
Advertisement
Table of Contents

Related Manuals for DURKOPP ADLER 867-M Premium


Summary of Contents for DURKOPP ADLER 867-M Premium
- Page 1 867-M PREMIUM Operating Instructions...
- Page 2 IMPORTANT READ CAREFULLY BEFORE USE KEEP FOR FUTURE REFERENCE All rights reserved. Property of Dürkopp Adler AG and protected by copyright. Any reuse of these contents, including extracts, is prohibited without the prior written approval of Dürkopp Adler AG. Copyright © Dürkopp Adler AG - 2015...
-
Page 3: Table Of Contents
Checking the pneumatic system (optional) ......... 42 Customer service ................44 Setup ....................45 Checking the scope of delivery ............45 Removing the transport locks .............. 46 Assembling frame components ............46 Completing the table top ..............47 Operating Instructions 867-M PREMIUM - 00.0 - 02/2015... - Page 4 Changing further parameters for the selected program ...... 80 8.6.7 Copying the program ................81 8.6.8 Deleting a program ................83 Disposal ..................... 85 Appendix .................... 87 10.1 Table top drawing ................87 10.2 Interconnection diagram ..............88 Operating Instructions 867-M PREMIUM - 00.0 - 02/2015...
-
Page 5: About These Instructions
1 About these instructions 1.1 Scope of the instructions These instructions describe the intended use and the setup of the special sewing machine 867-M PREMIUM. It applies to all sub- models listed in chapter 2.4 Technical data. 1.2 Applicable documentation The device contains built-in components from other manufactur- ers, e.g. -
Page 6: Symbols Used
Length of the machine arm, number of adjusting wheels, position of the stitch adjustment lever, presence of the keypad, etc. When this makes no difference to the handling steps, the figures show only one machine version as an example. Operating Instructions 867-M PREMIUM - 00.0 - 02/2015... -
Page 7: Technical Specifications
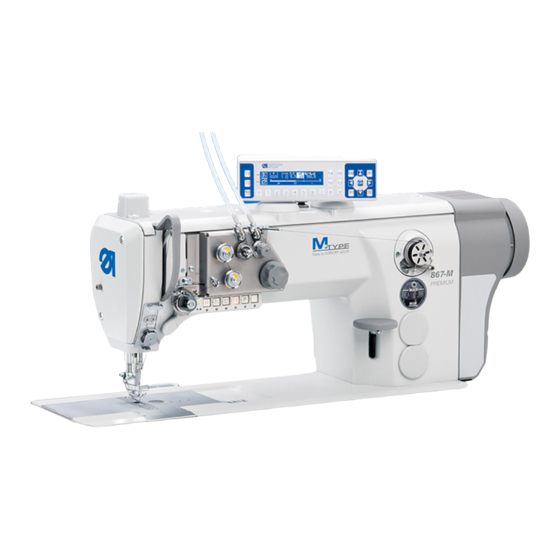
Technical Specifications 2 Technical Specifications 2.1 Characteristics The Dürkopp Adler 867-M PREMIUM is a flatbed sewing machine for double lockstitches. General technical characteristics • 1-needle machine • Large or extra-large vertical hook • Transport: Bottom feed, needle transport and alternating foot-top feed •... -
Page 8: Proper Use
Technical Specifications 2.3 Proper use The Dürkopp Adler 867-M PREMIUM is intended for sewing light to heavy material. Depending on the submodel the following needle sizes are to be used: • Light to moderately heavy material: 90 – 110 Nm •... -
Page 9: Technical Data
Adjustable stitch lengths Maximum s.p.m. 3800 3400 Number of stitches on delivery 3400 Maximum sewing foot stroke Maximum stroke height Mains voltage [V] Mains frequency [Hz] 50 / 60 Length/width/height [mm] 740/220/460 Weight [kg] Operating Instructions 867-M PREMIUM - 00.0 - 02/2015... -
Page 10: Additional Equipment
N800 080022 Edge stop / ruler on throat plate insert (2nd seam clearance suitable for swiveling edge stops) N800 080012 Edge stop Operating Instructions 867-M PREMIUM - 00.0 - 02/2015... - Page 11 Button bar (two functions) for activating quick stroke adjustment and/or manually switching to the next seam sections For additional instructions and further documentation, visit the download section on the Dürkopp Adler website: http://www.duerkopp-adler.com/de/main/Support/downloads. Operating Instructions 867-M PREMIUM - 00.0 - 02/2015...
- Page 12 Technical Specifications Operating Instructions 867-M PREMIUM - 00.0 - 02/2015...
-
Page 13: Safety
Setup The power cable must have a plug authorized for the country in which the machine is being used. The power plug may only be connected to the power cable by a qualified specialist. Operating Instructions 867-M PREMIUM - 00.0 - 02/2015... - Page 14 Safety Safety equipment should not be removed or deactivated. If this equipment cannot be avoided for a repair operation, the safety equipment must be refitted and put back into service immediately afterwards. Operating Instructions 867-M PREMIUM - 00.0 - 02/2015...
-
Page 15: Signal Words And Symbols Used In Warnings
Can result in minor or moderate injury. NOTICE Can result in material damage. CAUTION Pollution can result Symbols The following symbols indicate the type of danger to personnel: Symbol Type of danger General Electric shock Pointed objects Crushing Operating Instructions 867-M PREMIUM - 00.0 - 02/2015... - Page 16 Consequences of non-compliance. Measures for avoiding the danger. This is what a warning looks like for a hazard that could result in moderate or minor injury if the warning is ignored. Operating Instructions 867-M PREMIUM - 00.0 - 02/2015...
- Page 17 CAUTION Type and source of danger! Consequences of non-compliance. Measures for avoiding the danger. This is a warning note for a hazard that could result in pollu- tion if ignored. Operating Instructions 867-M PREMIUM - 00.0 - 02/2015...
- Page 18 Safety Operating Instructions 867-M PREMIUM - 00.0 - 02/2015...
-
Page 19: Machine Description
(3) - Keypad on the machine arm (9) - Handwheel (4) - Sewing foot with needle (10) - Electronic handwheel (5) - Hook (under the throat plate) (11) - OP1000 control panel Operating Instructions 867-M PREMIUM - 00.0 - 02/2015... - Page 20 Machine Description Operating Instructions 867-M PREMIUM - 00.0 - 02/2015...
-
Page 21: Operation
2. Press switch (2) up to position 1. Dimmable sewing lamp illuminates. Switching off the dimmable sewing lamp 1. Press switch (2) down to position 0. 2. Press switch (5) to the left to position 0. Operating Instructions 867-M PREMIUM - 00.0 - 02/2015... -
Page 22: Inserting And Replacing The Needle
Faults caused by an incorrect hook clearance After inserting a thinner needle: • Missing stitches • Thread damage After inserting a thicker needle: • Damage to the hook tip • Damage to the needle Operating Instructions 867-M PREMIUM - 00.0 - 02/2015... - Page 23 3. Pull the needle out towards the bottom. 4. Insert the new needle. 5. Important: Align the needle so that the groove (3) is facing the hook (4). 6. Tighten the screw (2). Operating Instructions 867-M PREMIUM - 00.0 - 02/2015...
-
Page 24: Threading The Needle Thread
2. Insert the thread from the rear to the front through the thread guide on the unwinding bracket (3). 3. Use a compressed air gun to feed the thread through the thread guide (1). Operating Instructions 867-M PREMIUM - 00.0 - 02/2015... - Page 25 7. Guide the thread under the diverter pin (4) to the thread tensioning spring. 8. Lift the tightening lever (1) with the thread. 9. Pull the thread under the spring tip (2). Operating Instructions 867-M PREMIUM - 00.0 - 02/2015...
- Page 26 - with the thread lever (16) in the highest position - has a length of approx. 4 cm. Important: Check the thread length. If the thread end is too long, the short thread cutter does not function correctly. Operating Instructions 867-M PREMIUM - 00.0 - 02/2015...
-
Page 27: Inserting And Winding On The Hook Thread
2. Insert the thread from the rear to the front through the thread guide on the unwinding bracket (3). 3. Use a compressed air gun to feed the thread through the thread guide (1). Operating Instructions 867-M PREMIUM - 00.0 - 02/2015... - Page 28 The hook thread is normally wound on when sewing is in progress. However, you can also wind on the hook thread without sewing, e. g. if you require a full bobbin in order to start sewing ( p. 70). Operating Instructions 867-M PREMIUM - 00.0 - 02/2015...
-
Page 29: Replacing The Hook Thread Bobbin
Fig. 10: Replacing the hook thread bobbin (1) - Slot (4) - Slot (2) - Guide (5) - Bobbin (3) - Tensioning spring (6) - Bobbin housing flap Operating Instructions 867-M PREMIUM - 00.0 - 02/2015... - Page 30 Each of the bobbins has a thread supply groove that is embedded in the bobbin core. Important: Insert the bobbin in the hook in such a way that the thread supply groove faces down. Otherwise, the remaining thread monitor will not work. Operating Instructions 867-M PREMIUM - 00.0 - 02/2015...
-
Page 31: Setting The Thread Regulator
Risk of injury from needle and moving parts! Switch off the sewing machine before setting the thread regulator. The thread regulator determines the tension applied to guide the needle thread around the hook. Operating Instructions 867-M PREMIUM - 00.0 - 02/2015... -
Page 32: Raising The Sewing Feet
Slide the thread regulator (2) to the left 2. Tighten the regulator screw (1). 5.7 Raising the sewing feet Fig. 14: Electronic sewing foot lifter with foot pedal (1) - Foot pedal Operating Instructions 867-M PREMIUM - 00.0 - 02/2015... -
Page 33: Sewing Backwards With The Stitch Adjustment Lever (Optional)
(1) - Stitch adjustment lever 1. Slowly push the stitch adjustment lever (1) down. The stitch length becomes smaller. In the lower end position, the machine sews in reverse with the currently set stitch length. Operating Instructions 867-M PREMIUM - 00.0 - 02/2015... -
Page 34: Setting Quick Stroke Adjustment
The elevated sewing foot stroke is retained as long as the knee switch is pushed to the right. • To switch off the elevated sewing foot stroke: Release the knee switch (1). Operating Instructions 867-M PREMIUM - 00.0 - 02/2015... -
Page 35: Quick Functions On The Keypad
(1) Activating a key function 1. Press the key. Function is activated. The key illuminates. Deactivating a key function 1. Press the key again. Function is deactivated. The key turns off. Operating Instructions 867-M PREMIUM - 00.0 - 02/2015... - Page 36 This key (6) activates the programmed auxiliary thread tensioner. Switch to the next seam section (7): The key (7) switches to the next seam section. The key is fully customizable. It is possible to implement other functions as necessary. Operating Instructions 867-M PREMIUM - 00.0 - 02/2015...
-
Page 37: Assigning Key Functions To The Favorite Button
2. Turn the screw under the desired key 90° so that the slot is vertical (3). 5.11 Operating the controller The machine is operated with a DAC controller ( Kap. 8 Settings via the software, p. 65). Operating Instructions 867-M PREMIUM - 00.0 - 02/2015... -
Page 38: Sewing
2. Push the material to be sewn into the initial position. Sewing: 1. Press the foot pedal forwards in pedal position +1: The machine sews. The sewing speed increases the further forward the pedal is pressed. Operating Instructions 867-M PREMIUM - 00.0 - 02/2015... - Page 39 1. Press the foot pedal back completely in pedal position -2: The machine sews the end bar tack, and the thread cutter cuts the thread. The machine stops, needles and sewing feet are up. 2. Remove the sewing material. Operating Instructions 867-M PREMIUM - 00.0 - 02/2015...
- Page 40 Operation Operating Instructions 867-M PREMIUM - 00.0 - 02/2015...
-
Page 41: Maintenance
Make sure no particles fly into the oil sump. NOTICE Malfunctions can occur due to a dirty machine. Lint and thread remnants can impair the operation of the machine. Clean the machine at regular intervals as described in the instructions. Operating Instructions 867-M PREMIUM - 00.0 - 02/2015... - Page 42 NOTICE Damage to paintwork may occur when using solvent- based cleaners. Solvent-based cleaners will damage paintwork on the ma- chine. Use only solvent-free substances for cleaning the machine. Operating Instructions 867-M PREMIUM - 00.0 - 02/2015...
-
Page 43: Checking The Oil Level
1. Switch off the sewing machine at the main switch. 2. Add oil up to but not past the maximum level marking (2). 3. Press the main switch again to turn the sewing machine back on. Operating Instructions 867-M PREMIUM - 00.0 - 02/2015... -
Page 44: Checking The Pneumatic System (Optional)
Checking the pressure: 1. Check the pressure on the pressure gage (2) every day. Standard value: 6 bar. Important: The pressure must never deviate from the stan- dard value by more than 1 bar. Operating Instructions 867-M PREMIUM - 00.0 - 02/2015... - Page 45 3. Remove the compressed air hose from the compressed air supply. 4. Unscrew the drain screw (3) completely. 5. Allow water to drain into the collection tray. 6. Re-tighten the drain screw (3). Operating Instructions 867-M PREMIUM - 00.0 - 02/2015...
-
Page 46: Customer Service
Contact for repairs if machine is damaged: Dürkopp Adler AG Potsdamer Str. 190 33719 Bielefeld, Germany Tel. +49 (0) 180 5 383 756 Fax +49 (0) 521 925 2594 Email: service@duerkopp-adler.com Internet: www.duerkopp-adler.com Operating Instructions 867-M PREMIUM - 00.0 - 02/2015... -
Page 47: Setup
• Reel stand with unwinding bracket • Controller • Control panel for the controller • Sewing lamp Optional additional equipment: • Table top • Drawer • Frame • Pedal • Knee switch • Maintenance unit Operating Instructions 867-M PREMIUM - 00.0 - 02/2015... -
Page 48: Removing The Transport Locks
(1) is above the longer end of the foot struts (5). 5. Screw the inner bars (2) down so that both head sections (1) are at the same height. Operating Instructions 867-M PREMIUM - 00.0 - 02/2015... -
Page 49: Completing The Table Top
(7) - Reel stand 1. Screw the drawer (3) with the left-hand bracket to the underside of the table top. 2. Screw the oil sump (4) in place under the recess for the machine. Operating Instructions 867-M PREMIUM - 00.0 - 02/2015... -
Page 50: Fastening The Table Top To The Frame
(1) - Screw holes and screws 1. Place the table top on the head sections of the inner bars. 2. Screw the table top firmly in place at the screw holes (1). Operating Instructions 867-M PREMIUM - 00.0 - 02/2015... -
Page 51: Setting The Working Height
2. Set the table top to the desired height. Important: Pull out or push in the table top evenly at both sides to prevent it from jamming. 3. Tighten the screws (1) on the frame bars. Operating Instructions 867-M PREMIUM - 00.0 - 02/2015... -
Page 52: Controller
1. Screw the controller (2) onto the 4 screw holders (3) under the table top. 2. Clamp the power cable of the controller (2) into the strain relief mechanism (1). 3. Screw the strain relief mechanism (1) under the table top. Operating Instructions 867-M PREMIUM - 00.0 - 02/2015... -
Page 53: Fitting The Pedal And Setpoint Device
5. Hang the pedal rod (1) with the ball socket on the setpoint device (5) and attach to the pedal (4). 6. Pull the pedal rod (1) to the correct length: Proper setting: 10° inclination with pedal (4) released 7. Tighten the screw (2). Operating Instructions 867-M PREMIUM - 00.0 - 02/2015... -
Page 54: Mounting The Machine Head
2. Fit the machine head from above at an angle of 45°. 3. Insert the upper hinge parts (2) into the rubber inlays (1). 4. Fold the machine head down and insert it in the recess. Operating Instructions 867-M PREMIUM - 00.0 - 02/2015... -
Page 55: Fitting The Oil Extraction Line
1. Tilt the machine head. 2. Screw the filter (2) into the oil sump with the plastic adapter to the right. 3. Insert the tube of the oil extraction line (1) into the plastic adapter. Operating Instructions 867-M PREMIUM - 00.0 - 02/2015... -
Page 56: Installing The Knee Switch
2. Guide the connecting cable (2) to the back between the oil sump and the controller. 3. Insert the plug (3) of the connecting cable in the socket of the controller. Operating Instructions 867-M PREMIUM - 00.0 - 02/2015... -
Page 57: Fitting The Control Panel
Make sure the power plug cannot be accidentally plugged back in. The voltage on the type plate of the sewing drive must correspond to the mains voltage. Operating Instructions 867-M PREMIUM - 00.0 - 02/2015... -
Page 58: Checking The Mains Voltage
1. Screw the sewing lamp transformer (1) in place at the pre- drilled holes under the table top. 2. Fasten the connecting cable under the table top using cable ties. 3. Establish the plug connection to the supply line for the sewing lamp. Operating Instructions 867-M PREMIUM - 00.0 - 02/2015... - Page 59 3. Loosen the adapter cover screws (3). 4. Connect the supply line: • for additional sewing lamps to be fitted to the X3 port (1) • for integrated LED sewing lamps connected to the 24V/X5 port (2) Operating Instructions 867-M PREMIUM - 00.0 - 02/2015...
-
Page 60: Establishing Equipotential Bonding
2. Feed the protective earth conductor from the connection (1) on the rear side of the controller through the cutout in the table top and plug it onto the tab connector (2) on the base plate. Operating Instructions 867-M PREMIUM - 00.0 - 02/2015... -
Page 61: Connecting The Controller
• Connect the controller to the power supply using the power cable. 1. Connect the controller as specified in the interconnection diagram, Interconnection diagram, p. 88. Operating Instructions 867-M PREMIUM - 00.0 - 02/2015... -
Page 62: Pneumatic Connection (Optional)
2. Connect the machine hose (4) coming out of the machine head to the maintenance unit (3) at the top right. 3. Connect the system connection tube (2) to the pneumatic system. Operating Instructions 867-M PREMIUM - 00.0 - 02/2015... -
Page 63: Setting Operating Pressure
2. Turn the pressure controller until the pressure gage (2) indicates 6 bar: • To increase pressure: Turn the pressure controller (1) clockwise. • To reduce pressure: Turn the pressure controller (1) counterclockwise. 3. Push the pressure controller (1) down. Operating Instructions 867-M PREMIUM - 00.0 - 02/2015... -
Page 64: Lubrication
Required oil: Only DA 10 or equivalent oil should be used for the machine, which has the following properties: • Viscosity at 40 °C: 10 mm²/s • Flash point: 150 °C Operating Instructions 867-M PREMIUM - 00.0 - 02/2015... - Page 65 Oil is a pollutant and must not enter the sewage system or the soil. Collect waste oil carefully and dispose of it and oily machine parts in accordance with the applicable statutory regulations. Operating Instructions 867-M PREMIUM - 00.0 - 02/2015...
-
Page 66: Sewing Test
10. Set stitch length. 11. Transfer the desired quick function from the keypad to the additional switch. 12. Start sewing test at low speed. 13. Gradually increase sewing speed until working speed is reached. Operating Instructions 867-M PREMIUM - 00.0 - 02/2015... -
Page 67: Settings Via The Software
Settings via the software 8 Settings via the software 8.1 OP3000 control panel Fig. 41: Control panel of the controller All settings in the controller for the 867-M PREMIUM are performed using the OP3000 control panel. Function 0 to 9... -
Page 68: Switching The Sewing Machine On
• On the right of the screen the controller software version The machine performs a reference run: The display shows the program last used, or manual mode. Fig. 43: Display of the program last used Fig. 44: Display in Manual mode Operating Instructions 867-M PREMIUM - 00.0 - 02/2015... -
Page 69: Controller Operating Modes
Settings via the software 8.3 Controller operating modes The controller of the 867-M PREMIUM has 3 available operating modes: • Manual mode (program 000) Manual mode is the simplest operating mode. There are no sewing programs and no inputs for individual sewing steps. -
Page 70: Manual Mode
to change the stitch length Thread tension Value range: 1 to 99 • Use to select the Thread tension parameter. • Use to change the thread tension Operating Instructions 867-M PREMIUM - 00.0 - 02/2015... - Page 71 After the thread has been cut off, the display is retained. Measurement/counting restarts when sewing starts again. Creating a program 8.6.1 Creating programs, p. 75 No function assigned ESC, F and S No function assigned No function assigned Operating Instructions 867-M PREMIUM - 00.0 - 02/2015...
-
Page 72: Quick Access Function (Softkey Menu)
Threading mode The needle bar moves to the defined position. The pedal is temporarily locked. Programming Programming starts. Bobbin mode Press the pedal halfway backwards. Bobbin mode is ended. Operating Instructions 867-M PREMIUM - 00.0 - 02/2015... -
Page 73: Menu For Other Settings
Start Tack (bartack at the start of a seam) Dialog box for defining the start bar tack End Tack (bartack at the end of a seam) Dialog box for defining the end bar tack Operating Instructions 867-M PREMIUM - 00.0 - 02/2015... -
Page 74: Sewing
The controller switches to automatic mode and the following information appears on the display: Fig. 47: Display in Automatic mode The following table shows the individual symbols on the display and the functions of the keys on the control panel. Operating Instructions 867-M PREMIUM - 00.0 - 02/2015... -
Page 75: Before Starting Sewing
Value range: -50 to +50 % Alters the stitch length in all seam sections/steps 1. Sew, press the pedal or press the OK key. The program switches to the 1st step. Operating Instructions 867-M PREMIUM - 00.0 - 02/2015... -
Page 76: Sewing
Pedal halfway Raise the sewing foot back Pedal fully Cut off the thread back The program remains stopped at the cutoff point. Lower softkey Softkey menu 8.4 Manual mode, p. 68 Operating Instructions 867-M PREMIUM - 00.0 - 02/2015... -
Page 77: Canceling The Program
or input a program number using the keypad keys 0 - 9 and then press OK. The following information is shown on the display, the P in the program number field flashes: Operating Instructions 867-M PREMIUM - 00.0 - 02/2015... - Page 78 Thread tension value (%) for the current step Value range: 0 to 99 • Use to select the Thread tension parameter. • Use to change the thread tension. Operating Instructions 867-M PREMIUM - 00.0 - 02/2015...
-
Page 79: Creating A Program By Keyboard Input
6. Repeat steps 4 and 5 to define up to 30 steps if necessary. 7. Press the ESC key. The program is saved. The machine switches to Automatic mode. The program that was just created is selected. Operating Instructions 867-M PREMIUM - 00.0 - 02/2015... -
Page 80: Creating A Program By Teach-In
Fig. 53: Display in Edit mode 1. Use and to select the program to be edited and the step. The selected step is shown bold in the program bar. Operating Instructions 867-M PREMIUM - 00.0 - 02/2015... -
Page 81: Changing Further Parameters For The Current Step
Start Tack (bartack at the start of a seam) Dialog box for defining the start bar tack End Tack (bartack at the end of a seam) Dialog box for defining the end bar tack Operating Instructions 867-M PREMIUM - 00.0 - 02/2015... -
Page 82: Changing Further Parameters For The Selected Program
to edit the value and confirm the change by pressing Symbol Meaning Program Name (program name) Thread Tension (thread tension) Sets up an auxiliary thread tensioner that can be activated during the sewing process with press of a button. Operating Instructions 867-M PREMIUM - 00.0 - 02/2015... -
Page 83: Copying The Program
The changed values are stored immediately. 6. Exit Edit mode using ESC. 8.6.7 Copying the program The selected program is copied into a new program number. 1. Press the key. The softkey menu appears. Operating Instructions 867-M PREMIUM - 00.0 - 02/2015... - Page 84 Fig. 56: Display after specifying the program number 4. Load the desired changes into the new program. 5. Press the ESC key. The controller exits Programming mode and reverts to Auto- matic mode. Operating Instructions 867-M PREMIUM - 00.0 - 02/2015...
-
Page 85: Deleting A Program
1. Press the key. The softkey menu appears. Fig. 57: Softkey menu 2. Press the key. 3. Press the ESC key. The controller exits Programming mode and reverts to Auto- matic mode. Operating Instructions 867-M PREMIUM - 00.0 - 02/2015... - Page 86 Settings via the software Operating Instructions 867-M PREMIUM - 00.0 - 02/2015...
-
Page 87: Disposal
When disposing of the machine, be aware that it consists of a range of different materials (steel, plastic, electronic components, etc.). Observe the applicable national regulations when disposing of these materials. Operating Instructions 867-M PREMIUM - 00.0 - 02/2015... - Page 88 Disposal Operating Instructions 867-M PREMIUM - 00.0 - 02/2015...
-
Page 89: Appendix
Appendix 10Appendix 10.1 Table top drawing Dimensions for manufacturing a table top Operating Instructions 867-M PREMIUM - 00.0 - 02/2015... -
Page 90: Interconnection Diagram
Appendix 10.2 Interconnection diagram Operating Instructions 867-M PREMIUM - 00.0 - 02/2015... - Page 91 Appendix Operating Instructions 867-M PREMIUM - 00.0 - 02/2015...
- Page 92 Appendix Operating Instructions 867-M PREMIUM - 00.0 - 02/2015...
- Page 93 Appendix Operating Instructions 867-M PREMIUM - 00.0 - 02/2015...
- Page 94 Appendix Operating Instructions 867-M PREMIUM - 00.0 - 02/2015...
- Page 95 Appendix Operating Instructions 867-M PREMIUM - 00.0 - 02/2015...
- Page 96 Appendix Operating Instructions 867-M PREMIUM - 00.0 - 02/2015...
- Page 98 DÜRKOPP ADLER AG Potsdamer Str. 190 33719 Bielefeld, Germany Germany Phone: +49 (0) 521 925 00 Email: service@duerkopp-adler.com iwww.duerkopp-adler.com...
Need help?
Do you have a question about the 867-M Premium and is the answer not in the manual?
Questions and answers