Nokia N79 Get Started
N series
Hide thumbs
Also See for N79:
- User manual (398 pages) ,
- Service manual (21 pages) ,
- Get started (21 pages)
Table of Contents
Advertisement
Quick Links
Advertisement
Table of Contents

Related Manuals for Nokia N79


Summary of Contents for Nokia N79
- Page 1 Nokia N79 Get started...
- Page 2 Nokia tune is a sound mark of Nokia Corporation. Other product and company names mentioned herein may be trademarks or tradenames of their respective owners. Reproduction, transfer, distribution, or storage of part or all of the contents in this document in any form without the prior written permission of Nokia is prohibited.
-
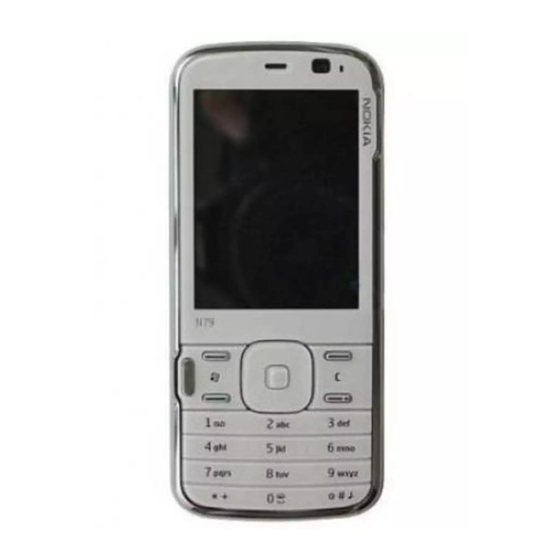
Page 3: Keys And Parts (Front)
— End key — Clear key C — Secondary camera — Light sensor — Power key — Nokia AV Connector for compatible headsets and headphones — Earpiece — Key lock switch for locking and unlocking the keys — Selection keys —... -
Page 4: Keys And Parts (Back And Sides)
Keys and parts (back and sides) — Main camera for high resolution (up to 5 megapixels) image capture and video recording — Memory card slot for a compatible microSD card and Micro USB connector to connect to a compatible — Charger connector —... -
Page 5: Insert Sim Card And Battery
Insert SIM card and battery Always switch the device off and disconnect the Insert the charger before removing the battery. battery. With the back To replace the of the device cover, direct the facing you, top locking catch press and hold toward its slot, the release and press down... -
Page 7: Switch The Device On
The factory setting for the lock code is 12345. If you forget the code and your device is locked, your device will require service and additional charges may apply. For more information, contact a Nokia Care point or your device dealer. -
Page 8: Antenna Locations
Antenna locations Your device may have internal and external antennas. As with any radio transmitting device, avoid touching the antenna area unnecessarily while the antenna is transmitting or receiving. Contact with such an antenna affects the communication quality and may cause the device to operate at a higher power level than otherwise needed and may reduce the battery life. -
Page 9: Insert The Memory Card
Memory card Use only compatible microSD cards approved by Push the card Nokia for use with this device. Nokia uses approved in. You can hear industry standards for memory cards, but some a click when the brands may not be fully compatible with this device. - Page 10 When Remove memory card and press 'OK' is displayed, open the cover of the memory card slot. Press the memory card to release it from the slot. Pull out the memory card. If the device is switched on, select OK.
-
Page 11: Charge The Battery
Charge the battery Connect a compatible charger to a wall outlet. Connect the power cord to the device. If the battery is completely discharged, it may take a while before the charging indicator starts scrolling. When the battery is fully charged, the charging indicator stops scrolling. - Page 12 Headset You can connect a compatible headset or use with this device, to the Nokia AV Connector, pay compatible headphones to your device. You may special attention to volume levels. need to select the cable mode. Warning: When you use the headset, your ability to hear outside sounds may be affected.
-
Page 13: Attach Wrist Strap
Attach wrist strap Remove the back cover. Thread a wrist strap, and tighten it. Replace the cover. - Page 14 Shortcuts To switch between open applications, press and hold . Leaving applications running in the background increases the demand on battery power and reduces the battery life. To view your multimedia content, press the multimedia key. To start a web connection (network service), in the standby mode, press and hold 0.
-
Page 15: Display Indicators
Display indicators The device is being used in a GSM network A compatible microSD card is in the device. (network service). A compatible headset is connected to the device. You have one or more unread messages in the A compatible TV out cable is connected to the Inbox folder in Messaging. - Page 16 Bluetooth connectivity is on. Data is being transmitted using Bluetooth connectivity. When the indicator is blinking, your device is trying to connect with another device. A USB connection is active. Synchronisation is in progress.
-
Page 17: Lock The Keypad
Lock the keypad When the device or keypad is locked, calls may be possible to the official emergency number programmed into your device. To lock and unlock the keys, use the lock switch at the top of the device, next to the power key. To set the keypad to lock automatically after a time- out, press , and select... -
Page 18: Personalise Your Device
Personalise your device You can personalise your device by changing the theme. The active standby display shows standby mode, main menu, tones, themes, or font application shortcuts, and size. Most of the personalisation options, such as events from applications changing the font size, can be accessed through the such as calendar and device settings. - Page 19 scroll to an application in the list, and press C. Leaving applications running in the background increases the demand on battery power.
-
Page 20: Multimedia Menu
Multimedia menu With the multimedia menu, you can access your Images — View your most recently taken ● most frequently used multimedia content. The images, start a slide show of your images or selected content is shown in the appropriate video clips, or view media files in albums. - Page 21 ● in the user guide. Your documents and files are not deleted in the reset. If the issue remains unresolved, contact Nokia for repair options. See www.nokia.com/repair. Before sending your device for repair, always back up or make a record of data in your device.
Need help?
Do you have a question about the N79 and is the answer not in the manual?
Questions and answers