Advertisement
Quick Links
INDEX
IMPORTANT SAFETY NOTICE .............................................................................. P. 1
ASSEMBLY TOOLS & HARDWARE LIST ................................................................ P. 2
ASSEMBLY INSTRUCTIONS ................................................................................. P. 3 - 6
COMPUTER INSTRUCTIONS ................................................................................ P. 7 - 12
COMPLETE PARTS LIST ...................................................................................... P. 13 - 14
EXPLODED DIAGRAMS ....................................................................................... P. 15 - 17
The Specifications and descriptions in this manual were accurate at the time of printing. Improvement is a
constant goal at MultiSports; therefore we reserve the right to make changes in specifications at any time
without notice and without incurring obligation.
The information in this manual is given in good faith. However any person who uses this information in any
way, does so entirely at his or her own risk. Neither MultiSports, nor its representatives can accept
responsibility for any damage or injury incurred as a result of information presented here except under the
terms of warranty of MultiSports products.
Advertisement

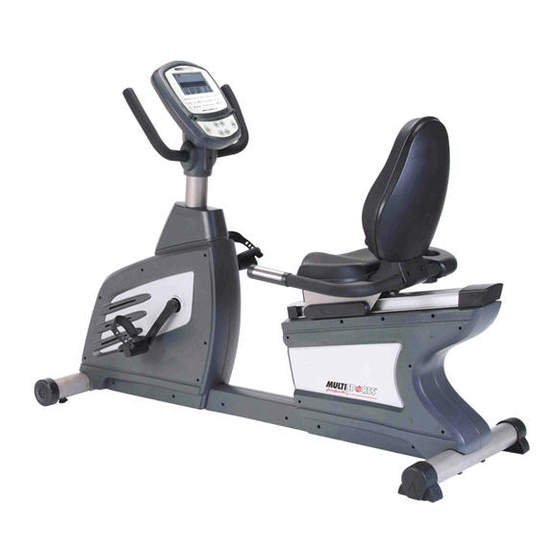
Related Manuals for MultiSports CC-755R

Summary of Contents for MultiSports CC-755R
-
Page 1: Table Of Contents
The Specifications and descriptions in this manual were accurate at the time of printing. Improvement is a constant goal at MultiSports; therefore we reserve the right to make changes in specifications at any time without notice and without incurring obligation. -
Page 2: Important Safety Notice
Congratulations on your purchase of the new MultiSports equipment. Although we go to the great lengths to ensure the quality of our products, occasionally errors or omissions occur. Should you find a missing or defective part in this product, please contact us within thirty days for a replacement by calling us at 713-460-8188, Emailing us at mssales@swbell.net or visiting our web site at www.multisportsfitness.com. -
Page 3: Assembly Tools & Hardware List
ASSEMBLY TOOLS & HARDWARE LIST OPEN THE BOXES Make sure to inventory all the parts that are included in the boxes. Check The Hardware Chart for a full count of the number of parts included for proper assembly. GATHER YOUR TOOLS Before starting the assembly of your unit, gather the necessary tools. -
Page 4: Assembly Instructions
ASSEMBLY INSTRUCTIONS Step 1 - Attach Front Stabilizer Attach Front Stabilizer (24) to Base Frame (1) and secure with: 2 - M16 Washers (19) 2 - M8 Spring Washers (18) 2 - M8 x 90MM Allen Screws (25) Step 2 - Attach Rear Stabilizer Attach Rear Stabilizer (28) to Base Frame (1) and secure with: 2 - M16 Washers (19) 2 - M8 Spring Washers (18) - Page 5 Step 4 - Install Seat Handlebar Protecting Covers Attach Front Protecting Cover (57) and Rear Protecting Cover (58) to Seat Handlebar (46) using: 1 - M5 x 10 MM Screw (44) 2 - M4 x 19 MM Screws (45) Step 5 – Install Seat and Back Support Pad Cover Attach Seat (63) to Seat Carriage Frame (53) using: 4 - M16 Washers (19) 4 - M8 Spring Washers (36)
- Page 6 Step 8 - Install Handlebar Post Cover and Handlebar Post Slide Handlebar Post Cover (34) up the Handlebar Post (33). Connect the Upper Speed Sensor Wire (3) to the Middle Speed Sensor Wire (4) and the Upper Heart Rate Wire (2) to the Heart Rate Wire (5). Attach Handlebar Post (33) to the Main Frame (1) using: 4 - M16 Washer (35) 4 - M8 Spring Washers (36)
- Page 7 Step 11 - Install Pedals and Pedal Straps Thread Right Pedal (32R) with an “R” onto the Right Crank Arm (30) in a clockwise direction. Thread Left Pedal (32L) with an “L” onto the Left Crank Arm (30) in a counter– clockwise direction.
-
Page 8: Computer Instructions
COMPUTER INSTRUCTIONS FUNCTION BUTTONS PROGRAM Press to select one of the following Modes: MANUAL, PROGRAM, or TARGET HEART RATE PROGRAM. START/STOP Press to Start or Stop the computer. QUICKSTART: Start pedaling to turn on computer, after computer turns on, press to start Manual Program and begin your workout. - Page 9 COMPUTER OPERATION Status A. Switch On Status:Pedal the bike and the Computer LCD will start on Beginning Status in 2 seconds. (See Picture 1) B. Auto off Status:After 5 minutes of no usage, the computer will automatically go into Auto off Status. Setting TIME, DISTANCE, CALORIES, PULSE Once the Computer is in Beginning Status, the LCD screen will start in two seconds (See Picture 1).
- Page 10 Press START/STOP to pause your workout and press ENTER to begin the following Set-Up mode: TIME: To count downwards: While the “TIME” function is flashing, press UP ( + ) or DOWN ( - ) to increase or decrease your desired workout period respectively.
- Page 11 Program 3 Program 4 Program 5 Program 6 Program 7 Program 8 Program 9 Program 10 Program 12 – Watts Control Program 11...
- Page 12 TARGET HEART RATE PROGRAM While in Set-Up mode (see Picture 2) and the functions P, MANUAL, PROGRAM, and TARGET H.R. are flashing, press the PROGRAM key to select a mode. Once TARGET H.R. is selected the other functions will disappear from the top of the screen. Press ENTER to confirm and to enter your information.
- Page 13 = Picture 5-2; Target H.R. 75% Option = = Picture 5-3; Target H.R. 90% Option = = Picture 5-4; Target H.R. THR Option = = Picture 6; Target H.R. Mode at Level 1 = PULSE SENSOR GRIP DESCRIPTION Place both hands on the grips of the hand pulse sensor for 30 seconds to 1 minute. The current heart rate (BPM) will display on the computer.
-
Page 14: Complete Parts List
CC-755R COMPLETE PARTS LIST DESCRIPTION Q'TY DESCRIPTION Q'TY BASE FRAME HEXAGON BERYNUT UPPER HEART RATE WIRE HANDLEBAR(LEFT) UPPER SPEED SENSOR WIRE HANDLEBAR(RIGHT) MIDDLE SPEED SENSOR WIRE HANDLEBAR FOAM GRIP HEART RATE WIRE REAR POST COVER CONTROL BOARD CABLE FRONT POST COVER... - Page 15 CC-755R COMPLETE PARTS LIST #10*50 PHILLIPS SCREW 111 NYLOCK NUT M6 LEFT SEAT CARRIAGE COVER 112 C20 C-RING RIGHT SEAT CARRIAGE COVER 113 BEARING <6004ZZ> SCREW M5 x 25 MM 114 BELT TENSIONER ARM UPPER WATER BOTTLE HOLDER 115 BEARING <6203ZZ>...
-
Page 16: Exploded Diagrams
CC-755R EXPLODED DIAGRAM 1 * MANY OF THE PARTS SHOWN HERE HAVE BEEN PRE-ASSEMBLED. - Page 17 CC-755R EXPLODED DIAGRAM 2 * ALL THE PARTS SHOWN HERE HAVE BEEN PRE-ASSEMBLED.
- Page 18 CC-755R EXPLODED DIAGRAM 3 * ALL THE PARTS SHOWN HERE HAVE BEEN PRE-ASSEMBLED.
Need help?
Do you have a question about the CC-755R and is the answer not in the manual?
Questions and answers