Table of Contents
Advertisement
Advertisement
Table of Contents

Related Manuals for Doro Primo 215


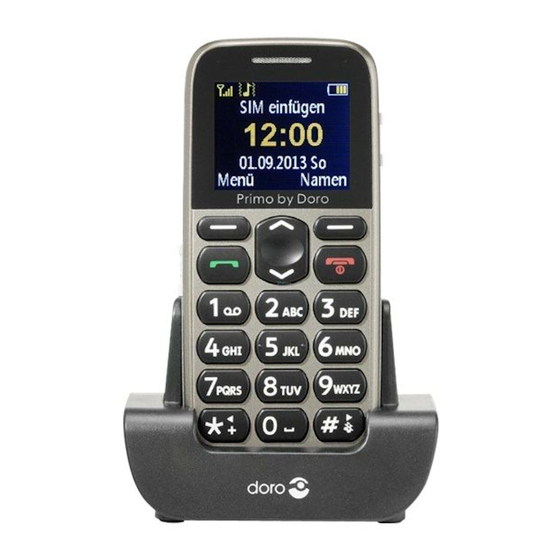
Summary of Contents for Doro Primo 215
- Page 1 Primo 215 by Doro Operating Instructions by Doro...
- Page 3 Switch for keylock Torch LED Earpiece Socket for 3.5mm standard earphone UP/DOWN keys In standby: Press to open the Shortcut key list. Press to open the Mes- sages menu. Press to navigate in menus and lists Left Soft Key Press it to enter the main menu Right Soft Key Press it to open the phone- book...
- Page 4 In editing mode, press to input numbers or characters. * key In standby mode, short press to input “*”/ “+” / “P”/“W”; In editing mode, press to input special characters # key In standby mode, long press to switch between Normal and Silent mode In editing mode, press to switch input methods...
-
Page 5: Table Of Contents
Contents Installation ....... .5 Scope of delivery ......5 Installing the SIM card, memory card and the battery . - Page 6 Headset ....... .17 Emergency calls ......18 Emergency button .
- Page 7 Phone settings ......40 Network settings ......43 Bluetooth®...
- Page 8 Technical data ......70 Specific Absorption Rate (SAR) ....71 Declaration of Conformity .
-
Page 9: Installation
Installation Scope of delivery • 1 mobile telephone • 1 energy-efficient switching power supply • 1 charger station • 1 battery pack Li-Ion 3.7 V / 1000 mAh • 1 stereo headset • 1 operating instructions IMPORTANT! Turn off the phone and disconnect the charger before removing the battery cover. - Page 10 1. Remove the cover from the battery compartment by sliding your fingernail into the small notches on the side of the bottom of the phone and pulling the cover upward. If the battery is installed, slide your fingernail in the notch next to the lower end of the battery and lift one side of the battery to remove it.
- Page 11 the "nose" is placed in accordance with the mar- ked area (see figure). The contacts of the memory card must not be scratched or bent. Push the metal bracket back down, pressing him flat and slide it away from the edge of the housing until it snaps into place.
-
Page 12: Charging
Charging CAUTION Only use batteries, charger and accessories that have been approved for use with this particular model. Connecting other accessories may be dangerous and may invalidate the phone's type approval and guarantee. If the battery is low, the empty symbol for the battery status blinks and a warning signal sounds. -
Page 13: Symbols
Note! To save power the LCD backlight goes off after a while. Press any button to illuminate the display. Full battery capacity will not be reached until the battery has been charged 3–4 times. Batteries degrade over time, which means that call time and standby time will normally decrease with regular use. -
Page 14: Display Status Symbols
Display status symbols Signal strength Battery level New entry in the call list (Missed call) Keypad locked Alarm active Bluetooth on Headset connected USB connection Ringer on Ringer off Vibration only Ringtone and vibration First vibration, then ringtone Unread SMS... -
Page 15: Operation
Operation Activating the phone Hold the red button on the telephone for approx. 4 seconds to turn it on/off. If the SIM card is valid but protected with a PIN code (Personal Identification Number), Input PIN is dis- played. Enter the PIN code and press OK ( upper left cor- ner of keypad). -
Page 16: Standby (Idle Mode)
Standby (Idle mode) When the phone is ready to use, and you have not keyed in any characters, the phone is in standby. Left selection button in standby is Menu. Right selection button in standby is Names. Tip: You can always press to return to standby. -
Page 17: Making A Call From The Phonebook
Making a call from the Phonebook 1. Press Names to open the phonebook. 2. Use the arrow buttons to scroll through the phonebook, or quick search by pressing the key corresponding to the first letter of the entry, see Entering text , p. -
Page 18: Call Options
characters, you can enter texts. Press the respective button repeatedly until the desired character is dis- played. Wait until the blue background of the current character disappears before you enter the next cha- racter. By pressing the * button, a list of special characters is displayed. - Page 19 Options (left selection button) A menu with the following options is displayed: Hold/Retrieve Hold/continue current call. End single call End current call (as with Phonebook Search telephone book. Call history Open call history. Messaging Read or write SMS messages. Soundrecorder Start recording the current call (only available if a SD card is installed)
-
Page 20: Call Waiting
Attention: Before you switch to loudspeaker, hold the device at least 1 m from your ear to avoid loud noises that might accidentally damage your ear! Note! The handsfree function allows only one person at a time to talk. Switching between talk/listen is triggered by the sound of the person talking. -
Page 21: Keylock
Keylock To lock/unlock the keyboard, activate the slide switch on the left side of the device. Even if the keylock is tur- ned on, you can accept incoming calls by pressing the button and you can turn the device on and off using the button. -
Page 22: Emergency Calls
When receiving a call you can use the answer key on the headset cable (if it has one) to answer and end calls. CAUTION Using a headset at high volume may damage your hearing. Adjust the volume level carefully when using a headset. -
Page 23: Emergency Button
Emergency button IMPORTANT! Always inform recipients in Number list that they are listed as your emergency contacts. CAUTION When an emergency call is activated the phone is pre-set to handsfree mode. Do not hold the device near your ear when the handsfree mode is in use, because the volume may be extremely loud. - Page 24 • The telephone then sends an SMS text message to all telephone numbers in the emergency call list if the emergency SMS is activated in the SOS set- tings. • The telephone then dials the first telephone num- ber in the list. If the call is not accepted within 25 seconds, the next number is dialed.
-
Page 25: Telephone Book
Telephone book 250 entries can be stored in the phone's telephone book. The number of entries that can be stored on the SIM card depends on the respective SIM card. Creating an entry in the telephone book 1. Press Menu, scroll to Phonebook and press OK. 2. -
Page 26: Creating Ice Entry (In Case Of Emergency)
Creating ICE entry (In Case of Emergency) With this additional information and medical informa- tion, first responders can access this information from the victim's phone in case of emergency. In the event of a trauma, it is critical to have this information as early as possible which can increase the chances of survival. -
Page 27: Phonebook Settings
Copy - Press Select to copy the selected entry from the telephone to the SIM card or vice versa. Phonebook settings In this menu, you will find the following options: Preferred storage - Set the storage location and the view settings for the contacts (Phone/SIM/ Both). - Page 28 Batch processing In this menu, you will find the following options: Copy SIM to phone/Copy phone to SIM - Option to copy selected contacts from the tele- phone to the SIM card and vice versa. Move SIM to phone/Move phone to SIM - Option to move selected contacts from the telephone to the SIM card and vice versa ATTENTION: The contacts will be deleted...
-
Page 29: Ice (In Case Of Emergency)
ICE (In Case of Emergency) First responders can access additional information such as medical information from the victim's phone in case of emergency. In the event of a trauma, it is criti- cal to have this information as early as possible to increase the chances of survival. - Page 30 the phonebook, select Delete to delete the entry, or Save to accept the current entry. Condition: Any medical conditions/medical devi- ces (e.g. diabetic, pacemaker). Allergies: Any known allergies (e.g. penicillin, bee stings). Blood type: Your blood type. Vaccination: Any relevant vaccination. Medication: Any medication that you are treated with.
-
Page 31: Messaging
Messaging Creating and sending SMS 1. Press shortcut button or press Menu, scroll to Messaging and press OK. 2. Select New and press OK. 3. Type your message, see Entering text , p. 13, then press Options. 4. Select Send to and then Add from Phonebook, select an existing recipient from the telephone book and press OK. -
Page 32: Inbox, Sent, Outbox
for best operation. Press * twice for the internatio- nal prefix +. Note! Before you can send any SMS, you need to save your message centre number. The number to your service centre is supplied by your service provider and is usu- ally set on the SIM card. -
Page 33: Call History
Use USSD - If the SMS contains a USSD, this is displayed for further options. Call history Missed calls, dialed numbers and received calls are stored in the call history. 10 calls of each type can be saved. If there are several calls to and from the same telephone number, only the most recent call will be saved;... -
Page 34: Image Viewer
Image viewer View your saved images. 1. Press Menu, scroll to Multimedia and press OK. 2. Select Image viewer and press OK. 3. Select an image by using and press Options. 4. Select one of the following options and press OK to confirm: View - Display the image. - Page 35 . Using the * and # press the right softkey buttons, you can switch to the previous or next song. Important: The files must be stored in the folder My music on the memory card, so that they will appear in the play list! 4.
-
Page 36: Fm Radio
FM radio Listen to the radio on your mobile telephone. Hint The reception is significantly improved when using a headset because the cable functions as an antenna. 1. Press Menu, scroll to Multimedia and press OK or use the shortcut buttons. 2. -
Page 37: File Manager
Settings Background play - Select On to continue lis- tening to the radio when exiting the menu. To deactivate the radio, end the background play- back in the FM radio menu. Loudspeaker - Select, whether the loudspea- ker should be switched on when a headset is connected or if the audio should only be played on the headset. -
Page 38: Connecting The Phone To A Pc
Connecting the phone to a PC Connect the phone to a computer and start transfer- ring pictures and sounds. All you have to do is connect an optional micro-USB cable between the phone and computer. From your computer's file explorer, you can drag and drop content between your phone and the computer. -
Page 39: Disconnect The Usb Cable Safely
Note! When the memory card is mounted to the computer, the phone cannot access the memory card. Some functionality and applications in the phone may not be accessible. You can transfer files by using a USB cable on most devices and operating systems supporting a USB Mass Storage interface. -
Page 40: Settings
Settings Note! The settings described in this chapter are carried out in standby mode. Press to return to standby mode. SOS Setting Emergency alert Turn the emergency call function on and off. 1. Press Menu, scroll to Settings and press OK. 2. -
Page 41: Emergency Numbers
1. Press Menu, scroll to Settings and press OK. 2. Select SOS Settings and press OK. 3. Select SOS Alarm tone and press OK. 4. Select On or Off and press OK. Call delay Setting the call delay when pressing the emergency call button. - Page 42 SOS SMS Turn SMS sending on and off when pressing the emergency call button. 1. Press Menu, scroll to Settings and press OK. 2. Select SOS Settings and press OK. 3. Select SOS SMS and press OK. 4. Select On or Off and press OK. Emergency call SMS text Entering the SMS text that is sent when the emer- gency call button is pressed (SOS SMS must be swit-...
-
Page 43: Top 10 Setting
Top 10 setting Set the entry as one of the first 10 contacts listed in the phonebook. Contacts in this list are always dis- played on top of the phonebook list, regardless of the initial letter of the name. 1. Press Menu, scroll to Phonebook and press OK. Select an entry with 2. -
Page 44: Phone Settings
Phone settings Time and date Setting the time and date 1. Press Menu, scroll to Settings and press OK. 2. Select Phone and press OK. 3. Select Time and date and press OK. 4. Select Set home city and press OK. 5. - Page 45 Setting the time and date format 1. Press Menu, scroll to Settings and press OK. 2. Select Phone and press OK. 3. Select Time and date and press OK. 4. Select Set format and press OK. 5. Set the time format (12 or 24 hours) with * and # and press 6.
- Page 46 3. Select Pref. input method and press OK. 4. Select Abc (first character is capitalized after a period), ABC (ALL CAPS), abc (all lower case) or Numeric (numbers) and press OK. Flight mode Flight mode means the radio part of the cell phone is turned off.
-
Page 47: Network Settings
Network settings Your phone automatically selects your (service provi- der's) home network if this is within range. If not within range, you may use another network, provided your network operator has an agreement that allows you to do so. This is called roaming. Contact your service provider for more information. -
Page 48: Bluetooth
Bluetooth® IMPORTANT If you are not using a Bluetooth connection, select Power/ off or Visibility / off. Do not pair with unknown devices. You can establish a wireless connection with other Bluetooth-compatible devices such as headsets. 1. Press Menu, scroll to Settings and press OK. 2. - Page 49 Authorize - Set the connection options for this device. Important For hands-free devices in cars, authoriza- tion can be very useful. Authorize the hands-free device in your car under this menu item to avoid having manually connect/pair when leaving the car or turning the device on and off.
-
Page 50: Security Settings
Security settings PIN lock You can select whether or not the SIM card PIN should be required when turning the phone on. Seve- ral SIM card providers do not allow the PIN query to be shut off. 1. Press Menu, scroll to Settings and press OK. 2. - Page 51 Phone lock If the telephone lock is activated, you need the tele- phone lock code to turn on the phone. To do this, you must enter the lock code (factory default 0000). You can change this lock code (see below). 1.
-
Page 52: Restore Factory Settings
Restore factory settings Reset the telephone to the factory settings. 1. Press Menu, scroll to Settings and press OK. 2. Select Restore factory settings and press OK. 3. Enter the current telephone lock code (default 0000) and confirm the reset. Important When resetting, all contacts in the telephone memory will be irrevocably deleted. -
Page 53: Call Settings
Call settings These services are partially dependent on the network support and subscription. You can get additional infor- mation from your provider. Send caller ID You can select whether or not the recipient should see your telephone number when you call. 1. -
Page 54: Call Divert
2. Select Call settings and press OK. 3. Select Call waiting and press OK. 4. Select one of the following options and press OK: Activate - Activates call waiting. Deactivate - Deactivates call waiting. Query status - Displays whether call waiting is activated or deactivated. -
Page 55: Call Barring
Divert all data calls - Diverts all data calls. Cancel all diverts - Calls are not diverted. Call barring To restrict the use of your telephone, certain types can be blocked. Notice! A password is required to use call blocking. You can get this password from your provider. - Page 56 Voice calls when roaming - The user cannot accept any incoming calls when roaming (use on other networks). Cancel all - Delete all call blocking functions (password required). Change barring password - Option for changing the lock password. Voice mail (Mailbox) If your provider has setup a voice mailbox for you (answering machine on the cellular network), callers can leave a voice message if you cannot accept a call.
-
Page 57: Auto Redial
Auto redial This function performs an autonomous redial. 1. Press Menu, scroll to Settings and press OK. 2. Select Call settings and press OK. 3. Select Advanced settings and press OK. 4. Select Auto redial and press OK. 5. Switch the function On or Off and press OK. Call time reminder If this function is switched on, you will be notified of the elapsed call time once or several times by a notifi-... -
Page 58: Sms Settings
Answer mode Settings options for accepting incoming calls. 1. Press Menu, scroll to Settings and press OK. 2. Select Call settings and press OK. 3. Select Advanced settings and press OK. 4. Select Answer mode and press OK. 5. Select one of the following options and press OK: Any key - Incoming calls can be accepted by pressing any key (except the right soft key and the red hang up button). - Page 59 number of your SMS center is stored on the SIM card, it will be displayed. If not, you can enter the number yourself. You can get additional informa- tion from your provider. Validity period - Select the desired validity period using the * and # buttons.
-
Page 60: User Profiles
User profiles You can save different profiles (special settings depen- ding on the user or environment), into which you can switch when necessary. Notice The profile with the red checkmark is the active pro- file. If you make changes to one of the profiles, the selected settings only have an effect when the profile is activated! 1. - Page 61 ringtone and vibration or vibration with a delayed ringtone. Ring type - You can choose between Beep once and Repeat. Incoming call - Select the melody for an inco- ming call. Ringtone volume - Select the volume for an incoming call. Message - Select the melody for an incoming message.
-
Page 62: Organizer
Organizer Alarm 1. Press Menu, scroll to Organizer and press OK. 2. Select Alarm and press OK. 3. Select an entry from the list and press Edit. 4. Using the * and # buttons select on or off and press 5. -
Page 63: Services
Services This menu contains preprogrammed services from your network operator. The services are dependent upon the network support and subscription. 1. Press Menu, scroll to Organizer and press OK. 2. Select Services and press OK. Calculator The calculator can perform basic arithmetic functions. 1. -
Page 64: Appendix
Appendix Safety instructions CAUTION The unit and the accessories can contain small parts. Keep all of the equipment out of the reach of small children. The mains adapter is the disconnect device between the product and mains power. The mains socket outlet must be close to the equipment and easily accessible. -
Page 65: Medical Units
This unit complies with guidelines for radiation when it is used either in a normal position against your ear, or when it is at least 1.5 cm from your body. If the unit is carried close to your body in a case, belt holder or other holder, these holders should not contain any metal, and the product should be placed at the dis- tance from your body specified above. -
Page 66: Pacemakers
Pacemakers The Health Industry Manufacturers Association recom- mends that a minimum separation of 15 cm be main- tained between a handheld wireless phone and a pacemaker to avoid potential interference with the pacemaker. Persons with pacemakers: • Should always keep the phone more than 15 cm from their pacemaker when the phone is turned •... -
Page 67: Protect Your Hearing
Follow the restrictions that apply to the use of radio equipment near places where fuel is stored and sold, chemical factories and places where blasting is in pro- gress. Areas with risk for explosion are often – but not always –... -
Page 68: Emergency Calls
Emergency calls IMPORTANT! Mobile phones use radio signals, the mobile phone network, the terrestrial network and user-programmed functions. This means that connection cannot be gua- ranteed in all circumstances. Therefore, never rely only on a mobile phone for very important calls such as medical emergencies. -
Page 69: Care And Maintenance
led and the airbag fills with air. It is prohibited to use the unit in flight. Turn off the unit before you board a plane. Using wireless telecom units inside a plane can pose risks to air safety and interfere with telecommunicati- ons. -
Page 70: Guarantee And Service Information
can form on the inside which can damage the electronic circuits. • Do not try to open the unit in any other way than that which is indicated here. • Do not drop the unit. Do not knock or shake it eit- her. - Page 71 We request that you register the goods in the original packaging incl. all accessories with a copy of the receipt with a meaningful description of the fault immediately after discovering the fault with our hotline. If no defect can be determined, the goods send in shall be returned with a corresponding notice.
- Page 72 bodies inside, chemical residues) lighting and overvoltage damages Modifications to the burden of proof to the detriment of the customer is not connected to the above regulations. Operating instructions and potentially provided soft- ware are excluded from the guarantee. This guarantee applies for new goods acquired in Germany.
- Page 73 limited to typical contractual, foreseeable damages insofar as there is no liability due to intent, gross negli- gence, the loss of life, limb or health or in accordance with product liability laws. The guarantee duration is not extended if guarantee services are provided. The receipt with the date of purchase is valid as the proof of guarantee.
-
Page 74: Technical Data
Technical data Network: Triband GSM 900/1800/1900 Display: 1.7”, 160 x 128 pixels Bluetooth ® BT 3.0 FM radio: Flashlight: Battery: Li-Ion, 3.7V, 1000 mAh Standby time: up to 10 days Call time: up to 5 hours Phonebook entries: ICE function: Emergency call button: Yes, 5 SOS numbers Organizer: Alarm, calculator... -
Page 75: Declaration Of Conformity
The maximum limit according to WHO is 2.0 W/kg measured over 10 g tissue. Declaration of Conformity We declare that Primo 215 by Doro conforms to the essential requirements and other relevant regulations contained in the Directives 1999/5/EC (R&TTE). A copy of the Declaration of Conformity is available at www.ivsgmbh.de... - Page 80 Internet: www.ivsgmbh.de IVS GmbH Im Frauental 14 92224 Amberg © IVS GmbH 2013 All rights reserved IVSUMEN_Primo 215 by Doro - V 2.01...
Need help?
Do you have a question about the Primo 215 and is the answer not in the manual?
Questions and answers