Table of Contents
Advertisement
Advertisement
Table of Contents

Related Manuals for migear Extreme X MGOVS015


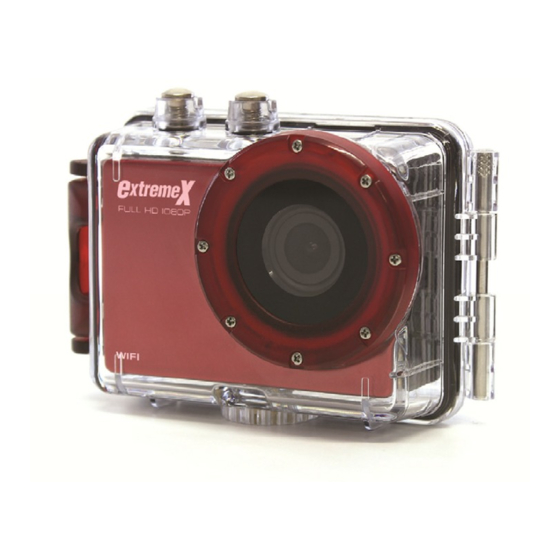
Summary of Contents for migear Extreme X MGOVS015
-
Page 2: Table Of Contents
CONTENTS PAGE Contents Page Introduction Safety Instructions Important Safety Precautions Product Specification Contents Getting to know your Camera Using the Action Camera Action Camera Operation WIFI Mode Connections Using the Remote Control Using the Mounting Accessories Troubleshooting... -
Page 3: Introduction
INTRODUC TIO N Congratulations on the purchase of your new Action Camera. This manual contains important safety and operating information. Please read all the information carefully before you use the device to avoid accidents and keep it for future reference. Follow these important safety and operation instructions. - Page 4 Rules. These limits are designed to provide reasonable protection against harmful interference in a residential installation. This equipment generates, uses and can radiate radio frequency energy and, if not installed and used in accordance with the instructions, may cause harmful interference to radio communications.
- Page 5 ‐ Consult the dealer or an experienced radio/TV technician for help. FCC Caution: Any changes or modifications not expressly approved by the party responsible for compliance could void the user's authority to operate this equipment. This transmitter must not be co‐located or operating in conjunction with any other antenna or transmitter.
-
Page 6: Safety Instructions
SAFETY INSTRUCTI ONS • The Action camera without underwater casing shall not be exposed to dripping or splashing and no objects filled with liquids, such as vases, shall be placed over the product. Dry location use only. • Keep the camera clean. Never store it next to a heat source or in dirty, humid or wet places. - Page 7 • Do not attempt to dismantle or repair this camera yourself. Qualified personnel should perform repairs. • Disconnect the camera from the power source before cleaning. • Use a dry soft cloth to clean this camera. • This product is not intended for commercial use. Household/personal use only.
-
Page 8: Important Safety Precautions
IMPORTANT SAFETY PRECAUTI ONS In order to prevent program failure, never disconnect the product suddenly from a PC while file transferring is in progress. Disconnect the appliance from PC when cleaning. Use a dry soft cloth to clean this appliance. Do not dismantle the product or use alcohol, thinners or benzene to clean the surface of the product. - Page 9 • Still Image Resolution: 12MP, 8MP, 5MP, 3MP, 2MP, VGA • Wide angle lens • Waterproof to 45m with Case • 1.5” Preview Screen • Expandable Micro SD Slot up to 32GB • High‐speed USB 2.0 interface • Built‐in rechargeable lithium battery •...
-
Page 10: Contents
CONTENTS Please make sure that the items shown below are included in the package. Should an item be missing, please contact the local retailer from which you purchased this product Action Camera 1 piece 45m Waterproof Case 1 piece Bike Mount 1 piece Helmet Mount and Strap 1 piece... -
Page 11: Getting To Know Your Camera
GETTING TO KNOW YOUR CAMERA DEV ICE OVE RVIEW Menu button OK button LCD screen Down button Up /Wifi button LED indicator light Shutter/Power button Mode button Microphone Micro SD card slot... - Page 12 HDMI socket USB socket Speaker Reset Tripod hole Lens...
-
Page 13: Using The Action Camera
USING THE ACTI ON CAM ER A BATT ERY OPERATION 1. Make sure the action camera is turned off. 2. To charge the internal battery, connect the action camera with the USB cable provided to a computer or a 1Amp wall charger. -
Page 14: Action Camera Operation
INSERTI NG MICRO SD CARD This action camera does not have internal memory. A Micro SD (TF) card (Class 10) and above must be inserted for this action camera to operate and record. 1. Turn off the action camera 2. Find the Micro SD card slot, and then insert the Micro SD card. - Page 15 NOTE: The action camera has a power saving setting and will automatically turn itself off after 5mins of inactivity to save power. MODES The camera has four modes for the action camera video mode, capture mode, car mode, playback mode. Press the “Mode” button to switch between these modes.
- Page 16 button and the menu will appear on the LCD screen, and then press the “Mode” button to access the settings menu as below. Use the “Up” “Down” and “OK” buttons to make your selections, also the “Mode” button to toggle the selections. MENU FUNCTION Sounds...
- Page 17 off automatically after a period of time. After you select the "off " that means the power save function is switched off 【1min】/【 3min 】/【5min】/【off 】 Date and Sets the date and time for the camera. Time Language Set the on‐screen language: 【EN】/【DE】/【IT】/【ES】/【PT】/【NL】...
- Page 18 Password standard password is set as 1234567890 Format Format your SD card including protected files, removing the SD card during formatting may damage the card. 【OK】/ 【Cancel】 Reset All Restores the action camera to default settings:【OK 】/【Cancel】 VIDEO MODE 1. Turn on the action camera; the camera should automatically be set to video mode when camera is turned on.
- Page 19 7. The action camera will stop recording automatically when the memory capacity is full. (While under the loop recording setting, once memory capacity is reached, it will erase files taken from the beginning. VIDEO MODE SCREEN When in Video mode, the below screen will show. 01:58:...
- Page 20 1.Video mode 5.Stabilizer 2.Movie Resolution 6.The Record Time 3.Loop Recording 7.Battery level 4.Audio SETTINGS IN VIDEO MODE While in video mode, press the “Menu” button and the below settings will appear. MENU FUNCTION Size Changing the video resolution for the recording.
- Page 21 Balance sources. There five items for option: 【Auto】 / 【 Daylight】 / 【 Cloudy】 / 【 Fluorescent】 /【Tungsten】 Video Adjust the quality of the recording 【Super Fine】/【Fine】 /【Normal】 Quality Stabilizer Helps to keep the recording stable 【On 】/【Off 】 Voice Rec Record voice when recording movie clips 【On 】/【Off 】...
- Page 22 metres and start automatically recording. 【On 】/【Off 】 Slow Enables slow motion recording 【On 】/【Off 】 Motion Time‐lapse Enables time‐lapse recording 【Off】/【3sec】 / 【5sec】/ 【10sec】 / 【30sec】/【1min】/【3min】 Time‐lapse Choose the duration of your time‐lapse Duration recording 【Unlimited】/【3min】/ 【5min】/【10min】 【15min】/【20min】/【30min】/【60min】 Date This function can be used to add a date and Stamp time to your pictures.
- Page 23 be set to video mode when camera is turned on. Press the “Mode” button to change to capture mode. 2. Take a still image by pressing the shutter button. 3. After the image has been taken the LCD will display black for a brief second.
- Page 24 【Auto】/【Daylight】/【Cloudy】/ 【Fluorescent】/【Tungsten】 Image Select a lower image quality to decrease the Quality image size in order to take more images. There are three options for choice: 【Super Fine】/【Fine】/【 Normal】 Metering Changes the metering method, which enables to change the brightness of the picture: 【Centre】/【Multi】/【Spot】...
- Page 25 sensitivity that your camera has to light in the surrounding environment. 【Auto】/【50】/【100】/【200】/【400】 /【800】/【1600】 Exposure Set the exposure value manually to compensate for unusual lighting conditions : 【‐2】/【‐1.7】/【‐1.3】/【‐1】 /【‐0.7】/【‐0.3】/【0】/【+0.3】/【+0.7】 /【+1】/【+1.3】/【+1.7】【+2】 Stabilizer Helps to keep the recording stable 【On 】/【Off 】 Auto After taking photo the will be displayed on Review the LCD screen for the below amount of...
- Page 26 before the image is taken: 【Off】/【2sec】/【10sec】 Photo Each time you press the “Shutter” button it Burst will continuously take a few pictures: 【Off】/【3】/【5】/【10】 Time‐lapse Enables time‐lapse photography, it will take one photo per the below timing: 【Off】/【3sec】 / 【5sec】/ 【10sec】 / 【30sec】/【1min】/【3min】...
- Page 27 PHOTO MODE SCRE EN When in Photo mode, the below screen will show. 1.Photo mode 5.Stabilizer 2.Resolution 6.Memory capacity 3.Photo Burst 7.Battery level 4.Exposure...
- Page 28 CAR MODE Press the “Mode” button to bring up the car mode. When in car mode the screen will automatically rotate 180 degrees. This is for when your camera is connected to a windshield/windscreen mount (Not included), it will record the correct the way and not be upside down.
- Page 29 4. To review the Video or Car File press the “Ok” button to start playing the video file, to pause the video press the “Up” button. Press the “Menu” button to stop playing the video file. 5. When viewing the images, use the “Up” and “Down” buttons to scroll through the images, press the “OK”...
- Page 30 00:00 PLAYBACK JPG FILE 1. Playback mode 4. Image File 5. Lock 2. Sequence of File 3. Date and Time...
- Page 31 2015/4/22 15:30...
- Page 32 SETTINGS IN PLAYBACK MODE While in playback mode, press the “Menu” button to access the settings. MENU FUNCTION Use this function to protect the files from Lock being deleted by accident. 【Single】/【Lock All】/【Unlock All】 Delete Use this function to delete a single file or all files.【Single】/【All】...
-
Page 33: Wifi Mode
Resize images to a smaller resolution. Resize* 【5M】/【3M】/【2M】/【VGA】 * Functions only available when viewing photos. WI FI MODE The action camera comes with Wi‐Fi function so you can wirelessly stream your video to your Smartphone or control your action camera by your phone. Firstly download the free APP “EXTREMEX”... - Page 34 Micro SD card into the action camera. 2. To turn on the Wi‐Fi function, press the “Up” button to activate Wi‐Fi. The screen will display “Waiting for WIFI Connection…” 3. Now with your mobile phone, disconnect from any current wireless networks and search for a WIFI connection called MGOVS015 and connect using password: 1234567890, the LCD screen on the camera will now say “WIFI Connection Ready”...
- Page 35 5. You can control the action camera with the App to take photos, videos and change different settings. 6. To watch the recorded videos you will need to download these from the APP to your phone, then watch the video as per you normally would on your phone...
-
Page 37: Connections
CO NNECTI ONS CONNECTING TO HDTV The action camera can be connected to a HDTV via a Mini HDMI cable (not supplied). Note: Before connecting or removing the HDMI cable, please stop video recording, playback and disconnect Wi‐Fi. Connect the action camera to a TV via a Mini HDMI cable (not supplied). - Page 38 black and the TV will display what is shown on your camera. From here you can playback your files on your TV by following the previous steps in playback mode. CONNECTING TO PC Turn on the action camera and connect it to the USB port of the PC via the supplied USB cable.
-
Page 39: Using The Remote Control
USING THE REMOTE CONTROL The remote control uses 2.4GHz wireless technology so you don’t need to point it towards the camera for it to work. The remote control has a 10‐15m working range. The remote control is powered by 1 x AAA battery (not included), please remove the battery cover and install the battery. -
Page 40: Using The Mounting Accessories
USING THE MOUNTING ACCESSORIES There are two mounts included in the action camera box. Bike Mount Helmet Mount The bike and helmet mounts can be attached to either the action camera directly or waterproof case (with the camera inside) - Page 41 FIXING THE ACTION CAMERA TO A BIKE 1. Find the Bike Mount A 2. This mount is separated into 3 parts. Main Section (1) Mounting Bracket (2) Connectors 2. Choose the connectors from the three given below depending on how you want to mount your camera, and then fix them to the part 1 of the main mount and part 2 the mounting bracket.
- Page 42 Make sure all the screws are done up tightly. FIXING THE ACTION CAMERA TO A HELME T 1. Find the Helmet Mount B 2. This mount is separated into 3 parts. Main Section (3) Mounting Bracket (2) Connectors 2. You can either connect the mounting bracket directly to the main section or choose some of the connectors from the three...
- Page 43 given below depending on how you want to mount your camera, and then fix them to the part 3 of the main section and part 2 the mounting bracket.
- Page 44 3. After fixing the action camera to the mount, use the strap provided or Sticker to attach to your helmet. MOU NTING ADAPTOR Supplied with the action camera is a Mounting Adaptor for GoPro Accessories, to use this adaptor connect to the action camera or the underwater case via the tripod Socket.
- Page 45 WATE RPROOF CASE CARING INSTRUCTIONS Before sealing the waterproof case, keep the camera housing’s rubber seal clean, a single hair or grain of sand can cause a leak. You can test by closing the case without inserting the camera. Submerse the case completely in water for about a minute. Remove the case from the water, dry off its exterior with a towel, and then open the case.
-
Page 46: Troubleshooting
the seal, which can cause failure. To clean the seal, rinse in fresh water and shake dry (drying with a cloth may cause lint to compromise the seal). Re‐install the seal into the grooves in the backdoor of the housing. Please note: the waterproof case is rated for use up to 45 metres deep. - Page 47 response. next image. Delete some images in SD/MMC card, if the memory is full. The product does Reset the camera by pressing the not respond reset button The video files are Please ensure you have very slow and bad downloaded the latest version of resolutions when your media player, or try such playing on my...
- Page 48 phone Cannot connect to Check to make sure you have mobile App connected to the Action Camera’s Wi‐Fi. Or turn camera off and on and connect the Wi‐Fi again following the steps. When SD card is Please remove the SD card and inserted shows format the card via your 0:00 recording...
- Page 49 If you have any questions regarding this product please contact us on the below email or visit our website: • support@migearextremex.com • www.migearextremex.com...
Need help?
Do you have a question about the Extreme X MGOVS015 and is the answer not in the manual?
Questions and answers