Table of Contents
Advertisement
Advertisement
Table of Contents

Related Manuals for LG LSSB2791 series


Summary of Contents for LG LSSB2791 series
- Page 1 Model: Built in Side by Side LSSB2791 ** Refrigerator Installation Guide...
-
Page 2: Table Of Contents
Contents 1. Precaution before installation ..............3 2. Product and cabinet dimension .............. 4 3. Precaution when moving the product ............ 5 4. Cabinet diagram and maximum door opening ........5 5. Refrigerator/Freezer door opening and how to fix at 90 degrees ..... 6 6. -
Page 3: Precaution Before Installation
1. Precaution before installation WARNING TIP-OVER HAZARD Use two or more people to move and install the refrigerator. To prevent the refrigerator from tipping over, install anti-tip brackets (provided). Failure to follow the refrigerator installation instructions can result in serious injury or death. Precaution ■... -
Page 4: Product And Cabinet Dimension
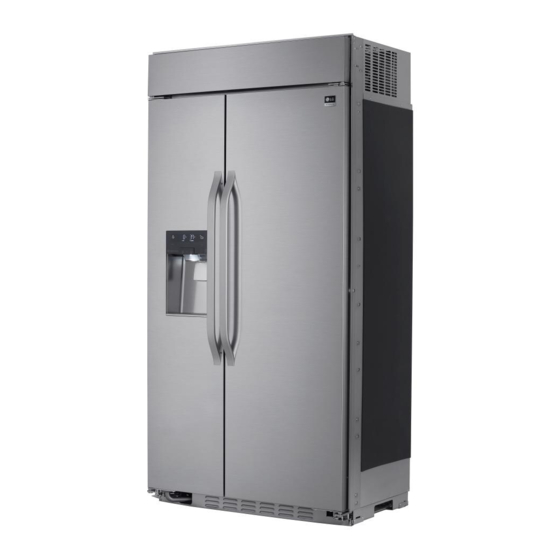
2. Product and cabinet dimension - Product dimension (In) : 42”(1,067mm) x 83-1/2”(2,121mm) x 25-3/8”(645mm) (W x H x D) Width of back of product Depth from back of product to door 41”(1,041mm) 25-3/8”(645mm) Height of back of product Height from floor to very top of the 83-3/8”(2,116mm) front of the product 83-1/2”(2,121mm) -
Page 5: Precaution When Moving The Product
3. Precaution when moving the product ■. Before moving the refrigerator, check the line of movement to the location to install. (Refer to the product dimension and rotating radius.) 1) Request the installation to the specialized technician. It can cause electric shock, fire, malfunction and explosion. 2) Due to the characteristics of the built-in product, the top is heavy and can easily fall over when not installed. -
Page 6: Refrigerator/Freezer Door Opening And How To Fix At 90 Degrees
5. Refrigerator/Freezer door opening and how to fix at 90 degrees Push and install the device to keep the refrigerator door open and fixed, included in the accessory box, to the hole marked on the picture completely. The left and right side are installed in the same method. - Page 7 6. Installation of part to prevent the product from falling over 1) Check if all the described parts are included in the accessory box. 2) Based on the recommended dimension on the picture, place the part to prevent the product from falling over. (Same for both left and right side) 3) Use the M4*L12 screw included in the accessory box to tighten 3 locations respectively on left and right side.
-
Page 8: Connecting Power And Securing Space For Water Supply Pipe
7. Connecting power and securing space for water supply pipe -. Power connection 1/2” (Unit : In) (10mm) The location of the 115V 60Hz power connector must be located on the rear side of the product as shown in 8-1/2”(220mm) the picture. -
Page 9: How To Install The Water Supply Pipe
8. How to install the water supply pipe ※ Check the location and installation detail of the water service pipe on the previous page before connecting the water supply pipe. Before inserting the product completely into the cabinet, check if there is any water leakage. 1) Disassemble the bottom grill. -
Page 10: Product Detail Dimension
9. Product detail dimension Total height of product 83-1/2” (2,121mm) 83-1/2” (2,121mm) Product height excluding front 82-1/2” air inlet (2,098mm) 82-1/2” (2,098mm) Front width (Including wing) 42”(1,067mm) -
Page 11: Cabinet Detail Dimension
10. Cabinet detail dimension Cabinet detail dimension 5/32”(4mm) Product height 83-1/2”(2,121mm) Cabinet height 83-3/4” (2,127mm) Handle height 34-13/16” (884mm) Height of bottom part 3” (77mm) Cabinet depth Handle projection 24”(610mm) 2-5/16”(59.5mm) -
Page 12: How To Adjust The Height Of The Refrigerator And Freezer Door
11. How to adjust the height of the refrigerator and freezer door 1) If the height of the refrigerator and freezer is different, turn the bottom door height adjustment bolt to adjust the height. - The refrigerator and freezer door can be adjusted by 1/8”(3mm) respectively. -
Page 13: How To Adjust The Height Of The Product
12. How to adjust the height of the product 1) Use the height adjuster on the front/rear side to level the product and adjust the height on both left and right side. ※ For built-in product, adjust the height of and level the product during the initial installation. -
Page 14: How To Disassemble/Reassemble The Top Grill
13. How to disassemble/reassemble the top grill 1) To adjust the left/right door, the top grill must be disassembled first. ※ Because the corners can be sharp, make sure to be careful during the task. ※ After disassembling the top grill, place it at a safe location to avoid any scratch on the panel. -
Page 15: Left/Right Door Adjuster For Refrigerator And Freezer
14. Left/Right door adjuster for refrigerator and freezer 1) The gap between the refrigerator and freezer is 5/16”(8mm) by factory default. If the gap between the refrigerator and freezer door changes during the product installation, use the left/right door adjuster to maintain the gap. - The refrigerator and freezer door can be adjusted by 5/32”(3.9mm) respectively. - Page 16 14. Left/Right door adjuster for refrigerator and freezer 2) Adjustment order ▶ Refrigerator door left/right adjuster Can be adjusted by Can be adjusted by Can be adjusted by 5/32”(3.9mm) 5/32”(3.9mm) 5/32”(3.9mm) Can be adjusted by Can be adjusted by Can be adjusted by 5/32”(3.9mm) 5/32”(3.9mm) 5/32”(3.9mm)
- Page 20 P/No. : MFL67410801...