Sign In
Upload
Download
Table of Contents
Contents
Add to my manuals
Delete from my manuals
Share
URL of this page:
HTML Link:
Bookmark this page
Add
Manual will be automatically added to "My Manuals"
Print this page
×
Bookmark added
×
Added to my manuals
Manuals
Brands
Pioneer Manuals
Car Navigation system
AVIC-F60DAB
Operation manual
Pioneer AVIC-F60DAB Operation Manual
Navigation av system
Hide thumbs
1
Table Of Contents
2
3
4
5
6
7
8
9
10
11
12
13
14
15
16
17
18
19
20
21
22
23
24
25
26
27
28
29
30
31
32
33
34
35
36
37
38
39
40
41
42
43
44
45
46
47
48
49
50
51
52
53
54
55
56
57
58
59
60
61
62
63
64
65
66
67
68
69
70
71
72
73
74
75
76
77
78
79
80
81
82
83
84
85
86
87
88
89
90
91
92
93
94
95
96
97
98
99
100
101
102
103
104
105
106
107
108
109
110
111
112
113
114
115
116
117
118
119
120
121
122
123
124
125
126
127
128
129
130
131
132
133
134
135
136
137
138
139
140
141
142
143
144
145
146
147
148
149
150
151
152
153
154
155
156
157
158
159
160
161
162
163
164
165
166
167
168
169
170
171
172
173
174
175
176
177
178
179
180
181
182
183
184
185
186
187
188
189
190
191
192
193
194
195
196
197
198
199
200
201
202
203
204
205
206
207
208
209
210
211
212
213
214
215
216
page
of
216
Go
/
216
Contents
Table of Contents
Troubleshooting
Bookmarks
Table of Contents
Table of Contents
Introduction
Manual Overview
How to Use this Manual
Conventions Used in this Manual
Terms Used in this Manual
Sd Memory Card
Notes on Internal Memory
Before Removing the Vehicle Battery
Data Subject to Erasure
Resetting the Microprocessor
Basic Operation
Checking Part Names and Functions
Protecting Your Product against Theft
Removing the Detachable Faceplate
Attaching the Detachable Faceplate
Notes on Using the LCD Panel
Adjusting the LCD Panel Angle
Inserting/Ejecting/Connecting Media
Inserting and Ejecting a Disc
Inserting and Ejecting an SD Memory Card
Connecting and Disconnecting an Ipod
Plugging and Unplugging a USB
Storage Device
Startup and Termination
On First-Time Startup
Regular Startup
A Message about the Map Database
Turning off the Display
How to Use the Screens
Switching Screens Using the Touch Panel Keys
Switching Screens Using the Hardware Buttons
Supported AV Source
Displaying the AV Operation Screen
Selecting a Front Source on the AV Source Selection Screen
Selecting a Front Source on the Source List
Selecting a Rear Source
Turning off the AV Source
Changing the Display Order of Source Icons
Changing the Display Order of Source Keys
Using the Touch Panel
Using the Common Touch Panel Keys
Operating List Screens
Operating the Time Bar
Operating the On-Screen Keyboard
On First-Time Startup of the Navigation System
How to Use the Navigation Menu Screen
Operating the Navigation Menu Screen
How to Use the Map
How to Read the Map Screen
Frequently Shown Route Events
Seeing the Current Position on the Map
Browsing the Data Field
Configuring the Driving Display
Operating the Map Screen
Changing the Scale of the Map
Smart Zoom
Switching between 2D, 3D, and 2D North up Views
Changing the View Angle of the Map
Scrolling the Map to the Position You Want to See
Searching for and Selecting a Location
Searching for a Location by Address
Searching for Points of Interest (POI)
Searching for Pois Using Preset Categories
Searching for Pois by Categories or Directly from the Name of the Facilities
Searching for Providers Nearby that Offer Emergency or Roadside Assistance Services
Selecting a Destination from Stored Locations
Selecting a Destination from Stored Routes
Selecting a Location You Searched for Recently
History
Smart History
Searching for a Location Using "Combined Search
Searching for a Location by Coordinates
Searching for a Location by Scrolling the Map
Checking and Modifying the Current
Modifying the Route
Checking Route Alternatives When Planning the Route
Checking Route Alternatives for an Existing Route
Setting a New Starting Position for the Route
Editing the List of Destinations
Cancelling the Current Route Guidance
Building a Route Using "Route Planner
Checking Route Information and Preferences
Watching the Simulation of the Route
Storing a Location in "Saved Location
Storing a Route in "Saved Routes
Registering and Editing Locations and
Saving a Location as an Alert Point
Using Traffic Information
Receiving Real-Time Traffic Information
(Tmc)
Checking the Traffic Incidents on the Map
Checking Useful Information about Your
Checking Useful Information
Customising Preferences of the
Customising the Navigation Settings
Restoring the Default Settings
Information on each Option of "Settings
Route Preferences" Settings
Sound" Settings
Warnings" Settings
Navigation Map" Settings
Regional" Settings
Display" Settings
Traffic" Settings
Weather" Settings
Trip Monitor" Settings
Connected Services" Settings
Usage Reports" Settings
Start Configuration Wizard" Settings
Registering and Connecting a Bluetooth
Preparing Communication Devices
Registering Your Bluetooth Devices
Searching for Nearby Bluetooth Devices
Pairing from Your Bluetooth Devices
Connecting to a Bluetooth Device Automatically
Deleting a Registered Device
Connecting a Registered Bluetooth Device Manually
Switching Visibility
Entering the PIN Code for Bluetooth Wireless Connection
Displaying the Bluetooth Device Address
Clearing the Bluetooth Memory
Updating Bluetooth Software
Displaying the Bluetooth Software Version
Using Hands-Free Phoning
Displaying the Phone Menu
Touch Panel Keys
Reading the Screen
Making a Phone Call
Direct Dialling
Calling a Number in the Phone Book
Dialling from the History
Using the Preset Dial Lists
Receiving a Phone Call
Answering an Incoming Call
Minimising the Dial Confirmation Screen
Changing the Phone Settings
Answering a Call Automatically
Switching the Ring Tone
Inverting Names in the Phone Book
Setting the Private Mode
Adjusting the Other Party's Listening Volume
Using the Voice Recognition Function (for Iphone)
Notes for Hands-Free Phoning
Ipod / Iphone or Smartphone Setup Operation
The Basic Flow of Ipod / Iphone or Smartphone Setup
Setting the Device Connection Method
Ipod Compatibility
Android Device Compatibility
Mirrorlink Device Compatibility
Information on the Connections and Functions for each Device
Using the Radio
Using the Touch Panel Keys
Reading the Screen
Starting Procedure
Selecting a Band
Manual Tuning
Seek Tuning
Selecting a Preset Channel from the Preset Channel List
Storing Broadcast Frequencies
Storing the Strongest Broadcast Frequencies
Tuning into Strong Frequencies
Receiving Traffic Announcements
Using News Programme Interruption
Limiting Stations to Regional Programming
Tuning into Alternative Frequencies
Switching Auto PI Seek
Activating the Auto PI Seek for Preset Stations
Switching the Sound Quality of the FM Tuner
Storing Song Information to an Ipod (Itunes Tagging)
Operating with the Hardware Buttons
Using the Touch Panel Keys
Using the Digital Radio (DAB)
Reading the Screen
Starting Procedure
Selecting a Band
Selecting a Channel from the List
Listening to a Recent Broadcast
Manual Tuning
Seek Tuning
Selecting a Preset Channel from the Preset Channel List
Storing Broadcast Frequencies
Switching to a Channel with Good Receiving Sensitivity Automatically
Operating with the Hardware Buttons
Playing a Disc
Using the Touch Panel Keys (for Audio)
Using the Touch Panel Keys (for Video)
Reading the Screen (for Audio)
Reading the Screen (for Video)
Starting Procedure
Selecting Files from the File Name List
Playing Tracks in Random Order
Setting a Repeat Play Range
Switching the Media File Type
Searching for the Part You Want to Play
Operating the DVD Menu
Switching the Subtitle Language
Switching the Audio Language
Frame-By-Frame Playback
Slow Motion Playback
Returning to a Specified Scene
Resuming Playback (Bookmark)
Operating the DVD Menu Using Touch Panel Keys
Switching the Multi-Angle DVD Display
Selecting the Audio Output
Operating with the Hardware Buttons
Playing Compressed Audio Files
Using the Touch Panel Keys
Reading the Screen
Starting Procedure (for Disc)
Starting Procedure (for USB/SD)
Switching the Browse Mode
Selecting Files from the File Name List
Selecting a File from the List Related to the Song Currently Playing (Link Search)
Playing Files in Random Order
Setting a Repeat Play Range
Switching the Media File Type
Operating with the Hardware Buttons
Using the Touch Panel Keys
Playing Compressed Video Files
Reading the Screen
Starting Procedure (for Disc)
Starting Procedure (for USB/SD)
Selecting Files from the File Name List
Setting a Repeat Play Range
Frame-By-Frame Playback
Slow Motion Playback
Switching the Media File Type
Operating with the Hardware Buttons
Playing Compressed Still Image Files
Using the Touch Panel Keys
Reading the Screen
Selecting Files from the File Name List
Setting the Slideshow Interval
Using the Touch Panel Keys (for Video)
Reading the Screen (for Audio)
Starting Procedure
Selecting Song or Video Sources from the Playlist Screen
Changing the Speed of Audiobook Playback
Reading the Screen
Using the Touch Panel Keys (App Control Side Bar)
Starting Procedure
Using the Keyboard
Adjusting the Image Size (for Smartphone Users)
Application (Iphone with Lightning Connector)
Using Mirrorlink
Starting Procedure
Reading the Screen
For Iphone with a Lightning Connector Users
Operating with the Hardware Buttons
Reading the Screen
Selecting Files from the File Name List
Using the Touch Panel Keys
Setting the Video Signal
Reading the Screen
Starting Procedure (for Camera)
Touch Panel Keys
Selecting Songs Not to be Played
System Settings Navigation Info Window
Setting the Digital Radio Aerial Power Supply
Activating the Bluetooth Audio Source
Setting the Rear View Camera
Setting the Camera for Camera View Mode
Guidelines
Setting the Safe Mode
Turning off the Demo Screen
Setting the Keyboard Language with the Application for Iphone
Adjusting the Picture
Displaying the Firmware Version
Checking Sensor Learning Status and Driving Status
Clearing the Status
System Settings
Audio Adjustments Using Fader/Balance Adjustment
Switching Sound Muting/Attenuation
Adjusting the Filter
Selecting the Listening Position
Adjusting the Time Alignment
Using the Automatic Sound Leveliser
Customising the Equaliser Curves
Performing Auto EQ
Setting the Illumination Colour
Selecting the Theme Colour
On the External Device (USB/SD)
Setting the Audio Language
Setting the Menu Language
Setting the Angle Icon Display
Setting Parental Lock
Automatic Playback of Dvds
Language Code Chart for Dvds
Selecting a Shortcut
Removing a Shortcut
Control Panel
Common Operations
Changing the Wide Screen Mode
Other Functions
Deleting the Password
Entering the Password
Forgotten Password
Appendix
Troubleshooting
Advertisement
Quick Links
1
Sd Memory Card
Download this manual
Operation Manual
NAVIGATION AV SYSTEM
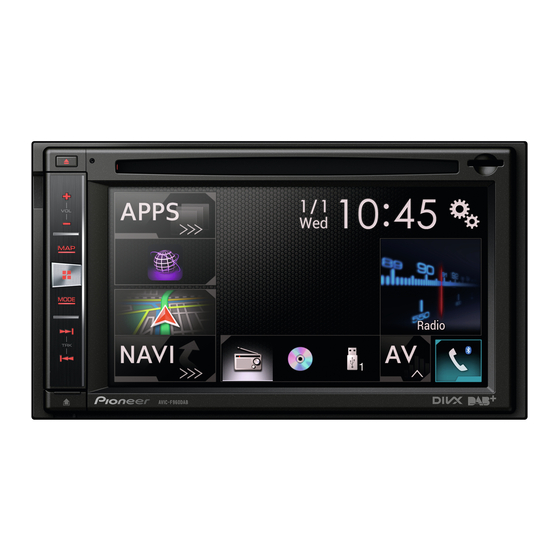
AVIC-F60DAB
AVIC-F960DAB
AVIC-F960BT
AVIC-F860BT
Be sure to read Important Information for the User
first!
Important Information for the User includes the
important information that you must understand before
using this product.
English
Table of
Contents
Previous
Page
Next
Page
1
2
3
4
5
Advertisement
Table of Contents
Need help?
Do you have a question about the AVIC-F60DAB and is the answer not in the manual?
Ask a question
Questions and answers
Related Manuals for Pioneer AVIC-F60DAB
Car Video System Pioneer AVIC-F860BT Installation Manual
(28 pages)
Car Navigation system Pioneer AVIC-F60BT Operation Manual
Navigation av player (188 pages)
Car Navigation system Pioneer AVIC-F60BT Installation Manual
Pioneer navigation av player installation manual (32 pages)
Car Navigation system Pioneer AVIC-F60BT Quick Start Manual
Pioneer navigation av player quick start guide (2 pages)
Car Navigation system Pioneer AVIC-F900BT Installation Manual
Flash memory multimedia av navigation receiver (57 pages)
Car Navigation system Pioneer AVIC-F700BT Operation Manual
(244 pages)
Car Navigation system PIONEER AVIC-F700BT Operation Manual
Navigation av system (172 pages)
Car Navigation system Pioneer AVIC-F500BT Connection Diagram
(8 pages)
Car Navigation system Pioneer AVIC-F500BT Operation Manual
Advanced multimedia navigation system (20 pages)
Car Navigation system PIONEER AVIC-F20BT Operation Manual
Navigation av system (200 pages)
Car Navigation system Pioneer AVIC-F20BT Installation Manual
(172 pages)
Car Navigation system Pioneer AVIC-F70BT Installation Manual
Navigation av player (32 pages)
Car Navigation system Pioneer AVIC-F77DAB Operation Manual
Navigation av system (240 pages)
Car Navigation system Pioneer AVIC-F88DAB Quick Start Manual
(16 pages)
Car Navigation system Pioneer AVIC-F900BT/XS/RE Service Manual
Navigation av system (187 pages)
Car Navigation system Pioneer AVIC-F160-2 Owner's Manual
(76 pages)
This manual is also suitable for:
Avic-f960dab
Avic-f960dbt
Avic-f860bt
Table of Contents
Save PDF
Print
Rename the bookmark
Delete bookmark?
Delete from my manuals?
Login
Sign In
OR
Sign in with Facebook
Sign in with Google
Upload manual
Upload from disk
Upload from URL


Need help?
Do you have a question about the AVIC-F60DAB and is the answer not in the manual?
Questions and answers