Table of Contents
Advertisement
Quick Links
Advertisement
Table of Contents

Related Manuals for Marantz DV3001e


Summary of Contents for Marantz DV3001e
-
Page 1: Dvd Player
Model DV3001e User Guide DVD Player CLASS 1 LASER PRODUCT... - Page 2 English The DV3001e is in conformity with the EMC directive and low-voltage directive. Français Le DV3001e est conforme à la directive EMC et à la direc- tive sur les basses tensions. Deutsch Das Modell DV3001e entspricht den EMC-Richtlinien und den Richtlinien für Niederspannungsgeräte.
-
Page 3: Safety Information
Depending on the reception conditions of the broadcast, interfer- ence may appear on the TV while you are watching a channel with the DVD player on. This is not a malfunction of the unit or the TV. Should this occur, simply switch off the DVD player. -
Page 4: Features
Features DVD: a completely new dimension in video entertainment Subtitles may be displayed in one of a maximum of 32 languages. The audio soundtrack can be heard in up to 8 languages. The multi-angle function allows you to choose the viewing angle of which scenes were shot from many different angles (limited to DVD discs recorded with multiple camera angles). -
Page 5: Table Of Contents
Table of contents Getting Started: Safety information ....... . . 1 Precautions . -
Page 6: Audio Button
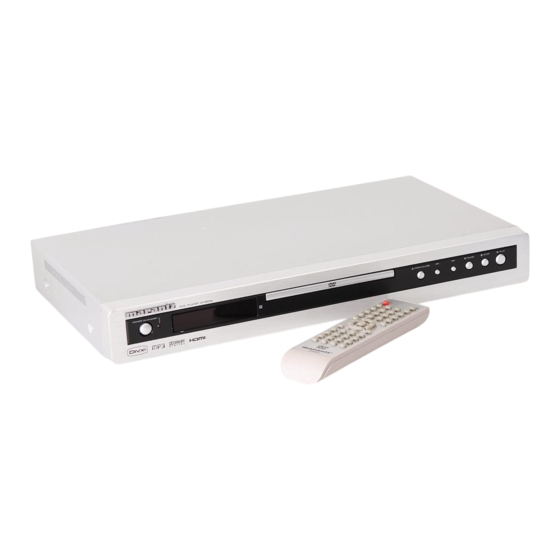
Control reference guide Main unit (1) POWER ON/OFF BUTTON (2) POWER ON INDICATOR (3) DISPLAY WINDOW (4) REMOTE CONTROL SIGNAL SENSOR (5) DISC TRAY (6) OPEN/CLOSE BUTTON Remote control unit (1) OPEN/CLOSE button (2) NUMERIC buttons (3) TITLE button (4) ANGLE button (5) SUBTITLE button (6) AUDIO button (7) CLEAR button... -
Page 7: Connection To Tv & Audio Players (Inc. Advanced Setup)
When the DVD player’s video outputs is connect with the TV and the TV is broadcast normally. Please cut off the other connections from the DVD player’s video outputs to the TV, in order to avoid the interference and insure the quality of the pictures. -
Page 8: Audio Connections
TV set. HDMI video resolution you can select via the 720P/1080i button on the remote handset. 1. TV set 2 DVD player 3. HDMI cable Connecting to a TV amplifier with 5.1ch input connector supporting Dolby Digital decoder B This player contains Dolby Digital decoder. -
Page 9: Digital Audio Connections
Digital audio connections Connecting to a decoder with Dolby Digital processing or MPEG processing A When DVDs recorded in Dolby Digital or MPEG audio are played, Dolby Digital bitstream or MPEG audio bitstream is sent to the player’s OPTICAL digital audio output connector or COAXIAL digital audio output connector. -
Page 10: Remote Control Preparation
Remote control preparation Battery installation A Insert the batteries while observing the correct (+) and (-) polari- ties as illustrated. Service life of batteries The batteries normally last for about one year although this depends on how often and for what operations the remote con- trol is used. -
Page 11: Stop Button
Basic operation Preparations Switch on the TV and select “Video” as the input source. Switch on the stereo system if the player has been connected to a stereo audio amplifier. Basic play 1. Press POWER ON button on the main unit to switch on the power. -
Page 12: Playing Audio Cds
Playing Audio CD’s Press the Power button then the OPEN/CLOSE button to open the CD drawer. Place the audio CD on the tray with the label facing up. Press the OPEN/CLOSE button once again to close the CD drawer. The player will read the disc contents and automatically play. To view the CD information such as track number and track time on the TV (OSD), press the DISPLAY button on the remote control. -
Page 13: Changing Subtitle Language
For your reference: If the power is reset or the disc is removed, subtitles will appear in the default language set by the DVD player. If this language is not recorded on the disc, they will appear in the disc’s default language. -
Page 14: Return
RETURN If you use the RETURN button on the remote control, the disc playing will automatically return to the root menu if available. RANDOM If you use this button you can paly the disc in shuffle mode: SHUFFLE REPEAT Press the REPEAT button during play If you play a DVD disc, the screen will display: TITLE CHAPTER... -
Page 15: Zoom Picture
RETURN If you use the RETURN button on the remote control, the disc playing will automatically return to the root menu if available. X1/4 In the ZOOM mode, you can use CURSOR buttons to move the picture for optimum viewing. VOLUME control Press VOLUME + on the remote control continuously to increase volume. -
Page 16: Playback Of Your Divx Disc
Please follow the actual Divx disc menu for proper operation. Disc supported by this DVD player is : 3.11, 4.0,5.0,5.04 and 5.11. This DVD player may be not able to playback certain Divx movie if out of the series. A software up-date may be required. -
Page 17: Initial Setting
SCREEN SAVER (picture 5) When this DVD player is idle, the screen saver can be activated to prolong the TV monitor’s life. You can press any button on the remote to continue. If the DVD player is kept in the screen saver mode , it will be turn off automatic after a few minutes. -
Page 18: Audio Setup Page
Analog format, the default setting. You OFF: should select this when you are playing the disc through the SPDIF OUTPUT Right & Left jacks on your DVD player. No sig- nal output from the coaxial port when selecting this function. SPDIF/RAW: Select this when the DVD player is connected with a power amplifier through DIGITAL OUT coaxial port. -
Page 19: Video Setup
HDMI: In this mode HDMI, YUV, S-Video and Video are available. PREFERENCE SETTING The DVD player must be in the stop mode or have the DVD door open to access the preference menu. To put the player in the stop... -
Page 20: Password Setup
Picture(16) PASSWORD SETUP PREFERENCE function works only with DVD discs. Select this to adapt the code, the screen shows: You may enter the old password You may enter the old password first (picture 17), then input new password (picture 18), at last enter new pass- word again to confirm. -
Page 21: For Your Reference
For Your Reference: Disc handling and maintenance Handling precautions Hold the disc by the edges so the surface will not be soiled with fingerprints. A Fingerprints, dirt and scratches can cause skipping and distortion. Do not write on the label side with a ballpoint pen or other writ- ing utensils. -
Page 22: Troubleshooting
Troubleshooting Before requesting service for this unit, check the chart below for a possible cause of the problem you are experiencing. Some simple checks or a minor adjustment on your part may eliminate the problem and restore proper operation. Symptom (Common) No power Play fails to start even when PLAY is pressed. - Page 23 Symptom (DVD) Play does not commence even when title is selected. Audio soundtrack and/or subtitle language is not the one selected at the initial settings. The menu is displayed in French (for example). No subtitles. Alternative audio soundtrack (or subtitle) languages fail to be selected.
-
Page 24: Definition Of Terms
Definition of terms Angle Recorded onto some DVD discs are scenes, which have been simultaneously shot from a number of different angles (the same scene is shot from the front, from the left side, from the right side, etc.). With such discs, the ANGLE button can be used to view the scene from different angles. - Page 26 2005/08...
Need help?
Do you have a question about the DV3001e and is the answer not in the manual?
Questions and answers