
Related Manuals for Scansonic DA310


Summary of Contents for Scansonic DA310
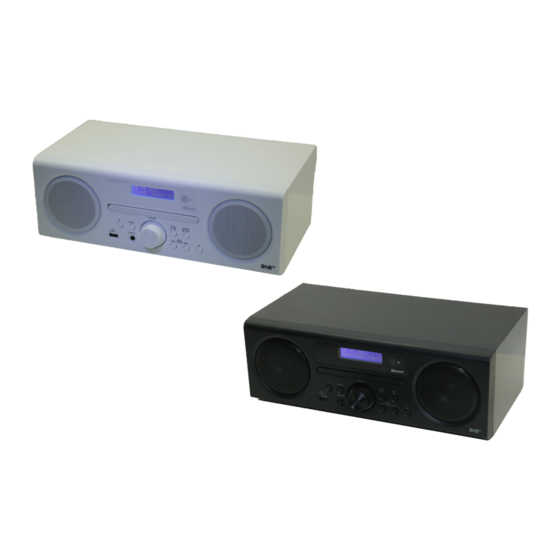
- Page 1 DA 310 DA 310 Micro System with CD/MP3 player UK User Manual DK Brugervejledning DE Bedienungsanleitung NL Gebruikershandleiding Manuale di istruzioni FR Guide d’instructions Manual de instrucciones...
- Page 2 Safety warnings • Read all the instructions carefully before using the unit and keep them for future reference. • Retain the manual. If you pass the unit onto a third party make sure to include this manual. • Check that the voltage marked on the rating label matches your mains voltage.
- Page 3 ensure that curtains and other materials do not obstruct the ventilation vents. • Do not install or place this unit in a bookcase, built-in cabinet or in an- other confined space. Ensure the unit is well ventilated. Safety • Always disconnect the unit from the mains supply before connection/ disconnecting other devices or moving the unit.
- Page 4 CAUTION RISK OF ELECTRIC SHOCK DO NOT OPEN CAUTION CAUTION RISK OF ELECTRIC SHOCK RISK OF ELECTRIC SHOCK DO NOT OPEN DO NOT OPEN ater The lightning flash with arrowhead symbol, witin an equilateral ater triangle, is intended do alert the user to the presence of uninsulated ated “ e”...
-
Page 5: Product Overview
product overview Product overview front view Front view MODE 5 6 7 10. SKIP/TUNE SEARCH I◄◄ 1. Disk tray 2. Display Button 3. Remote Control Sensor Skip backwards to the 1. Disk tray 9. SCAN/ Button Receive signal from the beginning of the track or to 2. -
Page 6: Remote Control
rear view Mains Cable 2. FM Aerial 1. Mains Cable 2. FM Aerial e control Remote control remote control utton 1. STANDBY Button 1. STANDBY Button unit between the ON and Switch the unit between the Switch the unit between the ON and odes. - Page 7 12. USB Button switch to USB operating mode. 13. BLUETOOTH Button switch to Bluetooth operating mode. 14. I◄◄ Button Skip backwards to the beginning of the track or to the previous track in bluetooth mode. 15. Display Button Display track information in CD or USB mode. 16.
- Page 8 30. TUNER/DAB Button switch to TUNER or DAB operating mode. 31. ►/II Button Start and pause playback in bluetooth mode. 32. I►► Button Skip forwards to the next track in bluetooth mode. 33. ►/II Button Start and pause playback in CD or USB mode. 34.
-
Page 9: Handling The Battery
Handling the Battery Improper or incorrect use of batteries may cause corrosion or battery leakage, which co Handling the Battery • Improper or incorrect use of batteries may cause corrosion or battery Install the battery correctly in the battery compartment. Normally the battery’s positive leakage, which could cause fire, personal injury or damage to polarity (+) will face up. -
Page 10: Remote Control Operation Range
remote control operation range Remote control operation range battery replacement for the remote control • The remote control sensor on the front unit is sensitive to the remote The remote control sensor on the front unit is sensitive to the remote control’s commands up control’s commands up to a maximum of 4 metres away and within a to a maximum of 4 metres away and within a maximum of 60°... -
Page 11: General Operation
general operation MODE repeatedly on the unit or pre CD, USB, TUNER/DAB, AUDIO IN General operation BLUETOOTH on the remote powering ON/OFF powering ON/OFF When you first connect the unit to the mains socket, display will show the Scan Time “Scan Time 00:00:00” and synchronize to the current local time if you can 00:00:00”... - Page 12 to switch the unit back to STANDBY mode. Press completely. If you cannot received any DAB signal, you can manually set the time. Once DAB signal is If you cannot received any DAB signal, you can manually set the When the unit is idle for approximately 15 minutes, it will automatically switch to stand received, the time will be automatically updated.
- Page 13 1. To set the sleep timer press SLEEP on the remote control repeatedly to view the 2. The system is now set to turn off after the number of minutes you have set. The display will show “SLEEP #”, e.g. “SLEEP 10” means the unit display will show “SLEEP #”, e.g.
-
Page 14: Manual Tune
ng the scan the display will show “Scanning… ” together with a slide bar that the unit will automatically enter into the DAB mode and perform auto scan function. ates the progress of the scan and the amount of stations that have been found so far. g the scan the display will show “Scanning…... -
Page 15: Powering On/Off
general operation MODE repeatedly on the unit or pre CD, USB, TUNER/DAB, AUDIO IN powering ON/OFF BLUETOOTH on the remote 2. Press PRESET to select your desired preset station number.Then press Scan Time ENTER confirm. 00:00:00” and synchronize to the current local time if you can receive a DAB signal in y 3. - Page 16 DLS (Dynamic Label Segment) Dynamic label segment is a scrolling message that the broadcaster may include with their transmissions. The message usually includes information, such as programme details etc. Programme Type This describes the “style” or “genre” of the programme that is being broad- cast.
- Page 17 to switch the unit back to STANDBY mode. Press completely. The unit will automatically switch between stereo and mono mode, When the unit is idle for approximately 15 minutes, it will automatically switch to stand but you can override this and switch this function manually. This is helpful when receiving poor signal reception.
-
Page 18: Compatible Disc Types
Station Name This displays the station name. Audio Type This displays if the station being received is in mono or stereo. compatible disc types Compatible disc types Disc Types Disc Logo Recorded Content CD-R (CD Recordable) AUDIO CD-RW (CD-Rewritable) AUDIO AUDIO-CD (Compact Disc Digital Audio) AUDIO CD operation... - Page 19 eat playback eat playback During stop or playback mode,press REPEAT once on the During stop or playback mode,press REPEAT once on the emote control, “REP_ONE”will show on the display. The eat playback emote control, “REP_ONE”will show on the display. The D will play the current track repeatedly.
- Page 20 The remote control requires a LR6 1.5V AA/AM3 battery. 1. Open the battery cover. general operation 2. Insert the supplied battery according to the direction indicated in the battery compa MODE repeatedly on the unit or pr When inserting or removing the battery, push it towards the (–) battery terminals. Bluetooth®...
-
Page 21: Battery Replacement For The Remote Control
3. Close the cover. • Press REPEAT once, “REP_ONE” will show on the display, It will play battery replacement for the remote control the current track repeatedly. • Press REPEAT twice, “REP_ALBUM” will show on the display. It will play the current folder repeatedly. The remote control requires a LR6 1.5V AA/AM3 battery. -
Page 22: Handling Discs
To clean the unit, wipe the case with a slightly moist, lint-free cloth. To clean the unit, wipe the case with a slightly moist, lint-free cloth. Do not spray aerosol at or near the unit. • To clean the unit, wipe the case with a slightly moist, lint-free cloth. Do not spray aerosol at or near the unit. -
Page 23: Hints And Tips
Hints and tips If a problem occurs, it may often be due to something very minor. The fol- lowing table contains various tips: Problem Solution No power Ensure the mains cable is connected securely at both ends. Make sure that the ON mode is selected. The remote Use the remote control near the unit. -
Page 24: Specifications
Specifications Model DA310 Power Power Supply AC 100-240V ~ 50/60Hz Power Consumption ECO Standby < 1W Power Consumption Output Power 5W x 2 USB Power 5V … 1000mA Feature Decoding Format CD, CD-R, CD-RW Connectivity USB 5V … 1A Charging Port x 1, AUDIO IN Socket x 1 Frequency Range DAB 174-239 MHz, FM 87.5 –...
Need help?
Do you have a question about the DA310 and is the answer not in the manual?
Questions and answers