Table of Contents
Advertisement
Available languages
Available languages
Quick Links
Advertisement
Table of Contents

Subscribe to Our Youtube Channel
Related Manuals for Steren CCTV-971


Summary of Contents for Steren CCTV-971
- Page 2 12” y DVR con DD de 1 TB. Por favor, revíselo completamente para estar seguro de cómo utilizar apropiadamente el producto. Para apoyo, compras y todo lo nuevo que tiene Steren, visite nuestro sitio web: www.steren.com La información que se muestra en este manual sirve únicamente como referencia sobre el producto.
- Page 3 • No instale el DVR cerca de fuentes de calor como radiadores, registros de calefacción, estufas u otros dispositivos semejantes. • Limpie el CCTV-971 solamente con un paño seco. • No obstruya las aberturas de ventilación. • No use ni almacene este equipo en lugares donde existan goteras o salpicaduras de agua.
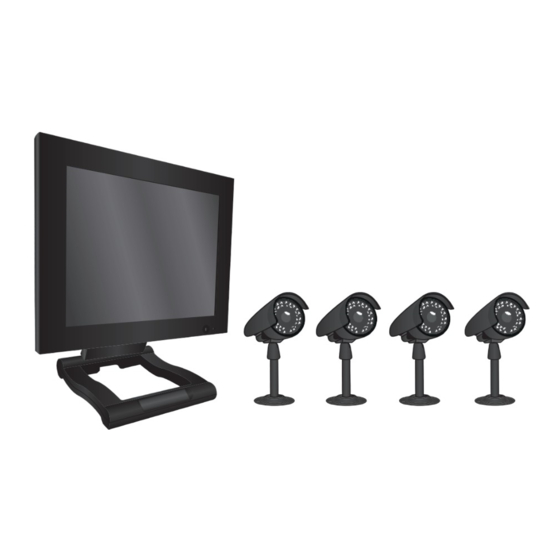
- Page 4 CARACTERÍSTICAS • El sistema de vigilancia consta de un monitor LCD de 12” a color, con grabador de video digital (DVR) y disco duro de 1 TB integrado, tarjeta de red para monitoreo vía internet y 4 cámaras con visión nocturna, que tienen todos los accesorios necesarios para el montaje.
-
Page 5: Panel Trasero
CONTROLES 1. Botón de encendido y apagado del monitor Panel trasero 2. 4 puertos RJ11 3. 2 puertos USB 4. Puerto Ethernet 5. +RS485 (cámaras PTZ) 6. Entrada de alimentación... -
Page 6: Parte Frontal
Parte frontal 7. LED de encendido... - Page 7 CONEXIONES - Conexión de cámaras Conecte el cable RJ11 en la parte posterior del monitor y a su vez, conecte a las cámaras los conectores de audio, de alimentación y de video utilizando los rollos de cable incluidos. - Conexión USB En los puertos USB puede conectar unidades de respaldo como memorias USB y un mouse.
- Page 8 INSTALACIÓN Y USO DEL RATÓN 1. Conecte el ratón al DVR en la entrada correspondiente. 2. Utilice los botones del ratón para realizar lo siguiente: • Botón izquierdo: • Botón derecho: - Haga clic para abrir el menú. - Haga clic para seleccionar una opción menú;...
-
Page 9: Control Remoto
CONTROL REMOTO... - Page 10 1. MULT: Vista simultánea o individual de pantallas. 2. Regresa en periodos de 2 segundos. 3. Inicia y detiene la grabación de video. En el modo PTZ, pulse esta tecla para iniciar o detener la función de rotación de dispositivos. 4.
- Page 11 FUNCIONES BÁSICAS E INICIO RÁPIDO Conecte y encienda el DVR y espere a que inicie el sistema. En la pantalla se mostrará la vista de los 4 canales en tiempo real. Dé clic derecho para ver menú emergente las diferentes opciones del sistema.
- Page 12 1. Menú principal: Cuando elija esta opción aparecerá la ventana de inicio de sesión del sistema. Una vez que se le solicite una cuenta de usuario para operar el DVR, seleccione “admin”, para ingresar bastará con dar clic en OK. Predeterminadamente, este usuario no cuenta con contraseña.
- Page 13 4. Control PTZ: Abre el menú de operación para cámaras PTZ o PT. 5. Alta Velocidad PTZ: Barrido de alta velocidad de cámara PTZ. 6. Ajuste color: Configure el brillo, contraste, saturación, matiz, ganancia, nivel de nitidez, vertical nitidez y más opciones en Avanzado. 7.
- Page 14 - Todo el contenido del disco será eliminado cuando sea formateado. - Al formatear el disco duro no se perderá ningún tipo de ajuste como configuración de grabación, usuarios y contraseñas establecidas en el CCTV-971. - Únicamente se eliminarán los videos y datos extra contenidos en el disco duro.
-
Page 15: Modo Manual
GRABACIÓN Para iniciar grabación fundamental que haya formateado el disco duro. Dé clic derecho con el ratón y seleccione Modo Grabación. Una vez que aparezca la siguiente ventana, seleccione canales que realizarán grabaciones (puede seleccionarlos todos dando clic en Todo) en el modo de grabación que desee: Horario, Manual o detenga la grabación de alguna cámara seleccionándola en Stop. - Page 16 Elija modo Horario establezca campos Periodo 1-4 las horas deseadas para la grabación y en las casillas siguientes, seleccione la modalidad de grabación a aplicar: Normal, o por Detección de movimiento (Detec). 7. Para guardar los cambios dé clic en OK. Repita los pasos para configurar un horario a otro canal/cámara.
- Page 17 REPRODUCCIÓN Y RESPALDO DE VIDEOS Para comenzar con la reproducción de grabaciones dé clic derecho con el ratón y seleccione Reproducir. 1. Si desea reproducir un día y hora específica, filtre el contenido en Buscar (lupa), seleccione el Tipo de archivo y el dispositivo en el que se encuentra (disco duro interno o dispositivo backup), los canales deseados, la Hora de comienzo y de fin, el modo de reproducción y haga clic en Buscar.
- Page 18 Una vez que se muestren las grabaciones podrá visualizar solamente un canal; selecciónelo haciendo clic sobre él. En el lado derecho puede ver la lista de grabaciones, dé clic sobre el registro deseado para su visualización. 2. Si desea hacer un respaldo en un dispositivo de almacenamiento USB, inserte la memoria en el puerto trasero del DVR.
- Page 19 Abra en su computadora el medio de almacenamiento externo (memoria USB) para buscar los archivos exportados. Recuerde que el nombre del video será el mismo que el DVR le asignó. En caso de que el CCTV-971 no permita exportar un video, pruebe cambiando de puerto la memoria USB.
-
Page 20: Tiempo De Grabación
TIEMPO DE GRABACIÓN Puede calcular las horas de grabación aproximada mediante una fórmula, el siguiente ejemplo utiliza un disco de 500 GB con 7 cuadros por segundo en calidad normal. El tiempo estimado es de 1387 horas. Tabla de referencias (horas) -
Page 21: Conexión De Red
CONEXIÓN DE RED - Las siguientes instrucciones solamente son una guía de referencia. Consulte con su proveedor de servicios de Internet (ISP) para conocer la manera de abrir los puertos y poder configurar el módem. - Consulte a un técnico en caso de no contar con los conocimientos para instalar un DVR a Internet. - Page 22 4. Para operar de modo local (LAN), teclee en la ventana de Internet Explorer (use sólo este navegador) la dirección IP que fue asignada para el DVR. Para operar de modo remoto (WAN), teclee en el explorador la dirección de la IP pública. - En caso de haber seleccionado en el campo Puerto HTTP un rango diferente a 80, deberá...
- Page 23 6. Una vez que aparezca la pantalla de inicio del DVR, introduzca el mismo usuario (admin), si el equipo tiene los ajustes de fábrica puede dejar en blanco el campo de Password e ingresar. Una vez que ingrese al DVR observará una ventana de operación remota y local, ésta se opera de la misma manera que en los menús del DVR.
-
Page 24: Especificaciones
ESPECIFICACIONES Monitor DVR Alimentación: 12 V--- 5 A Salida: 4x12 V--- 300 mA (para cámaras) Cámaras Alimentación: 12 V--- 300 mA Ángulo de visión de 60° Lente de 6 mm Iluminación<3Lux@f1,2 Control remoto Alimentación: 3 V--- (2xAAA) Mouse Alimentación: 5 V--- 100 mA Convertidor de voltaje Alimentación: 100-240 V~ 50/60 Hz 1,2 A Salida: 12 V--- 5 A... - Page 25 1.- Para hacer efectiva la garantía, presente esta póliza y el producto, en donde fue adquirido o en Electrónica Steren S.A. de C.V. 2.- Electrónica Steren S.A de C.V. se compromete a reparar el producto en caso de estar defectuoso sin ningún cargo al consumidor. Los gastos de transportación serán cubiertos por el proveedor.
- Page 27 Steren, visit our website: www.steren.com The instructions of this manual are for reference about the product. There may be differences due to updates. Please check our website (www.steren.com) to obtain the latest version of the instruction manual.
- Page 28 • Do not install the DVR near any heat sources like radiators, heat registers, stoves, or other devices. • Clean CCTV-971 only with a dry cloth. • Do not obstruct the ventilation openings. • Do not use or store this equipment in wet or damp places. It may cause electric shock or malfunction.
- Page 29 HIGHLIGHTS • The surveillance system has a 12” screen, DVR with 1 TB hard disk, network card for Internet connection, and four cameras with night vision; all required fittings for installation are included. • Perfect for different areas surveillance, the cameras can be monitored individually or all at the same time.
-
Page 30: Rear Panel
CONTROLS 1. Power button Rear panel 2. 4 RJ11 ports 3. 2 USB ports 4. Ethernet port 5. RS485 (PTZ cameras) 6. Power input... -
Page 31: Front Panel
Front panel 7. Power LED... - Page 32 CONNECTIONS - Camera connection. Connect the RJ11 cable on the back of the monitor and at the same time, connect to cameras audio, power and video connectors using the included cable rolls. - USB connection You can connect USB backup drives like thumb drives and mouse. - Ethernet connection Connect a network cable to the RJ-45 connector for remote access via Internet or Ethernet.
- Page 33 MOUSE INSTALLATION AND USE 1. Connect the mouse to the DVR in the corresponding entry. 2. Use the mouse to do the following: • Left button: • Right button: Click to open menu. Click to select a menu option, during live viewing in split-screen, double- click on a channel to view it in full screen, double click on the channel to...
-
Page 34: Remote Control
REMOTE CONTROL... - Page 35 1. MULT: Simultaneous screen display. 2. Rewinds in periods of 2 seconds. 3. Starts and stops recording video. In PTZ mode, press this key to start or stop the rotation device function. 4. SEARCH: Search for recordings. 5. To move between the video list. During playback, rewinds the entire video, or shifts to the previous one.
- Page 36 BASIC FUNCTIONS AND QUICK START Turn the DVR on and wait for the system to start. The system displays the 4 channels in live view. Right click to open the popup menu with the different options of the system. 11 11...
- Page 37 1. Main menu: When you choose this option the login window will appear. Once prompted a user to operate the DVR, select “admin”, it is sufficient to enter click on OK. Perform the process again to enter the menu. By default, passwords are disabled on the system. However, for security reasons, it is recommended to enable passwords on the system Main Menu>...
- Page 38 4. PTZ Control: Opens the operation menu for PTZ or PT cameras. 5. High Speed PTZ: High speed sweeping PTZ camera. 6. Color Setting: Adjust the brightness, contrast, saturation, hue, gain, sharpness level- vertical and horizontal, and more options in Advanced. 7.
- Page 39 - The entire contents of the disk will be deleted when it is formatted. - When format the hard drive you will not lose any kind of adjustment as recording settings, users and passwords established in the CCTV-971. - Only videos and extra data in the hard disk will be deleted.
-
Page 40: Manual Mode
RECORDING To start recording, it is essential that you’ve formatted the hard disk. Right click with the mouse and select Record Mode. Once the next window appears, select the channels that will be recording (you can select them all by clicking on ALL) in the recording mode you want: Schedule, Manual or Stop the recording of a camera by selecting it... - Page 41 6. Choose the Schedule mode and set in the fields Period 1-4 the desired hours for recording and in the following boxes, choose the record mode to apply: Regular, or motion detection (Detect). 7. To save the changes click OK. Repeat the steps to set a schedule for another channel/ camera.
- Page 42 PLAYBACK AND BACKUP VIDEOS To begin playback of recordings, right click with the mouse and select Playback 1. If you want to play one specific day and time, filter the content with the search button, select the type of file and the device in which it is located (internal hard disk or backup device), the desired channel, the start and end time, the playback mode and click on Search.
- Page 43 Once the recordings to be displayed are showed, you can view only one channel, select it by clicking it. If you want to search for records, simply select the channels, type and click on [Search]. In this mode you will need to click on a record for viewing it. Remember to use the Prev. and Next buttons to explore the content.
- Page 44 Open the means of external storage (USB memory) on your computer to search for exported files. Remember that the name of the video will be the same as the assigned by the DVR. In case that the CCTV-971 does not allow exporting a video, try changing the USB port.
-
Page 45: Recording Time
RECORDING TIME You can estimate the approximate time of recording by a formula; the following example uses a 500 GB hard drive with 7 frames per second in normal quality. The estimate time is 1387 hours. Reference chart (hours) -
Page 46: Network Connection
NETWORK CONNECTION - The following instructions are only for reference. Look for how to open ports and configure the modem with your Internet service provider (ISP). - Consult a technician in case of not knowing how to connect a DVR to the Internet. 1. - Page 47 4. To monitor it locally (LAN), enter the IP address you assigned to the DVR in the Internet Explorer window. To monitor remote (WAN) mode, enter the public IP. - If you have selected in the HTTP port field a different range than 80, enter the public IP address followed by a colon and the port number that you assigned, for example: http://189.254.6.194:87/.
- Page 48 6. Once the DVR home screen appears, enter your default username admin, if the DVR has default settings, you can leave the box Password blank and confirm. Once you enter them, you will see a remote and local operation window that operates in same way as the DVR menus...
-
Page 49: Specifications
SPECIFICATIONS DVR monitor Input: 12 V--- 5 A Output: 4x12 V--- 300 mA (for cameras) Cameras Input: 12 V--- 300 mA Angle of vision: 60° 6 mm lens Lighting: <3Lux@f1.2 Remote control Input: 3 V--- (2xAAA) Mouse Input: 5 V--- 100 mA Power converter Input: 100-240 V~ 50/60 Hz 1.2 A Output: 12 V--- 5 A... - Page 50 Part number: CCTV-971 Brand: Steren WARRANTY This Steren product is warranted under normal usage against defects in workmanship and materials to the original purchaser for one year from the date of purchase. CONDITIONS 1. This warranty card with all the required information, invoice, product box or package, and product, must be presented when warranty service is required.
Need help?
Do you have a question about the CCTV-971 and is the answer not in the manual?
Questions and answers