Table of Contents
Advertisement
Quick Links
Advertisement
Table of Contents

Related Manuals for Wine Corner WINE IN25


Summary of Contents for Wine Corner WINE IN25
- Page 1 U S E R G U I D E WINE IN25 D E F Y I N G C O N V E N T I O N...
-
Page 2: Table Of Contents
USING THE WINE CONDITIONING UNIT WINEMASTER ........14 3.1. Connecting the air conditioner WINE IN25 ..........14 3.2. Plugging in the wine conditioning unit WINE IN25 ........14 3.2.1. Temperature setting of the air conditioner WINE IN25 ......14 3.3. Standby mode ..................15 3.4. - Page 3 In order that your wine tasting remains moments to share, FONDIS guarantees you a sincere engagement, dedicated expertise and ongoing follow-up at your service! FONDIS. USER MANUAL WINE IN25 Page 3...
-
Page 4: Technical Data
If the thermal safety functions to often, there is a risk for the compressor to be damaged. In all cases, it must be avoid that the outside temperature remains at 35°C, this high temperature should be limited to the summer period. Technical drawing USER MANUAL WINE IN25 Page 4... -
Page 5: Cellar Equipment
: 1 m per elbow Radius elbow ≥ 300 mm Do not reduced the duct size View 1. EVACUATED AIR 2. AIR INLET 3. WINE CELLAR 4. EVACUATION ROOM OR HAUSE OUTSIDE 20°C OK 35°C NO USER MANUAL WINE IN25 Page 5... -
Page 6: Cellar Insulation
By panels fused together IMPORTANT: Avoid the intrusion of heat and humidity which can alter the functioning of ® the WINEMASTER View 1. WALL 2. INSULATION MATERIAL 3. GROUND LEVEL 4. FLOOR 5. CEILING 6. INSULATED DOOR USER MANUAL WINE IN25 Page 6... -
Page 7: Insulation Of Walls, Ceiling And Floor
Some insulating materials are damaged by rodents. If necessary, cover the insulation with a protective lining on the inside of the cellar to avoid presence of mouse or rats. Polyurethane is an insulator that, due to its chemical composition, is not attacked by the rodents. Floor insulation USER MANUAL WINE IN25 Page 7... -
Page 8: The Door
Avoid placing a wine cabinet or freezer who generates heat in the cellar. The central heating pipes should be re-isolated during their passage through the cellar. ® 2. INSTALLATION OF WINE CONDITIONING UNIT WINEMASTER USER MANUAL WINE IN25 Page 8... -
Page 9: Brackets Installation
ULATED WALL GRID INSULATED DUCT INSULATED DUCT WINE CONDITIONING UNIT WINE CONDITIONING UNIT INSULTED DOOR INSULTED DOOR Necessary material (not delivered) Material included in the box Material included in the box 2.1. Brackets installation USER MANUAL WINE IN25 Page 9... - Page 10 Unfolden the brackets and mount them on the Drill the holes wall Allow 400 mm distance above the brackets and 100 mm on each side Leave 300 mm space under the brackets in order having enough access to replace the filter USER MANUAL WINE IN25 Page 10...
-
Page 11: Installing The Wine Conditioning Unit
- Put the 2 grid casing DETAIL OF GRID ASSEMBLING : BLOWING SUCTION ATTENTION ! Each module consists of two grids (blowing and suction). Care must be taken to adapt the type of grid. Inside USER MANUAL WINE IN25 Page 11... -
Page 12: Examples
- Put together the differents elements with the muff conditioner nozzle - Place the clamp and tighten Sleeve and elbow PE Suction nozzle Reduction aspiration Frame Blowing nozzle soufflage Grid Telescopic muff Reduction 2.3.2. Examples USER MANUAL WINE IN25 Page 12... -
Page 13: Installing The Water Drainage System
2.4. Installing the water drainage system Installing the water drainage system 1. DRAIN PIPE 2. STICKER CLIP 3. POWER CABLE 4. BRACKET USER MANUAL WINE IN25 Page 13... -
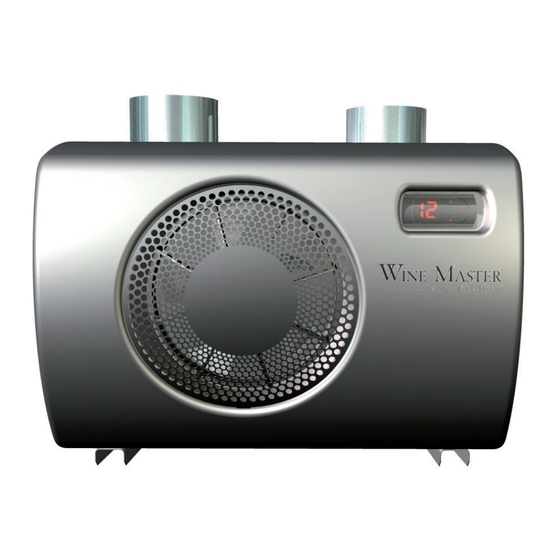
Page 14: Using The Wine Conditioning Unit Winemaster
3.2. Plugging in the wine conditioning unit wine conditioning unit WINE IN25 3.2.1. Temperature setting of the air conditioner WINE IN25 Temperature setting of the air conditioner WINE IN25 The setting of the targeted temperature is made on the temperature is made on the thermostat :... -
Page 15: Standby Mode
The program of the thermostat will run an automatic defrost time several times a day. During this operation, the compressor is stopped, only the fan is functioning at low speed. The condensate water producing during this period will be evacuated through the tube drain. USER MANUAL WINE IN25 Page 15... -
Page 16: Maintenance Of The Air Conditioner Winemaster
Replace the dust filter when necessary and at least once a year Replace the dust filter when necessary and at least once a year SPOILED FILTER = DAMAGED WINE CONDITIONING UNIT SPOILED FILTER = DAMAGED WINE CONDITIONING UNIT USER MANUAL WINE IN25 Page 16... -
Page 17: Warranty
Electric and Electronic components. Acting like that you make a gesture for the environment and you contribute to the safeguarding of the natural resources as well as to the protection of human health. USER MANUAL WINE IN25 Page 17... - Page 18 © Wine Corner Limited 2012. We reserve the right to change product specifications and prices without prior notice. Wine Corner Limited does not accept any responsibility for any loss, which may arise as a consequence of reliance on information contained in this price list.
Need help?
Do you have a question about the WINE IN25 and is the answer not in the manual?
Questions and answers