Table of Contents
Advertisement
Quick Links
Advertisement
Table of Contents

Related Manuals for Broadrack Venus Series


Summary of Contents for Broadrack Venus Series
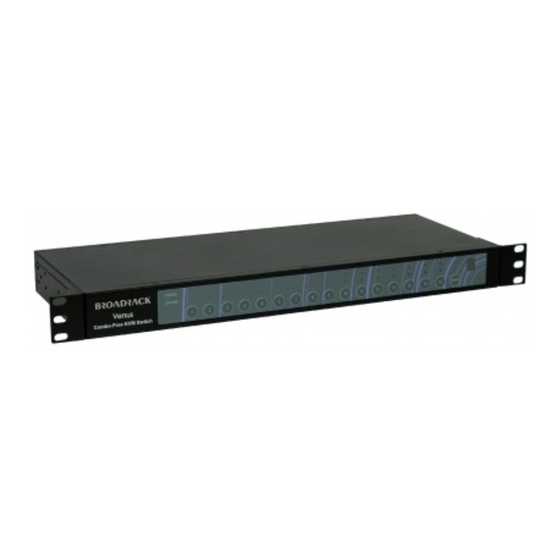
- Page 1 Venus Series Stand Alone & Modular Combo-free KVM Switch User Manual Rev 2.0...
-
Page 2: Table Of Contents
Venus Series User Manual Table of Contents Table of Contents ....................I 1. Introduction ....................1 1.1 Features ..................... 1 1.2 Package Contents ................3 1.3 Technical Specifications ..............4 1.4 System Requirements ................ 8 1.5 Cable Diagrams ................10 1.6 Rear Panel .................. - Page 3 Venus Series User Manual 6. Troubleshooting ..................36 7. Certifications ....................37...
-
Page 4: Introduction
Venus Series User Manual 1. Introduction The Venus series combo-free KVM switch can control attaching servers and computers from local or remote console. This KVM switch is loaded with features such as one local console port, plus one optional CAT5-based remote... - Page 5 Venus Series User Manual and to avoid Hotkey duplicate problem. Provide ACL (Access Control List) security function. Store up to 8 independent user accounts Hot Plug --- add or remove connected computers without powering off the KVM switch or computers...
-
Page 6: Package Contents
Venus Series User Manual 1.2 Package Contents Venus 8 / 16 Series: KVM Switch Unit 1 PCS User’s Manual CD-ROM 1 PCS Quick Setting Guide 1 PCS 12V DC Power Adapter 1 PCS Rack Mount Kit 1 SET KC-1515 Daisy Chain Cable (0.9 M) 1 PCS KC-1501C Signal Cable (with USB Adapter) (1.8... -
Page 7: Technical Specifications
Venus Series User Manual 1.3 Technical Specifications Venus 8 / 16 Series: Feature Specification KVM Type PS/2 and USB interface KVM switch One local USB console Console Ports plus one optional remote module PC Port Connector HDDB-15 PC Ports 8 / 16 Max. - Page 8 Venus Series User Manual function, store up to 8 independent controllable Computers lists Multilingual OSD (On 8 languages (English, France, Germen, Spanish, Screen Display) control Italian, Russian, Japanese, Simplified Chinese) Auto-Scan Intervals 5 ~ 99 Sec. Keyboard Emulation PS/2 or USB...
- Page 9 Venus Series User Manual Venus 8D / 16D Series: Feature Specification KVM Type PS/2 and USB interface KVM switch One local USB console Console Ports plus one optional remote module PC Port Connector HDDB-15 PC Ports 8 / 16 Max. Distance...
- Page 10 Venus Series User Manual Keyboard Emulation PS/2 or USB Mouse Emulation PS/2 or USB Housing Metal Power DC power adapter : DC 12V Operation Temperature 0 ~ 50 ℃ Storage Temperature -20 ~ 60 ℃ Humidity 0 ~ 95%, Non-Condensing...
-
Page 11: System Requirements
Venus Series User Manual 1.4 System Requirements Stand Alone Combo-free KVM Switch: Model No. Venus 8 Series Local Console side One VGA Monitor One USB Keyboard One USB Mouse Computer side 8 x HDDB-15 pin male to one HDDB-15 pin... - Page 12 Venus Series User Manual Modular Combo-free KVM Switch: Model No. Venus 8D Series Computer side 8 x HDDB-15 pin male to one HDDB-15 pin with two Mini Din 6 pin and one USB adapter IP module One CAT5 cable Network access environment...
-
Page 13: Cable Diagrams
Venus Series User Manual 1.5 Cable Diagrams PC Port Special Cable: HDDB-15 pin male to one HDDB-15 pin male with two Mini Din 6 pin and one USB adapter Figure 1-3. HDDB-15 / VGA + PS/2 x 2 (1.8M) PS/2 Keyboard to USB Adapter PS/2 keyboard to USB keyboard and mouse due HID adapter Figure 1-4. -
Page 14: Rear Panel
Venus Series User Manual 1.6 Rear Panel Venus 8: Venus 16: Venus 8 IP: Venus 16 IP: Venus 8 C5: Venus 16 C5: Venus 8D: Venus 16D: Venus 8D IP:... - Page 15 Venus Series User Manual Venus 16D IP: Venus 8D C5: Venus 16D C5: Figure 1-7. Rear Panel Venus 16 C5: Local Console Keyboard / Mouse Ports Local Console VGA Port / Daisy Chain port Connector for each Host Port Daisy Chain In...
-
Page 16: Hardware Installation
Venus Series User Manual Hardware Installation Before installation, please make sure all of peripherals and computers have been turned off. 2.1 Rack Mount Installation Stand Alone KVM Switch: Find a convenient place to put your KVM Switch. The 19” rack mount form factor makes it ideally mountable on a 19”... - Page 17 Venus Series User Manual Install Modular KVM Switch Steps: 1. Install two screws (length = 6 mm) to combine bracket and KVM switch. (Both sides) 2. Push KVM switch into the rails from rear of console. Plastic rail of KVM switch Rear view of rail 3.
-
Page 18: Computer / Server Installation
Venus Series User Manual 2.2 Computer / Server Installation Stand Alone KVM Switch: Modular KVM Switch: Figure 2-3. Computer / Server Installation... - Page 19 Venus Series User Manual 3-in-1 HDDB-15 Cable Installation Each computer port connector is HDDB-15 type. Inspect the 3-in-1 DB15 cable. It will have a HDDB-15 male connector at one end. Plug it into computer port on the rear of KVM switch. The other end of input cable has three connectors: a HDDB-15 male type for computer video, a purple mini din 6-pin PS/2 connector for keyboard and a green mini din 6-pin PS/2 connector for mouse.
-
Page 20: Console Installation
Venus Series User Manual Console Installation Local Console (Stand Alone KVM Switch Only) Connect the monitor to the HDDB-15 female port on the back of the KVM unit labeled with the monitor symbol at the Local Console connector. There may be USB local console or PS/2 local console. For USB local console, connect the USB keyboard to either one of USB local port and USB mouse to the other USB port. - Page 21 Venus Series User Manual Figure 2-7. IP Module Installation CAT5 Module CAT5 Remote Console Installation: Power off the KVM switch firstly. Remove the cover of the add-on slot, slide in the CAT5 transmitter module and make sure the module is fully inserted into the slot.
-
Page 22: Power On
Venus Series User Manual Power ON Check connections and plug in power supply Double check whether all cables/connectors are properly connected. You can check the color of keyboard and mouse connector to make sure the keyboard and mouse cables go to the correct ports. -
Page 23: Daisy Chain Connection
Venus Series User Manual CAT5 cables has CAT5, CAT5e, CAT6 and STP/UTP types; If your application need high VGA resolution and long distance please select high end cables. It is highly recommended to use optimal CAT5 cable length to get the best video quality and not waste unnecessary CAT5 cable. - Page 24 Venus Series User Manual Modular KVM Switch: Figure 2-9. Daisy Chain Connection The console OSD menu will show only the port information of the master KVM switch. When the master unit starts up, it will query all daisy chained Slave units, and automatically set up the Bank ID for each Slave unit.
-
Page 25: Usage
Venus Series User Manual 3. Usage When you power on KVM switch, it will prompt a Login window waiting for user name and password. Please refer to “Hotkeys and OSD manual” for details. Buttons (Stand Alone KVM Switch Only) The push Buttons 1~16 You can simply switch to a port by pressing the corresponding button. -
Page 26: Bank 7-Seg Led (Stand Alone Kvm Switch Only)
Venus Series User Manual 3.3 BANK 7-seg LED (Stand Alone KVM Switch Only) 7-Segment BANK LED Indication When you want to view the next bank KVM switch, please press “BANK” push button repeatedly to the destination bank. The bank LED will be changed from bank 1 to the maximum daisy chain level and then to bank 1 again. -
Page 27: Hotkey
Venus Series User Manual 4. Hotkey You can also conveniently command KVM switch by switching ports through simple key sequences. The default hot key is SCROLL LOCK and the user could change hot key as your convenient application. If you prefer to use some hot key, please go to OSD menu and change the default hot key to the other. - Page 28 Venus Series User Manual Example: hitting Scroll Lock twice then hitting key 1, key 0, and key 1 will switch to bank 1 port 01. The first port is local at bottom right at the back panel. Scroll Scroll Lock Lock Figure 4-1.
-
Page 29: Osd (On Screen Display)
Venus Series User Manual 5. OSD (On Screen Display) On Screen Display Menu provides a menu driven interface to handle a Multilingual Menu, Access Security, Computers switching process, to name a PC name or server name, to set up the password/window display time and to search PC port name if you don’t remember it. -
Page 30: Login Window
Venus Series User Manual 5.1 Login Window Figure 5-1. Login Window Turn on local console monitor and power on by plug in the power adapter, there will be login window at screen. No input for username and password over 1 minute at login windows the monitor’s signal will be turn off. -
Page 31: Port Name
Venus Series User Manual 5.2 Port Name Figure 5-3. Port Name OSD Function Key Description Go to Main Menu CONSOLE OFF Previous Menu Enter Switch to Selected Port ↑ / ↓ Move Select PgUp Previous Bank PgDn Next bank Quit... -
Page 32: Main Menu
Venus Series User Manual 5.3 Main Menu Figure 5-4. Main Menu OSD Function Key Description Enter Select ↑ / ↓ Move Go to Main Menu Console off Back Exit Table 5-3. OSD Function Key 5.3.1 LANGUAGE The default language is ENGLISH. Moving the cursor by keyboard -- Up Arrow key “... -
Page 33: Port Name Edit
Venus Series User Manual 5.3.2 PORT NAME EDIT Figure 5-6. Port Name Edit OSD Function Key Description Enter Port Name Edit ↑ / ↓ Move Go to Main Menu Console off Back Exit Show port 01 ~ 08 Show port 09 ~ 16... -
Page 34: Port Search
Venus Series User Manual Press “ Ins” key or click the right button of mouse for editing PC name. Press “ Esc” key to cancel editing PC name without any change or Enter” ” key to complete the new PC name. -
Page 35: Access List
Venus Series User Manual Figure 5-8. User Security OSD Function Key Description Enter Enter user name Move →↑←↓ Go to Main Menu Console off Back Exit Table 5-6. OSD Function Key Press “ENTER” key to get USERS list. The left column “S” means SUPERVISOR and “1”, “2”,“3”,…., “8”... -
Page 36: Hotkey
Venus Series User Manual OSD Function Key Description Enter Select Move →↑←↓ Go to Main Menu Console off Back Exit Table 5-7. OSD Function Key Only SUPERVISOR can set up the ACCESS LIST. The first column is the PC name list the following 8 column the access right of each ADMINISTRATOR use OSD MOUSE or Enter key to active/inactive the access right of each port. -
Page 37: Time Settings
Venus Series User Manual Some keyboard may not equip with all the special keys. Make sure the key you select is available in you keyboard. 5.3.7 TIME SETTINGS Figure 5-11. Time Settings OSD Function Key Description Enter Save Go to Main Menu... - Page 38 Venus Series User Manual Figure 5-12. OSD Mouse OSD Function Key Description Enter Save ↑ / ↓ Move Go to Main Menu Console off Back Exit Table 5-10. OSD Function Key...
-
Page 39: Troubleshooting
Venus Series User Manual 6. Troubleshooting No LED display Make sure the power adapter plugs in the KVM Switch. If the LED’s still won’t light, perform soft reset to KVM switch by press “BANK” button and last port button at the same time. - Page 40 Venus Series User Manual or if the PC boot up faster then the KVM switch, the PC miss the DDC (Data Display Channel) information that causes the VGA resolution output mismatch with the monitor’s. In this case, please turn off the PC wait few minute then turn on again.
Need help?
Do you have a question about the Venus Series and is the answer not in the manual?
Questions and answers