Table of Contents
Advertisement
Quick Links
Advertisement
Table of Contents

Related Manuals for Broadrack KSR Series


Summary of Contents for Broadrack KSR Series
- Page 1 KSR Series Single Rail LCD Console with Combo-free KVM Switch User Manual Rev 1.0...
- Page 2 KSR Series User Manual Packing List The complete KSR-11508-CF / 11516-CF / 11708-CF / 11716-CF / 11708HD-CF / 11716HD-CF / 11908-CF / 11916-CF package consist of: One 1U 19” rack mount console Two rails with front and rear bracket ...
-
Page 3: Safety Instructions
KSR Series User Manual Safety Instructions 1. Please read these safety instructions carefully. 2. Please keep this User’s Manual for later reference. 3. Please disconnect this equipment from AC outlet before cleaning. Don’t use liquid or sprayed detergent for cleaning. Use moisture sheet or clothe for cleaning. - Page 4 KSR Series User Manual The equipment has dropped and damaged. If the equipment has obvious signs or breakage. ...
-
Page 5: Table Of Contents
KSR Series User Manual Index of Contents Packing List ......................I Safety Instructions ....................II Index of Contents ....................IV 1. General Information ..................1 1.1 Overview ....................1 1.2 Product Specification ................2 1.2.1 KSR-11508-CF / 11516-CF Specification ........2 1.2.2 KSR-11708-CF / 11716-CF Specification ........ - Page 6 KSR Series User Manual 4. KVM SWITCH ..................... 32 4.1 Introduction ..................32 4.2 Feature ....................32 4.3 Technical Specifications ..............34 4.4 System Requirements ................. 36 4.5 Cable Diagrams .................. 37 4.6 Product Details ................... 38 Hardware Installation ............... 39 4.7.1 Computer / Server Installation............
-
Page 7: General Information
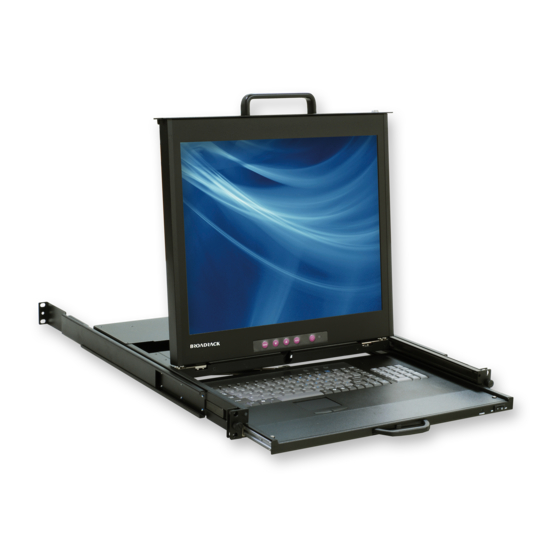
KSR Series User Manual 1. General Information 1.1 Overview The KVM console is an ideal solution for network administration with multiple servers / platforms. Their 15 / 17 / 17.3 / 19 / 20.1-inch large size TFT LCD color display and ultra-low-profile compact industrial keyboard / touchpad provide the user-friendliest and most reliable environment for network administrators. -
Page 8: Product Specification
KSR Series User Manual 1.2 Product Specification 1.2.1 KSR-11508-CF / 11516-CF Specification Model name KSR-11508-CF Number of ports Dimension 590.8 x 482.0 x 44.0 mm / 23.3 x 19.0 x 1.7 inches Package Dimension 788 x 564 x 206 mm / 31.0 x 22.2 x 8.1 inches Net Weight 12.0 Kg / 26.5 lbs... - Page 9 KSR Series User Manual Model name KSR-11516-CF Number of ports Dimension 590.8 x 482.0 x 44.0 mm / 23.3 x 19.0 x 1.7 inches Package Dimension 788 x 564 x 206 mm / 31.0 x 22.2 x 8.1 inches Net Weight 12.5 Kg / 27.6 lbs...
- Page 10 KSR Series User Manual Figure 1-1. KSR-11508-CF Dimension Figure 1-2. KSR-11516-CF Dimension...
-
Page 11: Ksr-11708-Cf / 11716-Cf Specification
KSR Series User Manual 1.2.2 KSR-11708-CF / 11716-CF Specification Model name KSR-11708-CF Number of ports Dimension 590.8 x 482.0 x 44.0 mm / 23.3 x 19.0 x 1.7 inches Package Dimension 788 x 564 x 206 mm / 31.0 x 22.2 x 8.1 inches Net Weight 13.0 Kg / 28.7 lbs... - Page 12 KSR Series User Manual Model name KSR-11716-CF Number of ports Dimension 590.8 x 482.0 x 44.0 mm / 23.3 x 19.0 x 1.7 inches Package Dimension 788 x 564 x 206 mm / 31.0 x 22.2 x 8.1 inches Net Weight 13.5 Kg / 29.8 lbs...
- Page 13 KSR Series User Manual Figure 1-3. KSR-11708-CF Dimension Figure 1-4. KSR-11716-CF Dimension...
-
Page 14: Ksr-11708Hd-Cf / 11716Hd-Cf Specification
KSR Series User Manual 1.2.3 KSR-11708HD-CF / 11716HD-CF Specification Model name KSR-11708HD-CF Number of ports Dimension 590.8 x 482.0 x 44.0 mm / 23.3 x 19.0 x 1.7 inches Package Dimension 788 x 564 x 206 mm / 31.0 x 22.2 x 8.1 inches Net Weight 13.0 Kg / 28.7 lbs... - Page 15 KSR Series User Manual Model name KSR-11716HD-CF Number of ports Dimension 590.8 x 482.0 x 44.0 mm / 23.3 x 19.0 x 1.7 inches Package Dimension 788 x 564 x 206 mm / 31.0 x 22.2 x 8.1 inches Net Weight 13.5 Kg / 29.8 lbs...
- Page 16 KSR Series User Manual Figure 1-5. KSR-11708HD-CF Dimension Figure 1-6. KSR-11716HD-CF Dimension...
-
Page 17: Ksr-11908-Cf / 11916-Cf Specification
KSR Series User Manual 1.2.4 KSR-11908-CF / 11916-CF Specification KSR-11908-CF Model name Number of ports 640.8 x 482.0 x 44.0 mm / 25.2 x 19.0 x 1.7 inches Dimension 827 x 564 x 206 mm / 32.6 x 22.2 x 8.1 inches Package Dimension 14.0 Kg / 30.9 lbs... - Page 18 KSR Series User Manual Model name KSR-11916-CF Number of ports Dimension 640.8 x 482.0 x 44.0 mm / 25.2 x 19.0 x 1.7 inches Package Dimension 827 x 564 x 206 mm / 32.6 x 22.2 x 8.1 inches Net Weight 14.5 Kg / 32.0 lbs...
- Page 19 KSR Series User Manual Figure 1-7. KSR-11908-CF Dimension Figure 1-8. KSR-11916-CF Dimension...
-
Page 20: Ksr-12008-Cf / 12016-Cf Specification
KSR Series User Manual 1.2.5 KSR-12008-CF / 12016-CF Specification Model name KSR-12008-CF Number of ports Dimension 639.6 x 482.0 x 43.8 mm / 25.2 x 19.0 x 1.7 inches Package Dimension 827 x 564 x 206 mm / 32.6 x 22.2 x 8.1 inches Net Weight 18.0 Kg / 39.7 lbs... - Page 21 KSR Series User Manual Model name KSR-12016-CF Number of ports Dimension 639.6 x 482.0 x 43.8 mm / 25.2 x 19 x 1.7 inches Package Dimension 827 x 564 x 206 mm / 32.6 x 22.2 x 8.1 inches Net Weight 18.5 Kg / 40.8 lbs...
- Page 22 KSR Series User Manual Figure 1-9. KSR-12008-CF Dimension Figure 1-10. KSR-12016-CF Dimension...
-
Page 23: Panel Controls And Osd Function
KSR Series User Manual 2. Panel Controls and OSD Function Controls Description Soft power on/off button. Adjacent LED is lit when Auto-synchronize and scale down display to any Auto valid factory preset timings. Press to scroll the function you want to adjust. -
Page 24: Input Source
KSR Series User Manual automatically and also tune the panel to its best condition. 2.2 Input Source 1. Press the “menu” button. 2. Use the “Down” and “Up” button to scroll. Auto tune. Input Source Brightness Contrast Color Position Language... -
Page 25: Contrast
KSR Series User Manual 2.4 Contrast 1. Press the “menu” button. 2. Use the “Down” and “Up” button to scroll. Auto tune. Input Source Brightness Contrast Color Position Language Recall Exit 1. Press the “menu” button to enter. 2. Use the “Down” and “Up” button to adjust the contrast of the display. -
Page 26: Position
KSR Series User Manual 3. Press the “menu” button to enter. And you will see: Icon Description 9300°K To set CIE coordinates at 9300°K color 7500°K To set CIE coordinates at 7500°K color 6500°K To set CIE coordinates at 6500°K color... -
Page 27: Language
KSR Series User Manual 4. Use the “Down” and “Up” button to scroll. 5. Press the “menu” button to enter. 2.7 Language 1. Press the “menu” button. 2. Use the “Down” and “Up” button to scroll. Auto tune. Input Source... -
Page 28: Recall
KSR Series User Manual 2.8 Recall 1. Press the “menu” button. 2. Use the “Down” and “Up” button to scroll. Auto tune. Input Source Brightness Contrast Color Position Language Recall Exit 3. Press the “menu” button to enter, and you will see: Yes/ No 4. -
Page 29: Installation
KSR Series User Manual 3. Installation 3.1 Install KSR-11508-CF / 11516-CF / 11708-CF / 11716-CF / 11708HD-CF / 11716HD-CF / 11908-CF / 11916-CF into Cabinet 3.1.1 Notes 1. Please check all peripherals according the list before installation. To make sure that the whole unit was not damaged and lost during shipping process. -
Page 30: Installation Steps
KSR Series User Manual 3. Flat screw x 6 (for rail mount to console body) 4. Screw x 6 7. Key x 2 3.1.3 Installation Steps 1. Loose (Not release) four rear screws then adjust rear bracket to fit your cabinet. - Page 31 KSR Series User Manual 5. Push console into left and right rails. (Be careful when takeout console.) 6. Unlock and pull rail–lock switch (left and right at the same time) then push console to the end. lock unlock rail-lock switch 7.
-
Page 32: Replace Longer Bracket Steps (For Rack Depth 828~1000Mm)
KSR Series User Manual 3.1.4 Replace Longer Bracket Steps (For rack depth 828~1000mm) 1. Release six screws. 2. Take rear bracket out. Original bracket Input rear long bracket to rear of the rail then adjust rear bracket to fit your cabinet. - Page 33 KSR Series User Manual 3. Unlock. 4. Pull console out until console lock. 5. Pull rail-release switch and pull console out.(Both sides. Be careful when pull out console.) rail-release switch 8. Push rail-lock switch on the rail and push rail back.(Both sides)
-
Page 34: Install Ksr-12008-Cf / 12016-Cf Console Into Cabinet
KSR Series User Manual 3.2 Install KSR-12008-CF / 12016-CF Console into Cabinet 3.2.1 Notes 1. Please check all peripherals according the list before installation. To make sure that the whole unit was not damaged and lost during shipping process. If you encounter any problem, please contact your dealer. -
Page 35: Install Console Steps
KSR Series User Manual 3.2.3 Install Console Steps 1. Adjust rail until two screws appear. Loose (Not release) two rear screws then adjust rear bracket to fit your cabinet. Rail 2. Install front and rear bracket on cabinet. 3. Tight-up two rear screws. - Page 36 KSR Series User Manual Part A 6. Pull rail–release switch (left and right at the same time) then push console to the end. Rail-release switch 7. Install three screws in rear of the console (Both sides). 8. Finish installation as below.
-
Page 37: Installing The Video Card And Video Driver
KSR Series User Manual 3.3 Installing the Video Card and Video Driver Before connecting the LCD console, make sure your computer has a video card already installed for the panel. After you connect the console, install the video software driver. -
Page 38: Kvm Switch
KSR Series User Manual KVM SWITCH 4.1 Introduction The combo-free KVM switch can control attaching servers and computers from local or remote console. This KVM switch is loaded with features such as one local console port, plus one optional CAT5-based remote console port or one optional IP-based remote console Port, On Screen Display (OSD) Menu, Password security, Hot key Control, Push Button and Auto Scan Control. - Page 39 KSR Series User Manual control functions, so Hotkey function can be used in various types of keyboards, and to avoid Hotkey duplicate problem. Provide ACL (Access Control List) security function. Store up to 8 independent user accounts Hot Plug --- add or remove connected computers without powering off the ...
-
Page 40: Technical Specifications
KSR Series User Manual 4.3 Technical Specifications Feature KSR-11508-CF / KSR-11516-CF / 11708-CF / 1708HD-CF 11716-CF / 11716HD-CF / / 11908-CF / 12008-CF 11916-CF / 12008-CF PC Ports PC Port Connector HDDB 15-pin Max. Distance 10 m (32 feet) (KVM switch -- Host) - Page 41 KSR Series User Manual control Auto-Scan Intervals 5 ~ 99 Sec. Keyboard Emulation PS/2 or USB Mouse Emulation PS/2 or USB Table 4-1. Technical Specification...
-
Page 42: System Requirements
KSR Series User Manual 4.4 System Requirements Model No. KSR-11508-CF / 11708-CF / 11708HD-CF / 11908-CF / 12008-CF Computer side 8 x HDDB 15-pin male to one HDDB 15-pin with two Mini Din 6-pin and one USB adapter IP module... -
Page 43: Cable Diagrams
KSR Series User Manual 4.5 Cable Diagrams PC Port Special Cable: HDDB 15-pin male to one HDDB 15-pin male (VGA) with two Mini Din 6-pin (PS/2) Figure 4-1. HDDB 15-pin / VGA + PS/2 x 2 (1.8M) PS/2 Keyboard to USB Adapter PS/2 keyboard to USB keyboard and mouse due HID adapter Figure 4-2. -
Page 44: Product Details
KSR Series User Manual 4.6 Product Details Rear panel of KSR-11508-CF / 11708-CF / 11708HD-CF / 11908-CF / 12008-CF: Rear panel of KSR-11516-CF / 11716-CF / 11916-CF / 12016-CF: Rear panel of KSR-11508-CF / 11708-CF / 11708HD-CF / 11908-CF /... -
Page 45: Hardware Installation
KSR Series User Manual KSR-11508-CF with CAT5 module: Remote Console Port (CAT5 Module) Connector for Each Host Port Daisy Chain In AC Power Inlet Figure 4-6. Rear Panel 4.7 Hardware Installation Before installation, please make sure all of peripherals and computers have been turned off. - Page 46 KSR Series User Manual 3-in-1 HDDB 15-pin Cable Installation Each computer port connector is HDDB 15-pin type. Inspect the 3-in-1 HDDB 15-pin cable. It will have a HDDB 15-pin male connector at one end. Plug it into computer port on the rear of LCD console. The other end of input cable has...
-
Page 47: Optional Module Installation
KSR Series User Manual 4.7.2 Optional Module Installation IP Module Please refer to “IP KVM Module User Manual” for details. IP Remote Console Installation: Power off the LCD console firstly. Remove the cover of the add-on slot, slide in the IP Module and make sure the module is fully inserted into the slot. -
Page 48: Cat5 Kvm Receiver (R-Box)
KSR Series User Manual Figure 4-11. CAT5 Module Installation 4.7.3 CAT5 KVM Receiver (R-Box) The CAT5 KVM receiver (R-Box) uses CAT5 cable to extend your keyboard, mouse and monitor 1000 feet (300 meters) away from the KVM switch. It also has built-in 2-to-1 OSD KVM switch for selecting remote or local Computer. -
Page 49: When Video Signal Is Foggy Or Unclear
KSR Series User Manual 5. Power on the R-Box by plugging in the power adaptor 6. Push the SELECT button to select remote or local Computer. 4.7.5 When video signal is foggy or unclear The R-Box (CAT5 Receiver) enables user to access to the computer, server, or... -
Page 50: Turning On The Console
KSR Series User Manual The OSD menu will show only the port information of the LCD console. When the master unit starts up, it will query all daisy chained Slave units, and automatically set up the Bank ID for each Slave unit. For stand alone KVM switch, the 7-seg LED on the Master unit will display 1, Slave 1 will display 2, Slave 2 will display 3, and so on. -
Page 51: Hotkey
KSR Series User Manual direct vendor for any technical issues if necessary. 4.8 Hotkey You can also conveniently command KVM switch by switching ports through simple key sequences. The default hot key is SCROLL LOCK and the user could change hot key as your convenient application. If you prefer to use some hot key, please go to OSD menu and change the default hot key to the other. - Page 52 KSR Series User Manual Example: hitting Scroll Lock twice then hitting key 1, key 0, and key 1 will switch to bank 1 port 01. The first port is local at bottom right at the back panel. Scroll Scroll Lock Lock Figure 4-14.
-
Page 53: Osd (On Screen Display)
KSR Series User Manual 4.9 OSD (On Screen Display) On Screen Display Menu provides a menu driven interface to handle a Multilingual Menu, Access Security, Computers switching process, to name a PC name or server name, to set up the password / window display time and to search PC port name if you don’t remember it. -
Page 54: Login Window
KSR Series User Manual 4.9.1 Login Window Figure 4-15. Login Window Turn on local console monitor and power on by plug in the power adapter, there will be login window at screen. No input for username and password over 1 minute at login windows the monitor’s signal will be turn off. -
Page 55: Port Name
KSR Series User Manual 4.9.2 Port Name Figure 4-17. Port Name OSD Function Key Description Go to Main Menu CONSOLE OFF Previous Menu Enter Switch to Selected Port ↑ / ↓ Move Select PgUp Previous Bank PgDn Next bank Quit... -
Page 56: Main Menu
KSR Series User Manual 4.9.3 Main Menu Figure 4-18. Main Menu OSD Function Key Description Enter Select ↑ / ↓ Move Go to Main Menu Console off Back Exit Table 4-7. OSD Function Key 4.9.3.1 LANGUAGE The default language is ENGLISH. Moving the cursor by keyboard -- Up Arrow... -
Page 57: Port Name Edit
KSR Series User Manual Figure 4-19. Language 4.9.3.2 PORT NAME EDIT Figure 4-20. Port Name Edit OSD Function Key Description Enter Port Name Edit ↑ / ↓ Move Go to Main Menu Console off Back Exit Show port 01 ~ 08... -
Page 58: Port Search
KSR Series User Manual “ and press Enter” ” key to switch current PC port to PC port 2, or moving cursor to SYSTEM 02 and double clicks the left button of mouse to switch current PC port to PC port 2. -
Page 59: Access List
KSR Series User Manual Figure 4-22. User Security OSD Function Key Description Enter Enter user name →↑←↓ Move Go to Main Menu Console off Back Exit Table 4-10. OSD Function Key Press “ENTER” key to get USERS list. The left column “S” means SUPERVISOR and “1”, “2”,“3”,…., “8”... -
Page 60: Hotkey
KSR Series User Manual OSD Function Key Description Enter Select →↑←↓ Move Go to Main Menu Console off Back Exit Table 4-11. OSD Function Key Only SUPERVISOR can set up the ACCESS LIST. The first column is the PC name list the following 8 column the access right of each ADMINISTRATOR use OSD MOUSE or Enter key to active / inactive the access right of each port. -
Page 61: Time Settings
KSR Series User Manual Some keyboard may not equip with all the special keys. Make sure the key you select is available in you keyboard. 4.9.3.7 TIME SETTINGS Figure 4-25. Time Settings OSD Function Key Description Enter Save Go to Main Menu... - Page 62 KSR Series User Manual Figure 4-26. OSD Mouse OSD Function Key Description Enter Save ↑ / ↓ Move Go to Main Menu Console off Back Exit Table 4-14. OSD Function Key...
Need help?
Do you have a question about the KSR Series and is the answer not in the manual?
Questions and answers