Tenvis JPT3815W Quick Start Manual
Hide thumbs
Also See for JPT3815W:
- Quick start manual (20 pages) ,
- Quick start manual (20 pages) ,
- Quick start manual (36 pages)

Related Manuals for Tenvis JPT3815W


Summary of Contents for Tenvis JPT3815W
- Page 1 Version 2.1 the world in my eyes Quick Start Guide For security’s sake, please update the default user name and password of your IP camera. The exact process is on page 9.
-
Page 2: Table Of Contents
Contents Chapter 1: Let’s get started What’s in the box Let’s show you around How it works Chapter 2: Let’s get PC view For windows For MAC Change camera’s password Chapter 3: Wi-Fi configuration Set up Wi-Fi connection Chapter 4: Internet access configuration Set up Port Forwarding Chapter 5: Mobile device configuration For iPhone and Android... -
Page 3: Chapter 1: Let's Get Started
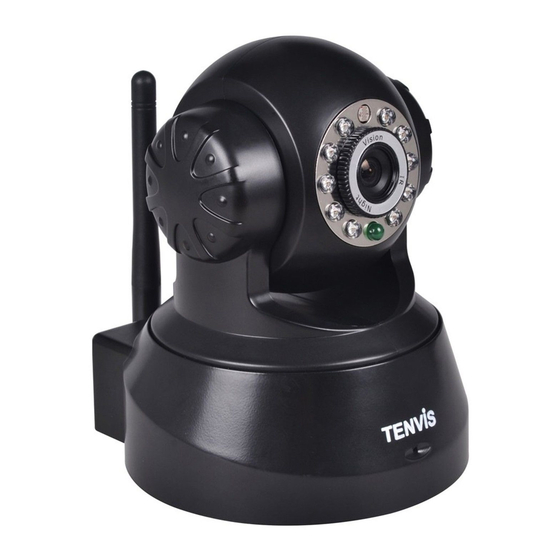
Chapter 1: Let’s get started What’s in the box Wireless IP Camera x 1 Power Adapter x 1 User Manual x 1 CD x 1 Mounting Bracket(set) x 1 Screws and Plastic Screw Anchors Stickers Let’s show you around Reset Wi-Fi Power Audio Out... -
Page 4: How It Works
How it works Wired LAN View PC/MAC Wired Mobile Phone Wired WIFI Wireless Router IP Camera Wireless LAN View PC/MAC Wired Mobile Phone Wireless WIFI Wireless Router IP Camera Internet View PC/MAC ADSL Modem Wired Mobile Phone Internet Wireless 3G/4G or WIFI Wireless Router IP Camera LAN means Local Area Network... -
Page 5: Chapter 2: Let's Get Pc View
Wi-Fi connection. For Windows 1. Insert the CD or download the software from www.tenvis.com/download 2. Open the CD and use autorun to install. Then click 3. After installation, please double click 4. Open Search Tool and click... - Page 6 6. Click Auto adjust to automatically configure camera's network settings conforming to your computer's network settings. Or you can adjust the network settings manually. Enter camera's username and password and click Apply for the settings to take effect. Tips: Camera’s default username is admin , default password is admin...
- Page 7 5. It is required to install a plug-in for the first login to Internet Explorer. Click Allow and download the plug-in and then install. You'll be able to watch live feed from camera after the plug-in is properly installed. Congratulations! Now you can watch live feed from the camera within local area network (LAN).
-
Page 8: For Mac
For Mac 1. Insert the CD and open TENVIS Search Tool.dmg Or you could software i from www.tenvis.com/download download the 2. Drag TENVIS Search Tool into Applications folder to install. 3. Run the software in Launchpad and ignore the security warning. - Page 9 4. Double click the IP address listed in the TENVIS Search Tool. Default browser will be opened automatically to display the camera login page. 5. Select browser mode to watch live video from the camera. Congratulations! You have set up wired LAN view for...
-
Page 10: Change Camera's Password
Change Camera’s Password For security reason, please update the default username and password of your IP camera. 1. Login the camera and then go to Settings page. For Non-IE User For IE User 2. Click System and select Change Password to update camera’s password. -
Page 11: Chapter 3: Wi-Fi Configuration
Chapter 3: Wi-Fi Configuration 1. Login to the camera and then go to Settings page. Check for Wi-Fi Status in About section. If the camera is not yet connected to a wireless router, it will show Disconnected Set up Wi-Fi here ;... -
Page 12: Chapter 4: Internet Access Configuration
Chapter 4: Internet access configuration Login the camera and go to Settings page. Then click on the DDNS URL for Internet view. If you can successfully access the camera via DDNS URL, you can also access the camera on any Internet enabled device. If attempt to access the camera via DDNS URL failed, please follow the instructions given on the next page. - Page 13 3 .Please do port forwarding on the router in order to properly access the camera via DDNS URL. You can get the camera's IP address and port using TENVIS IP Camera Search Tool first and then finish port forwarding manually.
-
Page 14: Chapter 5: Mobile Device Configuration
Chapter 5: Mobile device configuration 1. Search for TENVIS App Store Google Play and install TENVIS Slight Or visit www.tenvis.com/download to know more. 2. Run TENVIS Slight lick button to add a camera. The application will search cameras in LAN automatically. - Page 15 3. Select the detected camera or click Manually add camera add cameras. Enter camera password and then click Preview Tips: Camera information in the above snapshot is just for your reference. Default username is admin and default password is admin 4.
- Page 16 5.Select the camera just added to get live video. Disable audio Enable listen Enable speak Disable alarm Enable alarm Adjust video brightness Adjust video contrast Set or go preset position Notice: 1. For remote live view, please refer to Chapter 4 Internet access configuration and finish configuration first.
-
Page 17: Chapter 6: Last, But Not Least
Chapter 6: Last, but not least 1. Why does my computer or security software say the software is dangerous and it is a virus? The search tool will detect device in your network, and it seems like a virus. Please ignore the warning and continue. 2. -
Page 18: Learn More
2 Way Audio Learn more You can find more information, watch demos and learn more about TENVIS IP Camera at www.tenvis.com Support If you have any problem with the camera settings, please visit our forum to search your problem or post thread for help. - Page 19 TENVIS Technology Co., Ltd. www.tenvis.com How are we doing? Welcome to email our COO via admin@tenvis.com for any suggestion or complaint. Thanks for choosing TENVIS!
Need help?
Do you have a question about the JPT3815W and is the answer not in the manual?
Questions and answers