Advertisement
Advertisement
Table of Contents

Related Manuals for Bush Spira B1 10.1”


Summary of Contents for Bush Spira B1 10.1”
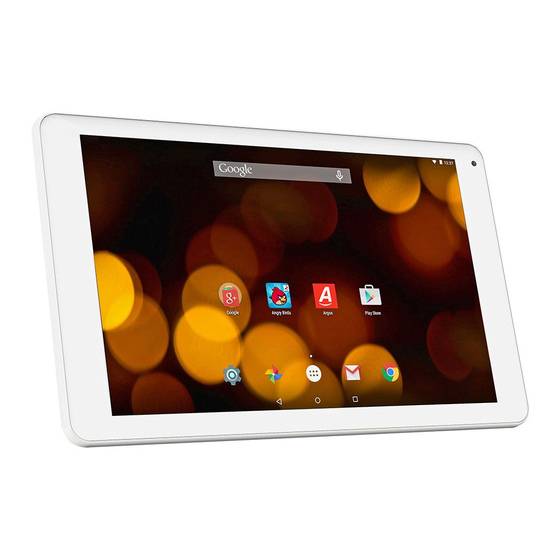
- Page 1 Instruction manual Bush Spira B1 10.1” Tablet...
-
Page 2: Table Of Contents
..............Troubleshooting....................For more information, please consult the FAQs on argos.co.uk/bush. Make sure to read them before considering any product return. As we are often updating and improving our products, your device’ software may have a slightly different appearance or modified functionality than presented in this manual. -
Page 3: Package Contents
Package contents Warranty, Instruction Legal and Safety manual Information 0681 AC101DPLV2 Bush Spira B1 10.1” Tablet Charger cable... - Page 4 Charger assembly Assembly: place the plug in the middle of the body and push it down until it ‘clicks’. Disassembly: press button and push it up. Click!
-
Page 5: Description Of The Device
Description of the device 0681 AC101DPLV2... -
Page 6: Webcam
Camera Webcam ON/OFF button Micro-USB port Volume buttons Headphone jack Reset hole Micro-SD card slot (inside, see below) Loudspeakers... -
Page 7: Getting Started
Charging Connect the supplied power cable to the device and to a wall outlet. The Bush device will start charging. You can use the device whilst on charge . Turning the device on Press the ON/OFF button for 2-3 seconds. - Page 8 Startup Wizard The first time you start up your device, the startup wizard will help you set up your device: - Language - Date & time - WiFi connection - Location service options - Third-party applications We strongly recommend that you open a Google account (you need this to download new apps) and we recommend that you answer yes to backing up your tablet to the Google account.
-
Page 9: Connecting To A Wifi Network
Connecting to a WiFi network WARNING: Make sure that you are in a WiFi zone. Touch ‘Settings’ to open the WiFi settings menu. If the WiFi is off, slide the WiFi switch to the ‘ON’ position. Once the WiFi is ON, the device will scan for WiFi networks in range. - Page 10 When entering a WiFi password, we recommend that you select ‘Show password’ so you can see the characters you are typing. TIPS: - To get the correct WiFi password (or settings) for the network, contact the WiFi network provider. - If your WiFi is on and you are in range of a network that you previously connected to, your device will automatically attempt to connect to it.
-
Page 11: The Android Interface
The Android interface... - Page 12 Android apps shortcuts > Opens an application. Back button > Goes back through the previous actions in an application (in reverse order) or out of any open application (app) if opening was the last action. Home button > Takes you to the home screen (where you can pin shortcuts to your favourite apps).
- Page 13 The Android interface The quick settings Touch the top of the screen and pull down to open the notifications. Pull down one more time to open the quick settings menu 1. To access all your settings. 2. Current user 3. Brightness: To adjust the screen brightness. 4.
- Page 14 The recent apps Opens a list of thumbnail images of apps you’ve worked with recently: - To open an app, touch it. - To close an app, swipe it left or right.
-
Page 15: Getting Familiar With Android
Getting familiar with Android Moving a home screen icon: Touch and hold your finger onto it until the positioning gridlines appear, then slide it to the desired location, and release your finger. Removing a home screen icon: Touch and hold it, slide your finger towards the top of the screen and drop it over the ‘Remove’... - Page 16 To check which applications are downloaded or built-in, go to ‘Settings’ then ‘Apps’. You can also uninstall apps in ‘Settings’ and move them from internal memory to SD card etc.. Creating application folders: To organise your apps, drop one app icon over another on the home screen and the two icons will create a folder.
- Page 17 Getting familiar with Android Locking the touchscreen: From the quick settings dashboard in the status bar, touch ‘Settings’. In ‘Settings’, scroll down and touch ‘Security’. Touch ‘Screen lock’. Touch the type of lock you would like to use. After you set a lock, a lock screen is displayed whenever your screen wakes up, requesting the pattern, pin or other specified key.
- Page 18 Backing up your files with your Google account 1. Make sure that you are connected to a WiFi network. 2. Make sure the files you want to back-up are added to your Google Drive. 3. Go to ‘Settings’. Under Accounts/Google, touch your Google email address and tick all the data you want to back up, including ‘Drive’.
- Page 19 Getting familiar with Android Syncing your photos/videos automatically on your Android devices. On your tablet: Make sure that you are connected to a WiFi network. Go to ‘Google Photos’ app and select your Google account. Make sure ‘Auto-Backup’ is turned on Select how you want to back-up your photos and videos (over Wifi or mobile network).
- Page 20 Transfering files to your tablet: From a computer, use the USB lead provided in the package box. From a USB device with a standard male USB connection, you will need to purchase a female USB to micro USB lead in order to connect it (e.g. USB card reader, USB connection from a camera etc.).
- Page 21 Getting familiar with Android Improving security on your tablet Online In order to avoid online threats we recommend that you install antivirus and security software on your device and keep these and your browser and other software up to date to take advantage of security fixes. Physical theft If you store valuable information on your tablet including passwords and logins for personal accounts etc.
-
Page 22: Encrypting Memory
Encrypting your memory In order to prevent more technically capable persons gaining access to your data, in the event that your tablet is lost or stolen you can encrypt your tablet’s memory, so that even if the password is breached the data will be unreadable. - Page 23 Getting familiar with Android • Please note that your tablet cannot be decrypted by the same process. To decrypt you must return the tablet to factory settings which will erase all of your files and downloaded apps (securely). • To reset to factory defaults go to ‘Settings’, select ‘Backup and Reset’ then ‘Factory data reset’.
- Page 24 NOTE: you may need to install a pdf viewer in order to open this file. Bush Tablets Helpline For detailed advice on this or any other issue concerning your Bush tablet you can consult with the technical support helpline – 0207 744 0346 or go to our FAQ on argos.co.uk/bush.
-
Page 25: Troubleshooting
Troubleshooting If your device is frozen: Press the ON/OFF button for at least 10 seconds. If your device doesn’t turn on: Charge your device then switch on normally. If this does not work, press the ON/OFF button for at least 10 seconds If you want to extend the life of your battery: Decrease the screen brightness and turn off the wireless connections if not in use. - Page 26 If you want to restore your product (erase all your settings? forgotten password?) : If your device is turned on: 1. Go to ‘Settings’, under ‘Personal’, go to ‘Backup & reset’ 2. Choose ‘Factory data reset’, then ‘Reset tablet’: this will erase all your files, settings and applications, so make sure you have backed-up your data in your Google account (see page 17) or a hard drive.
-
Page 27: National Restrictions
National restrictions This device is intended for home and office use in all EU countries (and other countries following the EU directive 1999/5/EC) without any limitation except for the countries mentioned below: Country Restriction Reason/remark Bulgaria None General authorization required for outdoor use and public service France Outdoor use limited... - Page 28 All brands and product names are registered trademarks and the property of their respective owners. Windows Media® and Windows® are trademarks or registered trademarks of Microsoft Corporation in the United States and/ or other countries. Specifications are subject to change without notice. Errors or omissions excepted. Images and illustrations may not always match contents.
Need help?
Do you have a question about the Spira B1 10.1” and is the answer not in the manual?
Questions and answers