Razer DeathAdder Quick Start Manual
Hide thumbs
Also See for DeathAdder:
- User manual (26 pages) ,
- Owner's manual (30 pages) ,
- Master manual (11 pages)
Advertisement
Quick Links
The Razer DeathAdder was released in 2006 and is still to date, the world's best-selling
gaming mouse, used by countless pro-gamers in the circuit as their de facto gaming
mouse. For its combination of ergonomics and precision, the Razer DeathAdder has
become legend
How did we improve on perfection? Very carefully.
We didn't want to fix anything that wasn't broken, and so, we literally didn't change
anything. We focused instead on enhancing and optimizing the Razer DeathAdder
utilizing next generation technologies and further ergonomics tweaks.
The Razer DeathAdder's optical sensor was upgraded from 3.5G to the cutting edge 4G
infrared sensor featuring improved performance and precision. We also retained the
iconic right handed ergonomic shape, but enhanced it with built in rubber side grips for
better mouse control and grip. Like its predecessor, the Razer DeathAdder will feature
Synapse support, for effortless synching of all your settings and profiles automatically
from the cloud.
The favorite weapon for pro-gamers all over the world just got better, and now, so will
your game.
1 | razer
Advertisement

Related Manuals for Razer DeathAdder


Summary of Contents for Razer DeathAdder
- Page 1 The Razer DeathAdder was released in 2006 and is still to date, the world’s best-selling gaming mouse, used by countless pro-gamers in the circuit as their de facto gaming mouse. For its combination of ergonomics and precision, the Razer DeathAdder has become legend How did we improve on perfection? Very carefully.
-
Page 2: Table Of Contents
2. REGISTRATION / TECHNICAL SUPPORT ............... 3 3. TECHNICAL SPECIFICATIONS ................4 4. DEVICE LAYOUT ....................5 5. INSTALLING YOUR RAZER DEATHADDER............. 6 6. CONFIGURING YOUR RAZER DEATHADDER ............7 7. SAFETY AND MAINTENANCE ................28 8. LEGALESE......................30 2 | For gamers by gamers... -
Page 3: Package Contents / System Requirements
To learn more about Razer Synapse and all its features, visit www.razerzone.com/synapse. If you are already a Razer Synapse user, register your product by clicking on your email address at the Razer Synapse application and select Warranty Status from the dropdown list. -
Page 4: Technical Specifications
3. TECHNICAL SPECIFICATIONS 6400dpi Razer Precision 4G Optical Sensor Ergonomic Right-Handed Design With Textured Rubber Side Grips 5 Independently Programmable Hyperesponse Buttons Razer Synapse Enabled 1000Hz Ultrapolling On-The-Fly Sensitivity Adjustment Always-On Mode 200 Inches Per Second And 50g Of Acceleration ... -
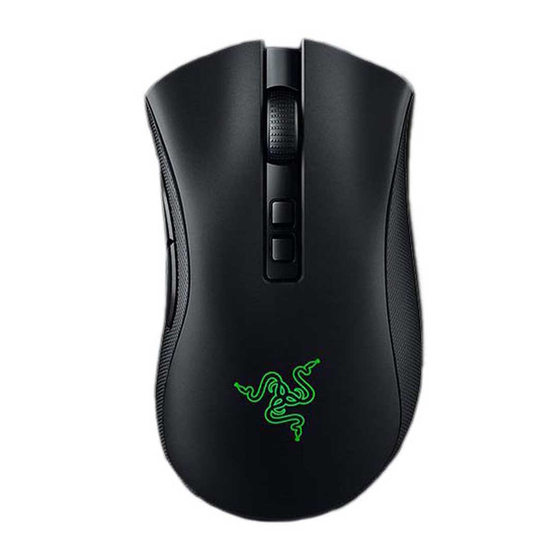
Page 5: Device Layout
4. DEVICE LAYOUT A. Left Mouse Button B. Right Mouse Button C. Scroll Wheel D. Mouse Button 5 E. Mouse Button 4 F. Razer Precision 4G Optical Sensor G. Ultraslick Mouse Feet 5 | razer... -
Page 6: Installing Your Razer Deathadder
5. INSTALLING YOUR RAZER DEATHADDER Step 1: Connect your Razer device to the USB port of your computer. Step 2: Install Razer Synapse when prompted* or download the installer from www.razerzone.com/synapse. Step 3: Register for a RazerID or login to Synapse with an existing account. -
Page 7: Configuring Your Razer Deathadder
6. CONFIGURING YOUR RAZER DEATHADDER Disclaimer: The features listed here require you to log in to Razer Synapse. These features are also subject to change based on the current software version and your Operating System. MOUSE TAB The Mouse Tab is your default tab when you first install Razer Synapse. This tab allows you to customize your device’s profiles, button assignments, performance, lighting and... - Page 8 PROFILE A profile is a convenient way of organizing all your custom settings and you can have an infinite number of profiles at your disposal. Any changes made within each tab are automatically saved to the current profile and stored into the cloud servers. You can create a new profile by clicking the button or delete the current profile by clicking the...
- Page 9 CUSTOMIZE TAB The Customize Tab is where you can modify the basic functionalities of your device such as button assignments to suit your gaming needs. The changes made in this tab are automatically saved to your current profile. 9 | razer...
- Page 10 BUTTON ASSIGNMENT MENU Initially, each of the mouse buttons is set to DEFAULT. However, you may change the function of these buttons by clicking the desired button to access the Button Assignment Menu. Listed below are the customization options and their descriptions. Default This option enables you to return the key to its original function.
- Page 11 Inter-device from the Button Assignment Menu, a sub-menu will appear. DEVICE TO LINK allows you to choose which currently connected Razer device can be linked while FUNCTION allows you to choose which functionality you want to use for the linked device.
- Page 12 Macro A Macro is a prerecorded sequence of keystrokes and button presses that is executed with precise timing. By assigning a Macro to a button, you can execute complex combinations with ease. The ASSIGN MACRO allows you to choose which recorded Macro to use while the PLAYBACK OPTION enables you to choose the behavior of the Macro.
- Page 13 - Mutes the microphone. Mute All - Mute both microphone and audio output. Play / Pause - Play, pause, or resume playback of the current media. Previous Track - Play the previous track. Next Track - Play the next track. 13 | razer...
- Page 14 Windows 8 Charms This option enables you to assign the key into an Operating System shortcut command. For more information please visit: http://windows.microsoft.com/en-sg/windows- 8/getting-around-tutorial. Windows Shortcut This option enables you to assign the key into an Operating System shortcut command. For more information please visit: http://support.microsoft.com/kb/126449.
- Page 15 Listed below are the performance options and their descriptions. Sensitivity Sensitivity pertains to how much effort is needed to move the mouse pointer in any direction. The higher the sensitivity, the more responsive the mouse will be. (Recommended setting: 1600 – 1800) 15 | razer...
- Page 16 Enable X-Y Sensitivity By default, the X-axis (horizontal) and Y-axis (vertical) use the same sensitivity values. However, you may set different sensitivity values to each of the axes by selecting the ENABLE X-Y SENSITIVITY option. Configure Sensitivity Stages A sensitivity stage is a preset sensitivity value. You can create up to 5 different sensitivity stages which you can cycle through using the sensitivity stage up/down buttons.
- Page 17 LIGHTING TAB The Lighting Tab allows you to configure the LEDs of your Razer DeathAdder. Simply toggle the ON or OFF options to enable or disable the Scroll Wheel and Logo lighting. Similar to the previous tabs, the changes made here are also automatically saved to your current profile.
- Page 18 CALIBRATION TAB The Calibration Tab allows you to optimize your Razer Precision Sensor to any mousing surface for better tracking. To use this feature, you must select the ON option under SURFACE CALIBRATION. The LIFTOFF RANGE allows you to set the distance in which the sensor stops tracking as it is being lifted away from its mousing surface.
- Page 19 Razer Mouse Mats The Razer DeathAdder is ‘tuned’ or optimized especially for Razer mouse mats. This means that the sensor has been tested extensively to confirm that the Razer DeathAdder reads and tracks best when paired with Razer mouse mats.
- Page 20 Other Mousing Surfaces If you are using a non-Razer mouse mat or a non-standard mousing surface, select OTHERS then click the button to access the manual calibration submenu. 20 | For gamers by gamers...
- Page 21 This submenu enables you to manually adjust the Razer Precision Sensor to suit any mousing surface. To begin calibrating the sensor, click the button. After clicking the button, Razer Synapse will begin tuning the sensor. Please avoid moving the Razer DeathAdder during this time.
- Page 22 Once the Razer Precision Sensor is ready, press and hold the left mouse button then move the mouse across your entire mousing surface in a zigzag pattern as shown on the screen guide. When you have moved through your entire mousing surface, release the left mouse button.
- Page 23 To create a macro command, simply click the button and all your keystrokes and button presses will automatically register on the macro screen. When you are done recording your macro commands, click on the button to end the session. 23 | razer...
- Page 24 The Macro section allows you to input the delay in-between commands. In RECORD DELAY the delay in-between commands are registered as how it is entered. The DEFAULT DELAY uses a predefined time (expressed in seconds) as the delay. And NO DELAY omits all the pauses in-between keystrokes and button presses.
- Page 25 The buttons gives you the option to move the command up or down. The button allows you to put in additional keystrokes, button presses or time delays either before or after the selected command. 25 | razer...
- Page 26 Once you have pressed the button, a new display window will appear beside the list of macro commands. The dropdown menu on this window allows you to choose a keystroke or a delay to be added in before or after the highlighted macro command. 26 | For gamers by gamers...
- Page 27 You may add in a new set of macro commands by clicking the button on the keystroke menu; or input time delays on the duration field using the delay menu. 27 | razer...
-
Page 28: Safety And Maintenance
7. SAFETY AND MAINTENANCE SAFETY GUIDELINES In order to achieve maximum safety while using your Razer DeathAdder, we suggest that you adopt the following guidelines: 1. Avoid looking directly at the tracking beam of your mouse or pointing the beam in anyone else’s eye. - Page 29 Razer. Some surfaces will cause undue wear on the feet requiring constant care and eventual replacement. Do note that the sensor of the Razer DeathAdder is ‘tuned’ or optimized especially for the Razer mousing surfaces. This means that the sensor has been tested extensively to confirm that the Razer DeathAdder reads and tracks best on Razer mousing surfaces.
-
Page 30: Legalese
LIMITATION OF LIABILITY Razer shall in no event be liable for any lost profits, loss of information or data, special, incidental, indirect, punitive or consequential or incidental damages, arising in any way out of distribution of, sale of, resale of, use of, or inability to use the Product. In no event shall Razer’s liability exceed the retail purchase price of the Product. - Page 31 (in so far as it is invalid or unenforceable) shall be given no effect and deemed to be excluded without invalidating any of the remaining terms. Razer reserves the right to amend any term at any time without notice. 31 | razer...
Need help?
Do you have a question about the DeathAdder and is the answer not in the manual?
Questions and answers