Advertisement
Available languages
Available languages
Quick Links
Download this manual
See also:
Manual
Advertisement

Related Manuals for Golf Buddy VT3


Summary of Contents for Golf Buddy VT3
- Page 1 Language English 中文 日本語 한글 Manual...
- Page 2 CONTENTS 1. Getting Started 2. Basic Operations 3. Advanced Operations 4. Course Updates...
- Page 3 Thank you for choosing GolfBuddy. The GolfBuddy VT3 provides you with accurate golf course distance information to enhance your golfing experience. It has a multi-function touch screen that you can navigate with a simple touch or swipe of a finger.
- Page 4 Quick Overview of GolfBuddy Mark Button Power/ Quick Menu Button USB Port...
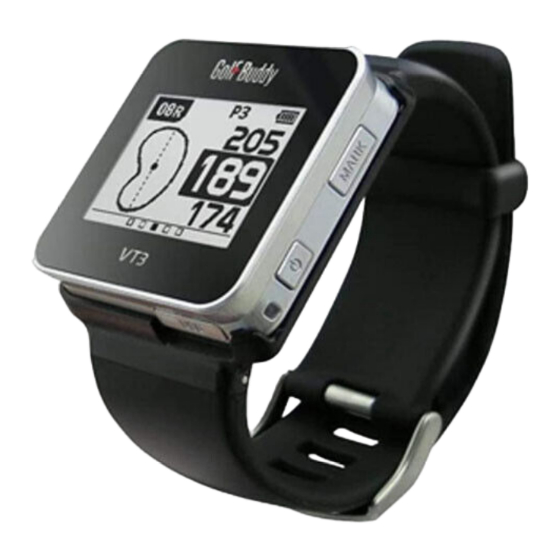
- Page 5 Main Screen Description Hole No. Par Information Meter (In Yards when not shown) Battery Indicator Dynamic Green View Remaining distance to the back of the Green Remaining distance to the center of the Green Remaining distance to the front of the Green...
- Page 6 Getting Started...
- Page 7 1. Getting Started Connect the unit to the power adapter using the data cable provided. Plug into a power socket to charge the unit. You may visit our website (www.gpsgolfbuddy. com) and go to our Course Library. You will find listed, over 36,000 golf courses in more than 130 countries around the world.
-
Page 8: Language Selection
Power Off : Press and hold the power button for 1-2 seconds and 2 options will appear on the display. Press the power button again to power off or press the Mark button to return to the previous screen. 1.2. Language Selection From the set-up screen, swipe down to bring up the Setting Screen. -
Page 9: Volume Setting
1. Getting Started 1.3. Setting Screen From the main screen, swipe down to bring up the Setting Screen. The Hole Number, Yard/Meter, Volume/Mute, and Pin positioning options will be displayed. 1.3.1. Volume Setting From the main screen, swipe down to bring up the Setting Screen and touch the desired volume level to set your sound level. -
Page 10: Changing Holes
1.3.2. Distance Mode Setting From the main screen, swipe down and touch the icon to change from Yards to Meter or vice versa. Touch the icon at the bottom left corner to save and go back to your previous screen. 1.3.3. - Page 11 1. Getting Started 1.3.4. Back to Previous Hole From the main screen, swipe down and touch the icon to go back to the previously recognized hole.
- Page 12 Basic Operations...
- Page 13 2. Basic Operations 2.1. Distance Information to the Green The main screen provides the distance information. Touch the screen to get voice information to the center of the green. Touch and hold the screen to get voice information to the front and back of the green.
-
Page 14: Measuring Distance
2.3. Measuring Distance From the main screen, press the Mark button for the Measuring Distance screen or slide right from the Main screen. Touch and hold the icon to mark your position. You can also press and hold the Mark button to start measuring. - Page 15 From the main screen, slide the screen to the left once to access the Watch Mode. Touch the screen and your VT3 device will speak the time. The time will be set when the VT3 connects with the satellite; but in order to set the local time zone, touch and hold the screen.
- Page 16 Advanced Operations...
- Page 17 3. Advanced Operations 3.1. Dynamic Green View / PIN Placement Setting You will see the green shape change as you move to different sides of the green while on the main screen or green view screen. This “Dynamic Green View” means you will always get the Front /Center/ Back distances from your angle of approach.
- Page 18 Hole No. Green View Remaining Distance to the Center 3.2. Quick Menu Screen Press the power button to activate the quick function selection screen. Touch the desired selection to bring to the front of the screen, then touch it again to activate that function. icon located at the bottom of the screen will access the Set-Up screen.
- Page 19 3. Advanced Operations 3.3. Screen Lock Mode Press the power button to bring up the Quick Menu screen. You can lock the screen by touching the icon at the bottom right corner of the screen. To unlock, touch and slide the icon to the right.
- Page 20 Course Updates...
- Page 21 Important! Please remember the user ID and password you used to register with. Please use the enclosed USB cable to connect your GolfBuddy VT3 to your computer. Run the GolfBuddy Course Manager previously installed on your computer and enter the user ID and password;...
- Page 22 4.1. Device Connection Please connect your GolfBuddy VT3 to your PC or MAC. Once the device is connected, please click “Next” to proceed to Step 2. 4.2. Firmware Information Click “Next” to install the latest firmware if it has not already been upgraded.
- Page 23 4. Course Updates 4.3. Course Download Select the desired country/state that needs to be updated. Click “Next” and a pop-up screen with the “Newly Updated Only” option will display. Click “Ok” to proceed and to update courses. Once the courses have been downloaded, the message “Update Complete”...
- Page 24 内容 1. 启动系统 2. 基本功能 3. 全新功能 4. 球场下载...
- Page 25 感谢您选择 。 GolfBuddy 电子语音球童为您提供最精确的球场 GolfBuddy VT3 信息 , 为您带来全新的高尔夫体验 。 只需轻触屏幕 或滑动手指即可为您全程导航 。...
- Page 26 产品概述 马克键 开关/快捷菜单 USB 接口...
- Page 27 显示屏说明 球洞 标准杆数 米(不显示码数时) 电池电量 动态果岭 相距果岭后方的距离 相距果岭中心的距离 相距果岭前方的距离...
- Page 28 启动系统...
- Page 29 启动系统 使用数据线将设备与电源转换器相连接后插入电 源插座进行充电 。 如有需要您可浏览我司网址( www.gpsgolfbuddy. )在线查看 “ 球场数据库 ”。 全球 多个国家 多个球场的列表可在线查看 。 (您的电子球 36,000 童已预装 最新固件与高尔夫球场 。 打开 GolfBuddy 包装即可开始使用 。 ) 您可以登录网站上的球场管理软件进行注册 , 并 将您的电子球童球场数据进行更新 。 具体操作参 考使用手册中 “ 球场下载 ” 部分 。...
- Page 30 1.1. 电源 开关 开机:按住电源开关键2~3秒 。 当您位于球场时 , 简 单的启动电源开启装置 , 系统将自动定位您所在的球 场位置 。 关机:按住电源开关键1~2秒直至看到屏幕提示,再 次按压电源键后 , 设备关机 。 如果不再次按压电源键 或按压马克键 , 设备将返回上一界面 。 2. 语 种切 换 向下滑动屏幕至设置界面 。 按压马克键启动语言切换界 面 。 选择所需的语种两次后 , 系统将加载所选语种 。...
- Page 31 启动系统 设置界面 向下滑动主屏幕至设置界面 。 屏幕将显示球洞编号 , 码数/米 , 音量/静音及球洞定位选项 。 3.1. 音量设置 向下滑动主屏幕至设置界面后 , 点击音量进行设置 。 点击左下角 键保存设置后返回上一界面 。 * 静音: 点击喇叭图标关闭声音 。...
- Page 32 3.2. 距离模式设置 向下滑动主屏幕至设置界面 , 点击 图标进行 码数与米数互换 。 点击左下角 键保存设置后返回上一界面 。 3.3. 切 球洞 换 向下滑动主屏幕至设置界面选择球洞图标 , 点击箭头 选择所需球洞 。 点击左下角 键保存设置后返回上一界面 。...
- Page 33 启动系统 3.4. 返回上一球洞 从设置界面选择 图标返回之前已确认球洞 。...
- Page 34 基本功能...
- Page 35 基本操作 2.1. 果岭距离信息 主屏提供距离信息 。 点击屏幕语音播报相距果岭中心 的距离 。 点按住屏幕语音播报相距果岭前后的距离 。 2.2. 目标和障碍物信息 向下滑动主屏幕至设置界面移动到目标和障碍物信息 。...
- Page 36 2.3. 得分追踪 向右滑动屏幕两次进入得分追踪 。 点击所需球洞旁的 计分盒进入个人得分 , 点触加减符号可调整得分 。 点 击左下角 键保存设置后返回得分追踪界面 。 2.4. 查看模式 向左侧滑动屏幕进入手表模式,点击屏幕可语音播报 当前时间 。 与卫星连接后可设置时区 , 点按住屏幕可设置时 钟 。...
- Page 37 基本操作 2.5. GPS搜索 向左侧滑动屏幕进入 GPS 搜索 。 点击开始图标启动追踪 。 按压暂停或停止键可终止搜 索 。 点按停止键两次可重新设置当前搜索 , 然后向右 滑动垃圾筒图标 。...
- Page 38 全新功能...
- Page 39 全新体验 3.1. 动 态 果岭视 图 随着向果岭的不同方位走动 , 可看到屏幕不同形状的 果岭形状 。 此动态果岭视图始终显示您当前方位相距 果岭前 , 中心及后方的距离 。 选择果岭视图界面 , 点击设置界面右下方的果岭形状 图标或点击主界面的果岭图标两次 。 在果岭视图下 , 点击并将旗杆拖动至所需位置设置球洞位置 。 屏幕将 显示相距新球洞位置中心的剩余距离 。 点击左下方 图标返回主界面 。 球洞编号 果岭视图 相距果岭中心距离...
- Page 40 3.2. 快捷菜 界面 单 按压电源键进入快捷菜单界面 。 双击所选功能即可进 入程序 。 点击左下方的工具图标将进入设置界面 。 3.3. 锁 屏模式 按压电源键进入快捷菜单 。 通过点击屏幕右下方的锁 形图标锁屏或解锁屏幕 。 解锁时可点按屏幕或任意 键 , 也可向右滑动锁形图标 。...
- Page 41 全新体验 3.4. 重新设置 按压住如下图所示的两个接触点十秒钟以上可对装置 进行重新设置 。...
- Page 42 球场下载...
- Page 43 密码然后按 “ login ” . 浏览我司官方网址 www.gpsgolfbuddy.com 并点 击售后支持项下 “ 下载 ”, 可为 PC 机或 MAC 机安 装球场管理软件 。 安装后您的桌面将显示 “ 球场管 理 ” 图标 。 点击进入程序 , 选择注册新用户并输 入您的个人信息 。 重要提示!请牢记您的用户名与密码。 请使用 USB 数据线将 VT3 设备与电脑相连接 。 输入用户名与密码后点击登录并运行程序 。...
- Page 44 4.1. 连 接 设备 设备与电脑相连接后 , 点击下一步进入步骤 。 4.2. 固件信息 如设备未进行更新 , 点击下一步可安装最新固件 。 如 果固件已更新 , 点击下一步进入步骤 。...
- Page 45 球场下载 4.3. 球 场 下 载 从球场列表中选择需更新的国家 。 点击 “ 下一步 ” ,系统 弹出已勾选 “ 仅最近更新的 ” 选项 。 点击 “ ” 开始球场 更新 。 当所有球场更新下载完成后系统将提示 “ 更新已完 成 ”, 即可退出程序 。 当设备再次开机时 , 更新将被激 活 。...
- Page 46 目次 1. 事前準備 2. 基本操作 3. その他機能 4. コースデータの更新...
- Page 47 この度はゴルフバディーVT3をお買上げいただき、誠 にありがとうございます。 本機は、簡単タッチスクリーン操作で様々な機能 をご使用いただけます。ゴルフバディーVT3でより 一層ゴルフライフをお楽しみください。...
- Page 48 各部の名称 マークボタン 電源/ クイックメニ ューボタン ポート...
- Page 49 メイン画面表示 ホールナンバー パー情報 メーター ( 表示がない場合はヤード ) バッテリー残量 ダイナミックグリーンビュー グリーン奥までの距離 グリーンセンターまでの距離 グリーンフロントまでの距離...
- Page 50 事前準備...
- Page 51 1. 事前準備 お買い上げ時は、電池パックが十分に充電されて いません。必ず充電してからお使いください。充 電には同梱の ケーブルとACアダプターをご使 用ください。 ケーブルを、本機下部の ポ ートに差し込み、ACアダプターを使って、コンセ ントに接続します。本機が自動でオンになり充電 が開始されます。ディスプレイにバッテリーアイ コンが表示され、フル充電になるとバッテリーア イコン中央に 「 稲妻 」 マークが表示されます。 ( フル充電時間:2~3時間、バッテリー持続時 間:約10時間 ) 弊社ホームページ ( ) の 「 コース www.golfbuddy.jp ・ライブラリー 」 にて、世界130ヶ国以上で登録され ています、約37,000コース (2013年12月31日現在) の リストをご確認いただけます。 工場出荷時の最新コースデータを事前登録してお りますが、お買い上げ後に弊社 マネージャーよ り、最新のコースデータをダウンロードされるこ とをお薦めします。...
- Page 52 1.1. 電源オン/オフ 電源オン:本機右側の 「 電源ボタン 」 を、画面にGB ロゴが表示されるまで、長押ししてください。ゴ ルフ場に到着したら、屋外で本機の電源をオンに してください。サテライト検索後、本機がゴルフ 場を自動認識します。 電源オフ:本機右側の 「 電源ボタン 」 を長押しする と、パワースクリーン ( 下図 ) が表示されます。本機 右側の 「 電源ボタン 」 をもう一度押すと、電源がオフ になります。表示画面のまま放置するかもしくは 本機右側の 「 マークボタン 」 を押すと、元の画面に戻 ります。...
- Page 53 1. 事前準備 1.2. 言語設定 お買上げ後最初に電源をオンにした際 「 言語設定画 面 ( 下図 )」 が表示されます。ご希望の 「 言語ボタン 」 に タッチして言語を選択した後、もう一度その 「 言語 ボタン 」 にタッチして確定します。設定された言語 を変更する場合は、メイン画面上を下方向へスラ イド ( 画面上を指でタッチしたまま指を下方に滑ら す ) すると、 「 メニュー画面 」 が表示されます。本機 右側の 「 マークボタン 」 を長押しすると、 「 言語設定 画面...
- Page 54 1.3. メニュー画面 メイン画面上を下方向へスライド ( 画面上を指でタ ッチしたまま指を下方に滑らす ) すると、 「 メニュー 画面 ( 下図 )」 が表示されます。この画面では 「 音量調 節/消音 」「 ホール変更 」「 距離単位の変更 」 および 「 ピン ポジション設定 」 を行うことができます。 1.3.1. 音量調節/消音 「 メニュー画面 ( 下図 )」 上部のスピーカーアイコンの右 のバーが音量になります。ご希望の音量バーにタッ チして、音量を調節します。またスピーカーアイコ ンにタッチすると、消音モードになります ( 下図右 ) 。 画面左下の...
- Page 55 1. 事前準備 1.3.2. グリーンの切替 「 メニュー画面 ( 下図左 )」 より 「 ホール変更 」 ボタン ( 上 段左 ) にタッチすると、 「 ホールナンバー画面 ( 下図 右 )」 が表示されます。ホールナンバーの下に表示さ れている 「 L ( 左 )」 または 「 R ( 右 )」 にタッチして、グリ ーンを左 ( もしくは右 ) に切替えます。 画面左下の...
- Page 56 1.3.4. 距離単位の変更 「 メニュー画面 ( 下図左 )」 上の 「 距離単位の変更 」 ボタ ン ( 上段右 ) にタッチすると、 「 距離単位画面 ( 下図右 )」 が表示されます。ご希望の距離単位 「 Y ( ヤード )」 も しくは 「 M ( メーター )」 にタッチしてください。 画面左下の アイコンにタッチすると元の画面に 戻ります。 1.3.5. ホールを戻す 「...
- Page 57 基本操作...
- Page 58 2. 基本操作 2.1. グリーンまでの距離情報 「 メイン画面 ( 下図 )」 上に、グリーンセンター、フロ ント、奥までの距離が表示されます。画面をタッ プ ( 軽くタッチ ) すると、グリーンセンターまでの距 離を音声でお知らせします。また画面上のグリー ンセンターまでの距離表示が反転します ( 下図左 ) 。 画面をロングタッチ ( 約3秒間タッチ ) すると、グリ ーンフロントおよび奥までの距離を音声でお知ら せします。また画面上のグリーンフロント、奥ま での距離表示が反転します ( 下図右 ) 。 2.2 ハザード情報 「メイン画面」上を上方向へスライド(画面上を 指でタッチしたまま指を上方に滑らす)すると、 そのホールのハザード情報が表示されます。...
- Page 59 2.3. 飛距離計測 どの画面からも、本機右側の 「 マークボタン 」 を押す か、もしくは 「 メイン画面 」 から左へスライド ( 画面 上を指でタッチしたまま指を右から左に滑らす ) す ると、飛距離計測画面 ( 下図左 ) になります。本機右 側の 「 マークボタン 」 を長押しするか、画面をロング タッチ ( 約3秒間タッチ ) すると飛距離計測を開始し ます。ボール落下地点まで移動して本機右側の 「 マ ークボタン 」 を押すか、画面をタップ ( 軽くタッチ ) す るとそのショットの飛距離を画面と音声でお知ら...
- Page 60 2. 基本操作 2.4. スコア入力 「 メイン画面 」 から左へ2度スライド ( 画面上を指で タッチしたま指を右から左に滑らす ) すると、 「 スコ ア入力画面 」( 下図左 ) になります。スコアを入力され るホールの 「 入力ボックス ( パー情報の右ボックス )」 にタッチすると、入力画面に移動します ( 下図右 ) 。 画面にはパー数が表示されていますので、 ア イコンにタッチしてスコアを選択し、画面左下の アイコンにタッチして、元の画面に戻り入力さ れたスコアを確認してください。...
- Page 61 2.5. 時刻モード 「 メイン画面 」 から右へスライド ( 画面上を指でタッ チしたまま指を左から右に滑らす ) すると、 「 時刻 モード画面 ( 下図左 )」 になります。画面にタッチす ると、音声で時刻をお知らせします。時刻を変更 するには画面をロングタッチ ( 約3秒間タッチ ) しま す。 「 タイムゾーン設定画面 ( 下図右 )」 に移動します ので、日本の時刻に設定する場合は、タイムゾー ンを 「 UTC+9:00 ( 下図右 )」 に設定してください。画 面左下の アイコンにタッチすると元の画面に戻...
- Page 62 2. 基本操作 2.6. GPSトラック 「 メイン画面 」 から右へ2度スライド ( 画面上を指で タッチしたまま指を左から右に滑らす ) すると、 「 GPSトラック画面 ( 下図左 )」 になります。 「 プレイ ボタン 」 にタッチすると、全移動距離・移動 時間の測定が開始されます。測定を中断する場合 は、 「 一時停止ボタン 」 にタッチします。また 測定を終了する場合は、 「 停止ボタン 」 にタッ チします。 測定をリセットする場合は、 「 停止 」 ボタンに 2度タッチします。...
- Page 63 その他機能...
- Page 64 3. その他機能 3.1. ダイナミック・グリーンビュー/ピンポ ジション設定 「 メイン画面 ( 次ページ図上段左 )」 および 「 グリーンビ ュー画面 ( 次ページ図下段 )」 上にはそのホールのグ リーンの形状が表示されます。弊社独自の 「 ダイナ ミック・グリーンビュー機能 」 により、グリーンの 周りを移動しますと、それに伴い画面上のグリー ンの向きも変わります。 「 グリーンビュー画面 ( 次ペ ージ図下段 )」 に切替えるには、 「 メイン画面(次ペ ージ図上段左 )」 上の 「 グリーン 」 をダブルタップ ( 軽 く2度タッチ...
- Page 65 ホールナンバー グリーンビュー グリーンセンターまでの残り 距離 ( ピンポジション変更後 は、ピンまでの距離 ) 3.2. クィックメニュー画面 本機右横の 「 電源ボタン 」 を押すと 「 クィックメニュ ー画面 ( 下図 )」 に切替わります。ご希望の画面のアイ コンにタッチした後、もう一度そのアイコンにタ ッチすると、ご希望の画面に移動します。画面左 下の 「 ツールアイコン ( 歯車 )」 にタッチすると、 「 メニ ュー画面 」 に移動します。...
- Page 66 3. その他機能 3.3. 画面ロック 3.2.の 「 クィックメニュー画面 」 右下の 「 ロックアイコ ン 」 にタッチすると、 「 画面ロック画面 ( 下図左 )」 が表 示され、画面がロックされます。ロックを解除す るには画面にタッチするか、本機右側の 「 電源ボタ ン 」 もしくは 「 マークボタン 」 を押すと、 「 ロック解除 ボタン ( 下図右 )」 が表示されますので、 「 ロック解除 アイコン...
- Page 67 コースデータの更新...
- Page 68 4. コースデータの更新 4.1. GBワールド・コース・マネージャーの インストール 4.1.1. 弊社ホームページ にア http://www.golfbuddy.jp クセスします。 4.1.2. トップページ左下の 「 コースマネージャーの ダウンロード 」 をクリッククリックします。...
- Page 69 4.1.3. ダウンロード画面に移動しますので、 「 」 Windows もしくは「 」を選択して下さい。 4.1.4. セキュリティ警告画面が表示される場合は、 「 実 行 」 をクリックします。...
- Page 70 4. コースデータの更新 4.1.5. ワールド・コース・マネージャーのダウンロ ードが開始されます。ダウンロードが完了しま すと自動的にログイン画面が開かれます。また お使いのコンピュータのデスクトップにショー トカットアイコンが作成されます。 4.1.6. ログインに必要な 「 メンバー登録 」 を行います。 画面右上の 「 メンバー登録 」 をクリックします。 4.1.7. 必要事項を入力し ( *は必須項目 ) 、画面下の 「 送信 ボタン 」 をクリックします。 ( 重要:ここで登録された 「 ユーザーID 」 および 「 パスワード 」 はGBワールド・コース・マネージャーにログインする際に 必要です。安全な場所に大切に保管してください。...
- Page 71 4.2. 接続 4.2.1. 付属の ケーブルを使い、ゴルフバディー G B VT3とコンピュータを接続し、 ワールド ・コース・マネ―ジャーを起動します。本機 の画面が同期モード ( コンピュータモニター アイコンが表示 ) になっていることを確認し てください。 4.2.2. 「 メンバー登録 」 で設定されたユーザーIDおよ びパスワードを入力し 「 ログイン 」 します。...
- Page 72 4. コースデータの更新 4.2.3 「 ステップ1 」 機器情報が認識されると画面下 部中央の 「 次へ 」 が反転するので、 「 次へ 」 をク リックすると、 「 ステップ2 」 へ進みます。...
- Page 73 4.3. ファームウェアの更新 4.3.1. 「 ステップ2 」 で画面下部中央の 「 次へ 」 をクリ ックすると、ファームウェアが更新されて いる場合は、本機のファームウェアを自動 で更新します。 4.3.2. ファームウェアの更新が終了すると、 「 ステ ップ3 」 へ進みます。...
- Page 74 4. コースデータの更新 4.4. コースデータの更新 4.4.1. 「 ステップ3 」 に進むと、国名リストの画面にな ります。国名の右横に 「 アップデートが可能で す 」 と表示されていると、更新データの取得が 可能です。更新希望の国名の左側ボックスを クリックし、 「 次へ 」 をクリックします。...
- Page 75 4.4.2. 更新コース選択のボックスが開くので、 「 新 コースのみ 」 を選択し、 「 はい 」 をクリックしま す。...
- Page 76 4. コースデータの更新 4.4.3. コースデータの更新が完了すると、画面左下 の 「 再試行 」 が反転します。 ケーブルを外 し、 ワールド・コース・マネージャーを クローズします。...
- Page 77 CONTENTS 1. 시작하기 2. 기본사용 3. 고급사용 4. 다운로드...
- Page 78 골프버디를 이용하시는 고객님께 진심으로 감사드립 니다. (주)데카시스템의 골프버디는 휴대용 GPS골프 거리 측정기로서 고객님의 플레이에 필요한 정확한 거리 정보를 음성 및 화면으로 제공하여 보다 즐거운 골프 게임을 만들어 드립니다.
- Page 79 골프버디 버튼 설명 골프버디 버튼 설명 마크 버튼 전원/퀵메뉴 버튼 USB 연결커넥터...
- Page 80 메인 화면 설명 홀번호 파정보 Meter (표시가 없을 경우 Yard ) 배터리 잔량 표시 다이나믹 그린뷰 Back 까지 남은 거리 Center 까지 남은 거리 Front 까지 남은 거리...
- Page 81 시작하기...
- Page 82 1. 시작하기 1.1. 전원 켜기/끄기 전원 켜기 : 골프버디 우측의 전원버튼을 길게 누르 면 전원을 켤 수 있습니다. 골프장에서 전원을 켜면 자동으로 안내가 나오니 이후의 버튼 조작이 필요 없 습니다. 전원 끄기 : 골프버디 우측의 전원버튼을 길게 누르 면 전원끄기 화면이 나타납니다. 이 화면에서 전원버 튼을...
- Page 83 1.2. 언어선택 설정화면에서 Mark 버튼을 길게 누르면 언어설정 화 면이 나타납니다. 원하는 언어를 선택해서 한번 더 터치하면 언어 설정이 완료됩니다. 1.3. 환경 설정 화면을 위에서 아래로 슬라이드하거나 퀵메뉴 화면 에서 을 터치하면 환경 설정 화면이 나타나며 홀 변경, Yard/Meter변경, 음량조절/음소거, 핀위치를 설정할...
- Page 84 1. 시작하기 1.3.1. 음량 조절 화면을 위에서 아래로 슬라이드하여 환경 설정 화면 을 실행시킨 후 원하는 음량을 터치하여 설정합니다. 화면 좌측 아래 아이콘을 터치하면 설정이 저장 되고 메인 화면으로 돌아갑니다. ※ 음소거 기능 : 스피커 아이콘을 선택하면 소리를 제거할 수 있 습니다.
- Page 85 1.3.3. 홀 변경 화면을 위에서 아래로 슬라이드하여 환경 설정 화면 을 실행시킨후 아이콘을 터치합니다. 홀변경 화 면에서 아이콘을 터치하여 원하는 홀로 변경합 니다. 화면 좌측 아래 아이콘을 터치하면 설정이 저장 되고 메인화면으로 돌아갑니다. 1.3.4. 이전 인식된 홀로 되돌리기 이동 중 홀이 잘못변경된 경우 를...
- Page 86 기본사용...
- Page 87 2. 기본사용 2.1. 그린까지의 거리정보 안내 메인 화면에서 그린까지의 거리정보를 확인할 수 있습 니다. 화면을 한번 터치하면 Center 까지의 거리를 음성으 로 확인 할 수 있으며 화면을 길게 터치하면 Front 와 Back 까지의 거리도 음성으로 확인 할 수 있습니다. 2.2. 타겟 정보 보기 메인화면에서...
- Page 88 2.3. 비거리 측정 어느 화면에서든 Mark 버튼을 누르거나 메인 화면에 서 화면을 왼쪽으로 한번 밀어 비거리 화면을 실행합 니다. Mark 버튼을 길게 누르면 비거리 측정이 시작되며 원하는지점으로 이동해서 Mark 버튼을 누르면 비거 리를 확인할 수 있습니다. 2.4. 스코어 기록 메인 화면에서 화면을 왼쪽으로 두번 밀어 스코어입 력...
- Page 89 2. 기본사용 2.5. 현재시간 메인 화면에서 화면을 오른쪽으로 한번 밀어서 현재 시간 화면을 실행합니다. 화면을 터치하면 음성으로 시간을 확인합니다. 현재시간은 위성과 연결되면 자동으로 설정되며, 화면 을 길게 터치해서 변경 화면이 나타나면 수동으로 빠르 게 원하는시간대로 설정이 가능하며 아이콘을 터치 하면 변경이 완료되어 현재시간 화면으로 돌아갑니다. 2.6.
- Page 90 고급사용...
- Page 91 3. 고급사용 3.1. 다이나믹 그린 뷰 / 핀설정 메인 화면에서 그린을 두번 터치하거나 환경 설정 화 면에서 아이콘을 선택하면 그린뷰 화면이 나타납 니다. 이 그린뷰화면과 메인화면에서 그린 shape이 사용자가 있는 위치에 따라 실시간으로 변경되는 것 을 확인할 수 있습니다. 또한 그린뷰 화면에서는 PIN을 터치하여 원하는 위 치로...
- Page 92 3.2. 퀵 메뉴 전원버튼을 눌러 퀵메뉴 화면을 실행할 수 있습니다. 원하는 아이콘을 터치하여 화면 중앙에 위치하면 다 시 아이콘을 터치하여 조금 더 빠르게 원하는 화면으 로 전환할 수 있습니다. 설정 아이콘을 터치하면 설정 화면이 실행되며, 잠금 아이콘을터치하면 화면의 잠금/해제를 설정할 수 있 습니다.
- Page 93 3. 고급사용 3.4. Reset 제품을 사용하시다가 갑자기 작동이 멈추거나 안 될 경우 아래 그림과 같이 두 곳을 10초동안 터치하면 다시 재부팅됩니다.
- Page 94 Course Updates...
- Page 95 Course Updates 당사 홈페이지 www.golfbuddy.co.kr로 접속하 신 후 골프버디 매니저 "다운로드"를 클릭하고 프 로그램을 설치합니다. 당사에서 제공하는 데이터 케이블을 이용해서 제품과 컴퓨터를 연결합니다. 설치된 "골프버디 코스 매니저" 프로그램을 열어 서 로그인 창에 사용자의 아이디와 비밀번호를 입력하면 당사의 코스 DB에 접속됩니다.
- Page 96 4.1. 단말기 연결 제품과 컴퓨터를 USB케이블을 사용하여 연결합니다. 제품과 컴퓨터가 연결되면 "다음" 버튼을 클릭하여 다 음단계로 넘어갑니다. 4.2. 펌웨어 업그레이드 제품과 컴퓨터가 연결되면 펌웨어 업그레이드 안내 문구가 나타납니다. 최신 펌웨어일 경우에는 "다음" 버튼을 클릭하고 구버전 펌웨어라면 자동으로 업그 레이드가 실행됩니다. 완료되면 "다음" 버튼을 클릭합 니다.
- Page 97 Course Updates 4.3. 코스 다운로드 국가별 목록이 나타나면 "설치 상태"를 확인하셔서 "업데 이트 필요"인 국가를 선택하시고 "다음"을 클릭합니다. "신규 업데이트 코스"를 선택하면 코스 업데이트가 실행 됩니다. 코스 다운로드가 완료되면 케이블을 제거하고 제품 을 재부팅합니다. ※ 데모보기 메인화면에서 Mark 버튼과 전원 버튼을 동시에 눌러주 면...
Need help?
Do you have a question about the VT3 and is the answer not in the manual?
Questions and answers