Table of Contents

Related Manuals for ZuumMedia D4960HS-H-BK


Summary of Contents for ZuumMedia D4960HS-H-BK
-
Page 1: User Manual
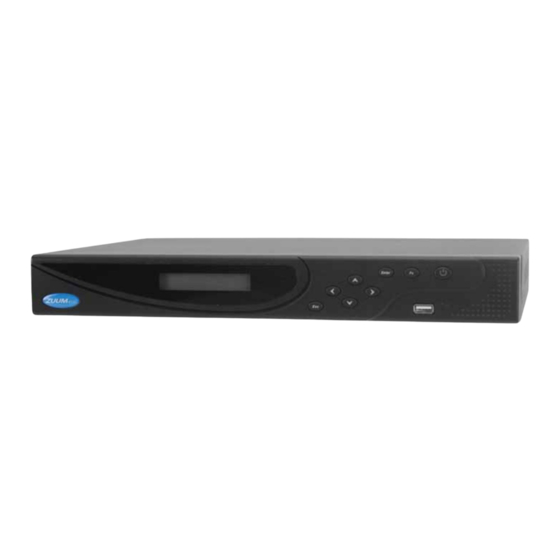
Model: D4960HS-H-BK Model: D8960H-H-BK Model: D16960HS-H-BK 4/8/16 Channel 960H High Performance Standalone DVR with HDMI 1080p Output User Manual 8805 Jones. Rd Ste C104, Houston Texas 77065 * 1-888-861-7351 * www.zuummedia.com... -
Page 2: Table Of Contents
Directory Precautions .............................. 5 Declaration .............................. 5 Product Introduction ..........................5 3.1 Product Overview ..........................5 3.2 Feature .............................. 5 3.3 Installation ............................6 3.3.1 Unpacking Inspection ......................6 3.3.2 Installation Preparation ......................6 3.3.3 Wiring Installation ......................... 6 3.4 Front panel ............................7 3.4.1 6000/6100-AS Series ...................... - Page 3 4.1.3 Color setting ........................26 4.1.4 The Video Inquiry ......................27 4.1.5 Alarm output ......................... 27 4.1.6 The Alarm Output ......................27 4.1.7 The Main Menu ......................28 The Introduction of the Main Menu ..................28 The Video Inquiry ........................29 Configuration ..........................
- Page 4 6.1.1 Summary ..........................56 6.1.2 FNT DDNS .......................... 56 6.1.3 CN99(www.3322.org) ....................56 6.1.4 NO-IP(www.no-ip.com) ....................57 6.1.5 Dyndns DDNS(www.dyndns.com)................. 57 6.1.6 Test and verify DDNS ......................58 6.2 Port Mapping ..........................58 6.2.1 UPNP Function ........................59 6.2.2 Manual port mapping ......................59 6.3 NTP function ...........................
-
Page 5: Precautions
Precautions The following is about the usage of DVR, the prevention of danger as well as preventing property from loss. Please be sure to comply. 1、Please placed DVRs within the permissible range of temperature and humidity. 2、Don’t install the DVRs in a damp, dust or soot place. 3、Place the product horizontally and pay attention to preventing it from falling. -
Page 6: Installation
and network backup. Video playback function Achieve searching videos by a variety of conditions, playback in local and network. Support multiple videos playback, fast playing, slow playing and frame-by-frame playback. Video playback can display the exact time of the incident. Provide timeline retrieving page for quick searching. Camera control and alarm Be controlled by the remote camera and equip many alarm input interfaces. -
Page 7: Front Panel
Installation Steps Make the DVR in a horizontal position and connect the camera to the video input interface in the rear panel. Connect the displayer to the video output. Connect the network to the RJ45 interface. Connect the Mouse to the USB interface and the USB interfaces in the front or rear panel both work. Connect the power. -
Page 8: 6000/6100-Bs Series
3.4.2 6000/6100-BS Series 6000/6100-BS series Front Panel Function 6000/6100-BS series Front panel Description Index Name Function Sign Logo Indicator Power indicator, Network indicator, Recorder indicator Receive the remote control signal. Function Function keys, numeric keys and the exiting key. keys Up/Down: Move up or down.Change the settings and increase or Direction decrease the digital. - Page 9 7000/7100 series Front panel Description Index Name Function 1、IP address of, clock, the external alarm channel, error status code of the machine, remote address, internal temperature of the chassis is displayed. 2、Network Connection status. 3、HDD status and numbers. “E” and flash label refer HDD error. 4、Cycling display the recording status and motion detection (distinguish by “REC”...
- Page 10 8000-AU series Front panel Description Sequence Title Icon Function Turn on by short press. ON/OFF Power Turn off by 3 seconds press. Display output switching. Text box is selected, a continuous press can switch numbers, upper case, lower case input. ↑...
-
Page 11: 8000-Ah Series
TAB switch. Child pages switching under PTZ control. Special cooperation. Long press to switch VGA&HDMI show resolution ratio. Play. Come to normal when rewind. ▶ Play/Pause Resume playback when pause. Enter into inquiry menu when real-time monitoring. PTZ control: Zoom +. PTZ control: Aperture, CW +, CCW -. -
Page 12: 9000 Series
3.4.6 9000 Series ■ CH1 CH2 CH3 CH4 CH5 CH6 CH7 CH8 CH9 CH10 CH11 CH12 CH13 CH14 CH15 CH16 PWR HDD LAN DATA ALARM ▶ ● Digital Video Recorder 2 4 10 7 6 12 13 9000 series Front Panel 9000 series Front Panel Description Sequence Title... -
Page 13: The Rear Panel
Close the control window or back to the previous Cancel/Exit menu. Operation confirmation. Jump to 【Confirm】for selection. Enter ENTER Enter into the Main Menu. Manually start/Stop recording. ● Record Enter into the Preset Positions when PTZ control. Single screen view: PTZ control and image color. Setup motion detection area: “Fn”... -
Page 14: 6000-Bs Series
6008-AS Rear Panel Interface 6016-AS Rear Panel Interface 6000-AS Rare Panel function Index Name Description Video input Composite video signal(CVBS)input interface. Audio input Audio input interface. Video/Audio Composite video/audio signal(CVBS)output interface. output RJ-45. VGA output interface. Power input DC 12V. Ports RS-485. -
Page 15: 6100 Series
VGA output interface. NET,USB RJ-45. USB Ports RS-485. Power input DC 12V. switch power switch 3.5.3 6100 Series 6104 series Rear Panel Interface 6108 series Rear Panel Interface 6116 series Rear Panel Interface 6100 Rare Panel function Index Name Description video The input interface of CVBS input... -
Page 16: 7000 Series
audio The output interface of the audio signal and CVBS output The network The network interface of RJ-45 and two USB ports interface The output interface of the VGA video signal interface The power 12V DC power the terminals The interface of the alarm input, he alarm output and RS-485 HDMI The output interface of the HDMI video signal interface... -
Page 17: 7100 Series
7016 Rear Panel Interface 7016-H plus Rear Panel Interface 7000 Rare Panel function Index Name Description Video input Composite video signal(CVBS)input interface. Audio input Audio input interface. Video/Audio Composite video/audio signal(CVBS)output interface. output Network RJ-45 interface VGA output interface. Power input DC 12V. - Page 18 7108E Rear Panel Interface 7100E Rear Panel Interface 7100 series Rare Panel function Index Name Description Video input The input interface of CVBS Audio input The input interface of the audio signal Video/Audi The output interface of the audio signal and CVBS output The network interface...
-
Page 19: 8000-Au Series
3.5.6 8000-AU Series 8000-AU series Rear Panel Interface 8000-AU Rare Panel PORT function Index Name Description Video input Composite video signal(CVBS)input interface. Audio input Audio input interface. Video/Audio Composite video/audio signal(CVBS)output interface. output RJ-45. The VGA output interface Power input 220V AC power, the switch control of the host Ports The Alarm input/output, the RS-485 interface... -
Page 20: 9000 Series
output USB/NET USB, RJ45 Video Composite video signal(CVBS)input interface, Loop out input/Loop out Ports Alarm input/output, RS-485 interface. Power input AC 220V 3.5.8 9000 Series 9000 series Rear Panel Interface 9000 WITH LOOP AND HDMI series Rear Panel Interface 9000 Rare Panel function Index Name Description... -
Page 21: Other External Interface
3.6 Other External Interface 10 12 14 16 9 11 13 15 DOWN 7016 I/O Interface 3.6.1 The Alarm Input The alarm input type can be normally open type or normally closed type. The alarm detector’s com port is in parallel with the ground port and connected with the ground port of the DVR. -
Page 22: The Mouse
3.7 The Mouse In addition to front panel keys and remote control menu, the user can use a to control. Insert the mouse interface into the USB interface. Left Click Left click to enter the right menu or the main interface. Left click to access the menu option. -
Page 23: Power On/Off
The input interface of Chinese 3.9 Power On/Off 3.9.1 Power On Install a DVR correctly and connect power. when the light is on, the DVR will boot automatically. Different types have different booting status. Refer to the front panel Introductions. DVRs will detect the hardware when power on and the process will last about 20 Seconds. -
Page 24: Power Off
3.9.2 Power Off 【Main Menu】→【shutdown】. Note: Change HDD after close the device. 3.9.3 Power recovery Reboot after an outage or forceful shutdown, DVR will save the record before outage and return to the normal operation mode. 3.10 Icon 3.10.1 The Screen Icons :The channel is recording. -
Page 25: Operation Icons
3.10.2 Operation Icons : Not selected. : Be selected. : The drop - down button :Leave the interface. :Cancel the settings. :Set parameters. :Save parameters :Restore the factory settings. :Apply current settings to the system. :Copy current settings to other channels. :Enter the configuration interface. -
Page 26: Operations Guide
Operations Guide The Right-click Menu Enter the real-time browsing interface. Click the right button and pop up a menu as shown in the figure. The Right button menu 4.1.1 The Screen Switching Users can choose single, four, nine and sixteen channel. 4.1.2 PTZ control Set the PTZ protocol, the baud rate, address bits and other parameters in PTZ Configuration of Peripheral... -
Page 27: The Video Inquiry
【Period】Two periods can be set according to ambient light during the day and night, device will automatically switch configuration time. Need to select the Enable box. 【Hue】Adjust according to image color cast 【Brightness】Visual image brightness, according to the environment, reduces or increases the brightness of the image brightness to make the image relatively clear. -
Page 28: The Main Menu
4.1.7 The Main Menu Left click in the real-time monitoring screen. Input a user name and a password. Default users User Type Name Default Password Administrator admin 123456 User user 123456 Hidden default default Note: security measures of the password: If input a wrong password for three times, the device will sound. -
Page 29: The Video Inquiry
The Video Inquiry In real-time monitoring screen, right click and select【search】to enter the searching interface. Record Search interface description Index Type Description There are video and pictures type to choose .The pictures’ feature Record (local inquiries picture) is not yet open, so it is grayed. Choose the time Select the records’... - Page 30 Choose searched recording mode, including whole, outside alarm, Recoding mode motive detection, whole alarm recording. The timeline of Show the status information of channels’ video recording within the videos one day by green, red, yellow. Achieve the playback of each channel’s record is of Synchronization synchronization in time and of consistency in operations.
-
Page 31: Configuration
Note: The player playback control bar shows file playback speed, channel, time, playback progress and other information. Playback speed and rewind function are related to DVR version, and please prompt on the player panel shall prevail. Configuration User can get into configuration through main menu. 4.4.1 System Get into the system configuration. -
Page 32: Record
【Time Format】24 hr or 12 hr mode 【Language】 Select a language. 【Full HDD】When HDD is full, there are two options: “Overwrite” or “Stop recording”. If you select “Overwrite”, the DVR will overwrite the earliest files and continue recording. If you select “Stop recording”, the DVR will stop recording. - Page 33 【Channel Name Display】Choose showing the channel name in screen or not. 【Date Display】Show the date or not 【Channel Display】Drag channel title, save instantly, after quitting by right button,position of channel title would not vary in displayer or monitor ,varied position can be shown recorder and WEB interface.
-
Page 34: Network
Click the set button to enter the following interface. 【Time 】Recording time.6 periods can be set every day. 【Normal】Normal record. 【Moving Detection】Moving detection. 【Alarm】Alarm record. 4.4.3 Network Set the DVR network parameters in “Network” interface. The default IP address is 192.168.1.88 Base setting 【DHCP】Enable the DVR to obtain an IP address automatically. - Page 35 for this IP. 【First DNS Server】DNS server IP. 【Alternate DNS Server】DNS alternate IP 【Physical Address】physical address of current net port Advanced 【PPPOE】Enable PPPOE. Input PPPOE’s username and password provided by ISP. Operation: Using this feature, the DVR will automatically obtain a public IP address from your ISP.
-
Page 36: Alarm
receiver’s mailbox. 【FTP】Choose to upload records or images. Set FTP server’s IP address and port(Default:21) . Create a account in FileZilla Server in the computer. Fill in the username, password and remote directory which have been created. Set file length, channel, time for recording, type and date and so on. Tick alarm, motion and general records or images to upload. - Page 37 【Copy】Copy the configuration to another channels. 【Process Mode】Click to enter the following interface. 【Period】 Set alarm active period...
- Page 38 【Linkage】 On/Off 【Record Channel】, 【PTZ】, 【Tour】, 【Snapshot】 linkage and select channel. Enable or disable 【Alarm Out】 , 【Show Message】 , 【Send Email】 , 【 Buzzing】 and 【Pushed to phone】 The delay time is between 10 to 300 seconds. Notice: Some models don’t have local alarm. Video detection 【Motion detection】motion detection and alarm 【Zone setting】22*18 =396 zones mask...
-
Page 39: Account
4.4.5 Account Note: Group and user names can be from 1-6 characters in length. Valid characters include letter, numbers, and limited symbols: underline, subtraction sign, dot, you may not use a space as a leading or ending character. There is no limit to the number of groups or users. By default there are two different group levels: admin and user. -
Page 40: Abnormity
4.4.6 Abnormity Enable 【No Disk】, 【Disk No Space】, 【Network Failure】, 【IP Conflict】and 【Disk Error】. 【No Disk】alarm when HDD is not present or it can’t be detected. 【Process】 You can choose 【Alarm Output】 , 【Display On Screen】 and 【Send Email】 and 【pushed to phone】to show abnormal events occurring. -
Page 41: Backup
Base Configuration “Base Configuration” as HDD management –base configuration, shows DVR storage capacity, available space and working status. 【Format】it is possible to format an individual HDD. Note: Hard disk format operation result in the loss of video data 【Set】to set HDD as read-write, read only or redundancy mode. In read only mode, video data cannot be covered. - Page 42 【Detect】Identify external USB device and display the device information. 【Backup】Tick the external device and click【Backup】to enter the backup menu . Select the records’ starting and stopping times and click【Add】to add in the list. Click【Delete】to clear the file list. Tick the record you want and click【Start】to backup and display time remaining. 【Delete】delete all data in USB backup device Note: USB backup carry player automatically This operation probably causes loss of permanent data.
-
Page 43: Output
Output The following Peripheral Management shows the peripheral management interface. 4.6.1 PTZ Configuration Set PTZ channel, protocol, address, baud rate, etc. Confirm the connection of PTZ A,B lines in the DVR and PTZ. 【Channel】Select the channel. 【Protocol】Select associated dome protocol (e.g. PELCOD) 【Address】Select associated dome address, default: 1(Note: this address has to correspond with dome address, or the dome wills not control.)... -
Page 44: Alarm Output
4.6.2 Alarm Output This menu manages alarm output parameters and displays the current state of Alarms. 【Channels】The number of channels that are in alarm status. 【Schedule】Alarm output is in control of alarm configuration. 【Manual】Alarm output is on and the status is active. 【Stop】Alarm output is off and the status is inactive. -
Page 45: Display
Bypassed port: connect with PC to bypass parameters; Net keyboard: keyboard connected by net port; PTZ matrix: control PTZ matrix Note: Certain models don’t have RS-232 port. 【Baud Rate】Set baud rate. 【Data Bit】Default: 8. 【Stop Bit】Default: 1. 4.6.4 Display Display mode can set the unit's display and polling 【Transparency】4 grades. -
Page 46: Maintain
【VGA Output】Select VGA resolution and refresh rate. Default is 1024×768@60Hz. 【TV Adjust】Adjust TV output area. Modify the image to the right size for monitor. 【VGATV Color Set】Adjust displayer’s hue, brightness, contrast, saturation 【TV Color Set】Adjust monitor or TV’s brightness, contrast, saturation Tour configuration Enable touring and interval between rotations. -
Page 47: Log
4.7.1 Select the type and time press the Find, the system will display the log in tabular form, you can also click the backup button to export the log backup to your computer. 【Type】 System operation, configuration, data management, alarm event, recording, user management, log delete and document operation can be selected. -
Page 48: Bps
Note:Menu transparency, language, time format, video format, IP, user ID, etc are not restored. 4.7.4 【BPS】Show video’s size, data rate of each channel by wave form. Note:Estimated value just for reference 4.7.5 Auto Maintain 【Auto Maintain】Set auto maintenance items. 4.7.6 Online User 【On-line Users】Display the current online user’s IP. -
Page 49: Shutdown
4.7.7 Shutdown 【Menu Logout】Log out of the current user. 【Shutdown】Shutdown the DVR 【Restart System】Reboot the DVR 5 Web and Client 5.1 Web Operation 5.1.1 Network Connection H&M Series Check network connection by LCD on front panel, “ ” refers connection error. P Series Check B-Lamp on front panel, light indicates connection. - Page 50 Login screen Install ActiveX: Right click and choose install. If installation is blocked by Windows, please add the IP as a trusted site or lower your Internet Explorer security settings to allow this. Install Control The following interface will popup when you input your username, password and click “Login”. Interface like Diagram 5-3 Web Interface when user login successfully.
-
Page 51: The Interface Of Web Operations
5.1.3 The Interface Of Web Operations WEB Interface Description Index Name Description Channel Channel selection Local playback: playback local record Function key Open all: play live views in surveillance window Surveillance window Change window layout Image color: modify brightness, contrast and Image color &... -
Page 52: Ptz Control
Click on 2 area in upper right corner can choose open / close the channel of the main stream or secondary stream, shows the current DVR's IP and rate information. Stream information Lower left corner shows the current video channel name. Upper right corner shows the current video time information. -
Page 53: Configuration
Control PTZ direction, step size, zoom, IRIS, preset, tour, pattern, border scan, light, wiper, auto pan, etc. Step size controls PTZ direction and speed, e.g. step size 8 is moved faster than step size 1. Eight direction rotations: up, down, right, left, up-left, up-right, lower left, lower right. PTZ control Border scan Operation: select the camera line scan of the left/right margin by direction button, and click the Settings... -
Page 54: Search Record
Configuration 5.1.7 Search Record Click “Search record” to open the search interface (Diagram 0-10 ), can search and operate record, alarm, motion, local record Search record By selecting the record type, start and end times, and click the check button, get a list of files on the DVR. Select the appropriate file and download can be played Play Double click a search result to play in video window. -
Page 55: Alarm Configuration
5.1.8 Alarm Configuration Click the 【Alarm】 to enter the alarm setup menu, users can set up and operate the alarm mode. Alarm configuration Choose type of alarm on menu, monitor video loss, motion detection, disk full, disk error, video mask, external alarm. -
Page 56: Functions
6 Functions 6.1 DDNS Function 6.1.1 Summary Dynamic DNS is a kind of system which point internet domain name to variable IP. According to the rule of internet domain name, domain name must associate with the fixed IP address. Dynamic DNS provide a fixed Name server for the dynamic domain, and then guide the domain search to the IP address of dynamic user through Name server, which can make the outside user connect to the dynamic user’s URL. -
Page 57: No-Ip(Www.no-Ip.com
Embedded DVR Setting Open 【Main Menu】→【Configuration】→【Network】→【Advanced】→【DDNS】→Enable Name Configuration DDNS CN99 DDNS Members.3322.org Port Domain name xxx.3322.org Username Password xxxxxx After setting up the information as above, you can access the Embedded DVR via XXX.3322.org 6.1.4 NO-IP(www.no-ip.com) Register Register new username at no-ip, click 【Create Account】. Create domain name, click 【Add a Host】. -
Page 58: Test And Verify Ddns
6.1.6 Test and verify DDNS After setting the Embedded DVR, wait for a few minutes, analysis records will update. Click Operation in the Menu of computer, input “cmd”, click “OK” to open a window. As the Diagram 0-1 Run Command Line Program shows. -
Page 59: Upnp Function
corresponding machine inside LAN. With this function, we can map many ports of a machine’s IP address to different machines’ different ports inside web. The port mapping can also have other special agent functions, like POP, SMTP, Telnet and so on. Theoretically, it can provide more than sixty thousand ports. For example, if we want to map a web server which has an IP address of 192.168.111.10, we just need to input the IP address and TCP port 80 into the port mapping chart of the router. -
Page 60: Ntp Function
The third step Input the public net IP address in the IE, and add the port number of the Embedded DVR you want to access after the IP, for example: http://155.157.12.227:81. If you want to access by Client Software, you can use the outer net TCP port directly. -
Page 61: Ptz Control
6.4.1 PTZ Control From PTZ control menu, set direction step length, zoom, focus, iris, advanced features, auxiliary features, camera settings. PTZ control Step size :Controls PTZ direction and speed, e.g. step size 8 is moved faster than step size 1. (Range 1-8, 8 is max value) Click and of zoom, focus and IRIS to modify zoom, focus and brightness. -
Page 62: Voice Intercom
Pattern You can begin the desired path or end a path by inputting the figure in the box. 6.5 Voice Intercom 6.5.1 Summarize Embedded DVR Bidirectional Talk: user can talk to remote client software or Web via DVR audio input and output ports;... -
Page 63: Hdd S.m.a.r.t
Redundancy HDD must be an independent HDD, user can set several HDDs as a redundancy HDD group. Once a HDD is assigned as redundancy HDD, the recording data can be saved in both normal HDD and redundancy HDD. Data on redundancy HDD should be automatically cycle coverage, cycle period depends on the recording data and redundant HDD’s capacity. - Page 64 9 Power-on Hours Count 10 Spin up Retry Count 194 Power temperatures 195 ECC on the Fly count 197 Current Pending Sector Count 198 Disconnection beyond repair 199 CRC cyclic redundancy check 200 Write Error Count Note: Different manufacturers and different models have different attribute description , the user has no need to know exact meaning ,attribute detection values enough for them.
-
Page 65: Appendix
7 Appendix 7.1 Terms Dual-stream Dual-stream: one high bit rate stream for the local HD store, QCIF/CIF/2CIF/DCIF/4CIF coding, other low bit rate stream for network transmission, such as QCIF / CIF coding, I Frame I frame: intra frame image, remove redundant information to compress the transmittal data, also called key frames. -
Page 66: Hard Disk Problem
(MB/hour) Similarly we can have the formula of recording time: ( ) TotalHDDCa pacity ( ) ecording time hour × ( ) CapacityOc cupationpe rHour AmountofCh annel Note: 1GB=1000MB, not 1GiB=1024MiB, so HDD capacity shown in Base Configuration under HDD Management less than real marked. File size per hour (CBR). -
Page 67: Common Faults
How to detect WDC HDD Get into www.wdc.com , choose WD support / download / SATA&SAS / WD Caviar / GP. WD Download Click Icon to hard disk detection after downloading. Double click hard desk in device list. WD Detection 7.3 Common Faults DVR startup failure or continuously reboot Possible reasons:... - Page 68 PTZ decoder, protocol, baud rate, address are incorrect; Parallel connect a 120Ω resistance to resolve signal reflex caused by too many PTZs on the line. The RS-485 port in DVR is defective. Blurred screen in preview mode Possible reasons: Please make sure your cameras match your video format selected in the General menu. E.g.
Need help?
Do you have a question about the D4960HS-H-BK and is the answer not in the manual?
Questions and answers