Table of Contents
Advertisement
Available languages
Available languages
CELLIER ENCASTRABLE OU LIBRE S'AGENÇANT
BUILT-IN WINE CELLAR / FREE STANDING WINE CELLAR
BEFORE USE, PLEASE READ AND FOLLOW ALL SAFETY RULES AND OPERATING INSTRUCTIONS.
AVANT D'UTILISER L'APPAREIL, VEUILLEZ LIRE ATTENTIVEMENT LES RÈGLES DE SÉCURITÉ ET
LES INSTRUCTIONS.
Cavavin a une politique d'amélioration continue de ses produits et se réserve le droit de changer les matériaux et
les spécifications sans préavis.
Cavavin has a policy of continuous improvement on its products and reserves the right to change materials and
specifications without notice.
URBANIA
CAVA46-1NDZ / CAVA46-1SDZ
AVEC TOUT TYPE DE DÉCOR
VINERA PARA EMPOTRAR
MODE D'EMPLOI
INSTRUCTION MANUAL
MANUAL DE INSTRUCCIONES
(L'image peut varier / Picture may vary)
CAVAVIN (2000) INC.
CAVAVIN (2000) INC.
CAVAVIN (2000) INC.
CAVAVIN (2000) INC.
4575 Sir Wilfrid Laurier Boulevard
Saint-Hubert, Quebec, Canada J3Y 3X3
E-Mail: info@cavavin.com
1
Advertisement
Chapters
Table of Contents

Related Manuals for Cavavin URBANIA CAVA46-1NDZ


Summary of Contents for Cavavin URBANIA CAVA46-1NDZ
- Page 1 Saint-Hubert, Quebec, Canada J3Y 3X3 E-Mail: info@cavavin.com Cavavin a une politique d’amélioration continue de ses produits et se réserve le droit de changer les matériaux et les spécifications sans préavis. Cavavin has a policy of continuous improvement on its products and reserves the right to change materials and...
-
Page 2: Table Of Contents
Interrupteur marche-arrêt Réglage de la température Capacité d'entreposage Éclairage intérieur Verrouillage de la porte Tablettes Entretien de l'appareil Nettoyage de l'appareil Panne de courant Déplacement de l'appareil Conseils éconergétiques Guide de dépannage Service de réparation Schéma de câblage Garantie Cavavin... -
Page 3: Sécurité Relative À L'appareil
SÉCURITÉ RELATIVE À L’APPAREIL Votre sécurité et celle des autres nous importe au plus au point Ce manuel ainsi que votre appareil contient des signaux de sécurité dont vous devez tenir compte et que vous devez respecter en tout temps. Voici le symbole de sécurité. -
Page 4: Conseils De Sécurité Importants
CONSEILS DE SÉCURITÉ IMPORTANTS Avant toute utilisation, le cellier doit être convenablement positionnée et installée comme il est décrit dans ce manuel, qu’il est donc nécessaire de lire attentivement. Pour réduire les risques d’incendie, d’électrocution ou de blessure lors de l’utilisation de l’appareil, nous vous recommandons de suivre les mesures de sécurité... -
Page 5: Aidez-Nous À Vous Aider
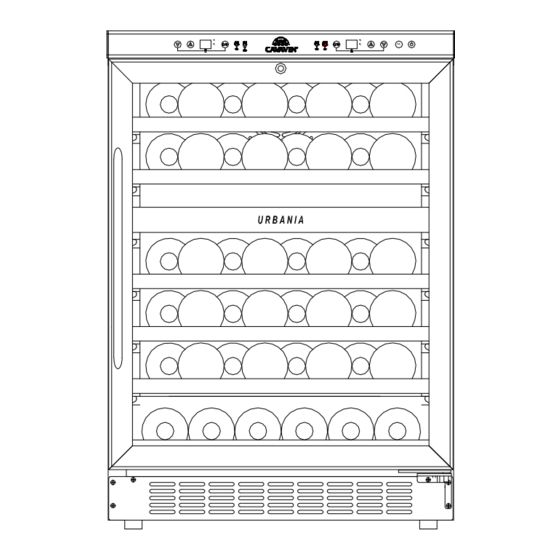
à : pour une aide supplémentaire. Service à la clientèle TOUT D’ABORD, contactez le service de Cavavin (2000) Inc. réparation avec qui vous avez fait affaire. 4575 boul. Sir Wilfrid Laurier Expliquez leur votre désagrément Dans la Saint-Hubert, Quebec J3Y 3X3 plupart des cas, cela résoudra le problème. - Page 6 PARTS & FEATURES 1. Panneau de commande inoxydable 2. Verrou de sécurité 3. Porte en acier inoxydable 4. Poignée en acier inoxydable 5. Tablettes amovibles (5 en tout) 6. Séparation de zones 7. Petite tablette inférieure 8. Grille inférieure 9. Pieds réglables (4) 10.
-
Page 7: Consignes De Sécurité Importantes
Branchez l’appareil seul dans une prise murale mise à la terre. Ne coupez ni n’enlevez sous aucun prétexte la troisième broche du cordon d’alimentation. Adressez toute question concernant l’électricité ou la mise à la terre à un électricien certifié ou à un centre de service Cavavin agréé. -
Page 8: Encastrement
ENCASTREMENT Cet appareil est prévu pour une installation autoportante ou encastrée. Si vous pensez l’utiliser encastré, veuillez suivre les conditions présentées ci-contre. Dimensions de l’encastrement Pouces Centimètre Largeur minimale ⅝ 60 cm ” Profondeur minimale ¼ 59 cm ” Hauteur minimale 34”... -
Page 9: Branchement Au Réseau Électrique
Une mauvaise utilisation de la prise de terre peut présenter des risques d’électrocution. Si le cordon d’alimentation est endommagé, faîtes-le remplacer par un centre de service Cavavin agréé. Pour votre sécurité, ce cellier doit être convenablement mise à la terre. Afin de minimiser le risque d’électrocution, le cordon d’alimentation de cet appareil est équipé... -
Page 10: Interrupteur Marche-Arrêt
INTERRUPTEUR MARCHE-ARRÊT Pour allumer ou éteindre la cave à vin, appuyer sur le bouton . L’affichage à DEL indiquera la température réglée précédemment (la température réglée en usine pour L’ÉTAGE INFÉRIEUR est de 12 ° C ou 54 ° F et de 5 ° C ou 40 ° F pour L’ÉTAGE SUP ÉRIEUR). RÉGLAGE DE LA TEMPÉRATURE Il est possible de régler la température indiquant de degrés Fahrenheit de façon quelle indique des degrés Celsius en appuyant sure le bouton ºC ou vice versa en appuyant sur le bouton ºF. -
Page 11: Capacité D'entreposage
CAPACITÉ D’ENTREPOSAGE Les bouteilles peuvent varier en taille et en dimension. Ainsi, le nombre réel de bouteilles qu’il vous sera possible d’entreposer variera également. REMARQUE : Ce cellier peut contenir 24 bouteilles de taille standard à l’étage supérieur et 22 à l’étage inférieur. -
Page 12: Entretien De L'appareil
Pour sortir une tablette de son rail, tirez-en environ le tiers vers l’extérieur. Prenez un long tournevis plat pour appuyer sur l’encoche en plastique de gauche, tel qu’indiqué à la Figure AA, et soulevez simultanément l’encoche en plastique de droite tel qu’indiqué à la Figure BB. Tirez ensuite doucement la tablette. -
Page 13: Guide De Dépannage
DES ENNUIS AVEC VOTRE CELLIER ? Vous pouvez facilement résoudre plusieurs des problèmes courants de votre appareil et vous épargner ainsi des frais de service. Essayez les suggestions ci-dessous qui s’appliquent à votre situation avant de faire appel à un professionnel. GUIDE DE DÉPANNAGE PROBLÈME CAUSE POSSIBLE... -
Page 14: Service De Réparation
Nous sommes fiers de l’organisation de notre service client et du réseau de techniciens professionnels qui fournissent ces services sur vos celliers Cavavin. En achetant un cellier Cavavin, vous pouvez compter sur l’équipe du Service à la clientèle Cavavin qui se fera un plaisir de vous aider et de répondre à vos questions. - Page 15 Appareils à usage commercial : Garantie limitée de un (1) an pièce et main-d’œuvre et de trois (3) ans pièce seulement sur le compresseur. Cavavin garantie à l’acheteur original de cet équipement qu’il est exempt de défaut de matériel ou de main-d’œuvre. Cavavin réparera ou remplacera toute pièce de l’équipement couvert par cette garantie durant la période applicable, tel que stipulé...
- Page 17 Interior Light Door Lock Shelves Care and Maintenance Cleaning Your Wine Cellar Power Failure Vacation Time Moving Your Wine Cellar Energy Saving Tips Troubleshooting Guide Service for Your Appliance Wiring Diagram Your Cavavin Products Warranty Instrucciones en Español 17 ~ 20...
-
Page 18: Wine Cellar Safety
WINE CELLAR SAFETY Your safety and the safety of others are very important. We have provided many important safety messages in this manual and on your appliance. Always read and obey all safety messages. This is the Safety Alert Symbol. This symbol alerts you to potential hazards that can kill or injure you and others. -
Page 19: Important Safeguides
IMPORTANT SAFEGUIDES Before the appliance is used, it must be properly positioned and installed as described in this manual, so read the manual carefully. To reduce the risk of fire, electrical shock or injury when using the appliance, follow basic precaution, including the following: •... -
Page 20: Help Us Help You
If for some reason you are not happy Customer Service with the service you receive, here are some Cavavin (2000) Inc. steps to follow for further assistance. FIRST, contact the people who serviced your 4575 Sir Wilfrid Laurier Blvd. -
Page 21: Parts And Features
PARTS & FEATURES 1. DIGITAL CONTROL PANEL 2. SECURITY LOCK 3. STAINLESS STEEL DOOR 4. STAINLESS STEEL HANDLE 5. ROLL-OUT SHELVES (TOTAL 5) 6. ZONE PARTITION 7. SMALL BOTTOM SHELF (TOTAL 1) 8. BOTTOM GRILLE 9. LEVELING LEGS (4) 10. CABINET REMARK: Model CAVA46-1NDZ is a wine cellar with black cabinet design. -
Page 22: Important Safety Instructions
Plug the Wine Cellar into an exclusive, properly installed-grounded wall outlet. Do not under any circumstances cut or remove the third (ground) prong from the power cord. Any questions concerning power and/or grounding should be directed toward a certified electrician or an authorized Cavavin service center. -
Page 23: Built-In Cabinet Instructions
Improper use of the grounded plug can result in the risk of electrical shock. If the power cord is damaged, have it replaced by an authorized Cavavin service center. This appliance should be properly grounded for your safety. The power cord of this appliance is equipped with a three-prong plug which mates with standard three prong wall outlets to minimize the possibility of electrical shock. -
Page 24: Installing Stainless Steel Handle
INSTALLING THE STAINLESS STEEL HANDLE This wine cellar includes a stainless steel handle that is not required to operate this unit. To install the handle please follow the below instructions: 6. Pull away the door gasket in the area where the handle is to be installed on the left side as shown below in Illustration # 1. -
Page 25: Operating Your Wine Cellar
OPERATING YOUR WINE CELLAR It is recommended you install the Wine Cellar in a place where the ambient temperature is between 23º- 26ºC/ 72º-78ºF. If the ambient temperature is above or below recommended temperatures, the performance of the unit may be affected. For example, placing your unit in extreme cold or hot conditions may cause interior temperatures to fluctuate. -
Page 26: Storage
NOTE: • If the unit is unplugged, power lost, or turned off, you must wait 3 to 5 minutes before restarting the unit. If you attempt to restart before this time delay, the Wine Chiller will not start. • When you use the wine chiller for the first time or restart the wine chiller after having been shut off for a long time, there could be a few degrees variance between the temperature you select and the one indicated on the LED readout. -
Page 27: Care And Maintenance
• To remove the shelves out of the rail pull each shelf approximately 1/3 out. Use a long flat screwdriver to press down the right plastic notch as shown in Figure A and at the same time lift the left plastic notch as shown in Figure B. -
Page 28: Vacation Time
VACATION TIME • Short vacations: Leave the Wine Cellar operating during vacations of less than three weeks. • Long vacations: If the appliance will not be used for several months, remove all items and turn off the appliance. Clean and dry the interior thoroughly. To prevent odor and mold growth, leave the door open slightly: blocking it open if necessary. -
Page 29: Problems With Your Wine Cellar
PROBLEMS WITH YOUR WINE CELLAR? You can solve many common Wine Cellar problems easily, saving you the cost of a possible service call. Try the suggestions below to see if you can solve the problem before calling the servicer. TROUBLESHOOTING GUIDE PROBLEM POSSIBLE CAUSE Wine Cellar does not operate. -
Page 30: Wiring Diagram
We are proud of our customer service organization and the network of professional service technicians that provide service on your Cavavin wine cellars. With the purchase of your Cavavin wine cellar, you can have the confidence that if you ever need additional information or assistance, the Cavavin Customer Service team will be here for you. - Page 31 Commercial Use : One (1) year limited warranty on parts and labor and three (3) years part only warranty on compressor. Cavavin guaranties to the original owner of this Product that it is free from defect in material and workmanship. Cavavin will either repair or replace the Product during the applicable period, as stated above, subject to the terms and conditions of this Warranty.
- Page 32 INSTRUCCIONES DE SEGURIDAD ATENCION INSTRUCCIONES PARA LA CONEXION A TIERRA Este aparato electrodoméstico debe estar conectado a tierra. En caso de un cortocircuito eléctrico, la conexión a tierra reduce el riesgo de choque eléctrico proporcionando un cable a tierra con una enchufe de conexión a tierra.
- Page 33 Temperaturas recomendadas para enfriar vinos: Vinos tintos 15 ~ 18ºC 58 ~ 65ºF Vinos blancos 9 ~ 14ºC 48 ~ 57ºF Vinos rosé 10 ~ 11ºC 49 ~ 51ºF Vinos espumante 5 ~ 8ºC 40 ~ 47ºF Para encender el electrodoméstico, oprima el botón marcado “ON/OFF” para ON. Ud puede cambiar de grados Centígrados a Fahrenheit o viceversa, oprimiendo el boton marcado ºF/C.
- Page 34 COMO INSTALAR LA MANIJA Su nevera viene equipada con una manija de acero inoxidable que no es necesario instalar para operar la unidad. Para instalarla, remueva los tornillos decorativos del frente de la puerta. Coloque la manija en su lugar designado utilizando los tornillos Phillips incluídos en la bolsa. Apriete los tornillos utilizando un destornillador Phillips (+).
- Page 35 CORTE DE CORRIENTE La mayoría de los cortes de corriente se corrigen en una o dos horas y no afectarán las temperaturas de su vinera. Sin embargo, Ud. deberá reducir la cantidad de veces que abra la puerta cuando la corriente esté...
Need help?
Do you have a question about the URBANIA CAVA46-1NDZ and is the answer not in the manual?
Questions and answers
how to fix code e8
Error code "E8" on the Cavavin URBANIA CAVA46-1NDZ indicates that the temperature sensor in the higher temperature zone has failed. This sensor is connected to the main control PCB with yellow wires.
To fix this issue:
1. Check the connection of the yellow wires between the temperature sensor and the main control PCB to ensure they are secure.
2. If the connection is intact but the error persists, the temperature sensor may need to be replaced.
For assistance or replacement parts, contact Cavavin Customer Service.
This answer is automatically generated
code f4 c est quoi
Can you replace the relay on this fridge? Any technician that can do it around Toronto area?