Table of Contents
Advertisement
Advertisement
Table of Contents

Related Manuals for Btwin B’ebike 5


Summary of Contents for Btwin B’ebike 5
- Page 1 Instructions for use B’ebike 5...
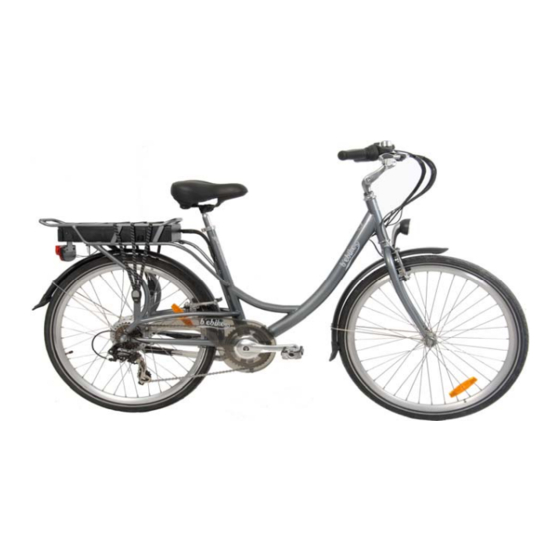
- Page 2 Congratulations! You are the happy owner of a B'ebike electric bike. This bike is equipped with electrical pedalling assistance , offering an entirely new way of cycling. Assisted pedalling makes cycling lighter and more comfortable than ever. Whether you use the bike for journeys between your home and work, for carrying heavy shopping or simply for pleasure, you will always have the wind behind you.
-
Page 3: Table Of Contents
Contents 1. Control panel Screen information Assisted pedalling controls 2. Battery 2.1 Precautions 2.2 Disconnecting and removing the battery 2.3 Charging the battery 2.4 Battery information 3. Assisted pedalling 3.1 What is assisted pedalling? 3.2 Everything else that you should know about assisted pedalling 4. -
Page 4: Screen Information
1. Control screen 1.1 Screen information Check that the battery is switched on. Activate the control panel using the start button (button 1). Start/Stop Battery indicator Assisted pedalling indicator light Assisted pedalling control Light switch 1.2 Assisted pedalling controls Use the assisted pedalling control (button 4) to choose between the 3 programmes. The 3rd (SPORT) position offers the most powerful electrical assistance. -
Page 5: Battery
Battery 2.1 Precautions Precautions to be taken with the charger: Solely for indoor use. Do not dispose of the charger inappropriately. Danger of electrocution. Do not dismantle the charger. Precautions to be taken with the battery: Do not burn the battery Do not expose the battery to temperatures of over 50 °C Do not expose the battery to water. - Page 6 Removing the battery from the bike Insert the key into the lock, push the lock inwards and turn the key one quarter turn to the left, in order to unlock the battery. Pull the battery from its housing very carefully, using the foldable handle.
-
Page 7: Charging The Battery
2.3 Charging the battery The electric bike is equipped with a Lithium-ion battery, which powers the motor. Unlike other batteries, Lithium-ion batteries do not have any "memory effect" and can be recharged even if they are not completely discharged. The battery reaches its full capacity after being charged and discharged several times. -
Page 8: Battery Information
2.4 Battery information • Never short-circuit the battery by placing the positive and negative terminals in contact with each other. • The battery is waterproof and can therefore withstand rain. You can therefore use your bike in rainy weather without any problems. However, try not to expose the battery to excessive quantities of water. -
Page 9: Assisted Pedalling
Assisted pedalling 3.1 What is assisted pedalling? This bike is equipped with electrical pedalling assistance. The motor supplements your own effort. The operation of the assisted pedalling depends upon the speed of rotation of the pedals. The faster you pedal, the greater the pedalling assistance will be, up to the limit of 25km/hr If you do not pedal, the motor remains idle. -
Page 10: Desired Seating Height
Saddle adjustment 4.1 Desired seating height Seating height means the distance between the seating part of the saddle and the pedal in its lowest position. The seating height is properly adjusted when, with your foot resting on the pedal (in low position), your knee is slightly bent (Fig. 1). Above all, do not hesitate to ask for guidance from your cycle sales advisor! 4.2 Adjusting the saddle Adjust the saddle height by loosening the hexagonal-socket-head screw on the... -
Page 11: Lights
5 Lights 5.1 Switching the lights on and off The bike is equipped with lights, which are directly connected to the battery. To switch them on, simply press the light control on the handlebar console. The lights are switched off in the same manner. -
Page 12: Brakes
Brakes 6.1 Brake adjustment information The brakes should be adjusted so that, when the brake levers are pulled to their halfway travel position (Fig.1), the whole of the brake pad braking surfaces rest against the wheel rim (Fig.2). Fig.1 Fig.2 6.2 Adjusting the brakes If you are unhappy with your brakes. -
Page 13: Tyres
In order to replace the brake pads, first turn the cable adjustment screw inwards, to loosen the brake cable. Then, close the brake levers using your thumb and index finger and unfasten the brake cable (Fig.5). There is enough space to allow you to loosen the brake pad fixing bolts (Fig.6). -
Page 14: Maintenance
Maintenance 9.1 Servicing We advise you to have your bike checked out regularly by your distributor. It is wise to have the first service after the first 3 months and the second after 1 year, with subsequent yearly services. Be aware that regular servicing can prevent needless damage and therefore also avoid a lot of needless expense. -
Page 15: Servicing
9.5 Servicing 1st Service after 3 months • Check the wheels and the tyres. (Trueness of wheels, spoke tension, tyre pressure, tyre condition.) • Check that all of the bike's tightened parts are securely fastened. • Brakes: Check brake pad wear – Adjust the tautness of the cable – Check the efficiency of the brakes. -
Page 16: Warnings
• Does the assisted pedalling operate correctly? • Do the gears work as they should? • Does the bike need a clean? • Has the bike been serviced recently? Warnings • Read these instructions attentively before use and follow them carefully. •... - Page 17 SERIAL NUMBERS (VIN) The bike's serial numbers are located on the frame, on the head tube, as shown in the illustration below. This number makes it possible to identify the bike. Make a note of this serial number in the space provided below, you may need it. Serial number OXYLANE Group 4 bd de Mons 59665 Villeneuve d’Ascq, France...
Need help?
Do you have a question about the B’ebike 5 and is the answer not in the manual?
Questions and answers