Advertisement
Table of Contents
- 1 Table of Contents
- 2 Congratulations
- 3 Safety Precautions
- 4 Product´s Description
- 5 Indoor Unit Display
- 6 Remote Control
- 7 Remote Control Description
- 8 Remote Control Display Indicators
- 9 First Use
- 10 How to Use the Remote Control
- 11 How to Use the Indoor Unit
- 12 Emergency Operation
- 13 Optimal Operation
- 14 Cleaning and Maintenance
- 15 Operation Tips
- 16 Troubleshooting
- Download this manual
Advertisement
Table of Contents

Related Manuals for Philco PARC09GGAWM


Summary of Contents for Philco PARC09GGAWM
- Page 1 PARC09GGAWM, PARC12GGAWM PARC18GNAWM, PARC24GNAWM...
-
Page 2: Table Of Contents
Table of Contents Congratulations ..................2 Safety Precautions .................. 3 Product´s Description ................5 Indoor Unit Display .................. 6 Remote Control ..................6 Remote Control Description ..............7 Remote Control Display Indicators ............8 First Use ....................9 How to use the Remote Control ............... 9 How to use the Indoor Unit .............. -
Page 3: Congratulations
Congratulations Congratulations and thank you for choosing a split-type air Conditions of use conditioner. We are sure you will find your new air conditioner This appliance is intended to be used in household and a pleasure to use. similar applications such as: Before you use the air conditioner, we recommend that you • Staff kitchen areas in shops, offices and other working read through the entire user manual, which provides the environments. -
Page 4: Safety Precautions
Safety precautions warning Inside this manual you will find many helpful hints on how to use and maintain your air conditioner properly. Just a little preventive If you notice an unusal situation, such as a care on your part can save you a great deal of time and money burning smell, please switch off the power to the over the life of your air conditioner. You’ll find many answers to air conditioner and contact an authorised service common problems in the chart of troubleshooting tips on page agent. If this abnormal status continues the air 20-21. If you review the chart of troubleshooting tips first, you conditioner may be damaged or even cause may not need to call for service. - Page 5 Safety precautions Usage caution Exposure to direct airflow from the air conditioner for an extended period of time could be hazardous to your Select the most appropriate temperature. health. It can save electricity. Do not expose people, pets or plants to the direct airflow Do not keep windows and doors open for a long for an extended period. time during operation. It will result in insufficient performance. Cleaning and maintenance Do not block the air inlet or outlet. 1 When cleaning the unit, first make sure that the power It will result in insufficient performance and cause and circuit breaker are turned off.
-
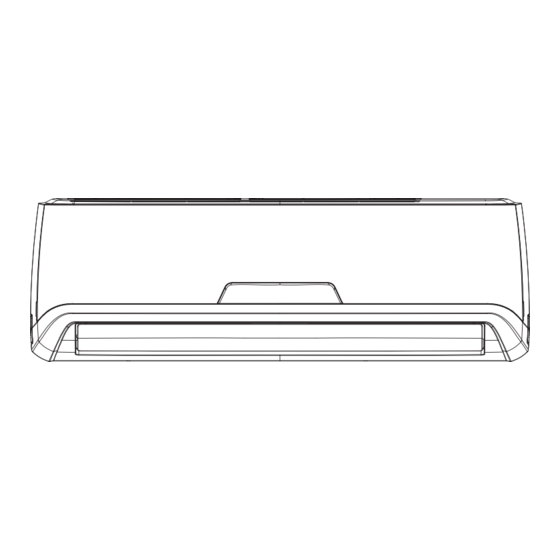
Page 6: Product´s Description
Product Description Air inlet Indoor Unit Air Outlet Outdoor Unit Air inlet (rear) Air inlet (side) Air Outlet Remote control Front panel Remote control holder Digital display Refrigerant pipe (if applicable) Healthy air filter (behind the dust filter) Drain hose (if applicable) Pre-dust filter Power cable (if applicable) Horizontal air louvers Mounting plate Vertical air louvers Connecting cable (if applicable) Cold plasma generator (if applicable) -
Page 7: Indoor Unit Display
Indoor Unit Display • If you keep the remote control in a position that hinders proper signal transmission, a time lag of up to 15 minutes may occur. • When the remote control sends out a signal, the symbol will blink for about 1 second on the display. The indoor unit Signal will acknowledge the signal with a beep when it receives an receiver... -
Page 8: Remote Control Description
Remote Control Description Turbo Button Press this button in COOL or HEAT mode to put the fan into the high speed Turbo mode and the air conditoner will work at maximum power. Press again to cancel this function. Clean Button Press the Clean button to active the Self-Cleaning. After the unit is turned off the indoor fan will continue operation for 10 minutes to dry the indoor unit prevent from bacteria and mildew growing. -
Page 9: Remote Control Display Indicators
Remote Control Display Indicator Fan Speed Display Transmission Indicator: Displays the selected fan speed in the following sequence: Displays when the remote control transmits signals to the indoor unit. “ ” (Low), “ ” (Medium), “ ” (High) and Auto. Turbo Display In Auto speed, only “ ” symbol displays. Displays when Turbo function is selected. -
Page 10: First Use
First Use 1 Ensure the unit is plugged in and power is available. 2 Be sure the batteries are inserted correctly in the remote control (the lights on the remote control will be on). 3 Set the time by Control buttons and confirm by pressing the Clock button. 4 Point the remote control to the indoor unit and press ON/ OFF button to turn the unit on. - Page 11 Start 2 Mode Button 1 ON/OFF Button Press to select FAN. Press this button to turn the air conditioner on. 3 Fan Button The temperature indicator on the indoor unit display lights Press to select the desired fan speed at: Auto, Low, Medium and High.
- Page 12 3 Control Buttons 3 Point the remote control to the indoor unit, confirm the set time by pressing the Timer-On button. Set the desired temperature. Normally, set between 21ºC to 28ºC. symbol will stay on the remote control’s display. 4 Fan Button Check that the Timer indicator on the display panel of indoor unit is illuminated. Press to select the desired fan speed at: Auto, Low, Medium and High.
- Page 13 1 Press the Timer-On button. 2 Set the desired time by pressing repeatedly or holding down the Control buttons until 18:00 shows in the display of the remote control. 3 Confirm the set time by pointing the remote control to the indoor unit and pressing again the Timer-On button. 4 Press the Timer-Off button. 5 Set the desired time by pressing repeatedly or holding down the Control buttons until 09:30 shows in the display of 3 Confirm the set time by pointing the remote control to the...
- Page 14 Setting the Clock Economy (Eco) Operation Press Eco button in COOL or HEAT (if applicable) mode, the air conditioner will automatically increase (in COOL mode) or decrease (in HEAT mode) 1 C per hour over a 2 hour period. The set temperature will be steady for the next 5 hours then the unit will stop. This function permits more comfort and saves energy. This operation is recommended for bed time. Temperature 1 hour 1 hour...
-
Page 15: How To Use The Indoor Unit
• When the louver moves to the desired direction, press the How to Use the Indoor Unit Swing button again and the louver will stay at where it is. • Press the Swing button again and the louver will start swing Additional Options up and down automatically. 1 Smart Restart Function The air conditioner resumes automatically with the previous settings after a possible power failure. 2 Removable Panel The front panel of indoor unit can be easily removed for cleaning and maintenance. 3 Self Diagnose and Auto Protection This air conditioner can detect the malfunctions, showing the diagnosis on the display of the indoor unit by means of Range Up and down airflow an error code. -
Page 16: Emergency Operation
• Press the Manual Control button again to turn the air • Do not move the horizontal louver manually. conditioner off. Always use the Swing button. Moving the louver The operation mode is seen in the following table. manually may cause malfunction during operation. If the louver malfunctions, stop the air conditioner Mode Model Temperature setting Airflow and restart it. AUTO COOLING 25°C (COOL, FAN) -
Page 17: Cleaning And Maintenance
Cleaning and Maintenance Maintenance The following maintenance operations must be performed regularly. Items Maintenance operations Recommended frequency Dust filter Clean Every month or more often if necessary Healthy air filters Replace/clean Every 3 months or more often if necessary Unit casing Clean Every month or more often if necessary Water tray and Clean and check for Each season before start up* evacuation piping obstructions Indoor and outdoor coils Clean Each season before start up* The operation must be performed by qualified personnel only. - Page 18 Dust filter warning Do not touch or try to clean the cold plasma generator (if applicable). It may cause an electric shock. General maintenance Clean the Dust filter with a vacuum cleaner or water, then If the air conditioner is not going to be used for a long period of dry it up in cool place. time: • Operate in FAN only mode for 3~4 hours to allow the unit to completely dry out.
-
Page 19: Operation Tips
• You also may hear a low “squeak” sound when the Operation Tips compressor is running or just stopped running. This is caused by heat expansion and cold contraction of the plastic The following events may occur during normal operation: parts in the unit when the temperature is changing. 1. Protection of the air conditioner. -
Page 20: Troubleshooting
Trouble Shooting The air conditioner is not user serviceable. Incorrect repair may cause electric shock or fire. Please contact an authorised service center for professional repair. warning If one of the following situations occur, immediately stop the air conditioner, disconnect the power, and contact the authorised service center. • If error code appear on the display window of indoor unit. • Water or other liquid is splashed into the unit. • Power indicator or other indicator flash rapidly and this • Water is leaking from the unit. - Page 21 The following checks prior to contact may save you time and money. Malfunctions Cause Malfunctions Cause • The humidity is high. The unit does not operate if it is turned Water leakage of The unit does not on immediately after it is turned off. This • Condensing water overflows. indoor unit operate is to protect the unit. Please wait about • Drain hose is loose or obstructed.
Need help?
Do you have a question about the PARC09GGAWM and is the answer not in the manual?
Questions and answers