Table of Contents
Advertisement
Quick Links
User guide
MPD-700
Portable DVD Player
Need help? Call us!
Return
Magnavox representatives are ready to help you with
your Warranty
any questions about your new product. We can guide
Registration Card
within 10 days
you through Connections, First-time Setup, or any of
the Features.We want you to start enjoying your
new product right away!
CALL US BEFORE YOU CONSIDER
RETURNING THE PRODUCT!
1-800-705-2000
or
Visit us on the web at www.magnavox.com
Advertisement
Table of Contents

Related Manuals for Magnavox MPD-700


Summary of Contents for Magnavox MPD-700
- Page 1 User guide MPD-700 Portable DVD Player Need help? Call us! Return Magnavox representatives are ready to help you with your Warranty any questions about your new product. We can guide Registration Card within 10 days you through Connections, First-time Setup, or any of the Features.We want you to start enjoying your...
-
Page 2: Warranty
Return your Warranty Registration card today to ensure you receive all the benefits you’re entitled to. • Once your Magnavox purchase is registered, you’re eligible to receive all the privileges of owning a Magnavox product. Warranty Verification Registering your product... -
Page 3: Important Safety Instructions
IMPORTANT SAFETY INSTRUCTIONS Read these instructions. Keep these instructions. Heed all warnings. Follow all instructions. Do not use this apparatus near water. Clean only with dry cloth. Do not block any ventilation open- ings. Install in accordance with the manufacturer´s instructions. Do not install near any heat sources such as radiators, heat registers, stoves, or other apparatus (including amplifiers) that... -
Page 4: Safety Precautions
Safety Precautions Power Sources This unit operates on a supplied AC adaptor, car adaptor, or a rechargeable battery pack. • Make sure that the input voltage of the AC adaptor is in line with the local voltage. Otherwise, the AC adaptor and unit may be damaged. -
Page 5: Table Of Contents
Important Safety Instructions ... Safety Precautions ... About MPD700 ... Controls Main Unit Remote Control Power Supply Using the AC power adaptor Using the battery pack Using the remote control General disc information, About Basic Operations Playback Language & channel select, DVD Menu Play, Pause Fast Searching, Slow Play Repeat Shuffle, Random, Digest... -
Page 6: About Mpd700
About MPD700 High Defintion The player adopts MPEG2 coding format and brings the horizontal resolution over 500 lines. Unique Functions Mutli-Angle and Multi-Language capability. Parental lock makes it easy to control the content of discs. Zoom You can enlarge pictures two or three or four times the original size. -
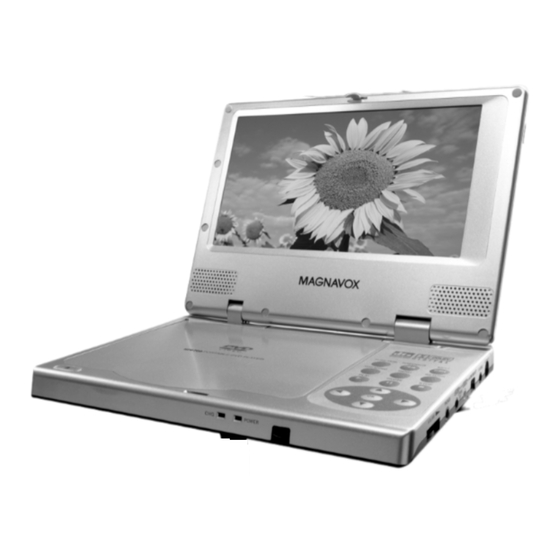
Page 7: Controls
Controls Main Unit Display panel Speaker OPEN CHG - battery charge indicator POWER - power indicator Infrared for remote control Direction buttons: 3, 4, 2, 1 (PAUSE) 9 (STOP) RETURN MENU FUNCTION & ∞/§ TIP : * Do not adjust the LINE SELECT switch at random. Keep the LINE SELECT switch in the OUT position when the POWER switch is set to ON. -
Page 8: Remote Control
Remote Control OSD (On-Screen Display) LANGUAGE AUDIO DIGEST RESUME MENU TITLE ∞ Direction buttons: 3, 4, 2, 1 2 / OK 9 (STOP) (PAUSE) SETUP LANGUAGE AUDIO SUBTITLE ANGLE DIGEST RESUME PLAY MODE ZOOM MENU TITLE REPEAT STOP PAUSE SLOW PLAY RETURN TIME SEARCH 10/0 RC-700... -
Page 9: Using The Ac Power Adaptor
Using the AC power adaptor Connect to power Connect the player's AC adaptor to the DC IN jack as shown. Plug the AC adaptor into a power outlet. TIP : Turn off the player before unplugging the AC adaptor so as to avoid damage to the player. The type plate is located on the bottom of the player. -
Page 10: Using The Battery Pack
Using the Battery Pack Attach the battery pack properly following the explanation below. Make sure that the bat- tery pack is attached firmly to the player when using it. Otherwise, the battery may become detached and cause injury or damage. Charge your battery before using. Attaching the Battery Pack Disconnect the AC adaptor and the power cord from the player, before you attach the battery... - Page 11 Using the Battery Pack Power shutdown mode The power circuit in your player is designed with a power shutdown mode. This is activated only during battery power operation of the player when the battery becomes completely drained. When this happens: 1 Adjust the POWER switch on the player to the OFF position.
-
Page 12: Using The Remote Control
Using the remote control Please remove the protective plastic tab (on top of the battery inside the battery compartment) if you have just unpacked the remote control and are using for the first time. To use the remote control, point it at the infrared sensor on the player’s front panel avoiding obstacles. -
Page 13: General Disc Information, About
Playable Discs TYPE DISC: LOGO • The marks shown in the following chart are used in the manual. MARK When Playing DVDs Many DVD discs have the following playback features: Title, Chapter, Audio, Subtitle, Angle, TT (Title) Time, CH (Chapter) Time, Repeat, and Time Display. About All the features described in this manual may not be available on every disc. -
Page 14: Basic Operations Playback
Basic Operations: Playback Before you begin, turn on the power of your TV, stereo, and any other equipment connected to the DVD Player. Make sure the TV and the stereo (if applicable) are set to the correct channel. Slide the POWER switch to ON to turn on the player. Press OPEN to open the disc tray. -
Page 15: Language & Channel Select, Dvd Menu Play,Pause
Language & channel select, DVD Menu Play,Pause DVD Language selection Different discs differ in languages. You can select a language in a variety of ways: • Using the OSD to enter the Preference Page --> Audio submenu to select. If a language is included from this Audio submenu: English... -
Page 16: Fast Searching, Slow Play
Fast Searching Fast Searching Press 6 to play fast forward. Each time you press the button repeatedly, the screen shows in sequence: Press 5 to fast reverse the disc. Each time you press the button repeatedly, the screen shows in sequence: Press B (PLAY)/OK to resume normal playback. -
Page 17: Repeat Play
Repeat Play REPEAT This button can be used to repeat a title, chapter, track, disc, or a specific portion of a disc. DVD and CD repeat options You may repeat a title or chapter. To repeat a chapter, press REPEAT. The screen will show Chapter To repeat a title, press REPEAT again. -
Page 18: Shuffle, Random, Digest
Shuffle, Random Shuffle or Random Play Both the Shuffle and Random options allow you to play the contents of your disc in a different order. In disc stop position, press PLAY MODE once or more to select shuffle or random play mode. -
Page 19: Bookmark, Zoom, Scanning Cds
Bookmark Bookmark The bookmark feature lets you mark a point on the disc that you can go to quickly. You can store up to 12 bookmarks per disc. When you turn the player off or remove the disc, book- marks are cleared. Creating a Bookmark During playback, press RESUME on the remote. -
Page 20: Selecting Dvd Subtitles
Subtitles Selecting DVD Subtitles This operation works only with discs on which multiple subtitle language are recorded. Press SUBTITLE repeatedly until the desired language is selected. The screen shows : Subtitle 01/03:ENGLISH To cancel subtitle : • Press SUBTITLE repeatedly until the screen shows "Subtitle Off"... -
Page 21: Using Time Search
With this button, you can toggle between 3 TIME SEARCH options. You may directly enter a time, title or chapter number to fast search on a disc, and play from that point. How to search a DVD title or a chapter For example: Searching to chapter 2 in title 6. -
Page 22: Programming Dvd And Cd Tracks
Programming DVD and CD tracks To use the program playback feature, you must enter the order in which you want the titles (and chapters) on the DVD or the tracks on the CD to play by creating a program. Program display options may vary according to your DVD and show TT-- (Title) as well as CH-- (Chapter). -
Page 23: Playing Mp3 Discs
Playing MP3 discs Select Tracks with Menu Insert a disc, the player reads the disc. The TV screen displays main menu. 00:00 00:00 001/012 Folder CD01 CD02 CD03 CD04 CD05 CD06 Press 4 to select a music folder. Press 2 (PLAY)/OK to confirm selection. -
Page 24: Selecting A Chapter
General OSD Operations OSD operation (for DVDs and CDs) The On-Screen Display (OSD) contains many playback features. • To see the OSD Menu, press the OSD button on the remote control while a disc is playing. During OSD Menu operation, your picture zooms out. -
Page 25: Language, Subtitles
OSD: Language Changing the Audio Language If the disc was created with different language tracks (recorded in different languages), you can use the OSD Menu to temporarily change the DVD player's Audio Language setting. While the disc is playing, press OSD on the remote control to bring up the Menu. -
Page 26: Angle, Tt Time, Ch Time, Repeat
OSD: Angle,TT Time, CH Time, Repeat Changing the Camera Angle Some DVDs contain scenes recorded from different angles. The camera angle will not change if the DVD does not contain sequences recorded from different camera angles. While the disc is playing, press OSD on the remote control to bring up the Menu. -
Page 27: Selecting A Specific Track
OSD: Time Display Changing the Time Disp(Display) You can change the time displayed on the screen: Title Elapsed, Title Remain, Chapter Elapsed and Chapter Remaining. While the disc is playing, press OSD on the remote control to bring up the Menu. Press 3 or 4 to highlight "Time Disp". -
Page 28: General Setup Menu Operation
General Setup Menu operations Menu Setting Functions may very according to the Disc and your additional equipment such as connecting with speaker sytstem. Set the following functions for the player to obtain the best viewing status. Press SETUP to enter the Setup Menu. SETUP The Setup Menu appears on the screen, with icons across the top of the screen, illustrat-... -
Page 29: General Setup:tv Display
• Press 2 (PLAY)/OK to confirm your selection. To exit the Setup Menu, press 4 to high- light "Exit Setup" and press 2 (PLAY)/OK to exit Setup Menu completely. General Setup: TV Display TV Display Page There are 3 TV display type options which you can select from the TV Display submenu on the General Setup Page. -
Page 30: Spdif, Captions, Screen Saver, Audio Setup
SPDIF, Captions, Screen Saver, Audio Setup Normal/LB (letterbox) This is selected when the player is connected to a standard screen TV. Widescreen images are shown on the screen, with a black frame on the top and bottom. Wide This is selected when the player is connected to a widescreen TV. -
Page 31: Speaker Setup, Dolby Submenus
Speaker Setup, Dolby submenus Speaker Setup Page The submenu structure is: -- Speaker Setup Page - Downmix Audio Setup Set Downmix Mode • Lt/Rt The output signal will be incorported to left and right channel. • Stereo The output signal will be incorported to stereo. -
Page 32: 3D Processing, Lcd, Password Setup
3D Processing, LCD, Password Setup 3D Processing Page The submenu structure is: -- 3D Processing Page - V SURR Reverb Mode Audio Setup Set Virtual Surround • V SURR (Virtual Surround) You can select to turn the Virtual Surround sound on and off. •... -
Page 33: Preference Page: Default, Parental
The parental lock will not block viewing of such discs. - Magnavox cannot guarantee the availability of parental control with all discs, and there- fore denies any liabilty associated with... -
Page 34: Connecting To Additional Equipment
Connecting to additional equipment You can connect the player to a TV or an amplifier to enjoy DVDs or karaoke. Connecting a TV and a Stereo/Amplifier (see 1) Connect one end of the yellow video cable to the VIDEO IN jack of the TV. Connect the other end to the VIDEO OUT jack on the player. - Page 35 VOLUME Before you begin, make sure you have an RF modulator and extra RF coaxial cables. These are not supplied with the player, but are available from Magnavox or most consumer electronics retailers. 1 Connect the supplied video cable (which has yellow markings) to the player’s yellow VIDEO (VIDEO OUT) jack.
- Page 36 Connecting to additional equipment 4 Connect an RF coaxial cable (not supplied) to the RF OUT, ANTENNA OUT, or TO TV jack on the RF modulator. The RF OUT jack may be labelled differently among different brands. Refer to the instructions provided with your RF modulator. Connect the other end of the same RF coaxial cable to the ANTENNA IN or RF IN jack on your TV.
-
Page 37: Technical Specifications
Power Consumption Dimensions Weight Magnavox reserves the right to make design and specification changes for product improvement without prior notice. This product incorporates copyright protection technology that is protected by method claims of certain U.S. patents and other intellectual property rights owned by Macrovision Corporation and other rights owners. -
Page 38: Troubleshooting
Troubleshooting If a fault occurs, first check the points listed below before taking the set for repair. If you are unable to remedy a problem by following these hints, consult your dealer or service center. WARNING: Do not open the set as there is a risk of electric shock. - Page 39 DVD player may require a playability enhancement or upgrade. As DVD technology has advanced, these enhance- ments have become both common and easy to complete. Please contact Magnavox at 1-800-705-2000 for assistance. will appear on http://www.magnavox.com Troubleshooting...
-
Page 40: Limited Warranty
When it is necessary for you to ship the product to Magnavox for exchange, you will pay the shipping costs for shipment to Magnavox. Magnavox will pay the shipping costs when returning a product to you. - Page 41 48 business hours of Magnavox’ receipt of the product. *When it is necessary for you to ship the product to Magnavox for exchange, you will pay the shipping costs for shipment to Magnavox. Magnavox will pay the shipping costs when returning a product to you.
- Page 42 MAGNAVOX A Division of Philips Consumer Electronics North America Knoxville, Tennesses 37914-1810, U.S.A Meet Magnavox at the Internet http://www.magnavox.com MPD700 CLASS 1 LASER PRODUCT IB8449E001 Printed in China BK326...
Need help?
Do you have a question about the MPD-700 and is the answer not in the manual?
Questions and answers