Table of Contents
Advertisement
Advertisement
Table of Contents

Related Manuals for Shark Rotator NV680UKT


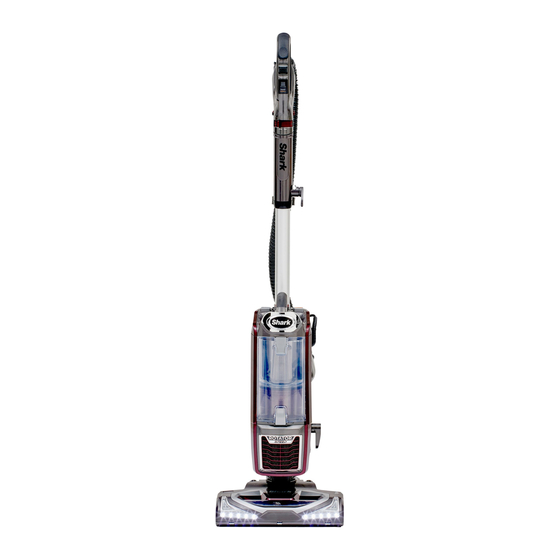
Summary of Contents for Shark Rotator NV680UKT
- Page 1 Model NV680UKT ™ 0 8 0 0 8 6 2 0 4 5 3 w w w . s h a r k c l e a n . e u...
-
Page 2: Table Of Contents
Contents Thank you for Getting to Know Your Shark Rotator Powered Lift-Away True Pet Vacuum ..................3 ® ™ ™ Assembly ......................................4 purchasing the Shark ® Upright Cleaning ....................................5 Rotator Powered ™ What Does the Brushroll Indicator Light Mean? ..........................5 Above Floor Cleaning...................................6 Lift-Away True Pet. -
Page 3: Save These Instructions
READ ALL INSTRUCTIONS BEFORE USE IMPORTANT SAFEGUARDS IMPORTANT SAFEGUARDS When using an electrical appliance, basic safety precautions should always be GENERAL USE observed, including the following: 17 Use only as described in this manual. WARNING 18 DO NOT put any objects into openings. DO NOT use with any opening blocked; keep free of dust, lint, hair, and anything that may reduce air flow. -
Page 4: Getting To Know Your Shark ® Rotator
GETTING TO KNOW YOUR SHARK ROTATOR POWERED LIFT-AWAY SPEED ® ™ Articulated Upholstery Tool 312FV680 Two cleaning tools in one. The stiff bristle brush gets stuck-on debris off a multitude of surfaces. Remove the bristles to reveal an upholstery tool for removing stubborn pet hair from upholstery and more. -
Page 5: Assembly
ASSEMBLY STEP 1 STEP 2 STEP 3 STEP 4 STEP 5 Place the selected floor nozzle on the floor and insert Slide the pod onto the wand. Insert the 2-in-1 crevice tool and articulated upholstery the wand. tool into the accessory posts as shown. Slide the hose clip into the notch at the back of the Insert the handle into the wand. -
Page 6: Upright Cleaning
UPRIGHT CLEANING WARNING: To reduce the risk of electric shock, unplug the unit before assembling, adding or removing attachments or converting modes. WARNING: Always ensure the power is OFF before plugging and unplugging. NOTE: DO NOT use to pick up drywall dust or fireplace ash. STEP 1 STEP 2 STEP 3... -
Page 7: Above Floor Cleaning
ABOVE FLOOR CLEANING NOTE: DO NOT use to pick up drywall dust or fireplace ash. STEP 1 STEP 2 STEP 3 Suction Control Wand Release For above floor cleaning with the hose, press the WAND or Insert wand or handle directly into desired tool. This unit is equipped with SUCTION CONTROL to help when HANDLE release (depending on the amount of reach required) dusting delicate objects or drapery. -
Page 8: Changing Floor Nozzles
CHANGING FLOOR NOZZLES Use the motorised floor nozzle for deep cleaning carpets and picking up large debris on hard floors. Use the Dust-Away to pick up debris and wipe away fine dust in one easy step. ™ DUST-AWAY ™ MOTORISED FLOOR NOZZLE STEP 1/STEP 2 STEP 3 Wand Release... -
Page 9: Powered Lift-Away
POWERED LIFT-AWAY CLEANING LIFT-AWAY CLEANING ™ ™ STEP 1 STEP 2 Extension Wand Press LIFT-AWAY button to lift the pod off the floor Insert the HANDLE into either the the motorised floor Attach the desired accessory directly into the HANDLE. nozzle. -
Page 10: Empty Dust Cup
MAINTENANCE To keep your vacuum’s suction power optimal, follow these instructions. Make sure unit is off and cord unplugged. IMPORTANT: Allow ALL filters to dry completely before replacing into the vacuum. STEP 1 STEP 2 STEP 3 EMPTY THE DUST CUP Pull up on the dust cup release latch and lift the dust Holding the dust cup over a rubbish bin, press the Press the top dust cup release latch to access the dust... -
Page 11: Check For Blockages
MAINTENANCE To keep your vacuum’s suction power optimal, follow these instructions. Make sure unit is off and cord unplugged. STEP 1 STEP 2 STEP 3 STEP 4 CHECK FOR BLOCKAGES A portion of the base is removable to Remove any string, carpet fibers or To reassemble, replace base by Use a coin to unlock the 3 locks on the allow for better access to the brush... -
Page 12: Trouble-Shooting Guide
TROUBLE-SHOOTING GUIDE Vacuum is not picking up dirt. No suction or light suction • Check filters to see if they need cleaning. Follow instructions for rinsing and drying the filters before re-inserting back into the vacuum. • Dust cup may be full; empty dust cup. •... - Page 13 NOTES 0 8 0 0 8 6 2 0 4 5 3...
- Page 14 NOTES Euro-Pro and Shark are registered trademarks of Euro-Pro Operating LLC. Rotator, Dust-Away and Lift-Away are trademarks of Euro-Pro Operating LLC. s h a r k c l e a n . e u w w w .
-
Page 15: Warranty
® When you register your guarantee we’ll have your details to hand if we ever need to get in touch. You can also receive tips and advice on how to get the best out of your Shark vacuum and hear the ®... - Page 16 Euro-Pro Europe Limited 15 Mariner Court Calder Park Wakefield WF4 3FL Freephone 0800 862 0453 www.sharkclean.eu NV680UKT�150807�2 Illustrations may differ from actual product. We are constantly striving to improve our products, therefore the specifications contained herein are Printed in China ©...
Need help?
Do you have a question about the Rotator NV680UKT and is the answer not in the manual?
Questions and answers