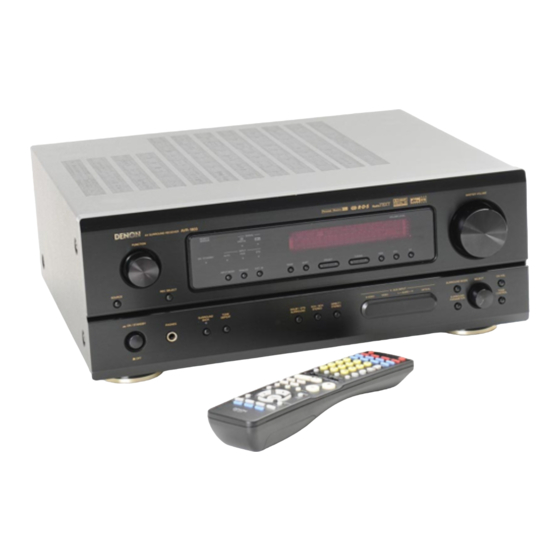
Denon AVR-1803 Operating Instructions Manual
Av surround receiver
Hide thumbs
Also See for AVR-1803:
- Operating instructions manual (131 pages) ,
- Brochure & specs (2 pages) ,
- Operating instructions manual (72 pages)
Table of Contents
Advertisement
Available languages
Available languages
AV SURROUND RECEIVER
AVR - 1803
OPERATING INSTRUCTIONS
BEDIENUNGSANLEITUNG
MODE D'EMPLOI
ISTRUZIONI PER L'USO
INSTRUCCIONES DE OPERACION
GEBRUIKSAANWIJZING
BRUKSANVISNING
FOR ENGLISH READERS
PAGE
00,
FÜR DEUTSCHE LESER
SEITE
02, 35 ~ SEITE
POUR LES LECTEURS FRANCAIS
PAGE
02, 67 ~ PAGE
PER IL LETTORE ITALIANO
PAGINA 02, 99 ~ PAGINA 130, 227
PARA LECTORES DE ESPAÑOL
PAGINA 2, 131 ~ PAGINA 162, 227
VOOR NEDERLANDSTALIGE LEZERS
PAGINA 2, 163 ~ PAGINA 194, 227
FOR SVENSKA LÄSARE
SIDA
2, 195 ~ SIDA
02 ~ PAGE
034, 227
066, 227
098, 227
227
Advertisement
Chapters
Table of Contents

Related Manuals for Denon AVR-1803


Summary of Contents for Denon AVR-1803
- Page 1 AV SURROUND RECEIVER AVR - 1803 INSTRUCCIONES DE OPERACION OPERATING INSTRUCTIONS GEBRUIKSAANWIJZING BEDIENUNGSANLEITUNG BRUKSANVISNING MODE D’EMPLOI ISTRUZIONI PER L’USO FOR ENGLISH READERS PAGE 02 ~ PAGE 034, 227 FÜR DEUTSCHE LESER SEITE 02, 35 ~ SEITE 066, 227 POUR LES LECTEURS FRANCAIS PAGE 02, 67 ~ PAGE 098, 227...
- Page 2 ENGLISH DEUTSCH FRANCAIS ITALIANO ESPAÑOL NEDERLANDS SVENSKA NOTE ON USE / HINWEISE ZUM GEBRAUCH OBSERVATIONS RELATIVES A L’UTILISATION / NOTE SULL’USO CAUTION NOTAS SOBRE EL USO / ALVORENS TE GEBRUIKEN / OBSERVERA RISK OF ELECTRIC SHOCK DO NOT OPEN CAUTION: TO REDUCE THE RISK OF ELECTRIC SHOCK, DO NOT REMOVE COVER (OR BACK).
-
Page 3: Table Of Contents
2 CAUTIONS ON INSTALLATION 2 We greatly appreciate your purchase of the AVR-1803. 2 To be sure you take maximum advantage of all the features AVR-1803 has to offer, read these Noise or disturbance of the picture may be generated instructions carefully and use the set properly. -
Page 4: Part Names And Functions
FUNCTION knob ........(17, 19) button ..........(20 ~ 22, 24) SOURCE button ..........(17) INPUT MODE select SELECT knob ........(17 ~ 22, 25) DIMMER button....(18) buttons......(17, 18, 29) NOTE: • The shaded buttons do not function with the AVR-1803. (Nothing happens when they are pressed.) -
Page 5: Read This First
• Use the AC OUTLET for audio equipment only. Do not use them for hair driers, etc. • Analog recording of signals input to the AVR-1803 in digital format is not possible. To record in analog, also Step 2 (page 9) connect the analog signals of the player to the AVR-1803’s analog input terminals. -
Page 6: Connections
ENGLISH Connecting the audio components (2) Connecting the video equipments TV or DBS tuner AUDIO VIDEO Connecting a TV/DBS tuner CD player OUTPUT Connecting a CD player TV/DBS • Connect the TV’s or DBS tuner’s video output jack (VIDEO OUTPUT) to the (yellow) DIGITAL AUDIO DIGITAL AUDIO... - Page 7 ENGLISH To connect the video signal, connect using a 75 Ω/ohms video signal cable cord. Using an improper cable can Connecting a Video Component Equipped with Color Difference (Component - result in a drop in sound quality. Y, P ) Video Jacks (DVD Player) Video game •...
- Page 8 If the protection circuit is activated again even though there are no problems with the wiring or the ventilation around the unit, switch off the power and contact a DENON service center. Note on speaker impedance NOTES: •...
-
Page 9: Using The Remote Control Unit
ENGLISH 9 USING THE REMOTE CONTROL UNIT FRONT SPEAKER SYSTEMS CENTER SPEAKER SYSTEMS Following the procedure outlined below, insert the batteries before using the remote control unit. Range of operation of the remote control unit ( L ) ( R ) Point the remote control unit at the remote control sensor as shown on the diagram at the left. -
Page 10: Setting Up The System
ENGLISH 10 SETTING UP THE SYSTEM Before setting up the system • Once all connections with other AV components have been completed as described in “CONNECTIONS” (see Check that all the components are correct, then press the POWER operation pages 5 to 9), make the various settings described below on the display. switch on the main unit to turn on the power. - Page 11 ENGLISH Setting the Subwoofer mode and Crossover Frequency Use the (left) and (right) buttons to select your surround speaker type. This screen is not displayed when not using a subwoofer. (Initial) • Set the crossover frequency and subwoofer mode according to the speaker system being used. LARGE SMALL NONE 3 SURR.
- Page 12 ENGLISH Setting the speaker distance Use the (left) and (right) buttons to set the distance from the surround Input the distances from the listening position to the speakers and set the surround back speakers to the listening position. delay time. Center 11 S.BACK 3.0m...
- Page 13 ENGLISH Setting the Auto Surround Mode Use the (left) and (right) buttons to assign the input function connected For the three kinds of input signals as shown below, the surround mode played the last is stored in the to the OPTICAL input 3 (OPT 3) terminal. memory.
-
Page 14: Remote Control Unit
11 REMOTE CONTROL UNIT Preset memory DENON and other makes of components can be operated by setting the preset memory. Operating DENON audio components This remote control unit can be used to operate components of other manufacturers without using the learning function by registering the manufacturer of the component as shown on the List of Preset Codes (pages •... - Page 15 NOTES: • For this CD, CDR, MD and TAPE components, buttons can be operated in the same way as for Denon audio components (page 14). • The TV can be operated when the switch is at DVD/VDP, VCR, TV position.
-
Page 16: Operation
ENGLISH 12 OPERATION Punch Through • “Punch Through” is a function allowing you to operate the PLAY, STOP, MANUAL SEARCH and AUTO Before operating SEARCH buttons on the CD, TAPE, CDR/MD, DVD/VDP or VCR components when in the DBS/CABLE or TV mode. - Page 17 ENGLISH Input mode when playing DTS sources Playing the input source Notes on playing a source encoded with DTS • Noise will be output if DTS-compatible CDs or LDs • Noise may be generated at the beginning of are played in the “ANALOG” or “PCM” mode. playback and while searching during DTS When playing DTS-compatible sources, be sure to playback in the AUTO mode.
- Page 18 ENGLISH [5] Checking the currently playing program source, etc. With the name of the volume to If you do not want the bass and treble to be be adjusted selected, turn the adjusted, turn on the tone defeat mode. Front panel display SELECT knob to adjust the level.
-
Page 19: Surround
ENGLISH Recording the program source (recording the source currently being monitored) Press the TEST TONE button. After completing the adjustment, press the TEST TONE button again. Playing one source while recording another (REC OUT mode) (Remote control unit) Press the REC SELECT button. 2, 4 Test tones are output from the different speakers. - Page 20 ENGLISH • CENTER WIDTH setting Dolby Surround Pro Logic mode Set the various surround parameters. • CINEMA EQ setting CENTER WIDTH O CINEMA EQ OFF The Dolby Surround Pro Logic II Cinema or Music mode can be chosen directly by pressing the •...
- Page 21 ENGLISH Surround parameters q Select the DTS NEO:6 mode. Set the various surround parameters. Pro Logic Mode: • CINEMA EQ setting The Cinema mode is for use with stereo television shows and all programs encoded in Dolby Surround. The Music mode is recommended as the standard mode for autosound music systems (no video), and is CINEMA EQ OFF optional for A/V systems.
- Page 22 ENGLISH When performing this operation from the main Select the Dolby/DTS Surround mode. Use the (left) and (right) buttons to set the LFE level. unit’s panel, press the SURROUND MODE button, then turn the SELECT knob and select Dolby Pro Logic or DTS NEO:6. (Remote control unit) (Main unit) (Remote control unit)
-
Page 23: Dsp Surround Simulation
ENGLISH 14 DSP SURROUND SIMULATION Surround parameters w CINEMA EQ. (Cinema Equalizer): • This unit is equipped with a high performance DSP (Digital Signal Processor) which uses digital signal processing The Cinema EQ function gently decreases the level of the extreme high frequencies, compensating for to synthetically recreate the sound field. - Page 24 ENGLISH (3) DELAY TIME DSP surround simulation Use the (left) and (right) buttons to set the delay time. • To operate the surround mode and surround parameters from the remote control unit. (Initial) Select the surround mode for the input channel. 30ms 110ms DELAY...
- Page 25 ENGLISH • Operating the surround mode and surround parameters from the main unit‘s panel. 2 Surround modes and parameters When When Channel output Turn the SELECT knob to select the surround When When playing playing playing playing mode. Dolby ANALOG signals Digital FRONT...
-
Page 26: Listening To The Radio
ENGLISH Parameter (default values are shown in parentheses) 15 LISTENING TO THE RADIO SURROUND PARAMETER NEO:6 MUSIC MODE Dolby Digital signals DTS signals Auto preset memory ONLY Mode CENTER IMAGE CINEMA EQ D.COMP. This unit is equipped with a function for automatically searching for FM broadcast stations and storing them in the DIRECT C (OFF) C (0dB) - Page 27 ENGLISH Auto tuning Preset stations Preparations: Set the input source to “TUNER”. Use the “Auto tuning” or “Manual tuning” operation to tune in the station to be preset in the memory. Press the MEMORY button. (Main unit) (Remote control unit) (Remote control unit) Watching the display, press the BAND button to select the desired band (AM or FM).
-
Page 28: Additional Information
ENGLISH RDS (Radio Data System) To continue searching, repeat step 3. When a broadcast station is found, that station's If no other RDS station is found when all the name appears on the display. RDS (works only on the FM band) is a broadcasting service which allows station to send additional information frequencies are searched, “NO RDS”... -
Page 29: Last Function Memory
ENGLISH 16 LAST FUNCTION MEMORY TP search Use this function to find RDS stations broadcasting traffic program (TP stations) • This unit is equipped with a last function memory which stores the input and output setting conditions as they were immediately before the power is switched off. •... -
Page 30: Additional Information
Adding these speakers, however, increases the surround effect not only with sources recorded in 6.1 channels but also with conventional 2- to 5.1-channel sources. All the Denon original surround modes (see page 23) are SL: Surround L channel compatible with 6.1-channel playback, so you can enjoy 6.1-channel sound with any signal source. - Page 31 ENGLISH When not using surround back speakers Speaker setting examples Front speakers • Set the front speakers with their front surfaces Here we describe a number of speaker settings for different purposes. Use these examples as guides to set up Center speaker as flush with the TV or monitor screen as your system according to the type of speakers used and the main usage purpose.
- Page 32 When either of these signals is input to the AVR-1803, the surround mode is automatically set to Dolby speakers. To avoid this, be sure to switch the input mode to “AUTO” or “DTS” before playing CDs or Pro Logic when the “DOLBY/DTS SURROUND”...
-
Page 33: Troubleshooting
ENGLISH 19 TROUBLESHOOTING DTS-ES Extended Surround DTS-ES Extended Surround is a new multi-channel digital signal format developed by Digital Theater Systems If a problem should arise,first check the following. Inc. While offering high compatibility with the conventional DTS Digital Surround format, DTS-ES Extended 1. -
Page 34: Specifications
ENGLISH 2 Video section Symptom Cause Measures Page • Standard video jacks 1 V p-p, 75 Ω/ohms • Batteries dead. • Replace with new batteries. Input/output level and impedance: • Remote control unit too far from • Move closer. Frequency response: 5 Hz ~ 10 MHz —... - Page 35 • Este problema será especialmente frecuente al Gracias por haber elegido el receptor Surround DENON A/V. Este notable componente ha sido diseñado para 10 cm o más usar antenas interiores o cables alimentadores de proporcionarle la escucha de un espléndido sonido de fuentes tales como un DVD en el sistema “AV theater”...
- Page 36 (REMOTE SENSOR)........(137) Botón SURROUND Indicador de alimentación (ON/STANDBY) NOTAS: PARAMETER ......(148 ~ 150, 152) • Los botones sombreados no funcionan Botón FUNCTION........(145, 147) Botón SELECT ......(145 ~ 150, 153) con el AVR-1803. (No sucede nada cuando se Botón SOURCE ..........(145) pulsan.)
-
Page 37: Lea Esto Primero
No las utilice para secadores de pelo, alimentación eléctrica del equipo. componentes. • No se puede realizar la grabación análoga de las señales de entrada en el AVR-1803 en formato digital.Para Paso 2 (pagina 137) grabar de forma análoga, conecte también las señales análogas del reproductor a las terminales de entrada análogas AVR-1803. - Page 38 ESPAÑOL Conexión de los componentes de audio (2) Conexión de equipos de video Televisor o sintonizador DBS Conexión de un televisor/sintonizador DBS AUDIO TB/DBS Reproductor de CD VIDEO OUTPUT Conexión de un reproductor de CD • Conectar el conector de salida de video del televisor o sintonizador DBS (VIDEO Conecte los conectores de salida analógica del OUTPUT) al conector VIDEO...
- Page 39 ESPAÑOL Para conectar la señal de video, use un cable para señales de video de 75 Ω/ohmios. El uso de un cable Conexión de aparatos de video equipados con tomas de video de diferencia de incorrecto puede desmejorar la calidad de sonido. color (componente - Y, P ) (reproductor DVD) Juego de Vídeo...
- Page 40 Si el circuito de protección se activara de nuevo aún cuando no detectara problemas en el cableado o en la ventilación del aparato, desconecte la alimentación eléctrica y póngase en contacto con el servicio técnico de DENON. Notas: • No conecte dos antenas de FM simultáneamente.
-
Page 41: Uso Del Mando A Distancia
ESPAÑOL SISTEMAS DE ALTAVOCES SISTEMA DE USO DEL MANDO A DISTANCIA ALTAVOZ CENTRAL DELANTEROS Después de efectuar el procedimiento que se describe más abajo, inserte las pilas antes de usar la unidad de control remoto. Radio de acción de la unidad de control remoto ( L ) ( R ) Apunte la unidad de control remoto hacia el sensor de... -
Page 42: Configuración Del Sistema
ESPAÑOL CONFIGURACIÓN DEL SISTEMA NOTA: • De systeeminstellin verschijnt niet op het display wanneer “HEADPHONE ONLY” is geselecteerd. • Una vez que se han realizado todas las conexiones con otros componente de audio/vídeo, tal como se describe en “CONEXIONES” (véanse las páginas 133 a 137, prosiga con los diversos ajustes descritos más adelante en la pantalla de visualización. - Page 43 ESPAÑOL Ajuste del modo de subwoofer y de frecuencia de transición Utilice los botones (izquierda) y (derecha) para seleccionar el tipo de Esta pantalla no se visualiza cuando no se utiliza un subwoofer (altavoz de ultragraves). altavoz periférico Surround. • Ajuste los modos de frecuencia de transición y de subwoofer de acuerdo con el sistema de altavoz que se (Inicial) esté...
- Page 44 ESPAÑOL NOTA: Ajuste del tiempodemora • No se puede realizar ningún ajuste cuando se ha seleccionado “None” para los altavoces periféricos Surround. Ingrese las distancias desde la posición de audición a los altavoces y seleccione el tiempo de retardo para sonido envolvente.
- Page 45 ESPAÑOL Configuración del modo Auto Surround • Seleccione “OFF” si no se conecta ningún dispositivo. Pulse el botón ENTER o (abajo) para cambiar al ajuste de entrada óptica 3 Para las tres clases de señales de entrada que se muestran a continuación, se almacena en la memoria el (OPT 3).
-
Page 46: Unidad De Control Remoto
UNIDAD DE CONTROL REMOTO Preset memory Se pueden controlar componentes DENON y de otras marcas ajustando la memoria de preajuste de acuerdo Funcionamiento de los componentes de audio DENON con la marca del componente de vídeo que se desea controlar. - Page 47 • Para estos componentes CD, CDR, MD y TAPE , se puede hacer funcionar a los botones de la misma forma que para los componentes de audio Denon (página 142). mando a distancia de ese aparato.
-
Page 48: Operaciones
ESPAÑOL 12 OPERACIONES Pasar através (Punch Through) • “Pasar através” es una función que le permite hacer funcionar los botones PLAY, STOP, MANUAL SEARCH y Antes de la puesta en marcha AUTO SEARCH en los componentes CD, TAPE, CDR/MD, DVD/VDP o VCR cuando se encuentre en el modo DBS/CABLE o TV. - Page 49 ESPAÑOL entradas de descodificadores externos se Modo de entrada cuando se reproducen fuentes DTS Reproducción de la fuente de entrada reproducen sin pasar por la circuitería surround. • Se producirá ruido si se reproducen CDs o LDs compatibles con DTS en el modo “ANALOG” o NOTA: “PCM”.
- Page 50 ESPAÑOL [5] Comprobación de la fuente de programas que se está reproduciendo, etc. Después de iniciar la reproducción Visualización en el panel frontal [1] Ajuste de la calidad del sonido (tono) • Las descripciones de las operaciones realizadas en el equipo también se visualizan en el panel frontal de El tono se activa de la siguiente forma cada vez visualización.
-
Page 51: Surround
ESPAÑOL Grabación de una fuente de programas Después de hacer estos ajuste, pulse de nuevo Pulse el botón TEST TONE. el botón TEST TONE. (grabación desde la fuente actualmente monitorizada) En los distintos altavoces se Reproducir una fuente mientras se graba otra fuente (modo REC OUT) producen los tonos de prueba. - Page 52 ESPAÑOL • Ajuste CENTER WIDTH Modo Dolby Surround Pro Logic Ajuste los diversos parámetros de sonido envolvente. CENTER WIDTH O • Ajuste CINEMA EQ puede elegir CINEMA EQ OFF directamente el modo Dolby Surround Pro Logic II Cinema o Music •...
- Page 53 ESPAÑOL Parámetros de los altavoces surround (de tonos graves) q Seleccione el modo DTS NEO:6. Ajuste los diversos parámetros de sonido envolvente. Modo Pro Logic II: El modo Cinema (cine) debe utilizarse con una televisión estéreo y con programas codificados en Dolby •...
- Page 54 ESPAÑOL Si se lleva a cabo esta operación desde el panel Seleccione el modo Dolby/DTS Surround. Utilice los botones (izquierda) y (derecha) para ajustar el nivel LFE. de la unidad principal, pulse el botón SURROUND MODE (modo surround), luego gire la perilla SELECT y seleccione Dolby Pro logic o DTS NEO:6.
-
Page 55: Simulación Surround Dsp
Parámetros de los altavoces surround (de tonos graves) w CINEMA EQ. (Ecualizador Cinema): • El AVR-1803 está equipado con un DSP (procesador de señales digitales) de gran calidad que procesa señales La función ecualizador cinema disminuye suavemente el nivel de las frecuencias extremas altas, digitales para recrear sintéticamente el campo sonoro. - Page 56 ESPAÑOL (3) DELAY TIME Simulación surround DSP Utilice los botones (izquierda) y (derecha) para ajustar el tiempo de • Cómo operar el modo surround y los parámetros surround desde la unidad de control remoto. retardo. (Inicial) Seleccione el modo surround para el canal de entrada.
- Page 57 ESPAÑOL • Cómo operar el modo surround y los parámetros surround desde el panel de la unidad principal. 2 Modos y parámetros surround Cuando se Cuando se Salida de canales Girar el botón SELECT para seleccionar el modo Cuando se Cuando se reproducen reproducen...
-
Page 58: Recepción De Radio
ESPAÑOL Parameter (default values are shown in parentheses) 15 RECEPCIÓN DE RADIO PARÁMETRO DE SONIDO ENVOLVENTE Sólo MODO DE MÚSICA Señales Dolby Digital Señales DTS Memoria de presintonización automática NEO:6 Modo CENTER IMAGE CINEMA EQ D.COMP. Esta unidad incorpora una función de búsqueda y almacenamiento automático de estaciones de FM en la DIRECT C (OFF) C (0dB) - Page 59 ESPAÑOL Sintonización automática Emisoras presintonizadas Preparación: Ajuste la fuente de entrada a “TUNER”. Use la función “Auto Tuning” (sintonización automática) o “Manual Tuning” (sintonización manual) para sintonizar la estación ajustada en la memoria. Presione el botón MEMORY (Unidad principal) (Remote control unit) (memoria).
- Page 60 ESPAÑOL RDS (Sistema de información radial) Presione el botón PRESET UP (preajuste en Cuando se encuentra una estación, el nombre ascenso) o DOWN (descenso) para comenzar de esa estación aparece en el visualizador. RDS (sólo funciona en la banda de FM) es un servicio de transmisión que permite a la estación enviar automáticamente la operación de búsqueda información adicional junto con las señales del programa radial normal.
-
Page 61: Memoria De Ultima Función
ESPAÑOL Búsqueda TP MEMORIA DE ULTIMA FUNCIÓN • Esta unidad está equipada con una memoria de última función la cual almacena las condiciones de Utilice esta función para encontrar estaciones RDS que emitan programas de tráfico (estaciones TP). configuración de entrada y salida tal como estaban inmediatamente antes de apagar el equipo. •... - Page 62 6,1 canales sino también con fuentes convencionales de 2 a 5,1 canales. Todos los SR: Canal surround R modos surround originales de Denon (consulte la página 151) son compatibles con la reproducción de 6.1 SB: Canal trasero surround (1 spkr o 2 spkrs) canales, de esta forma puede disfrutar de sonido de 6.1 canales con cualquier fuente de señal.
- Page 63 ESPAÑOL Al no utilizar altavoces traseros surround Ejemplos de ajustes de altavoces Altavoces frontales • Ajuste los altavoces delanteros con sus Aquí describimos una serie de ajustes de altavoces para distintos objetivos. Use estos ejemplos como guía para Altavoz central superficies frontales tan parejo con el TV o la configurar su propio sistema de acuerdo con el tipo de altavoces que se están utilizando y su finalidad principal.
- Page 64 DTS por primera vez, baje el volumen master a un nivel bajo, comience a reproducir el disco DTS y Estos son dos tipos de señales de grabación de sonido envolvente DVD Dolby. compruebe si el indicador DTS del AVR-1803 (véase la página 150) se ilumina antes de subir el volumen. q Señales estereofónicas PCM de 2 canales 3 Se necesita un reproductor DVD con salida digital compatible con DTS para reproducir DVDs en DTS.
- Page 65 013, 023, 028, 031, 033, 053, Minolta 013, 023 054, 088, 091, 098, 099, 115 Mitsubishi 001, 003, 008, 013, 014, 017, Sentra Denon 014, *[111] Craig 007, 087, 088, 091, 115 027, 029, 039, 040, 041, 045, Sharp 001, 002, 021, 097...
- Page 66 ENGLISH DEUTSCH FRANCAIS ITALIANO ESPAÑOL NEDERLANDS SVENSKA Bradford 019, 051, 052, 072, 073, 091, Pulsar CABLE Brockwood 003, 047 117, 126 Quasar 036, 037, 074, 141 006, *[007], 008, 009 Candle 003, 030, 031, 032, 038, 047, Kawasho 018, 046 Radio Shack 011, 044, 063, 093, 118 Archer...
- Page 67 NEDERLANDS ESPAÑOL ITALIANO FRANCAIS DEUTSCH ENGLISH Magnavox Sony Nokia 080, 084, 085, 086 TAPE Philips Primestar Denon *[111] Proscan 048, 055, 056 Aiwa 001, 002 048, 055, 056, 068 Carver Realistic Harman/Kardon 002, 003 Sierra I 004, 005 Sierra II...
- Page 68 16-11, YUSHIMA 3-CHOME, BUNKYOU-KU, TOKYO 113-0034, JAPAN Telephone: (03) 3837-5321 Printed in Korea 511 3946 001...
Need help?
Do you have a question about the AVR-1803 and is the answer not in the manual?
Questions and answers