Table of Contents
Advertisement
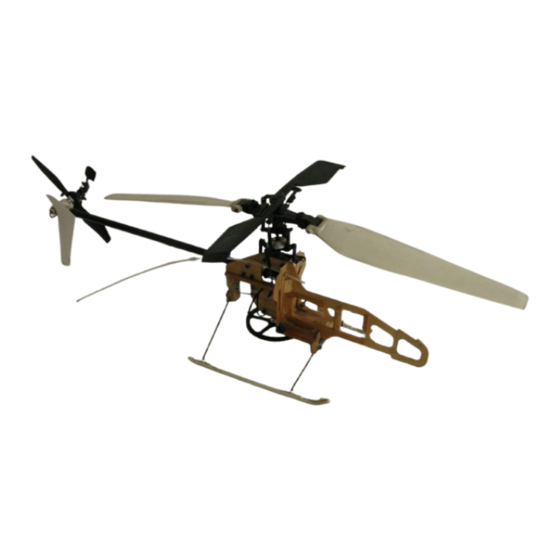
Op er a tor's Guide
W
arnings
WARNING!
WARNING!
WARNING!
WARNING!
THE RADIO CONTROLLED MODEL HELICOPTER BUILT FROM THIS KIT IS
NOT A TOY, AND IS NOT MEANT FOR CHILDREN. IT IS A FLYING MACHINE
CAPABLE OF CAUSING PROPERTY DAMAGE AND SERIOUS BODILY HARM
TO THE OPERATOR AND SPECTATORS IF NOT BUILT AND OPERATED
CORRECTLY AND RESPONSIBLY. ROTATING COMPONENTS, ESPECIALLY
THE MAIN ROTOR BLADES, ARE AN EVER-PRESENT DANGER.
Helicopters, by their nature, are not positively stable. Even if assembled and
adjusted properly, helicopters will not hold a particular flight position without constant
control inputs from the pilot, and will not automatically recover from an unwanted
flight attitude without pilot intervention.
It is your exclusive responsibility to correctly and responsibly build, maintain and
operate this helicopter. Lite Machines has spent considerable time making this
product reliable and easy to build, but only the operator can ensure that it is safe.
Because the safe operation of this helicopter is beyond the control of the
manufacturer and distributor, the owner/operator assumes all risk of use.
THIS PRODUCT CONTAINS CHEMICALS WHICH ARE KNOWN BY THE STATE
OF CALIFORNIA TO CAUSE CANCER, BIRTH DEFECTS AND/OR OTHER
REPRODUCTIVE HARM. Many common materials, such as metals, plastics, glues,
fuels, lubricants and coatings contain chemicals in varying amounts and
concentrations which will cause harm if introduced into the human body. Lite
Machines strives to produce safe and reliable products, and is interested in the
well-being of every user of its products. For more information on chemicals contained
in Lite Machines' products, please contact Lite Machines Corporation. For further
information on toxic or dangerous chemicals, please refer to California's health and
safety codes sections 25249.5-13.
Warnings
LITE MA CHINES
Advertisement
Table of Contents

Related Manuals for Lite Machines LMH-110

Summary of Contents for Lite Machines LMH-110
- Page 1 WARNING! It is your exclusive responsibility to correctly and responsibly build, maintain and operate this helicopter. Lite Machines has spent considerable time making this product reliable and easy to build, but only the operator can ensure that it is safe.
- Page 2 Op er a tor's Guide Acknowledgments cknowledgments We thank all of those people who helped make Lite Machines Corporation possible. We especially thank Mom and Dad. Without their help and constant encouragement we could not have done this. David and Paul Arlton...
-
Page 3: Table Of Contents
Op er a tor's Guide Table of Contents able of Contents Model Helicopter Safety Fuel Safety ....1-1 Flight Safety ....1-2 Electric Power Safety . - Page 4 Op er a tor's Guide Table of Contents Glow-Fuel Engines General Operating Considerations ..4-1 Fuel Mixture and Compression ..4-1 The Importance of Clean Fuel ..4-3 Synthetic Oils .
- Page 5 Op er a tor's Guide Table of Contents Zen and the Art of Helicopter Maintenance General Maintenance ....7-1 Engine Maintenance ....7-1 Brushed Motor Maintenance .
-
Page 6: Fuel Safety
Model Helicopter Safety odel Helicopter Safety This section contains important safety information regarding proper handling and operation of Lite Machines helicopters and accessories. Fuel Safety 1. Use ONLY commercial fuel developed for model engine use. NEVER USE GASOLINE, DIESEL, OR ANY OTHER FUEL! These fuels will ruin model engines, and can explode and burn causing injury to YOU and OTHERS. -
Page 7: Flight Safety
4. NEVER, EVER FLY NEAR OR OVER PEOPLE. Always keep your model at a safe distance from yourself and spectators. 5. Use only those model engines designed specifically for your Lite Machines helicopter. Use of more powerful engines (such as racing engines) is potentially dangerous and voids all warranties. -
Page 8: Electric Power Safety
Op er a tor's Guide Model Helicopter Safety Electric Power Safety 1. Electric power systems can be very dangerous. High electric currents can heat wires, cause sparks and lead to fires and personal injury. DO NOT TO TOUCH EXPOSED ELECTRIC COMPONENTS, AND NEVER FLY AT A SITE LOCATED NEAR FLAMMABLE MATERIALS. - Page 9 Op er a tor's Guide Terminology and Controls erminology and Controls This section contains information on helicopter terminology and flight control functions. Review the figures and become familiar with the names and functions of the major components and controls. For more information on helicopter controls see the How Helicopters Work section of this Operator’s Guide.
-
Page 10: Helicopter Controls
Op er a tor's Guide Terminology and Controls Helicopter Controls To fly a model helicopter you must first understand the function of each flight control. Fig. 2-2 through Fig. 2-5 illustrate the flight motions produced with the right cyclic (pronounced “sigh-click”) stick on the transmitter. The right stick tips the rotating main rotor in the direction of the stick motion and controls the direction of horizontal flight. - Page 11 Op er a tor's Guide Terminology and Controls O-Stick yaw Figure 2-4. Fig. 2-4 and Fig. 2-5 show the ef fect of mov ing the left stick on the trans mit ter. The left stick con trols the tail ro tor and throt tle. As shown in Fig.
-
Page 12: Holding The Transmitter
Op er a tor's Guide Terminology and Controls Holding the Transmitter Model airplane fliers commonly hold their transmitter so only their thumbs touch the transmitter sticks. When flying with thumbs, it is easy to unintentionally mix controls by moving the right stick up and to the right, and the left stick up and to the left. O-Hands on trans mit ter Figure 2-6. -
Page 13: The Corona Electric Helicopter
Op er a tor's Guide Electric Motors lectric Motors This section describes basic principles of electric powered flight and the operation of Electro-Fusion brushed motors. If you have a gas-powered helicopter you can skip this section. The Corona Electric Helicopter Before it made its first flight, the Corona electric helicopter was optimized by a computer program to fly at maximum efficiency with Electro-Fusion brushed motors. -
Page 14: Batteries
Op er a tor's Guide Electric Motors diameter pipe can carry more water than a small pipe. The Corona electric helicopter normally flies on about 11 to 19 amps of electric current. Electric resistance is measured in ohms and represented by the Greek letter omega (Ω). -
Page 15: Brushed Motors
Op er a tor's Guide Electric Motors Like all magnets, electro-magnets have a north pole and south pole. North and south poles attract each other. When two magnets are placed next to each other, the magnets tend to rotate so the north pole of one magnet aligns with the south pole of the other. -
Page 16: Adjustable Timing
Op er a tor's Guide Electric Motors The speed of rotation of a brushed motor is determined by the load on the motor, the amount of current passing through the coils, the number of turns or winds in the coils and the operating voltage. -
Page 17: Brushless Motors
Op er a tor's Guide Electric Motors this problem. To adjust the point at which the brushes touch the commutator segments, the motor end-bell can be rotated relative to the motor body. “Advanced” timing gives the coils more time to develop a strong magnetic field so they can pull on the permanent magnets longer and with less magnetic conflict. -
Page 18: Problems With Brushed Motors
Op er a tor's Guide Electric Motors Problems with Brushed Motors Electro-Fusion motors are modified versions of standard 540-size brushed motors. The original 540-size motors made in the 1980’s produced about 50 watts of power, but Electro-Fusion motors can produce as much as 150 watts with the same size brushes. - Page 19 Op er a tor's Guide Electric Motors O-Re move end-bell Figure 3-5. 4. Loosen (but do not remove) the end-bell screws. Rotate the end-bell assembly, and pull it off the motor as shown in Fig. 3-5. 5. Remove the armature from the motor can. O-Worn brush and comm Figure 3-4.
- Page 20 Op er a tor's Guide Electric Motors 7. If the commutator is worn unevenly as shown in Fig. 3-4, replace the entire armature with a new one. This will significantly increase motor power. O-Comm clean #1 Figure 3-6. 8. If the commutator surface is smooth but dark and discolored, clean it with a LiteBrite commutator cleaning pad until it is a shiny copper color (six to ten twists by hand) as shown in Fig.
-
Page 21: The Fusion 35 Speed Controller
Op er a tor's Guide Electric Motors 10. If the commutator was clean when you opened the motor, wait a few more flights before cleaning it the next time. If it was dark and discolored, clean it more frequently. 11. Clean the inside of the motor can and motor end-bell with a paper towel. 12. -
Page 22: Arming The Fusion 35
Op er a tor's Guide Electric Motors receiver loses transmitter signal for more than two seconds, an additional safety feature turns off power to the motor. Warning! Electric power systems can be very dangerous. High electric currents can heat wires, cause sparks and lead to fires and personal injury. -
Page 23: Optional Rf Filter
The Fusion 35 controller includes a factory-installed Lite Machines connector on the battery power cable. You must install a corresponding Lite Machines connector to the wire leads on your battery pack and check the connections to your controller to insure proper polarity. -
Page 24: Battery Elimination Circuitry (Bec)
Op er a tor's Guide Electric Motors Warning! IF THE POSITIVE AND NEGATIVE BATTERY CONNECTIONS TO YOUR SPEED CONTROLLER ARE REVERSED, YOU WILL PERMANENTLY DAMAGE YOUR SPEED CONTROLLER. THIS DAMAGE IS NOT COVERED UNDER WARRANTY. Warning! Do not install a fuse between your speed controller and battery. If the fuse blows the controller and radio receiver will have no power. -
Page 25: Battery Chargers
Op er a tor's Guide Electric Motors instance, charge a new 2400 mAh battery pack at about 240 mA for ten hours before flying it on your helicopter or fast-charging it at a high current (3-5 amp) setting. Since flight times generally run in the range of five to seven minutes, but charging times run thirty to sixty minutes, it is best to charge several battery packs for each flying session. -
Page 26: Flying Weight
Op er a tor's Guide Electric Motors Flying Weight Proper flying weight is an important factor in electric helicopter flight. Without enough weight, the main rotor blades turn too slowly, and stability and control power are reduced. This is especially noticeable in high winds. For this reason, a heavier seven-cell battery is preferred over a lighter six-cell battery in the Corona helicopter. -
Page 27: General Operating Considerations
Glow-Fuel Engines low-Fuel Engines Lite Machines gas helicopters are powered by Norvel Vmax-6 and Vmax-7 helicopter engines. In both engines, the crankshaft is supported by one or more durable bronze bushings to withstand the side-loads generated by gear driven rotor systems. Each engine has five directional transfer ports for easier starting and extra lugging power. - Page 28 Op er a tor's Guide Glow-Fuel Engines The needle valve on the carburetor meters the amount of fuel mixed with the air. Too much fuel (too “rich”) causes the engine to slow down and lose power. Too little fuel (too “lean”) causes the engine to over-heat, slow down and lose power. Vmax engines operate best within a needle valve range of about +1/4 to -1/4 turn.
-
Page 29: The Importance Of Clean Fuel
Hint: Use the Lite Machines Lil’ Squeezer fuel system to quickly fuel and de-fuel your helicopter. The Lil’ Squeezer fuel system consists of a fuel storage bottle that protects your fuel from sunlight during storage, and a filtered transfer tube that will not contaminate your fuel with rubber byproducts. -
Page 30: Breaking-In A New Engine
You may break-in your new engine on a test stand or in your helicopter. Always use a Lite Machines heat sink on the engine in your helicopter. If you use an airplane style glow head without the heat sink, your engine will overheat and seize. NEVER run your engine a test stand without an airplane propeller. -
Page 31: Preferred Engine Starting Procedure
This section contains a detailed, step-by-step procedure for starting the Norvel engine in your Lite Machines helicopter. Since you will probably want to try flying your helicopter once the engine is running, you should first read the Main Rotor Stability and Control and Learning to Fly sections of this Operator’s Guide. - Page 32 2 to 2-1/2 turns. 8. Connect your Lite Machines high-speed electric starter to a 12-volt starter battery. The starter should spin in the direction shown in Fig. 4-1. If not, reverse the starter wires on the battery.
- Page 33 Lite Machines SpiraLite Speed and Norvel Freedom XL glow plugs require 1.2 volts. The best way to power a Lite Machines or Norvel glow plug is with a DuBro Kwik-Start clip. Never wire the glow plug directly to 12 volts (like your car battery) or the plug will burn out.
- Page 34 Op er a tor's Guide Glow-Fuel Engines Warning! ALWAYS WEAR EYE AND HEARING PROTECTION. Model engines throw out oil droplets when running. It is nearly impossible to avoid getting oil on you while starting the engine. 12. Move the transmitter throttle stick (left stick) to about ½ throttle, and the throttle trim lever to full.
-
Page 35: Alternate Starting Method
Op er a tor's Guide Glow-Fuel Engines Alternate Starting Method Fig. 4-3 illustrates an alternate starting method requiring two people − one to hold and start the helicopter and another to hold and operate the transmitter. This starting method is illustrated for completeness and because the engine sometimes starts more easily when held vertically. -
Page 36: Adjusting Fuel Mixture And Compression
Op er a tor's Guide Glow-Fuel Engines Adjusting Fuel Mixture and Compression This section describes a step-by-step procedure for adjusting fuel mixture and compression on Norvel engines. 1. Set your helicopter on the ground with the engine idling. Slide a heavy pole or wood plank from side to side over the landing gear skids and between the wire struts in order to weigh your helicopter to the ground. -
Page 37: Inspecting Spiralite Speed Glow Plugs
Op er a tor's Guide Glow-Fuel Engines 8. If the needle valve seems to be adjusted correctly but the engine does not produce much power, it may not yet be broken-in or the compression may be set too low. Try removing a washer from under the glow plug and readjusting the needle valve. -
Page 38: Electric Starter Effect On Glow Plug
Op er a tor's Guide Glow-Fuel Engines Electric Starter Effect on Glow Plug Norvel engines usually start easily. On-going difficulty with engine starting is sometimes a sign of a field-equipment problem. Many fliers have a field box with a small 5 Ah motorcycle battery connected to a power panel which powers the glow plug and electric starter motor. -
Page 39: Rotor Blade Designations
Rotor Blade Designations Lite Machines rotor blades each have a blade number that describes the blade design and size. Series 1 blades, which are standard on Model 110 and earlier helicopters, are not marked. Blades having different numbers are incompatible with each other, so do not use two blades with different numbers on the same rotor head. - Page 40 Op er a tor's Guide Main Rotor Stability and Control O-Tracking out Figure 5-1. Start the engine as outlined in the Preferred Engine Starting Procedure section of this Operator’s Guide. Once the engine is running properly, open the throttle until your helicopter is just about to lift off (about half throttle).
-
Page 41: Dynamic Balancing
Op er a tor's Guide Main Rotor Stability and Control Dynamic Balancing If the main rotor blades are tracking properly, but the helicopter still vibrates noticeably, the main rotor may not be properly balanced. To dynamically balance the main rotor without removing it from the helicopter, stick a small piece of blade balancing tape to one of the main rotor blades and run the main rotor at flight speed. -
Page 42: Adjusting Main Rotor Blade Pitch
The main rotors on Lite Machines helicopters are designed to generate high lift with very little engine power. High lift is required to fly on hot days and at high elevations where air density is low. - Page 43 The Model 110 helicopter is more like a compact car than a luxury car. Adding one to five ounces [28g to 142g] of weight to a Lite Machines gas-powered helicopter will significantly improve its flying qualities, especially in windy conditions.
-
Page 44: Getting Started
Learning to Fly earning to Fly This section describes a three step process for learning to fly your Lite Machines helicopter. Although it is possible to learn on your own, try to find an experienced helicopter pilot to help. An experienced pilot can start and tune your engine, trim the controls, track the rotor blades and copilot your helicopter while you are learning. -
Page 45: Training Gear
Op er a tor's Guide Learning to Fly Fly your helicopter in open areas outdoors away from people and property such as buildings and cars. When learning to hover, the best flying sites are clean, smooth paved surfaces. While not as soft as grass, paved surfaces allow the model to skid around without leaving the ground. -
Page 46: Step 1: Learn The Left Stick
Learning to Fly Step 1: Learn the Left Stick The following describes a step-by-step process for learning to fly your Lite Machines helicopter. The process consist of driving the helicopter on the ground using just the left control stick on the transmitter until your control actions become unconscious and automatic. -
Page 47: Step 3: Learn The Right Stick
Op er a tor's Guide Learning to Fly While learning the left stick, it is sometimes helpful to have an experienced flyer control the right stick (this requires a skilled pilot, since beginners often allow the model to turn nose-in). Agree ahead of time who does what in case things get out of control. -
Page 48: Main Rotor Controls
Op er a tor's Guide Learning to Fly Main Rotor Controls You will notice a slight time lag between right stick control inputs and the resulting motions of the model as illustrated by Fig. 6-3. Frame 1 shows a helicopter hovering with the controls neutralized. - Page 49 Op er a tor's Guide Learning to Fly (ODECELC) Figure 6-4. The same technique used to start a helicopter moving is used to stop. In Frame 1 of Fig. 6-4, a helicopter is moving sideways with controls neutralized. In Frame 2, a control input immediately tilts the helicopter to the right creating a small sideways thrust.
-
Page 50: Forward Flight And Translational Lift
Op er a tor's Guide Learning to Fly Forward Flight and Translational Lift O-Lift Figure 6-5. When a helicopter is hovering in still air, the air flowing down through the main rotor (called the “down-wash”) tends to circle around to the top of the rotor and flow through again as illustrated in Fig. -
Page 51: Circles
Op er a tor's Guide Learning to Fly This effect is called “translational lift” because the extra lift is generated as the helicopter translates (moves forward) through the air. Translational lift affects both model and full-size, man carrying helicopters. Some early, underpowered full-size helicopters could not climb above about twenty feet without moving forward to gain translational lift. - Page 52 Op er a tor's Guide Learning to Fly Flying circles is a good way to prepare for forward flight. First practice hovering with the model turned sideways. It helps to turn your whole body with the model as shown in Fig. 6-7. Next, try flying circles around yourself as shown in Fig. 6-8. Practice both left and right circles.
-
Page 53: Figure 8'S And Nose-In Hovering
Op er a tor's Guide Learning to Fly Figure 8’s and Nose-In Hovering Having conquered hovering and circles, you have most of the basic flight skills needed for forward flight. The final skill to master is nose-in hovering. When the nose of the model is pointing toward you, the left/right and fore/aft controls appear to operate backwards. -
Page 54: Descending From Altitude
Op er a tor's Guide Learning to Fly Descending from Altitude O-Downwash Figure 6-10. If a helicopter descends straight down in still air, it will likely fly into its own down-wash as illustrated in Fig. 6-10. This is like flying into a strong downdraft and the helicopter will drop rapidly even at full power. -
Page 55: Piezo Gyro Stabilizers
Forward cyclic also tends to keep the tail rotor high when landing in tall grass. Lite Machines helicopters tend to rotate to the left when you suddenly drop the throttle after landing. By suddenly lowering the throttle you remove the engine torque driving the main rotor, but the main rotor and tail rotor are still turning at high speed. -
Page 56: Adjusting The Arlton Gyro Stabilizer
Op er a tor's Guide Learning to Fly Adjusting the Arlton Gyro Stabilizer The dual-gain mechanical Arlton Gyro stabilizer on the Model 110 helicopter greatly reduces tail swing caused by wind gusts or changes in engine speed. If the tail on your Model 110 helicopter swings excessively with throttle changes, check that all parts of the gyro, tail rotor blades and spider slider linkages are oiled and move very smoothly. -
Page 57: General Maintenance
Model helicopters, like their full-size counterparts, spend most of their time shaking themselves apart. The following sections provide a maintenance schedule and basic repair techniques for your Lite Machines helicopters. General Maintenance Periodically check all parts of your helicopter for breakage, fatigue cracks, loose screws and normal wear before flying each day and when cleaning up at home. -
Page 58: Brushed Motor Maintenance
Op er a tor's Guide Zen and the Art of Helicopter Maintenance Brushed Motor Maintenance • Clean com mu ta tor with LiteBrite pad (ev ery 6 to 10 flights) • Check length of brushes, re place if less than 3/16” (5mm) long (ev ery 10 flights) •... -
Page 59: Main Rotor Maintenance
Op er a tor's Guide Zen and the Art of Helicopter Maintenance Main Rotor Maintenance • Check tight ness of all bolts, set screws and pins (ev ery 10 flights) • Check the main ro tor hub and blades for cracks, chipped ends and any other dam age. Warn ing! DO NOT FLY DAM AGED BLADES. -
Page 60: Making Repairs With Ca And Glass Fiber
Op er a tor's Guide Zen and the Art of Helicopter Maintenance Making Repairs with CA and Glass Fiber The following procedure describes how to make an instant fiberglass patch on a broken part like a wood crutch using CA glue and fiberglass tape. Warning! NEVER TRY TO REPAIR THE FLEXIBLE PLASTIC PARTS OR ROTOR BLADES OF YOUR HELICOPTER! No type of glue (including CA glue) will stick to the plastic,... -
Page 61: Making Repairs With Ca And Baking Soda
Tail booms are frequently dented by the main rotor blades during crashes or hard landings. Small dents will not affect the flight qualities of your Lite Machines helicopter. A bent boom can usually be straightened by hand several times before being replaced. -
Page 62: Introduction
This section provides a brief technical explanation of certain aspects of helicopter flight control systems, and is included in this Operator’s Guide for your interest only. It is not necessary to read this section in order to build or fly your Lite Machines helicopter. -
Page 63: Background And History
Op er a tor's Guide How Helicopters Work details without completely understanding the big picture. It would have been handy to start with a basic understanding of helicopters so that we could have discussed some of the problems more intelligently. The following sections provide a brief introduction to helicopter flight dynamics for those who are just starting and want to know a little more. -
Page 64: Main Rotor Control
Op er a tor's Guide How Helicopters Work often covers the front half of the helicopter, but does not always extend back to the tail rotor because of the added weight and complexity of attaching the rear shell to the rest of the helicopter. - Page 65 Op er a tor's Guide How Helicopters Work As shown in Fig. 8-2, in addition to a pitch axis, rotor blades are generally hinged near the rotor hub to allow the blade to flap up and down and swing forward and backward. This allows the rotor blades to react to the constantly changing aerodynamic and gyroscopic forces encountered in flight.
- Page 66 On Lite Machines helicopters, to tilt the rotor disk backward the main rotor blades are pitched to a high angle of attack as they pass around the right side of the fuselage and to a low angle of attack around the left side of the fuselage.
-
Page 67: Main Rotor Stability
The change in pitch, and associated lift force of the rotating rotor blades causes the helicopter to gain or loose altitude. Some small model helicopters (such as the Lite Machines Model 110) rely on variable engine speed instead of collective blade pitch for altitude control since main rotor thrust is proportional to rotor speed as well as blade pitch. -
Page 68: Retreating-Blade Stall
In this way, Hiller paddles actually contribute negative lift. The unusual Arlton Subrotor stabilizer blades on Lite Machines helicopters serve a triple purpose. As part of the main rotor control system, they amplify pilot control commands to the main rotor blades. -
Page 69: Anti-Torque Systems
(and consequently to the pilot’s legs in full-size helicopters, or to the servos in model helicopters). The unique swept tail rotor blades on Lite Machines helicopters balance the aerodynamic twisting forces of high lift cambered airfoils with other forces. They... -
Page 70: Gyro Stabilizers
Op er a tor's Guide How Helicopters Work Gyro Stabilizers In general, maintaining a constant heading in hover or low speed flight can be a difficult business for a helicopter pilot. To counterbalance the constantly changing forces on the helicopter fuselage produced by changes in engine torque and atmospheric conditions such as wind gusts, the pilot must continually manipulate the tail rotor controls. - Page 71 Op er a tor's Guide How Helicopters Work OEXPGYRO Figure 8-4. Left to themselves, the gyro paddles will remain tilted unless the helicopter starts turning in the opposite direction. But the small Z-links that connect the paddles to the tail rotor are angled slightly at one end (see Fig.8-4) so that the pitch of the paddles changes as the paddles tilt.
- Page 72 Op er a tor's Guide How Helicopters Work OPLTCTRL Figure 8-5. The Arlton Gyro stabilizer works automatically without any input from the pilot, but at some point the pilot may wish to trim the tail rotor or turn the helicopter without interference from the gyro.
- Page 73 All of these variations, along with the other unique features of Lite Machines helicopters, are patented in the United States and countries all over the world.
- Page 74 Trouble-Shooting Glow Engines rouble-Shooting Glow Engines This section identifies a variety of problems that you may encounter when starting and operating the Norvel engines on a Lite Machines helicopter. Possible causes and suggested actions are also provided. Engine will not pop: Glow plug bad Remove glow plug and test.
- Page 75 Bad/old fuel Buy new fuel, change brands (fuel must contain castor oil). Electric starter too slow Try Lite Machines high-speed micro starter. Check charge of starter battery. Electric starter holding Remove starter from engine when engine starts back engine...
- Page 76 Op er a tor's Guide Trouble-Shooting Glow Engines Engine runs at full power for 1-2 minutes then suddenly stops: Mixture too lean Open needle valve 1/8 turn. Cylinder head leak Oil bubbles around glow plug indicate a leak under glow plug. Make sure glow plug seat is clean and washers are not bent.
- Page 77 Op er a tor's Guide Trouble-Shooting Glow Engines Engine losing power over time: Air temperature/humidity If air much cooler, add glow plug washer; if much changing compression warmer, remove washer. Dirt particle scratched Replace piston/cylinder or crankcase. cylinder wall or crankshaft seal “Varnish”...
- Page 78 Op er a tor's Guide Trouble-Shooting Glow Engines Engine suddenly stops at low throttle or while descending from altitude: Compression too high, Add glow plug washers. fuel pre-detonating Bad glow plug, glass seal Replace glow plug (normal tests will not find this leaking problem).
- Page 79 Remove needle valve and fuel line. Back-flush needle valve body with fuel. Reassemble needle valve and fuel line. Bad fuel fouling glow plug Buy new brand of fuel, change glow plug. Nothing will work, situation is hopeless: Gremlins in system Call Lite Machines LITE MA CHINES...
- Page 80 Op er a tor's Guide Trouble-Shooting Brushed Motors rouble-Shooting Brushed Motors This section identifies a variety of problems that you may encounter when operating an Electro-Fusion brushed motor your Corona electric helicopter. Possible causes and suggested actions are also provided. Motor losing power/flight times going down Commutator oxidized/dirty Clean commutator with LiteBrite pad...
- Page 81 Op er a tor's Guide Trouble-Shooting Brushed Motors Tail swings after landing Low battery, gyro turning Land sooner with more battery power BEC not supplying Use separate receiver battery adequate voltage to gyro Motor turns backwards Motor connections Reverse power cables on motor. DO NOT backwards CHANGE POWER CABLES ON BATTERY LITE MA CHINES...
Need help?
Do you have a question about the LMH-110 and is the answer not in the manual?
Questions and answers