Table of Contents
Advertisement
Available languages
Available languages
Quick Links
Download this manual
See also:
Use and Care Manual
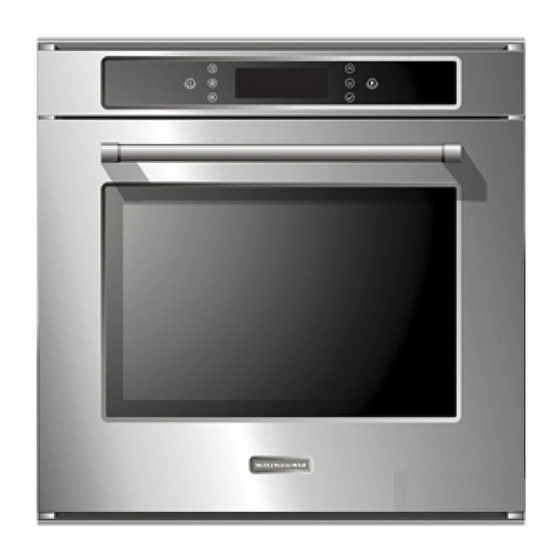
24" (60 CM) ELECTRIC BUILT-IN OVEN
FOUR ÉLECTRIQUE ENCASTRÉ DE 24" (60 CM)
BUILT-IN OVEN SAFETY ...............................................................1
INSTALLATION REQUIREMENTS ................................................2
Tools and Parts ............................................................................2
Location Requirements................................................................2
Electrical Requirements ...............................................................4
INSTALLATION INSTRUCTIONS ..................................................4
Prepare Built-In Oven...................................................................4
Remove Oven Door......................................................................4
Make Electrical Connection .........................................................5
Install Oven...................................................................................6
Complete Installation ...................................................................7
We have provided many important safety messages in this manual and on your appliance. Always read and obey all safety
messages.
This is the safety alert symbol.
This symbol alerts you to potential hazards that can kill or hurt you and others.
All safety messages will follow the safety alert symbol and either the word "DANGER" or "WARNING."
These words mean:
WARNING
All safety messages will tell you what the potential hazard is, tell you how to reduce the chance of injury, and tell you what can
happen if the instructions are not followed.
IMPORTANT:
Save for local electrical inspector's use.
IMPORTANT :
À conserver pour consultation par l'inspecteur local des installations électriques.
501971002095
INSTALLATION INSTRUCTIONS
INSTRUCTIONS D'INSTALLATION
Table of Contents/Table des matières
BUILT-IN OVEN SAFETY
Your safety and the safety of others are very important.
DANGER
SÉCURITÉ DU FOUR ENCASTRÉ ................................................8
EXIGENCES D'INSTALLATION .....................................................9
Outils et pièces.............................................................................9
Exigences d'emplacement...........................................................9
Spécifications électriques ..........................................................11
INSTRUCTIONS D'INSTALLATION.............................................12
Préparation du four encastré .....................................................12
Dépose de la porte du four ........................................................12
Raccordement électrique...........................................................12
Installation du four......................................................................14
Achever l'installation ..................................................................15
You can be killed or seriously injured if you don't immediately
follow instructions.
You can be killed or seriously injured if you don't follow
instructions.
Advertisement
Table of Contents

Related Manuals for KitchenAid KEBC149BSS


Summary of Contents for KitchenAid KEBC149BSS
-
Page 1: Table Of Contents
INSTALLATION INSTRUCTIONS 24" (60 CM) ELECTRIC BUILT-IN OVEN INSTRUCTIONS D’INSTALLATION FOUR ÉLECTRIQUE ENCASTRÉ DE 24" (60 CM) Table of Contents/Table des matières BUILT-IN OVEN SAFETY ...............1 SÉCURITÉ DU FOUR ENCASTRÉ ..........8 INSTALLATION REQUIREMENTS ..........2 EXIGENCES D'INSTALLATION .............9 Tools and Parts ................2 Outils et pièces................9 Location Requirements..............2 Exigences d’emplacement............9... -
Page 2: Installation Requirements
INSTALLATION REQUIREMENTS Tools and Parts Location Requirements Gather the required tools and parts before starting installation. IMPORTANT: Observe all governing codes and ordinances. Read and follow the instructions provided with any tools listed Cabinet opening dimensions that are shown must be used. here. -
Page 3: Product Dimensions
Product Dimensions ³⁄₁₆ " (5 mm) Installed in Cabinet A. 21½" (54.5 cm) E. 22½" (57.2 cm) ¹⁄₈ B. ¾" (20 mm) F. 21 " (53.8 cm) ¹⁄₈ C. 23½" (59.5 cm) G. 21 " (53.7 cm) D. 23½" (59.5 cm) Cabinet Dimensions Undercounter ⁵⁄₈... -
Page 4: Electrical Requirements
Electrical Requirements If codes permit and a separate ground wire is used, it is Models rated 3.6 kW and below at 120/240 volts require a recommended that a qualified electrical installer determine that separate 15-amp circuit. Models rated 3.6 to 4.8 kW at the ground path and the wire gauge are in accordance with local 120/240 volts require a separate 20-amp circuit. -
Page 5: Make Electrical Connection
Make Electrical Connection 4. Connect red wire (D), yellow/green wire (C), and black wire (B) WARNING as shown in the following illustration. Electrical Shock Hazard Disconnect power before servicing. Use 12 gauge solid copper wire. Electrically ground oven. Failure to follow these instructions can result in death, fire, or electrical shock. -
Page 6: Install Oven
4-Wire Cable from Home Power Supply Install Oven 1. Remove the oven racks. WARNING Excessive Weight Hazard Use two or more people to move and install oven. Failure to do so can result in back or other injury. 2. Using two or more people, lift the oven by the side handles located on the right and left side of the oven. -
Page 7: Complete Installation
4. Securely fasten oven to cabinet using the two 4 x 25 mm self- tapping screws provided. Insert the screws through holes in Complete Installation mounting rails. Do not overtighten screws. 1. Check that all parts are now installed. If there is an extra part, go back through the steps to see which step was skipped. -
Page 8: Sécurité Du Four Encastré
SÉCURITÉ DU FOUR ENCASTRÉ Votre sécurité et celle des autres est très importante. Nous donnons de nombreux messages de sécurité importants dans ce manuel et sur votre appareil ménager. Assurez-vous de toujours lire tous les messages de sécurité et de vous y conformer. Voici le symbole d’alerte de sécurité. -
Page 9: Exigences D'emplacement
Exigences d’emplacement IMPORTANT : Observer les dispositions de tous les codes et La surface de support du four doit être robuste, horizontale et règlements en vigueur. en affleurement avec le bas de l’ouverture découpée dans le placard. Le plancher doit pouvoir supporter le poids d'un four Respecter les dimensions indiquées pour les ouvertures à... - Page 10 Dimensions du produit ³⁄₁₆ " (5 mm) Four installé dans un placard A. 21½" (54,5 cm) E. 22½" (57,2 cm) ¹⁄₈ B. ¾" (20 mm) F. 21 " (53,8 cm) ¹⁄₈ C. 23½" (59,5 cm) G. 21 " (53,7 cm) D.
-
Page 11: Spécifications Électriques
Spécifications électriques Si on utilise un conducteur distinct de liaison à la terre et lorsque Un modèle à 120/240 volts de 3,6 kW ou moins doit être les codes le permettent, il est recommandé qu’un électricien alimenté par un circuit indépendant de 15 A. Un modèle de qualifié... -
Page 12: Instructions D'installation
INSTRUCTIONS D’INSTALLATION Préparation du four encastré Raccordement électrique 1. Choisir l’emplacement final pour l’installation du four. Éviter de percer ou de sectionner le câblage du domicile pendant AVERTISSEMENT l'installation. AVERTISSEMENT Risque du poids excessif Utiliser deux ou plus de personnes pour déplacer et installer le four. - Page 13 3. Introduire le conduit flexible homologué CSA (A) dans 9. Installer un connecteur de conduit homologué CSA sur le l'ouverture du fond du four. boîtier de connexion. IMPORTANT : Raccorder le conduit flexible homologué CSA de manière à ce que l'étiquette d'avertissement se trouve à l'extérieur du four.
-
Page 14: Installation Du Four
Installation du four 1. Retirer les grilles du four. 4. Fixer solidement le four au placard à l’aide des deux vis autotaraudantes de 4 x 25 mm fournies. Insérer les vis à travers les trous des rails de montage. Ne pas serrer AVERTISSEMENT excessivement les vis. -
Page 15: Achever L'installation
Achever l’installation 1. Vérifier que toutes les pièces sont maintenant installées. S’il 5. Appuyer sur START (mise en marche). reste une pièce, passer en revue les différentes étapes pour Si le(s) four(s) ne fonctionne(nt) pas, contrôler ce qui suit : découvrir laquelle aurait été... - Page 16 501971002095 © 2012. 3/12 All rights reserved. Printed in Italy Tous droits réservés. Imprimé en Italie...
Need help?
Do you have a question about the KEBC149BSS and is the answer not in the manual?
Questions and answers