Table of Contents
Advertisement
Advertisement
Table of Contents

Subscribe to Our Youtube Channel
Related Manuals for Rush PAR 1 RGBW

Summary of Contents for Rush PAR 1 RGBW
-
Page 1: User Manual
PAR 1 RGBW User Manual Professional Entertainment Technology... - Page 2 The Martin logo, the RUSH by Martin logo, the RUSH by Martin name, the Martin name and all other trademarks in this document...
-
Page 3: Table Of Contents
Temperature test..................22 Fixture time....................22 Firmware version..................22 Effects ......................22 Strobe effects ....................23 Electronic dimming..................23 Color control ....................23 Maintenance ....................24 Cleaning ...................... 24 Service and repairs ..................25 RUSH PAR 1 RGBW user manual... - Page 4 DMX protocols ....................26 5 channel mode................... 26 7 channel mode................... 26 Control menus....................28 Troubleshooting ....................31 Specifications....................33 RUSH PAR 1 RGBW user manual...
-
Page 5: Safety Information
Always ground (earth) the fixture electrically. Use only a source of AC power that complies with local building and electrical codes and has both overload and ground-fault RUSH PAR 1 RGBW user manual... - Page 6 Connect only other fixtures of the same type to the power throughput sockets. Do not connect any other type of device to these sockets. Do not stick filters, masks or other materials onto any optical component. RUSH PAR 1 RGBW user manual...
- Page 7 Block access below the work area and work from a stable platform whenever installing, servicing or moving the fixture. Do not operate the fixture with missing or damaged covers, shields or any optical component. RUSH PAR 1 RGBW user manual...
- Page 8 Never attempt to use a fixture that is obviously damaged. Do not modify the fixture or install other than genuine RUSH by Martin™ parts. Refer any service operation not described in this manual to a qualified technician.
-
Page 9: Introduction
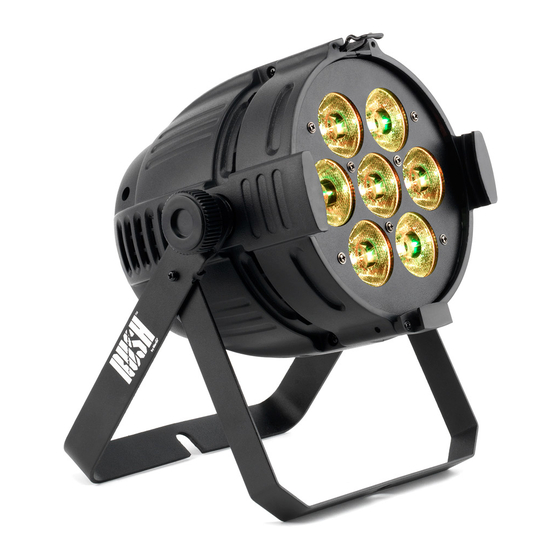
Introduction The PAR 1 RGBW is a powerful LED lamp incorporating seven 10 W RGBW long-life CREE LEDs. It provides RGBW color mixing, 32 color presets, smooth electronic dimming, as well as strobe effects. The device is extremely rugged, lightweight and compact, and is ideal for mobile DJ’s or small fixed installations. -
Page 10: Physical Installation
4. Secure the fixture against clamp failure with a secondary attachment such as an approved safety cable that is rated for the weight of the fixture and affixed to the safety cable attachment point on the fixture (do not use the mounting bracket). RUSH PAR 1 RGBW user manual... -
Page 11: Ac Power
The fixture has an auto-ranging power supply that accepts AC mains power at 100V~240V, 50/60Hz. Do not apply AC mains power to the fixture at any other voltage than this. RUSH PAR 1 RGBW user manual... - Page 12 120 V 60 Hz mains power, do not connect more than 4 fixtures to power in one chain. • 230 V 50 Hz mains power, do not connect more than 8 fixtures to power in one chain. RUSH PAR 1 RGBW user manual...
-
Page 13: Fixture Overview
Hold to exit the menus (this occurs automatically after a period where there has been no user input). DOWN Go down a menu branch Go up a menu branch ENTER Confirm the selected function RUSH PAR 1 RGBW user manual... - Page 14 The T 6.3A fixture fuse can be found under the cover next to the display. The fuse protects the fixture from current surges. Mains power input and output (6) For connection to supply mains power (blue socket) and for daisy chaining to the next fixture (white socket). RUSH PAR 1 RGBW user manual...
-
Page 15: Control Data Link
XLR plug with a 120-Ohm, 0.25-Watt resistor soldered between pins 2 and 3, “soaks up” the control signal so it does not reflect and cause interference. If a splitter is used, terminate each branch of the link. RUSH PAR 1 RGBW user manual... -
Page 16: Connecting The Data Link
2. Connect the DMX output of the fixture closest to the controller to the DMX input of the next fixture and continue connecting fixtures output to input. Terminate the last fixture on the link with a 120-Ohm resistor. RUSH PAR 1 RGBW user manual... -
Page 17: Fixture Setup
2. Use the UP and DOWN buttons to select a DMX address. 3. Once the address has been selected, press the ENTER button to set it (or, to return to a higher level of the menu structure without any change press the MENU button). RUSH PAR 1 RGBW user manual... -
Page 18: Dmx Channel Modes
Shows one of ten preset colors with no scene changes (sound activation has no effect). Colors are with full range dimming. Color changes - fast (SP1) to slow (SP3) - (sound activation has no effect) RUSH PAR 1 RGBW user manual... -
Page 19: Dimmer Modes
3. Once the mode has been selected, press the ENTER button to set it (or, to return to the higher level of the menu structure without any change press the MENU button). Sound activation RUSH PAR 1 RGBW user manual... -
Page 20: Microphone Sensitivity
MENU button). LED display on/off To set the LED display to be on all the time, or to automatically switch off when not in use: 1. Select menu and press the ENTER button. RUSH PAR 1 RGBW user manual... -
Page 21: Led Display Inversion
2. Use the DOWN and UP buttons to choose (red), (green), (blue), (white), (dimmer) or (strobe). Press the ENTER button to select (or, to return to the higher level of the menu structure without any change press the MENU button). RUSH PAR 1 RGBW user manual... -
Page 22: Auto Test
ENTER button. The display will show the version of software installed on the fixture. 2. To return to a higher level of the menu structure, press the MENU button. Effects This section describes DMX-controllable effects that require particular RUSH PAR 1 RGBW user manual... -
Page 23: Strobe Effects
Overall intensity can be adjusted 0-100% using electronic dimming in 5 and 7- channel DMX modes. Color control All DMX modes offer full RGBW color mixing. 32 color presets are available in 7-channel mode. RUSH PAR 1 RGBW user manual... -
Page 24: Maintenance
Check again at frequent intervals. This procedure will allow you to assess cleaning requirements in your particular situation. If in doubt, consult your RUSH by Martin dealer about a suitable maintenance schedule. -
Page 25: Service And Repairs
Never try to repair the fixture by yourself as this may result in damage, malfunction and it may potentially void your product warranty. The equipment must only be serviced or repaired by an authorized RUSH by Martin service technician. Installation, on-site service and maintenance can be provided worldwide by the Martin Professional Global Service organization and its approved agents, giving owners access to Martin’s expertise and product knowledge in a... -
Page 26: Dmx Protocols
Color 10 86-92 Color 11 93-100 Color 12 101-108 Color 13 109-116 Color 14 117-123 Color 15 124-131 Color 16 132-139 Color 17 140-147 Color 18 148-154 Color 19 155-162 Color 20 163-170 Color 21 RUSH PAR 1 RGBW user manual... - Page 27 Strobe - Slow-Fast 132-139 Open 140-181 Pulse - Slow to fast, fast close & slow open 182-189 Open 190-231 Pulse - Slow to fast, slow close & fast open 232-239 Open 240-247 Random strobe 248-255 Open RUSH PAR 1 RGBW user manual...
-
Page 28: Control Menus
Orange (dimmable) Green (dimmable) Yellow (dimmable) Magenta (dimmable) Light blue (dimmable) White (dimmable) Green-tinted yellow (dimmable) Show mode – color scene transitions (sound activation not used) Rapid scenes/color changes Medium scenes/color changes Slow scene/color changes RUSH PAR 1 RGBW user manual... - Page 29 White balance – green White balance – blue Manual mode - red Manual mode – green Manual mode – blue Manual mode – white Manual mode – dimmer Manual mode - strobe Automatic test Temperature test RUSH PAR 1 RGBW user manual...
- Page 30 Menu Option/setting Explanation Fixture operating hour counter Currently installed firmware version RUSH PAR 1 RGBW user manual...
-
Page 31: Troubleshooting
Ensure that the fixture is does not work. react to the beat of not connected to a DMX music. signal Tap the microphone to ensure that it is functioning. The fixture should react when in sound activation mode. RUSH PAR 1 RGBW user manual... - Page 32 DMX network. Attempt to control the fixture with another DMX control device. Move the fixture if it is being operated very close to an unshielded high- voltage installation. RUSH PAR 1 RGBW user manual...
-
Page 33: Specifications
Light source ..........7 x 10 W RGBW CREE MC-E LEDs Beam angle....................20° Control and Programming DMX channels....................5/7 DMX control protocol ............. USITT DMX512/1990 Interface ................LCD Control panel Non-DMX control ............Standalone in Show Mode RUSH PAR 1 RGBW user manual... - Page 34 Help preserve the environment! Ensure that this product is recycled at the end of its life. Your supplier can give details of local arrangements for the disposal of RUSH by Martin products RUSH PAR 1 RGBW user manual...
- Page 35 RUSH PAR 1 RGBW user manual...
- Page 36 I n n o v a t i o n Q u a l i t y P e r f o r m a n c e...
Need help?
Do you have a question about the PAR 1 RGBW and is the answer not in the manual?
Questions and answers