
Related Manuals for Magellan Triton Triton 400


Summary of Contents for Magellan Triton Triton 400
-
Page 1: User Manual
® Magellan Triton ™ User Manual Magellan Triton 400 Magellan Triton 500 Magellan Navigation, Inc. 960 Overland Court, San Dimas, CA 91773... -
Page 2: Important Safety Warnings
IMPORTANT SAFETY WARNINGS The Magellan Triton is a navigation aid designed to assist you in arriving at your selected destination. When using the Magellan Triton, these safety rules must be followed to prevent accidents that can result in injury or death to yourself or others: IN THE INTERESTS OF SAFETY, DO NOT USE THIS NAVIGATION DEVICE WHILE DRIVING A VEHICLE. -
Page 3: Federal Communication Commission Interference Statement
The Magellan Triton must be installed and operated at a distance no closer then 8 inches (20 cm) from the user. This Class B digital device meets all requirements of the Canadian Interference-Causing Equipment Regulations. - Page 4 © 2008 Magellan Navigation, Inc. All rights reserved. The Magellan Logo, Magellan, and Magellan Triton are trademarks of Magellan Navigation, Inc. No part of this user manual may be reproduced or transmitted in any form or by any means, electronic or mechanical, including photocopying and recording, for any purpose other than the purchaser’s personal use, without the prior written permission of Magellan Navigation, Inc.
-
Page 5: Table Of Contents
Overview ...1 Features of the Magellan Triton 400 & 500 ... 1 Specifications ... 3 Fundamentals ...4 Turning the Triton on ... 4 Turning the Triton off ... 4 Setting the display backlight intensity ... 4 Setting the Time Zone ... 4 Changing Languages ... - Page 6 Calibrating the Compass (Magellan Triton 500) ... 14 Calibrating True North (Magellan Triton 500) ... 15 The Altimeter / Barometer Screen (Magellan Triton 500) ... 15 The Satellite Status Screen ... 16 Customizing the Data Fields for the Satellite Status Screen ... 16 Explanation of Data Field Types ...
- Page 7 Creating a Trail ... 45 Creating a Trail (Alternate method) ... 45 Activating a Trail ... 45 Deleting a Trail ... 46 Deleting a Trail (Alternate Method) ... 46 Duplicating a Trail ... 47 Reversing a Trail ... 47 Table of Contents Magellan Triton...
- Page 8 Turning On/Off the Waypoint Proximity Alarm for a Place Waypoint ... 50 Viewing Best Fish and Hunt Times for a Place Waypoint ... 51 Viewing Sun and Moon Rise and Set Times for a Place Waypoint ... 51 Media ... 53 Browsing Photographs ... 53 Table of Contents Magellan Triton...
-
Page 9: Overview
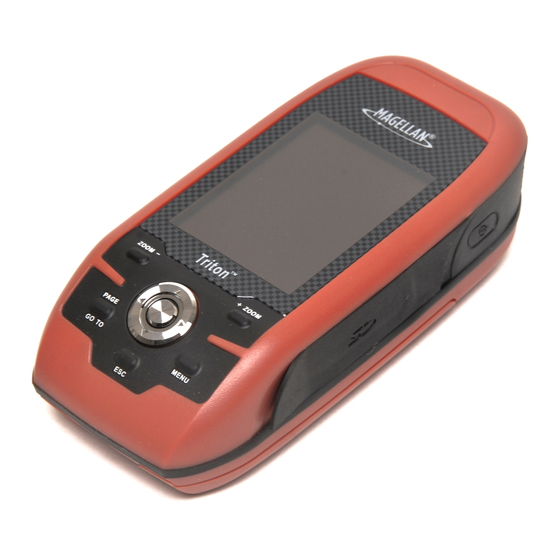
Thank you for your purchase of the Magellan Triton GPS receiver. The Magellan Triton was designed for the outdoor enthusiast with all the features needed to make your outdoor adventures safe and enjoyable. Be sure to register your Magellan Triton at software updates and new features as they become available. - Page 10 Backlight Button Power Button Zoom - (Zoom out) Button Zoom + (Zoom in) Button ENTER Button / Cursor Control PAGE / GO TO Button Esc (Escape) Button Menu Button SD Card Slot (under protective rubber cover) Overview Magellan Triton...
-
Page 11: Specifications
Specifications PHYSICAL Case Base Map Size Weight Display Data Storage Antenna Keypad Operating Range PERFORMANCE Receiver Acquisition Time Update Rate Accuracy Languages Coordinate Systems POWER Source Battery Life Overview Rubber armored impact-resistant plastic, water-resistant seal, IPX-7 Built-in base map of the continental United States and Canada. 4.65"... -
Page 12: Fundamentals
Turning the Triton on Press and hold the power button until the Triton splash screen is displayed. Turning the Triton off When turning off the Triton you can select to have it shutdown or go into suspend mode. Press the Power button and the Triton will begin the shutdown sequence. -
Page 13: Changing Languages
Choose the interval that the backlight will turn off with no keys pressed. You can also select Off if you want the backlight to remain on as long as the Triton is turned on. Fundamentals Display Options Icon (Compass Icon appears on Magellan 500 only) -
Page 14: Automatic Power Off
Triton to not turn off automatically. Menus Accessing the features of the Magellan Triton is done through the Main Menu. The Main Menu has three options; Go To, Create and View. Selecting one of these menu options brings up the menu for the corresponding function. -
Page 15: Navigation Screens
Magellan Triton. The View Menu has options for many of the support functions and tools found in the Magellan Triton. The Local Info option provides access to information about the best hunting and fishing times as well as solar and lunar rise and set times for the location of your cursor. -
Page 16: Data Fields
Detailed maps, including National Geographic maps, can be purchased and downloaded from the Magellan Store and loaded to the SD card in your Magellan Triton. Once loaded, you will need to select the detailed map you want to use to activate it. - Page 17 Select a profile. Press PAGE / GO TO to select the Navigation page. Select Electronic Compass and set it to OFF. Disable the barometer if barometric pressure data is not required. (Magellan Triton 500) Press MENU. Select View. Select Profiles.
- Page 18 Connect to PC using USB cable (if possible). Connect the Magellan Triton to a computer using the USB cable supplied with the Magellan Triton. Select POWER ONLY from the options menu that is displayed. Connect to Vehicle Power Adapter (optional accessory).
-
Page 19: Navigation Screens
The Magellan Triton has six navigation screens and a Satellite Status screen. The Navigation screens provide you with information to assist you in your journeys. Selecting Navigation Screens While viewing one of the Navigation screens, press PAGE / GO TO (next screen) or ESC (previous screen) to select the navigation screen you are looking for. -
Page 20: Cancelling Pan
The pan cursor (target icon) can be moved to any position on the map by using the cursor control. A small red dot around the cursor indicates the direction to your present position. The pan cursor is used for adding waypoints to the map or creating a go to route from your present position to a spot on the map. -
Page 21: Current Location Screen
The Large Data screen displays four customizable data fields in a large, easy-to-read format. This screen is a handy option for those times that you need to position the Magellan Triton at a distance but still need to view navigation information. -
Page 22: Resetting Maximum Speed
Calibrating the Compass (Magellan Triton 500) The compass should be calibrated everytime that the batteries are changed. While viewing the Compass screen, press MENU. Select User Calibration. Place the Magellan Triton on a flat, horizontal surface away from any metallic objects. Select Start. Navigation Screens... -
Page 23: Calibrating True North (Magellan Triton 500)
Calibrating True North (Magellan Triton 500) While viewing the Compass screen, press MENU. Select Set true north direction. Place the Magellan Triton on a flat surface. Rotate the Triton until the green arrow points to the North (N) symbol on the compass. -
Page 24: The Satellite Status Screen
The Satellite Status Screen The Satellite Status Screen graphically displays the satellites and their signal strength that is being used to compute your location. This screen shows when you are getting strong, weak, or poor signal reception. Green satellite icons represent satellites that are being used to compute your position while yellow (good), white (medium), and red (poor) icons show signal strengths of other available satellites. -
Page 25: Explanation Of Data Field Types
Explanation of Data Field Types Latitude (LAT) Latitude is the coordinate measurement of North and South. The latitude lines run parallel to the equator. They range from 0° (the Equator) to 90° N/S (the Poles) Longitude (LON) Longitude is the coordinate measurement of East and West. The longitude lines run to and from the poles. - Page 26 Cross Track Error (XTE) Cross Track Error measures how far the user is off the trail or route. If no Go To or Route is set, this will appear blank or dashes. Elevation Elevation measures the height above or below Sea Level which is 0. Current Speed Current Speed measures how fast the user is travelling.
-
Page 27: Using The Keyboard
Entering alphanumeric characters into the Magellan Triton is done by the use of the keyboard. Key Types Alphanumeric Cursor Position Symbol Select Symbol Set Select Using the Keyboard Using the Keyboard Color Sample Light Blue Medium Blue Blue Medium Blue... - Page 28 Extended Character Select Numeric Select Alpha Select Delete Using the Keyboard Medium Blue Blue Blue Medium Blue Changes the available characters to extended characters. Changes the available characters to numeric characters. Changes the available characters to alphabetic characters. Deletes the character to the left of the character cursor.
- Page 29 Shift Key Return Accept Cancel Using the Keyboard Medium Blue Medium Blue Green With alphabetic characters shown, shifts between upper and lower case characters. With extended characters shown, shifts between two character sets. Not functional when numeric or symbol characters are displayed.
-
Page 30: Date Entry
Date Entry The Magellan Triton uses a standard calendar display to enter dates for local information and waypoint data. Use the left and right arrows to change months. With the desired month displayed, select the date to be entered. (If the day portion of the calendar is highlighted you will need to press the up arrow until one of the month selector arrows is highlighted.) -
Page 31: Settings
The Magellan Triton gives you the means to customize the receiver and view details about the Magellan Triton receiver. Customizing Navigation Settings From the Map screen press MENU. Select View. Select Settings. Select Navigation. Select the option you want to change and press ENTER to display the drop down menu. -
Page 32: View Memory Usage
View Memory Usage From the Map screen press MENU. Select View. Select Settings. Select Memory. Select View Usage. Press ESC when done. Clearing Memory Use caution when clearing memory. This will delete waypoints and routes stored in the receiver and cannot be undone. -
Page 33: Getting Software Version Information
From the Map screen press MENU. Select View. Select Settings. Select About. Select Copyright Info. Press ESC to return to the About Menu. Personalizing Magellan Triton From the Map screen press MENU. Select View. Select Settings. Select About. Select Owner. - Page 34 Select Settings. Select Diagnostics. Select Audio Test, Video Test, Keypad Test or Touch Test. Follow the displayed instructions for each test. Press ESC to return to the Diagnostics Menu. Settings...
-
Page 35: Profiles
The Magellan Triton gives you the means to set up three profiles; Hiking, Marine and Geocaching. Each profile contains custom settings that you can select. You can customize the profiles to fit your particular needs. You will notice that the background colors for the screens change depending upon the profile selected. -
Page 36: Map Page
Sets the volume level for the audible alarm. Sets the volume level for the beeper. Sets beeper usage. Sets distance that the Magellan Triton can drift from its present position before the anchor alarm will sound. Sets distance that the Magellan Triton can be off course before the off course alarm will sound. - Page 37 On, Off Profiles Turns the arrival alert on or off. Sets distance that the Magellan Triton will alert you to as you approach a waypoint. Sets distance that the Magellan Triton will alert you to as you a geocache waypoint.
-
Page 38: Waypoints
Magellan Triton. In its simplest form, a waypoint is a point on the map. The Magellan Triton uses waypoints much the same as you use addresses to get from your home to your destination. With information on where you are and a waypoint of where you want to go, the Triton can provide the necessary information to get you there. -
Page 39: Creating Waypoints
Creating Waypoints Creating a Current Location Waypoint from the Map Screen While viewing the Map screen, press ENTER. Select Create Waypoint. The Waypoint Details screen is displayed with the latitude, longitude and elevation for your current location. Edit the waypoint information as needed. Select the Media page to add media or the Options page to turn the proximity alarm on or off. -
Page 40: Creating A Waypoint From A Point On The Map Using The Triton Menu
Creating a Waypoint from a Point on the Map Using the Triton Menu While viewing the Map screen, press MENU. Select Create. Select Waypoint. Select Point on Map. The Map screen is displayed. Use the arrow keypad to move the pan cursor to the point on the map desired. -
Page 41: Viewing Waypoints
Select Waypoint. Select Coordinates. The Waypoint Details screen is displayed with the latitude and longitude for your current location or the pan cursor position. Select the latitude field (LAT). Use the keyboard to enter the latitude for the waypoint. Select the green checkmark when done. -
Page 42: Editing Waypoints
Editing Waypoints Editing a Saved Waypoint From the Map screen, press MENU. Select Go To. Select Waypoint. Change the order that the waypoints are displayed, if needed, or search for a waypoint. (Select the Search field under the Select Waypoint header. Select the order you want the waypoints listed, either by nearest, date added, or by name. -
Page 43: Duplicating A Saved Waypoint
Change the order that the waypoints are displayed, if needed, or search for a waypoint. (Select the Search field under the Select Waypoint header. Select the order you want the waypoints listed, either by nearest, date added, or by name. To do a search, select Search and using the keyboard, enter the first few characters of the waypoint.) Select the waypoint you want to delete from the list of waypoints. -
Page 44: Geocache Waypoints
They post these locations on geocaching web sites that can be found on the internet. You then enter these geocache waypoints into your Magellan Triton either by creating a geocache waypoint or by saving the geocache file from the internet, adding it to the VantagePoint software and uploading it into the Magellan Triton. -
Page 45: Deleting A Saved Geocache Waypoint
Change the order that the geocache waypoints are displayed, if needed, or search for a geocache waypoint. (Select the Search field under the Select Waypoint header. Select the order you want the waypoints listed, either by nearest, date added, or by name. To do a search, select Search and using the keyboard, enter the first few characters of the waypoint.) Select the waypoint you want to view from the list of waypoints. -
Page 46: Duplicating A Saved Geocache Waypoint
When the waypoint name is highlighted press ENTER. Select the View icon to the left of the waypoint name and press ENTER. Use the PAGE / GO TO button to display the Options page. Select Delete Waypoint. Confirm the deletion by selecting the green checkmark. Duplicating a Saved Geocache Waypoint From the Map screen, press MENU. -
Page 47: Routes
There are two types of routes that are commonly used in the Magellan Triton, Go To route and Multileg route. A third type of route, Backtrack route, is also commonly used and is described in the chapter on Trails. A Go To route is the simplest route possible. It begins at your current location and goes to a single destination you select. -
Page 48: Creating A Go To Route To A Place Waypoint
waypoints listed, either by nearest, date added, or by name. To do a search, select Search and using the keyboard, enter the first few characters of the waypoint.) Select the waypoint you want to go to from the list of waypoints. When the waypoint name is highlighted press ENTER. -
Page 49: Creating A Go To Route To A Geocache Waypoint
Creating a Go To Route to a Geocache Waypoint From the Map screen press MENU. (Alternate Method: Press and hold the GO TO button while the present position cursor is displayed on the Map screen.) Select Go To. Select Geocache. If needed, change the order that the waypoints are displayed or search for a waypoint. -
Page 50: Activating A Multileg Route
The Route Create screen is displayed with the waypoint you selected as the starting waypoint as the only item in the list. Select Add Point. Select the method for determining the next destination in the route. The same options as explained in step 4 apply. -
Page 51: Deleting A Multileg Route
Deleting a Multileg Route From the Map screen press MENU. Select Go To. Select Route. If needed, change the order that the waypoints are displayed or search for a waypoint. (Select the Search field under the Go To route header. Select the order you want the waypoints listed, by date added or name. -
Page 52: Cancelling A Route
From the Map screen press MENU. Select Go To. Select Route. Change the order that the saved routes are displayed if needed or do a search on a route. (Select the Search field under the Go to route header. Select the order you want the waypoints listed, by date added or name. -
Page 53: Trails
Trails are displayed on the Map screen as dotted lines. Creating a Trail Once you begin traveling with the Magellan Triton, it will begin to store track information. If you want to save this track to be used again, you need to follow the steps provided here. -
Page 54: Deleting A Trail
order you want the trail listed, by name or date added. Select search to enter the first few characters for a trail you are looking for.) Select the trail you want to go to from the list of trails and press ENTER. When the trail name is highlighted, select the View icon to the left of the trail name. -
Page 55: Duplicating A Trail
Select Delete Trail. Select the green checkmark to confirm deletion. Duplicating a Trail From the Map screen press MENU. Select Go To. Select Trail. Change the order that the trails are displayed, if needed, or search for a trail. (Select the Search field under the Select Trail header. -
Page 56: Hiding/Showing A Trail
Select Hide Trail or Show Trail. Activating a Backtrack Route Many might consider a Backtrack route as the most important function in a handheld GPS receiver. Being able to quickly create a route back to your starting point is not only handy for normal outdoor adventures, but also gives the traveller the security in knowing that directions back to camp are only a button press away. -
Page 57: Places
Places are waypoints that are part of the base map that is installed in your Magellan Triton. These waypoints can’t be deleted or duplicated but they can be used as the destination for a Go To route or a multileg route. Places are categorized as roads, world maps, waterways or city centers. When searching for a Place waypoint, you will need to select the category to narrow down the search. -
Page 58: Turning On/Off The Waypoint Proximity Alarm For A Place Waypoint
Select the category or All Categories. Select the subcategory or All Subcategories if available. Select Nearest to view the waypoints in the category sorted by the distance from your current location (or cursor position if in pan mode) or do a search on a waypoint. (Select the Search field under the Places header. -
Page 59: Viewing Best Fish And Hunt Times For A Place Waypoint
Viewing Best Fish and Hunt Times for a Place Waypoint From the Map screen, press MENU. Select Go To. Select Place. From the Select Map display, select the background map or the detailed map for the waypoint. (If you do not have any detailed maps loaded, Background Maps will be the only option.) Select the category or All Categories. - Page 60 search brings up the keyboard so you can enter the first few characters for a waypoint you want to search for.) Select the waypoint name from the list of waypoints and press ENTER. Select the View icon to the left. The Waypoint Detail screen is displayed. Use the PAGE / GO TO button to switch to the Options Page.
-
Page 61: Media
Before using any of the media options you need install an optional SD card in the SD card slot located on the right side of the Magellan Triton. Browsing Photographs Press MENU. Select View. Select Media. Select the Sort button at the top to choose how the images will be sorted – by date, distance or name.
Need help?
Do you have a question about the Triton Triton 400 and is the answer not in the manual?
Questions and answers
I am trying to calibrate my Triton 400