Advertisement
Table of Contents
- 1 Table of Contents
- 2 Safety Warnings
- 3 Required Tools
- 4 Before You Begin
- 5 Assembly and Set-Up
- 6 Charging the Battery
- 7 Before Riding
- 8 Repair and Maintenance
- 9 Replacement Parts
- 10 Troubleshooting Guide
- 11 TT250/XS250/ES350 Parts
- 12 Safety Gear
- 13 Safety Reminders
- 14 Warranty Information
- Download this manual
Advertisement
Table of Contents

Related Manuals for Burro Max ES350 BURROeSCOOTER

Summary of Contents for Burro Max ES350 BURROeSCOOTER
- Page 1 ES350 BURROeSCOOTER ES350 XS250 TT2500 BURROMICRO BURROMINI Electric Mini Bike Series O w n e r ’ s M a n u a l Read and understand this entire manual before riding! DO NOT RETURN TO STORE! It contains important safety information...
-
Page 2: Table Of Contents
Contents NOTE: Manual illustrations are for demonstration purposes only. Illustrations may not reflect exact appearance of actual product. Specifications subject to change without notice. Safety Warnings.................1-2 Before You Begin................3 Assembly and Set-Up................4-6 Before Riding..................7-8 Repair and Maintenance..............9-17 Troubleshooting Guide..............18-20 TT250/XS250/ES350 Parts ............21-25 Safety Reminders................26 Warranty Information................27... -
Page 3: Safety Warnings
Safety Warnings WARNING: Riding an electric Do not exceed the maximum motorbike can be a hazardous activity. recommended rider weight Certain conditions may cause the equipment to fail without fault of the Warning: Rider weight does manufacturer. Like other electric necessarily mean a person’s size is products, these vehicles can and are appropriate to fit or maintain control of... - Page 4 Safety Warnings PROPER RIDING ATTIRE These bikes were manufactured for Always wear proper protective performance and durability but are not equipment such as an approved safety impervious to damage. Jumping or other helmet (with chin strap securely aggressive riding can over-stress and buckled).
-
Page 5: Before You Begin
Before You Begin Remove contents from box. Remove the foam separators that protect the components from damage WARNING during shipping. Inspect the contents of the box for DO NOT USE NON-Burromax scratches in the paint, dents or kinked cables that may PRODUCTS WITH YOUR have occurred during shipping. -
Page 6: Assembly And Set-Up
Assembly and Set-Up Attaching the Handlebars TT250-XS250-ES350 WARNING Tools required: 6mm Hex Key wrench Failing to properly adjust and tighten the bolts that affix the handlebars can cause you to lose control and crash. Place the handlebars in the handlebar clamps. Make sure cables are not kinked Align parallel to the fork and tighten the bolts using a 6mm Allen... - Page 7 Assembly and Set-Up Attaching the Foot Rest (TT 250) Tools required: 12mm wrench Align Right and Left footrest mount holes with frame mount holes. Insure the peg folds up pointing towards the rear of the bike. Attaching the Number Plate Tools required: Philips screwdriver ES350 XS 250 Remove screw from front fork.
- Page 8 Assembly and Set-Up TT 250 Remove screw from front fork. Align the number plate with the hole in the fork and tighten with a screwdriver. Inflating the Tires Note: The pressurized air supplies found at gasoline stations are designed to inflate high-volume automobile tires.
-
Page 9: Before Riding
BEFORE RIDING WARNING Charging the Battery Rechargeable batteries are only to be charged under adult supervision. Always Your electric motorbike may not have a fully charged battery; disconnect your electric you must charge the battery prior to use. motorbike from the charger before cleaning with liquid. - Page 10 BEFORE RIDING • Run time: Run time may vary depending on rider weight, riding conditions, climate and/or proper maintenance. WARNING • Average battery life: 250 charge/discharge cycles Failure to recharge the • To ensure long battery life, do not store the battery in battery at least once a temperatures above 75°...
-
Page 11: Repair And Maintenance
Repair and Maintenance Turn power switch “OFF” before conducting any maintenance procedures. WARNING Check the Burromax website for any updates on the The brake is capable of causing the electric latest repair and maintenance procedures. motorbike to skid the tire throwing an unsuspecting Adjusting the Brakes rider. - Page 12 Repair and Maintenance Chain and Rear Tire Replacement Tools required: Screwdriver, 5mm hex key wrench, 10mm, 12mm and 17mm wrench Loosen screws and remove chain guard. TT250 XS250 ES350 With a 5mm Hex Key wrench remove Brake Mounting Plate adjuster screw (shown) and cable anchor screw. If replacing tire also remove 2 Brake caliper mounting bolts (5mm Hex Key) and remove caliper.
- Page 13 Repair and Maintenance With 12mm and 17mm wrenches, loosen the axle. Remove the rear axle and remove the chain from the sprocket--pull the wheel out. Note: Your hands will get greasy doing this. TT250 Replacing the chain on the TT 250 requires removal of a Master Link.
- Page 14 Repair and Maintenance TT250 & XS250 Note the sequence of the hardware TT250& XS250 Right Side Drive B-1 Rear Wheel Axle B-2 Rear Axle Adjuster (2) B-3 Mounting Plate-Caliper B-4 Spacer (2) B-5 Flat Washer B-6 Lock Washer B-7 Acorn Nut Install the new chain or wheel by slipping the chain around the axle.
- Page 15 Repair and Maintenance Tighten chain adjusters using 10mm wrench evenly to remove some slack from the chain as required. Chain and Sprocket Notes The chain will typically have a “loose spot” and “tight spot” corresponding with a particular sprocket rotational position. This is normal and common to all chain-driven products due to run-out...
- Page 16 Repair and Maintenance Tighten the brake mount plate bolts securely. Re-attach the chain guard. Test ride. Readjust as needed. Replacing the Fuse Remove the battery cover. WARNING To prevent shock, please follow the instructions accordingly and do not skip or combine any steps.
- Page 17 Repair and Maintenance Remove the fuse and replace with a new one of equal amperage. Requires 30 amp fuse. Close the fuse cover and reattach the battery cover. Amperage number 2-Stage Safety Speed Limiter To switch from slow speed to regular speed, or vice-versa, follow the steps below.
- Page 18 Repair and Maintenance ES350 Battery Replacement: When Replacing Batteries always replace in sets WARNING Battery replacement should be preformed by an adult with knowledge of electrical systems ES350 and circuits. Use only Burromax replacement parts when replacing batteries or components. Note: Battery life is prolonged when the batteries are fully...
-
Page 19: Replacement Parts
Repair and Maintenance Battery Care and Disposal WARNING Do not store the battery in temperatures above 75° F or To avoid a pinch or below -10° F. injury, keep fingers away from moving sprockets CONTAINS SEALED and chain. NON-SPILLABLE LEAD BATTERIES.BATTERIES MUST BE RECYCLED. -
Page 20: Troubleshooting Guide
Troubleshooting Guide Problem Possible Cause Solution Motorbike does not run Undercharged battery Charge the battery. A new battery should have been charged for at least 12 hours before using the motorbike for the first time and up to 8 hours after each subsequent use. - Page 21 Troubleshooting Guide Problem Possible Cause Solution The tires are inflated when shipped but Tires are not properly inflated they invariably will lose some pressure between the point of manufacturing and your purchase. Refer to instructions on page 5 of this manual to properly inflate tires.
- Page 22 Troubleshooting Guide Problem Possible Cause Solution Charger gets warm Normal response to No action required. This is normal during use charger use for some chargers and is no cause for concern. If your charger does not get warm during use, it does not mean that it is not working properly.
-
Page 23: Tt250/Xs250/Es350 Parts
TT250/XS250/ES350 Parts TT250 Main Components Throttle Brake Lever Adjustable Shock Hi/Low Speed On/Off Switch Drive Chain 250W Motor Battery Charge Level Indicator Front Fork Battery Charge Port Brakes Folding Foot Kick Stand Pegs... - Page 24 TT250/XS250/ES350 Parts XS250 Main Components Throttle Brake Lever Battery Charge Port Brakes Kick Stand Hi/Low Speed 250W Motor Battery Charge Level Indicator Decorative On/Off Switch Shock Front Fork Drive Chain Folding Foot Pegs...
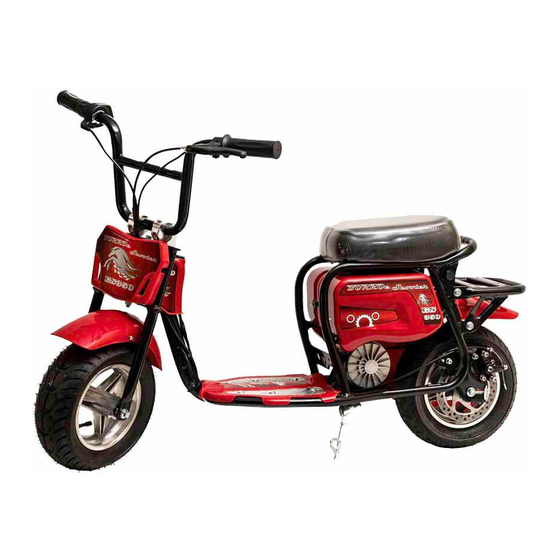
- Page 25 TT250/XS250/ES350 Parts ES350 Main Components Battery Charge Level Indicator Battery Charge Port On/Off Switch Brakes 350W Motor Kick Stand Throttle Battery Case Screw Brake Lever Front Fork Drive Chain Hi/Low Speed...
- Page 26 TT250/XS250/ES350 Parts Electrical Schematics XS250 Battery Charge Port Speed Switch On/Off Switch Brake Lever Controlle Speed Control Fuse Motor Battery...
- Page 27 TT250/XS250/ES350 Parts TT250/ES350 Battery Charge Port Speed Switch On/Off Switch Brake Lever Controller Speed Control Fuse Motor Battery...
-
Page 28: Safety Reminders
Safety reminders PRE-RIDE CHECKLIST Loose Parts Tire Inflation Check and secure all fasteners before Periodically inspect the tires for excess every ride. Make sure handlebar wear, and regularly check the tire clamp bolts are locked properly in pressure and re-inflate as necessary. If place. -
Page 29: Warranty Information
DECLARATION SB 1918 (CALIFORNIA) DECLARATION YOUR INSURANCE POLICIES MAY NOT PROVIDE COVERAGE FOR ACCIDENTS INVOLVING THE USE OF THIS SCOOTER/ELECTRIC RIDE-ON PRODUCT. TO DETERMINE IF COVERAGE IS PROVIDED, YOU SHOULD CONTACT YOUR INSURANCE COMPANY OR AGENT. Warranty Burromax Limited Warranty Burromax does not offer an extended warranty. - Page 30 Product Registration Name Address City Province/State Country Home Phone Work Phone Email Purchase Date Purchased from Serial Number Male/Female Rider? Is this your first BurroMax product? Other similar product owned before How did you hear about the Product?
- Page 31 Product Registration Name Address City Province/State Country Home Phone Work Phone Email Purchase Date Purchased from Serial Number Male/Female Rider? Is this your first BurroMax product? Other similar product owned before How did you hear about the Product? For warranty coverage Mail this form to: Burromax LLC P.O.
- Page 32 Burromax Electric Mini Bike March 2015...
Need help?
Do you have a question about the ES350 BURROeSCOOTER and is the answer not in the manual?
Questions and answers
controller burromax es350
The Burro Max ES350 eScooter has a small rocker-type switch inside for speed control. It can be adjusted using a small screwdriver through an access hole. The switch has two positions: “O” for regular speed and “I” for slow speed.
This answer is automatically generated