Table of Contents
Advertisement
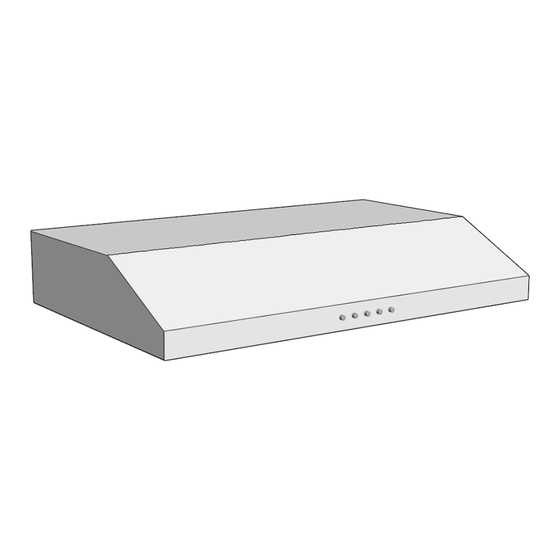
UNDER CABINET RANGE HOOD
Universal Installation Instructions and Use & Care Guide
Model:
Y01
W01
IMPORTANT: READ AND SAVE THESE INSTRUCTIONS.
FOR RESIDENTIAL USE ONLY.
Revised September 2014
Disclaimer: Item purchased may be slightly different from the manual.
For questions about features, operation/performance parts, accessories or service, call:
1-626-453-0550
1
Advertisement
Table of Contents

Related Manuals for AKDY AK-U75-Y01-SS


Summary of Contents for AKDY AK-U75-Y01-SS
- Page 1 UNDER CABINET RANGE HOOD Universal Installation Instructions and Use & Care Guide For questions about features, operation/performance parts, accessories or service, call: 1-626-453-0550 Model: IMPORTANT: READ AND SAVE THESE INSTRUCTIONS. FOR RESIDENTIAL USE ONLY. Revised September 2014 Disclaimer: Item purchased may be slightly different from the manual.
-
Page 2: Table Of Contents
TABLE OF CONTENTS RANGE HOOD SAFETY ..............2 INSTALLATION REQUIREMENTS ...........4 Tools and Parts Requirements ...........4 Location Requirements .............4 Installation Dimensions ............5 Ventilation Requirements ............6 Electrical Requirements ............7 INSTALLATION INSTRUCTIONS ..........8 Prepare Location ..............8 Connect Vent System ..............10 Complete Installation ..............11 Electrical Connection ……………………………………………..12 RANGE HOOD USE .................13 Range Hood Controls ..............14... -
Page 3: Important Safety Instructions
IMPORTANT SAFETY INSTRUCTIONS WARNING: TO REDUCE THE RISK OF A RANGE TOP WARNING: TO REDUCE THE RISK OF FIRE, ELECTRIC GREASE FIRE, READ THE FOLLOWING: SHOCK, OR INJURY TO PERSONS, READ THE FOLLOWING: Never leave surface units unattended at high settings. ■... -
Page 4: Installation Requirements
INSTALLATION REQUIREMENT TOOLS AND PARTS REQUIREMENTS Electrical drill or ratchet driver 1/2” drill bit for drilling pilot holes 1 ¼” drill bit for drilling electrical wiring access hole. Screwdrivers: Philips & Straight blade Pliers Tape measure or ruler and pencil Electrical supplies for wiring Aluminum foils tape and/or duct tape Hammer... -
Page 5: Installation Dimensions
INSTALLATION DIMENSIONS A. Countertop height B. Hood height from ceiling to bottom of the range hood filter surface: D-A-C=B C. 29” (73.66 cm) min. from cooking surface, suggested 31” (78.74 cm) max. D. Ceiling height... -
Page 6: Ventilation Requirements
VENTILATION REQUIREMENTS Venting Method ■ Range hoods must be ventilated to the This canopy hood is factory set for through outdoors ■ Do not ventilate the range hood into an the roof or wall. attic or other enclosed areas. ■ Do not use 4" (10.2 cm) laundry-type wall A 6"... -
Page 7: Electrical Requirements
Calculating Vent System ELECTRICAL Length REQIUREMENTS Observe all governing codes and ordinances. To calculate the length of the system you need, Ensure that the electrical installation is adequate add the equivalent feet (meters) for all vent and in conformance with the National Electrical pieces used in the system. -
Page 8: Installation Instructions
INSTALLATION INSTRUCTIONS PREPARING THE LOCATION It is recommended for the vent system to be installed before hood is installed. ■ Before making cutouts, make sure there is proper clearance from the range hood to the cook top. ■ Check your cabinet’s height and the hood height available for your ceiling before selecting your ■... - Page 9 Air Flow Flapper Preparation Mark the flappers location under the cabinet. Cut out a rectangle a little bit larger than the air flow flapper under the cabinet. Also, cut out a circle where the white, green, and black wires would be. Complete Preparation Determine and make all necessary cuts in the wall for the vent system.
-
Page 10: Connect Vent System
STEP 1: CONNECTING VENT SYSTEM Air Flow Flapper Installation Install the non-return air flap on top of hood with M5 X 8 screws (Part B). Remove the tape from the air flow flappers. (Part C) -
Page 11: Complete Installation
STEP 2: MOUNTING THE RANGE HOOD After preparing the location, use two or more people, hang the range hood on the 8 mounting screws (Part A), installed during preparations (Look at page 8), through the mounting slots on the top of hood (Part B1). Excessive Weight Hazard Use two or more people to move and install range hood. -
Page 12: Electrical Connection
STEP 3: ELECTRICAL CONNECTION Connect the three prong cable (not included) to the existing cable on the range hood. Connect the White to White, Black to black, and Green ground to green ground by either a solder or with a connection piece. DO NOT FORGET TO GROUND THE CONNECTION SAFETY WARNING: Risk of electrical shock. -
Page 13: Range Hood Use
RANGE HOOD USE The range hood is designed to remove smoke, vapors, and odors. For best results, start the hood before cooking. After, the cooking process is complete, allow the range hood to run for several minutes to completely clear all the smoke and odors from the kitchen. Return Air flapper LED/Halogen lights C. -
Page 14: Range Hood Controls
RANGE HOOD CONTROLS Operating the lights The On/Off light button controls both lights. Press once for “ON” and again for “OFF”. Operating the blower The “Speed” button turns the fan on and controls the fan speed and sound level for quiet operation. The speed can be changed anytime during the fan operation by pressing the desired blower speed button. -
Page 15: Range Hood Care
RANGE HOOD CARE Cleaning IMPORTANT: Clean the hood and grease filters frequently according to the following instructions. Replace panel filters before operating hood. Exterior Surfaces To avoid damage to the exterior surface, do not use steel wool or soap-filled scouring pads. Always wipe dry to avoid water marks. -
Page 16: Replacement
Replacing the LED/Halogen light Turn off the range hood and allow the LED/Halogen to cool. To avoid damage or decreasing the life of the new bulb, do not touch bulb with bare fingers. Replace bulb using tissue or wearing cotton gloves to handle bulb. -
Page 17: Trouble Shooting
TROUBLE SHOOTING Potential Effect of Potential Cause(s) Recommended Action(s) Failure Lamp does not turn Electronic Control a) Pressing any key the LCD lights up and does not work. Due to icons are in place? Over Voltage Yes, Proceed with the following diagnostic sequence No, Replace the control and user interface. - Page 18 in the white plastic. - Push inwards the motor/lamp connectors until the locking system on connectors is well attached. 5) Connect hood to power supply and verify. The blower is Filters are dirty 1) Verify that the grease and/or charcoal too noisy filters are clean.
-
Page 19: Warrenty & Services
SHOPRANGEHOODS.COM MAJOR APPLIANCE WARRANTY LIMITED WARRANTY For three year from the date of purchase, when this major appliance is operated and maintained according to instructions attached to or furnished with the product, Www.shoprangehoods.com will pay for Factory Specified Parts. This limited warranty is valid only in the United States or Canada and applies only when the major appliance is used in the country in which it was purchased.
Need help?
Do you have a question about the AK-U75-Y01-SS and is the answer not in the manual?
Questions and answers
How do I replace the light bulb
To replace the light bulb in the AKDY AK-U75-Y01-SS range hood:
1. Turn off the range hood and allow the LED/Halogen bulb to cool.
2. Avoid touching the bulb with bare fingers to prevent damage or reduce its lifespan. Use a tissue or wear cotton gloves when handling the bulb.
3. Install the new bulb.
4. If the new LED/Halogen light does not work, check that the lamps are inserted correctly before seeking service.
This answer is automatically generated