Table of Contents
Advertisement
Advertisement
Table of Contents

Summary of Contents for Foxpro Inferno
- Page 2 FOXPRO . Visit us online: www.gofoxpro.com ® This manual, the animal sounds stored in your caller, and animal sounds purchased from FOXPRO Inc. for installation in your caller are protected by copyright. ® Copyright ©℗ 2015 by FOXPRO Inc.
-
Page 3: Table Of Contents
Table of Contents Getting Started ............................4 1-1 Inferno: First Glance ........................... 4 Quick Start Guide ............................5 2-1 Playing Sounds ............................ 5 2-2 Using Favorites/Presets (P1 and P2) ....................5 Auxiliary Jack Function..........................6 Using External Speakers ..........................6 Inferno Transmitter Detailed Information .................... -
Page 4: Getting Started
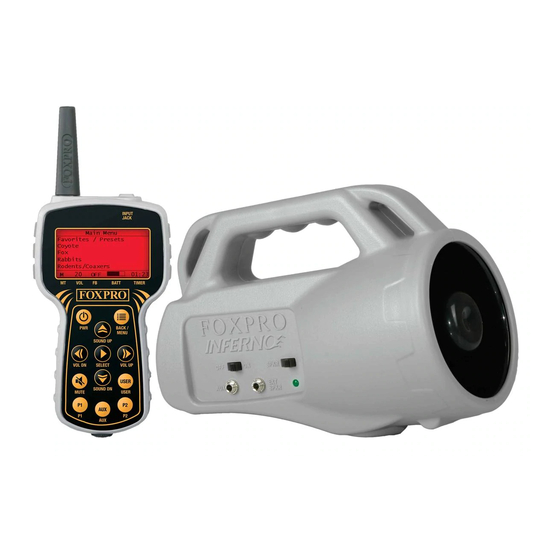
Getting Started Congratulations on your purchase of the FOXPRO Inferno digital game call! To avoid personal injury and product damage, be sure to read all operating instructions before operating. 1-1 Inferno: First Glance The images below, and their corresponding charts, highlight notable elements of the Inferno game call and remote. -
Page 5: Quick Start Guide
1 METER (3 FEET). IF THE TRANSMITTER IS LOCATED TOO CLOSE TO THE CALLER, PROPER OPERATION CANNOT BE ENSURED. Turn on the Inferno by moving the power switch to the on position (to the right). When powered on, the Inferno pilot lamp illuminates green, indicating that it is powered on. -
Page 6: Auxiliary Jack Function
OFF before connecting an external speaker! To connect an external speaker, plug the connector of the external speaker into the external speaker jack on the side of the Inferno. If you wish to have ONLY the external speaker produce sound, you must disable the internal speaker by moving the speaker switch to the left or off position. -
Page 7: Foxfeatures: Foxbang
5-5 Sound Settings: Volume Steps The Inferno remote has a range of volumes from 0 – 20. Increasing the volume in the field by increments of 1 may be too slow for some and therefore this stepping value is configurable. You can choose from 1, 2, and 3. -
Page 8: Display/Power: Backlight
The elapsed timer (located on the bottom right on the display) allows you to see how long you have been on a stand. The timer starts as soon as you turn on the Inferno transmitter. You can reset the timer by accessing the main menu, selecting timer option, and then selecting the “Stand Timer Reset.”... -
Page 9: Timer: Alarm
5-14 Timer: Alarm The Inferno remote features a visual alarm that can be set to go off after a span of time. The available times are represented in minutes: 1 – 15 (individual steps) and 20-60 (steps of 5). When the alarm is set and the configured time span passes, the stand timer (or clock if set to display the clock) will display a confirmation message and the timer indicator will begin to flash. -
Page 10: Obtaining New Sounds
6-1 Obtaining New Sounds You can access the FOXPRO website at any time to purchase new sounds for your Inferno. The website is located at: http://www.gofoxpro.com. From the site, access the “FOXPRO Sounds” menu option from the main menu and click on one of the sound pack options. You can purchase 4 sounds of your choice, 8 sounds of your choice, and 16 sounds of your choice. -
Page 11: Updating The Transmitter Playlist & Category List
Power on the Inferno to initiate the transfer process. The display on the remote updates as the transfer progresses. It displays the number of sounds transferred and whether or not a valid category file has been found. -
Page 12: Fcc & Ic Information
RF Exposure Safety Notice The Inferno transmitter is not intended to be operated closer than 20cm (about 8 inches) to your body. The transmitter can produce a radiated RF field similar to that of a standard cell telephone, although the duty cycle of this RF field is much lower than that of a cell telephone.


Need help?
Do you have a question about the Inferno and is the answer not in the manual?
Questions and answers