Table of Contents
Advertisement
Advertisement
Table of Contents

Summary of Contents for DFRobot OverLord 3D
- Page 1 OverLord 3D Printer User Manual DFRobot 3DPrinting team Dec.2014...
-
Page 2: Table Of Contents
OverLord 3D Printer User Manual Contents STATEMENT........................3 SAFETY PRECAUTIONS (BE SURE TO READ) ................ 4 CHAPTER 1 OVERLORD AND ITS MENU ................6 1.1 O 3D P ) ....7 RINTER TRUCTURE RO VERSION FOR EXAMPLE 1.2 S PECIFICATION ...................... -
Page 3: Statement
OverLord 3D Printer User Maunal will be updated when necessary. Please notice our official website http://www.DreamMaker.cc, and download the latest version. This manual helps users to master the basic operation skills of OverLord 3D Printer. All users must read this manual before operating OverLord 3D Printer. All users should follow the steps and act according to this manual. -
Page 4: Safety Precautions (Be Sure To Read)
OverLord 3D Printer User Manual. Any dangers or losses caused by improper use, or use beyond the range of OverLord 3D Printer, DFRobot does not assume any legal liability, unless otherwise required by law, please understand. - Page 5 OverLord 3D Printer User Manual ************************* Forbidden ************************** Avoid operating this product in forbidden places, on plane or other vehicles. Avoid operating the equipment without anyone who knows how to operate at site. Avoid placing the equipment near high heat source or flammable and explosive objects. Keep a 15~32℃...
-
Page 6: Chapter 1 Overlord And Its Menu
OverLord 3D Printer User Manual Chapter 1 OverLord and its menu Brief: 1.1 OverLord 3D Printer Structure 1.2 Specification -- OverLord Pro -- OverLord 1.3 Menu Introduction... -
Page 7: Overlord 3D Printer Structure (Take Pro Version For Example)
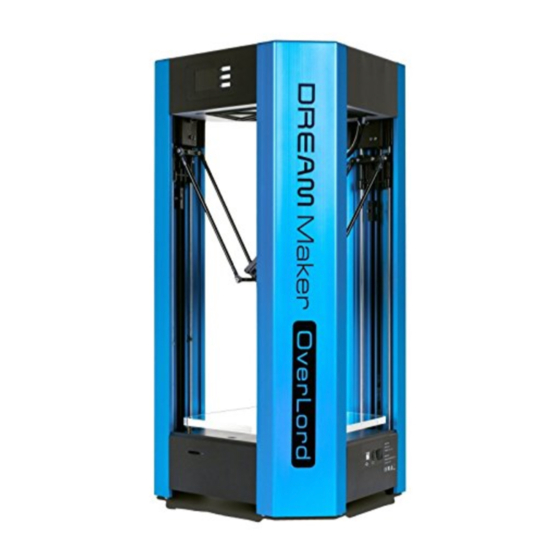
OverLord 3D Printer User Manual 1.1 OverLord 3D Printer Structure (Take Pro version for example) Filament cantainer OLED screen and control panel Feeding Tube Nozzle Part/Hotend Z axis X axis Y axis Build Plate (The glass is optional for Pro version) -
Page 8: Specification
OverLord 3D Printer User Manual 1.2 Specification OverLord Pro Machine Model OverLord Pro Printing Performance Print technology FFF (Fused Filament Facrication) Build Volume Cylinder : 170mm x 260mm Diameter x Height Print Speed 100mm/s Layer Resolution 20μm ~ 200μm Nozzle Diameter 0.4mm... - Page 9 OverLord 3D Printer User Manual OverLord Machine Model OverLord Printing Performance Print technology FFF (Fused Filament Facrication) Build Volume Cylinder : 150mm x 160mm Diameter x Height Print Speed 100mm/s Layer Resolution 20μm ~ 200μm Nozzle Diameter 0.4mm Operation Nozzle Temperature 200℃~250℃...
-
Page 10: Menu Introduction (Take Pro Version For Example)
OverLord 3D Printer User Manual 1.3 Menu Introduction (Take Pro version for example) The optimaized OverLord User interface simplified the operation of 3D printer. By just pushing down the button, OverLord is able to print, change material, and calibrate the buildplate all by itself. -
Page 11: Chapter 2 How To Print
OverLord 3D Printer User Manual Chapter 2 How to Print Brief: 2.1 Turn on OverLord 3D Printer 2.2 Startup 2.3 Prepare printable models files 2.4 Cura Installation and settings --file location --Cura Installation --Cura Settings 2.5 Start using Cura --Interface... -
Page 12: Turn On Overlord 3D Printer
OverLord 3D Printer User Manual 2.1 Turn on OverLord 3D Printer Attention: Please mind plugging direction to avoid burning main PCB down! Plug in Turn off status Turn on status, blue light on 2.2 Start-up OverLord runs machine Start-up at the first time you open it. Please follow the instructions and enjoy the basic operating experience. -
Page 13: Cura Installation And Settings
.gcode format that can be recognize by 3D Printers. OverLord 3D Printer uses open source model slicing software Cura. You will find it already in the SD Card sent with the machine, or you can download it directly from our website: www.dreammaker.cc. -
Page 14: File Location
OverLord 3D Printer User Manual 2.4.1 File location OverLord official website www.Dreammaker.cc provides free download of Cura installation file. You can find the installation file in your SD card too. 2.4.2 Cura Installation The following tutorial is based on Windows system. If your system is MAC or Linux, please download the right version and install afterwards. - Page 15 OverLord 3D Printer User Manual...
-
Page 16: Cura Settings
OverLord 3D Printer User Manual 2.4.3 Cura settings... - Page 17 OverLord 3D Printer User Manual If this is your first time running Cura, “First time run wizard” will help you set the software. (Former users can add new 3D Printers through” Machine setting--Add new machine”) 当你第一次打开 cura 时,将出现 “First time run wizard”字样。...
- Page 18 OverLord 3D Printer User Manual There are some difference between the settings of OverLord Pro and OverLord. (1) OverLord Pro...
- Page 19 OverLord 3D Printer User Manual Now appears the software UI, click “machine” in the menu and choose “Machine settings”. Set the parameters as shown in the picture. Take special care to those in orange circle. Click “OK” to finish. NOTE: You should choose “UltiGCode” for “GCode Flavor”.
- Page 20 OverLord 3D Printer User Manual Click “machine” in the menu and choose “Machine settings”. Set the parameters as shown in the picture. Take special care to those in orange circle. Click “OK” to finish.
-
Page 21: Start Using Cura
OverLord 3D Printer User Manual NOTE: You should choose “UltiGCode” for “GCode Flavor”. 2.5 Start using Cura 2.5.1 Interface Quick print Menu Observation window Control The main interface is consists of 3 parts: Menu, Control region, and Display region. -
Page 22: Your First Print
OverLord 3D Printer User Manual 2.5.2 Your first print Click “File-Load model file…”(Ctrl+L) Usually 3D model files are in .stl format. You can also load .jpg/.bmp/.png file. Cura will transfer the file into 3D shape then create .gcode that can be printed. -
Page 23: Full-Settings
OverLord 3D Printer User Manual a long time to create a high quality print. Under “Fast low quality print” option, the printing speed accelerates, however the quality of print goes down too. You would like to choose “Normal quality print” to balance the time and quality. - Page 24 OverLord 3D Printer User Manual Advanced settings Advanced settings provide some setting of your specific machine, please do not change them if not necessary. Below are recommended settings. Plug-ins Cura provides plug-in interface. User can download or programme different plug-ins to...
- Page 25 OverLord 3D Printer User Manual Expert settings Click “Expert-Open expert settings…” (or Ctrl+E) on menu to open expert settings window. There are more professional settings in the Expert-config window. The following settings are recommended. We do not suggest changing these settings unless you know exactly what these...
-
Page 26: Printing
OverLord 3D Printer User Manual 2.6 Printing CAUTION:Some operations of 3D Printer generate high temperature in 3D printer parts. Please do not let any part of your body reaching inside to prevent injury. CAUTION: 3D printing is one kind of production operation. Please make sure there is an operator nearby during its operating. - Page 27 OverLord 3D Printer User Manual (1) Before printing, make sure there is nothing left on the buildplate. If there is broken dry glue membrane left, please wipe it away with a wet cloth. Then before printing, paint glue stick 3 times on the dry buildplate;...
- Page 28 OverLord 3D Printer User Manual (3) Select “Print” in the control panel to enter print file chosen menu. Attention: If there is an unfinished print task, OverLord will remind you if you want to continue that task. Choose “Yes” to continue and “No” to give up and then enter print file chosen menu.
- Page 29 OverLord 3D Printer User Manual After heating complete, OverLord start to print automatically. A printing progress bar and estimated time will be shown on screen. During printing, if there is a demand, you can pause the printing at time select “Pause”.
-
Page 30: Auto-Remove/Feed Printing Material
OverLord 3D Printer User Manual (7) When the temperatures of nozzle and buildplate back room temperature, carefully use a scraper to remove the print object. CAUTION: Do not let the scraper blade towards yourself and other people, and use it carefully to prevent injury. - Page 31 OverLord 3D Printer User Manual Wait until preheating of the print nozzle is done. (2) After the heating is done, select “Continue” to auto-remove the material. If there is no material inside the printer, please “Skip” this step. extruder reversing material. After it...
- Page 32 OverLord 3D Printer User Manual (5) After removing the material, select “Cancel” if you want to stop feeding material. Or you can press “Ready” to move to the next step. Please prepare a new spool of material and insert and PUSH it into...
- Page 33 OverLord 3D Printer User Manual (6) Select “Ready”, the material will automatically fed into the nozzle. (7) The material will exit the nozzle when material feeding complete. Select “Ready” move material settings. If you change the material during OverLord’s pausing,...
-
Page 34: Advanced Functions
OverLord 3D Printer User Manual (8) Last step, set what material you are using, for instance “PLA”. Press “OK” to return to main menu. 2.8 Advanced functions 2.8.1 Break point resume The break point resume function allows pausing during printing. - Page 35 OverLord 3D Printer User Manual 3. You can choose whether to do it manually or not. “Continue” means automatic resume. “Manual” means you need to adjust where on Z axis to continue manually, this function is made for special cases.
-
Page 36: Auto/Manually Calibrate Buildplate
OverLord 3D Printer User Manual After solve the power problem, enter “Print” menu and continue last print. 2.8.2 Auto/manually calibrate buildplate Build plate calibration, or leveling, is a very important and fundamental step before start your printing. Build plate calibration let the printer know where is the build plate so that it can lay down the first layer of printing in correct place. - Page 37 OverLord 3D Printer User Manual Repeat this step until the manual calibration finish. (3) Select “Continue” to optimize calibration. Repeat the steps in (2). After calibration, screen returns to main menu.
-
Page 38: Chapter 3 Maintenance
OverLord 3D Printer User Manual Chapter 3 Maintenance Brief: 3.1 Clean your nozzle 3.2 Clean the broken filament inside extruder 3.3 Clean the broken filament inside filament tube 3.4 Fastening the belt 3.5 How to paint the glue before printing (Only for OverLord Pro) 3.6 How to use the special printing tape (Only for OverLord) -
Page 39: Clean Your Nozzle
OverLord 3D Printer User Manual 3.1 clean your nozzle Why: The nozzle could be blocked by dirt, carbonized material or changing material of different properties. Sometimes it happens gradually: first, porous structures start to appear on surface of print object, then it becomes worse and worse, till there is nothing come out of the nozzle. If you do not clean your nozzle when the above signs start to appear, the quality of print will become worse and worse. - Page 40 OverLord 3D Printer User Manual 3. Unscrew the golden pneumatic fitting. Pull it up about 10mm. Cut off the filament along the pneumatic cross section, so that about 10mm filament is left outside nozzle. This 10mm makes taking out the filament easier afterwards.
- Page 41 OverLord 3D Printer User Manual white tube inside (shown below), then screw it to the nozzle module. 8. Insert 1 meter of filament you are using now into nozzle, push it hardly for a while and then pull it back to get the dirt inside nozzle out. Cut the head of filament and repeat this step again and again, until the filament flows out smoothly without much resistance.
-
Page 42: Clean The Broken Filament Inside Extruder
OverLord 3D Printer User Manual 10. After successfully clean the nozzle, carefully screw the original golden pneumatic fitting on. Make sure the white thin tube inside nozzle is inserted into that golden pneumatic fitting, and do not bend it. Then re-assemble the PCB and black plastic spiral. - Page 43 OverLord 3D Printer User Manual 2. Pull out the extruder with extruding stepper out and unplug the stepper wire. Then unscrew the 4 screws to disassemble stepper. 3. Carefully open extruder in half and take the broken filament out. Do not get the M3 nut inside...
- Page 44 OverLord 3D Printer User Manual 4. Re-assemble extruder and make everything back in place. When you assemble the adjust screw, make sure the distance between the screw head and the mounting plane is about 6mm. CAUTION: Be careful do not get lost the M3 nut inside extruder when operating.
- Page 45 OverLord 3D Printer User Manual 3.3 Clean the broken filament inside filament feeding tube Why: Sometimes the filament breaks inside filament feeding tube and affects material changing function. CAUTION: The following steps generate high temperature in 3D printer nozzle module.
-
Page 46: Fastening The Belt
OverLord 3D Printer User Manual 3.4 Fastening the belt Why: Frequently printing operation may cause mechanical fatigue in belt, and the belt becomes longer and longer. This may affect the quality of print too. If the print quality goes down however there is no problem in the extrusion of material, maybe you would like to check whether the belt is fastened or not. -
Page 47: Use Special 3D Printing Tape (Only For Overlord)
OverLord 3D Printer User Manual Painting glue on the build plate correctly avoids print detaching the build plate during printing. We recommend clean the stick glue membrane once a while because it can cause uneven print surface on bottom. How: 1. -
Page 48: Maintenance Of Over Lords Parts
OverLord 3D Printer User Manual 3.7 Maintenance of OverLord’s parts Why: If you do not use 3D printer more than 2 weeks, we recommend you to remove and seal the filament, which changes its property gradually in open air, and unplug the lithium battery on mainboard to extend its life. - Page 49 OverLord 3D Printer User Manual...
-
Page 50: Chapter 4 Faqs
OverLord 3D Printer User Manual Chapter 4 FAQs Problem Solution When I installing Cura, antivirus We promise that the Cura installation file provided in the software stops it. OverLord SD Card does not contain any harmful files that may destroy your computer or files. Please add trust for Cura installation file. - Page 51 OverLord 3D Printer User Manual DFRobot Telephone: 86-021-61001656 Email: support@dreammaker.cc Official website: http://www.dreammaker.cc Address: Rm. #615, Y1 Bldg, Liangxiu Rd. #112, Shanghai, China...
Need help?
Do you have a question about the OverLord 3D and is the answer not in the manual?
Questions and answers
Z轴限位开关卡住,停止运行