Advertisement
OPERATOR'S MANUAL
LOMAC
Carpet Cleaning Machine and Pile Lifter
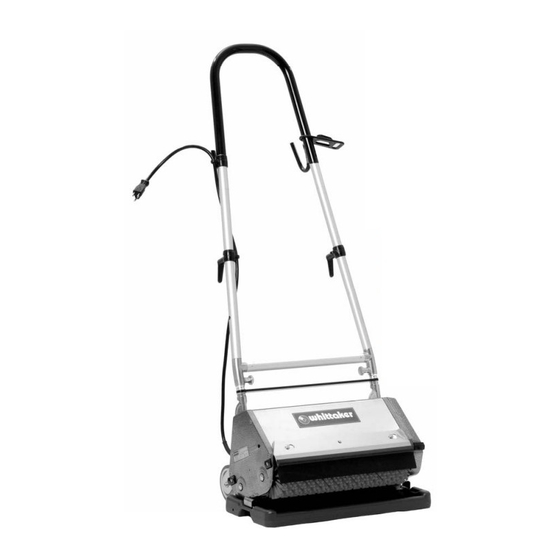
Photo of Machine
Assembly
Operation
Brush Selection and Removal/Replacement
Cleaning Instructions (Crystal Dry
Maintenance
Troubleshooting
Technical Details
SAFETY ADVICE
Parts List
Parts Drawing
Limited Warranty
Please read Operator's Manual completely before using
the machine and pay close attention to the safety advice.
®
Machine
1
2
3
3
Extra)
4
®
5
6
7
7
Insert
Insert
Insert
Advertisement
Table of Contents

Related Manuals for Whittaker LOMAC

Summary of Contents for Whittaker LOMAC
- Page 1 OPERATOR’S MANUAL LOMAC ® Machine Carpet Cleaning Machine and Pile Lifter Photo of Machine 1 Assembly 2 Operation 3 Brush Selection and Removal/Replacement 3 Cleaning Instructions (Crystal Dry Extra) 4 ® Maintenance 5 Troubleshooting 6 Technical Details 7 SAFETY ADVICE 7 Parts List Insert Parts Drawing Insert Limited Warranty Insert Please read Operator’s Manual completely before using the machine and pay close attention to the safety advice. ...
- Page 2 Please record identification numbers below. You should provide these numbers when ordering parts and accessories to insure accuracy. Date of Purchase _______________________ Model No: _______________________ Serial No.: _______________________ 1 – Handle – Top loop 2 – Handle – Side upright (2) Fig. 1-1 3 – H piece 4 – Snap lock knobs (2) 5 – Handle cone assembly 6 – Extension Cord hook – plastic (3) 7 – Identification Plate 8 – Motor Protector Breaker 9 – Removable Flap 10 – Large extension cord hook 11 – 4 ft power cord – from base 12 – 4 in transport wheels (2) 13 – Storage Tray All information, illustrations and specifications in this manual are based on the latest information at 14 – Extension Cord Strain Reliever the time of publication. The right is reserved to 15 – Gear Side Housing make changes at any time without notice. 16 – Electrical Side Housing ...
-
Page 3: Setup Instructions
SET‐UP INSTRUCTIONS Your LOMAC machine is designed to give you excellent performance and long life. Reading this manual will help you get the most from its many features. ASSEMBLY: In the box you will find: machine base (17) (shipped with brushes installed), front flap (9), storage tray (13), and three pieces to make the handle (1, 2). A. Remove the machine base (17) and place it squarely on the storage tray. Fig. 2‐1. To do this, raise the H piece (3) upright until it locks. Lift the machine with the flat painted bar indicated by the arrow in Fig. 2‐1. B. On flat surface lay out handle parts (1, 2). Fig. 2‐3. Connect handle parts by pressing the release buttons while pushing the parts together. C. Place assembled handle on handle cone assembly (5) indicated by the arrow in Fig. 2‐4. Plastic cord holders (6) should face toward rear of machine, the same as large cord hook (10). D. Be sure the snap lock knobs (4) are ... -
Page 4: Brush Removal
LOMAC ® MACHINE OPERATION A. Remove assembled machine from storage tray (13). Fig. 3‐1. B. Connect power cord (11) to grounded outlet. C. Tilt machine toward foot pedal end of machine, press foot pedal in with foot, and pull handle back. Brushes will revolve. Fig. 3‐2. D. Slowly lower machine onto brushes – this reduces the initial startup friction. E. To turn off the machine, return the handle to its upright and locked position. BRUSH REMOVAL: A. Unplug power cord. B. Stand machine on its gear side housing (15) Fig. 3‐3. C. With a finger, push axles straight up and pull out. No tools are required if machine is kept clean. NOTE: Brushes should be removed and rotated end‐to‐end regularly. BRUSH SELECTION ... - Page 5 CLEANING INSTRUCTIONS SPRAY Mix Crystal Dry ® Extra solution according to instructions on bottle. • • Spray a fine mist on carpeting. Fig. 4‐1 Do not allow spray to dry before scrubbing. AGITATE Scrub Crystal Dry ® Extra in immediately – no waiting required. • Run LOMAC ® back and forth as you would a vacuum, or in straight • rows as you would a lawn mower. For heavily soiled areas, run machine in 2 different directions (North/South then East/West). Fig. 4‐3 Continuous passes over the same area with any brush may dam‐ age the carpet fibers. Use with caution • A small amount of foam appears on most fiber types for 3‐5 seconds before disappearing. ...
-
Page 6: Maintenance
MAINTENANCE During Operation: • Rotate brushes every 2‐3 hours of operation. This prolongs brush life and protects against gear damage. • Do not lubricate axles—keep clean and dry. • Never rest machine with brushes directly on the floor. • Place machine on storage tray when not in use to prevent brush damage. Fig. 5‐1. After Each Use: A. Unplug power cord (4) at wall outlet. B. Tilt machine to its side onto the gear housing (15) (opposite the power cord end of machine). C. Reach under with a finger and push axles up and out. No tools are required if machine is kept clean and brushes are rotated regularly. D. Remove brushes. Inspect for wear. Use the Brush Wear Indicator Card included with this manual. E. Wipe underside of machine with damp cloth. Fig. 5‐2. F. Rotate the front brush end‐to‐end before replacing and do the same with rear brush. Storage: ... -
Page 7: Troubleshooting
TROUBLESHOOTING Problem Solution • Machine does not start and makes no noise. Wait 30 seconds if machine is warm. Push mo‐ tor protector reset button. Use a small object to be sure to press it in far enough. (Fig. 6‐1) • Check electrical cords and connections for breaks. • If machine is equipped with the optional power handle casing, be sure machine is plugged into the receptacle on the right. (Fig. 6‐2) • Machine does not start and makes grunting Tilt machine toward the foot pedal side noise. and allow brushes to rotate at full speed before lowering slowly onto the carpet. • Only one brush turns. One or more gears have stripped and need replaced before use. • Check foot pedal for wear and make sure Machine turns on prematurely. spring is inserted properly to keep the handle in an upright position. • Machine bounces roughly when in use. Inspect brushes for directional set from scrubbing in one direction too long. • Inspect axles and brush end caps to wear which will cause a vibration. HINT: To prevent directional set, rotate the front brush end to end, and do the same with the back brush. Do this at day’s end or after 2‐ 4 hours of continuous use. ... -
Page 8: Technical Details
TECHNICAL DETAILS 15in 20in MOTOR ½ hp/800 watts POWER CORD 4’ 16AWG with ground EXTENSION CORD 50’ 16AWG BRUSH SPEED 480rpm WEIGHT 45 lbs 55 lbs HEIGHT ... - Page 9 How do you make a warranty claim? If it becomes necessary to repair your unit, you need to package the unit in a well‐ padded heavy cardboard box. You must call us for an RMA # and enclose a paper with the following details— • Name • Company • Address • Phone • Fax • Description of the claim • Copy of invoice • Send to: R. E. Whittaker Co. 302 S. Croton Ave. New Castle, PA 16101 USA Freight must be prepaid to our facility. Insurance is recommended. What does your warranty not cover? This warranty does not cover the following: • Damage from negligence, misuse, abuse, accident, or failure to follow operating instructions. • Changes or repairs by anyone other than R. E. Whittaker Co. • Unit on which the serial number has been defaced, modified or removed. • Ordinary adjustments, which you can perform as outlined in the operator’s manual. • Gear stripping. What other limitations apply to this warranty? THIS WARRANTY IS NON‐TRANSFERABLE AND APPLIES ONLY TO ...
Need help?
Do you have a question about the LOMAC and is the answer not in the manual?
Questions and answers