
Related Manuals for White's TREASUREmaster


Summary of Contents for White's TREASUREmaster
- Page 1 TREASUREmaster ® TREASUREpro Owner’s Manual Manufactured in Sweet Home, Oregon USA White’s Electronics, Inc. 1011 Pleasant Valley Road Sweet Home, Oregon 97386...
-
Page 3: Table Of Contents
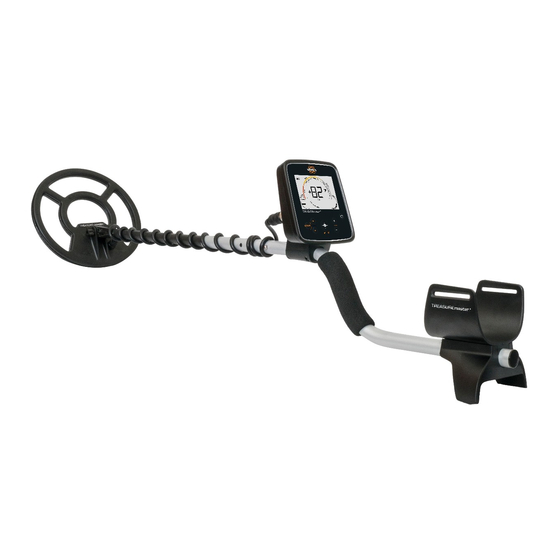
Introduction Thank you for choosing White’s metal detecting products. White’s TREASUREmaster® and TREASUREpro are our newest, lightweight, easy-to-use metal detectors. They are designed and built with the latest electronics technology, used to locate metal objects in the ground and provide the user with the infor- mation to help decide if that object has potential value worth digging for. -
Page 5: Assembly
6. Grip your Treasuremaster by the handle with your arm in the elbow cup and sweep the search coil over the floor. If the fit feels uncomfortable, adjust the position of the lower fiber rod in a different adjustment hole on the “S”... -
Page 6: Batteries
Batteries The TREASUREmaster® and TREASUREpro operate for up to 20 hours (without backlight) using two quality “AA” batteries. 1. Open the battery compartment door by gently pushing up on the battery tabs on the back of the display and hinge open the battery compartment door. - Page 7 Display & Controls Backlight Indicator TREASUREpro only Battery Gauge Target Identification Depth Indication Program Sensitivity Selects Options Up & Down Power, Pinpoint Backlight (+) & (-) TREASUREpro only 1. Power: ON/OFF. Quick presses of the button toggle Backlight on and off (TREASUREpro only). 2.
-
Page 8: Sensitivity
Sensitivity Used to increase or decrease responsiveness to targets, ground, and external electrical noise. By finding the highest setting that performs in your area, maximum depth can be achieved. Settings 1–8 are available. Reduced sensitivity is often needed to search bad ground con- ditions or high electrical activity areas. - Page 9 Press Option again to return to normal searching. Restore to Factory Settings TREASUREmaster® - Power on the detector while holding down the Options button until “Fd” appears in the VDI area. TREASUREpro- Navigate to the RESET command in the menu...
-
Page 10: Discrimination
Discrimination The Treasuremasters have the ability to accept or reject metal types based on their conductivity and/or electrical phase. Target conductivity/phase is indicated on the display VDI scale (Visual Discrimination Indication) with a VDI reference number. By learning what targets consistently indicate specific VDI num- bers, you can be sure to accept or reject the different target VDI ranges that interest you. - Page 11 The point is to reject the most common trash and accept the most common good targets. The TREASUREmaster® has 8 rejection ranges and the TREASUREpro has 16 rejection ranges. Discrimination comes already set up for the Program you have selected.
-
Page 12: Volume
Volume adjusts how loudly a metal target beeps. The Treasure- masters provide adequate volume levels for individuals with good hearing. Those with declining or impaired hearing should use headphones with the Treasuremaster models. With head- phones, Treasuremaster volume is maximized. To Adjust Volume: 1. -
Page 13: Tone Identification
1. Press Options and use Up & Down arrows to select Tone ID. 2. Press (+) & (-) to select Tone Identification and type. 3. Press Options to exit. TREASUREmaster® When 2-Tone is selected: • Iron = Lowest Tone (if accepted), no tone if rejected •... -
Page 14: Ground Balance
TREASUREpro 2- & 4-Tone are the same as TREASUREmaster® When 8-Tone is selected: • Iron = Lowest Pitched Beep (if accepted) • Foil = Slightly higher pitched beep (if accepted) • Pull Tabs = Slightly higher pitched beep (if accepted) •... -
Page 15: Depth Units
OFF or switching in or out of the Beach mode, remember to re- lock the ground tracking if that is required for the area. Depth Units The TREASUREmaster® and TREASUREpro can report target depth in inches or metric. 1. Press Options and use Up & Down arrows to select Depth Units. -
Page 16: Backlight
Fundamental to detecting success is choosing great places to use your Treasuremaster. These can be researched by word of mouth, at the library, in the newspaper, in books, or on the Internet. The longer an area has seen use, and the more activi-... -
Page 17: Digging
Digging Different terrains require different types of digging tools and digging techniques. • On sandy beaches any simple strainer type scoop works fast and easily to recover targets. • In grass or turf, a trowel or knife like tool works best. It can be combined with the hinged door digging method. -
Page 18: Service
Any stereo headphone between 8 and 150 ohms will work. 2. Carry Cases- White’s offers backpacks and gun-style cases to fit both the TREASUREmaster® and TREASUREpro. These padded cases offer convenience for storage and protection for travel. 3. Search Coils- The standard search coil is the best for all- around use. -
Page 19: Warranty
Warranty If within two years (24 months) from the original date of purchase, your White’s detector fails due to defects in either materials or workmanship, White’s will repair or replace, at its option, all neces- sary parts without charge for parts or labor. Simply return the complete detector to the Dealer where you purchased it or to your nearest Authorized Service Center. - Page 20 Printed in the USA 5/15 All rights reserved. ©White’s Electronics, Inc. 621-0552...
Need help?
Do you have a question about the TREASUREmaster and is the answer not in the manual?
Questions and answers