
Related Manuals for UWAY Vigilant Hunter


Summary of Contents for UWAY Vigilant Hunter
-
Page 1: Instruction Manual
Vigilant Hunter® Instruction Manual Model: MB600 HSPA+ / GSM Cellular Camera Model PLEASE READ CAREFULLY BEFORE USING CAMERA... - Page 2 Thank you for Purchasing your UWAY Camera The UWAY Vigilant Hunter is a high quality digital surveillance camera. It has been precisely engineered and tuned to provide you with optimal and consistent performance. This camera will provide high quality digital pictures and sound recording video for applications such as home, cabin, and business surveillance and animal monitoring for hunting and research.
-
Page 3: Cellular Information
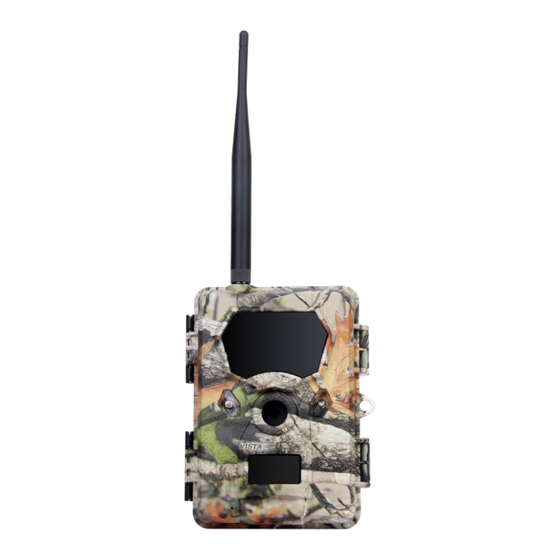
Antennae Battery Compartment Color Display SD Card Slot SIM Slot Snap Lock Padlock Padlock Hole Hole Snap Lock Control Buttons: Ports & Slots: DC 6V Port Up, Down, Left, Right USB Port Menu, OK ON/OFF/SETUP CELLULAR INFORMATION: This camera contains a HSPA+ cellular module to transmit pictures directly from the camera to your cellular phone and/or email address. -
Page 4: Mounting Camera
MOUNTING CAMERA: This camera is designed to use the UWAY Bracket (sold separately) to obtain maximal mounting versatility. Camera can be securely locked with cable lock (through camera, bracket, or both) or security box (with or without bracket). Camera can be mounted with nylon strap (included) or security box (sold separately). -
Page 5: Checking Battery Level
BATTERIES This camera is designed for Lithium/Alkaline or Nickel Metal-Hydride (NiMH) batteries. An AC to DC power cord (sold separately) can be attached to the bottom port of the camera. Insert 12 AA batteries while ensuring polarity (+ -) is correctly orientated. Note: 6V or 9V DC power can be used with or without batteries inserted. - Page 6 LIVE PREVIEW This option allows the user to view in real time what the camera is capturing. Pictures/videos can be captured using the “OK” button while in this mode. This camera is equipped with a Day Color Mode and Night IR Mode while in Live Preview. It is recommended to minimize the use of Night IR Mode to avoid battery depletion.
- Page 7 I. CAMERA SETTINGS MENU CAMERA MODE This camera can be set to capture still pictures OR video. 1. Select CAMERA MODE 2. Select Capture Image for PHOTO mode, Video Record for VIDEO mode, or Playback using UP or DOWN arrow and push OK to set PHOTO RESOLUTION Photo resolution can be set at (4:3): 8MP, 5MP or 3MP or (16:9): 6MP, 4MP, or 2MP 1.
- Page 8 1. Select QUIET TIME 2. Select desired „quiet time‟ and push OK to set NOTE: The camera is only able to do one thing at a time; it has one internal processor. When in cellular mode, the camera must finish transmitting the image before it can capture a subsequent image.
- Page 9 NOTE: When in cellular mode, it is important to understand the cellular limitations. For example, it may not be a good idea to set time-lapse interval to short as you will maximize the daily limit quickly. Furthermore, setting a time-lapse interval will require taking into consideration the cellular transmission speed.
- Page 10 1. Select TEMPERATURE 2. Select Fahrenheit or Celsius and push OK to set POWER TYPE This camera is a precisely tuned instrument. It is recommended to use high quality Alkaline, Lithium or high quality NiMH batteries. Programming which batteries are present increases accuracy of battery level meter.
-
Page 11: Firmware Version
Displays SD memory card USED SPACE and FREE SPACE FIRMWARE VERSION Displays the current camera firmware version UPGRADE User can upgrade camera firmware. Place firmware files on „EMPTY‟ SD card. Insert card into camera and Select UPDATE III. CELLULAR SETUP This menu is for setting up the cellular network. - Page 12 See the graphics below for reference Send Mode: OFF: turns off the cellular function; camera functions without cellular functionality. INSTANT: to send a picture instantly when the camera captures a picture. Page | 11...
- Page 13 When this option is selected, you need to set a Max Num. Max Number defines the maximum pictures that will be sent within 24 hours. For instance, 20 means the camera will only send the first 20 pictures within 24 hours regardless of the actual number of pictures captured that day.
- Page 14 Send Via: The camera provides two solutions, i.e. MMS or SMTP, to send the pictures to the desired phone numbers and email addresses. MMS: uses MMS cellular plan If MMS is selected, pictures will be sent to the preset phone numbers (maximum 4 numbers allowed) and email addresses (maximum 4 addresses allowed) or both phone number and email address (use semicolon ";"...
- Page 15 When SMTP is chosen, there is a reminder to ask the user to set the Sending Email. Click the "Sending Email" button; there would be another pop-up dialog box as shown below: Complete the above information and click "OK" to save. This email address will be the "Sender"...
- Page 16 For instance, if the user uses an USA AT&T SIM card, choose "USA" in the "Country" drop down dialog, then choose "AT&T" in the "Operator" drop down dialog. If user cannot find the country or operator information in the preset software, the user needs to do custom settings and contact local operators to fill in the operator information.
- Page 17 Recipients: Recipients are where the pictures are transmitted to: phone number or email address. The recipients allow 4 phone numbers and 4 email addresses, use semicolon ";" between each phone number and email address. Remote Control: This feature allows the user to send a text message command to change certain settings. Page | 16...
- Page 18 Disable: turns off remote control. 24 Hour: to allow camera to receive text message command in 24 hour mode.Note: this mode consumes more power since the Cellular module will be on standby all the time for incoming SMS messages, turn it off or switch to Once mode (see below) when this mode is no longer needed.
- Page 19 Note 2: Once the Send Mode is changed to OFF, the module will be turned off and will not receive any further text message commands; you will need to retrieve the camera to turn cellular mode back ON. Additional text message commands supported are: Text Message Command Protocol Example Change Remote Control Mode...
- Page 20 Note: Normal quality is good for general purpose, high quality will increase the data size of sending picture which will result in longer sending time and more power consumption. Camera Name: User can input a camera name in the form of 4 digits; the camera name will be shown on the right corner of time stamp of each picture taken.
- Page 21 Sending a picture takes 5s-60s depending on the network signal strength. SMTP generally takes longer time than MMS. USING CAMERA ONLY TO SETUP CELLULAR SETTINGS Set SEND MODE: Off, Instant, Customized, or Daily Report Set SEND VIA: MMS or smtp Set SEND TO: Phone, Email, or Both Set NETWORK SETUP: NOTE: Push the OK button to select each letter/number.
-
Page 22: Additional Information
The signal strength of the mobile network may vary with location and time of day, which may lead to failures in sending pictures. Rain, rainstorms or bad weather may cause poor signal reception. Be sure to set up camera at a location with strong network coverage. - Page 23 Make sure you follow carefully the Download Tool instructions or menu on the camera in setting up the network. The camera shows full or partial reception bars and I get login failure or no pictures transmitted Although the camera may show full or partial cellular power, the network may be busy at the time of transmission and login;...
- Page 24 Reduce number of picture burst and/or reduce video length. iii. Ensure batteries are fully charged; test batteries with tester if possible In cold temperatures, the battery life becomes shorter SD card may have jammed causing battery to drain; use different SD card and/or brand Pictures count in burst mode does not equal what I programmed Camera has sophisticated power meter;...
- Page 25 PIR motion detection window; adjust camera position and try again. 17. Images are blurry (stills or motion) UWAY offers some of the best picture quality. Although we try to cover every scenario, it is important to realize that different environments and conditions will affect the picture quality.
-
Page 26: Specifications
Cold temperature will reduce battery output to IR lights. iii. Remove brush, grass, and other debris that may prevent IR light from reaching its potential. 19. Too many empty pictures/video or false triggers Ensure camera is mounted on a solid surface; trees and surface may move in wind causing camera to trigger falsely. - Page 27 Duty Time WARRANTY INFORMATION This UWAY camera is warranted to be free from defects in material and workmanship for 1 year from the original date of purchase when purchased through an authorized dealer. UWAY will, at its option, repair or replace your camera with the same or comparable...
-
Page 28: Camera Repair
Some problems may be solved easily with help from customer service. CAMERA REPAIR Repairs for damages not covered by the warranty will be subject to a charge. Please contact UWAY to discuss repair options not covered under warranty. CUSTOMER SERVICE CONTACT: U.S.A& International Email: sales@hcooutdoors.com...
Need help?
Do you have a question about the Vigilant Hunter and is the answer not in the manual?
Questions and answers