
Related Manuals for UWAY Vigilant Hunter VH400HD


Summary of Contents for UWAY Vigilant Hunter VH400HD
-
Page 1: Instruction Manual
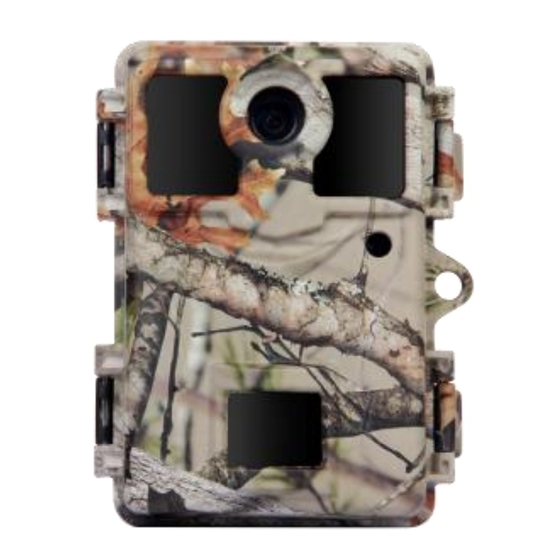
Vigilant Hunter® Instruction Manual Model: VH400HD PLEASE READ CAREFULLY BEFORE USING CAMERA... - Page 2 Thank you for Purchasing your UWAY Camera The UWAY Vigilant Hunter is a high quality digital surveillance camera. It has been precisely engineered and tuned to provide you with optimal and consistent performance. This camera will provide high quality digital pictures and sound recording video for applications such as home, cabin, and business surveillance and animal monitoring for hunting and research.
- Page 3 place camera inside a sealed plastic bag before bringing into warm room temperature. If condensation forms, remove SD card and batteries until camera is dry. Remove batteries when storing camera. Removing batteries from the camera during storage reduces the risk of battery acid leakage and battery drain.
-
Page 4: Mounting Camera
MOUNTING CAMERA: This camera is designed to use the UWAY Bracket (sold separately) to obtain maximal mounting versatility. Camera can be securely locked with cable lock (through camera, bracket, or both) or security box (with or without bracket). Camera can be mounted with nylon strap (included) or security box (sold separately). - Page 5 GETTING STARTED SD MEMORY CARD The camera supports both SD and SDHC memory cards up to 32 GB. 1. Open camera 2. Insert SD card with marked side facing back of camera 3. Push gently until card clicks into place 4.
-
Page 6: Checking Battery Level
CHECKING BATTERY LEVEL Battery level can be seen in bottom left corner of viewer screen TESTING AND WORKING MODES The camera has two modes: Setup Mode and Work Mode. Turn switch to middle position to access SETUP mode. The camera will enter Live Preview Mode automatically. If the camera beeps, it means either no SD card is inserted or the SD card is not inserted properly. -
Page 7: Photo Mode
PHOTO MODE a. Push ‘Right arrow’ button (you will see photo icon) b. Push ‘Right arrow’ button to toggle between 5MP, 3MP, 6MP, 4MP (Note: 6, and 4 are in Wide Vision mode) c. Push UP Arrow to switch between Day Color and Night IR Mode d. -
Page 8: Photo Format
VIDEOS Push OK to PLAY, UP arrow to PAUSE, Right and Left arrows to rewind or fast forward. Push UP arrow to delete after playing video PICTURES Push UP arrow to delete 5. DOWN arrow returns you to LIVE PREVIEW mode 6. - Page 9 VIDEO RESOLUTION Video mode includes High Definition HD 1280 x 720 or VGA 640 x 480. Select VIDEO RESOLUTION Select HD or VGA mode and push OK to set VIDEO LENGTH Video length can be set in 1 sec increments from (5s – 30s). NOTE: Longer video lengths will deplete battery power and memory more quickly than lower lengths.
-
Page 10: Pir Sensitivity
Select TRIGGER MODE Select Electricity or Normal mode ILLUMINATION This feature allows the user to use external lighting (XtendIR-B) or turn off IR lights if no lights are required in the night. User selects Internal when they want the IR lights of camera to work normally;... -
Page 11: Time Lapse
Set camera STOP time using arrows and push OK to set Push LEFT arrow button to return to menu Note: For 24 hour activity: START: 00:00 and STOP 23:59 TIME LAPSE This feature allows the camera to take pictures at a pre-set time interval (10 seconds to 60 minutes). -
Page 12: Set Date/Time
1. Select TIME STAMP 2. Select NO or YES and push OK to set SET DATE / TIME This feature allows the user to set the display format for date and time, as well as set the current date and time. 1. - Page 13 3. Push OK to proceed with formatting SD card ACCESS CONTROL This feature allows the user to set a 4-digit password to deter theft and render the camera unusable without the password. 1. Select ACCESS CONTROL SET PASSWORD Select desired password using ARROWS and push OK to set DISABLE PASSWORD ...
-
Page 14: Additional Information
Select YES to update and push OK ADDITIONAL INFORMATION TRANSFERRING PICTURES AND VIDEO TO A COMPUTER: Pictures and video can be removed in one of two ways: 1. SD memory card can be removed (ALWAYS ensure camera is OFF before removing) and transferred to computer or SD card reader. - Page 15 with battery tester. Approximately 1.7V for Lithium and 1.3V for NiMH is full power. Ensure SD card is properly inserted and not in locked position iii. Reset camera by removing batteries and SD card for 10 minutes Cold temperature decrease battery output sufficiently to prevent camera from turning ON;...
- Page 16 battery brands to find what works best for your environment. Reduce number of picture burst and/or reduce video length. iii. Ensure batteries are fully charged; test batteries with tester if possible In cold temperatures, the battery life becomes shorter SD card may have jammed causing battery to drain; use different SD card and/or brand Pictures count in burst mode does not equal what I programmed...
- Page 17 Try different brand of SD card for compatibility SD card is inserted into another device (i.e. camera) and is not recognized SD card may be formatted differently than the other device (i.e. camera) can recognize The camera file system is generally compatible with other digital cameras;...
- Page 18 13. Images are blurry (stills or motion) UWAY offers some of the best picture quality. Although we try to cover every scenario, it is important to realize that different environments and conditions will affect the picture quality.
- Page 19 A close running animal/human may make it across detection zone before triggering the camera Sunlight and heat waves may result in certain scenarios of false triggers; position camera in different location. Call UWAY customer support for more information and help with camera if needed. Page | 18...
-
Page 20: Specifications
SPECIFICATIONS UWAY Vigilant Hunter Camera : VH400HD Lens: FOV = 52 Photo resolution 6MP, 4MP and 5MP, 3MP Photo burst: 1-3 photos per trigger (programmable) Video resolution: HD 1280 x 720 or 640 x 480 VGA ... -
Page 21: Warranty Information
1 year from the original date of purchase when purchased through an authorized dealer. UWAY will, at its option, repair or replace your camera with the same or comparable model, free of charge (shipping charges may apply) for a period of (1) one year from the original date of purchase in the event of a defect in materials or workmanship occurring with normal use. -
Page 22: Camera Repair
Some problems may be solved easily with help from customer service. CAMERA REPAIR Repairs for damages not covered by the warranty will be subject to a charge. Please contact UWAY to discuss repair options not covered under warranty. Page | 21... - Page 23 Phone: 1-770-582-0004 UWAY Outdoor Products 6665 Corners Industrial Ct.. Suite D Norcross, GA 30092 CANADA Only Email: sales@uwaycanada.ca Website: www.uwaycanada.ca Phone: 1-403-942-6800 UWAY Outdoors Canada Inc. 210A 12A St. N. Suite 410 Lethbridge, AB T1H 2J1 Page | 22...
Need help?
Do you have a question about the Vigilant Hunter VH400HD and is the answer not in the manual?
Questions and answers