Table of Contents
Advertisement
WARNING:
If the information in
this manual is not followed exactly, a fire
or explosion may result causing property
damage, personal injury or loss of life.
-- This water heater MUST NOT be installed
in any location where gasoline or flammable
vapors are likely to be present.
-- WHAT TO DO IF YOU SMELL GAS
• Do not try to light any appliance.
• Do not touch any electric switch; do not
use any phone in your building.
• Immediately call your gas supplier from a
near by phone. Follow the gas supplier's
instructions.
• If you cannot reach your gas supplier, call
the fire department.
• Installation and service must be performed
by a qualified installer, service agency, or
the gas supplier.
Installation & Service Manual
Models: 497 - 2067
WARNING:
This manual supplies information for the
installation, operation, and servicing of the
appliance. It is strongly recommended that this
manual be reviewed completely before proceeding
with an installation. Perform steps in the order
given. Failure to comply could result in severe
personal injury, death, or substantial property
damage.
Save this manual for future reference.
CBX-CWX-I-S Rev A
Advertisement
Table of Contents

Related Manuals for Lochinvar COPPER-FIN 497 - 2067


Summary of Contents for Lochinvar COPPER-FIN 497 - 2067
- Page 1 -- This water heater MUST NOT be installed in any location where gasoline or flammable vapors are likely to be present.
-
Page 2: Table Of Contents
General ... 48 Water Velocity Control ... 48 Pipe Size Requirements Typical Water Heater Piping w/ Storage Tank ... 49 Single Water Heater Piping w/Two Storage Tanks ... 50 Multiple Water Heater Piping w/One Storage Tank ... 51 Multiple Water Heater Piping w/Multi. Storage Tanks . 52 Water Chemistry... -
Page 3: Please Read Before Proceeding
Please read before proceeding Special instructions This is a gas appliance and should be installed NOTICE by a licensed electrician and/or certified gas supplier. Service must be performed by a qualified service installer, service agency or the gas supplier. WARNING If the information in these instructions is not followed exactly, a fire or explosion may result causing property damage, personal injury, or death. -
Page 4: Safety Information
Please read before proceeding Safety information Owner warning – The information contained in this manual is intended for use by qualified professional installers, service technicians, or gas suppliers. Consult and follow all local Building and NOTICE Fire Regulations and other Safety Codes that apply to this installation. -
Page 5: The Copper-Fin - How It Works
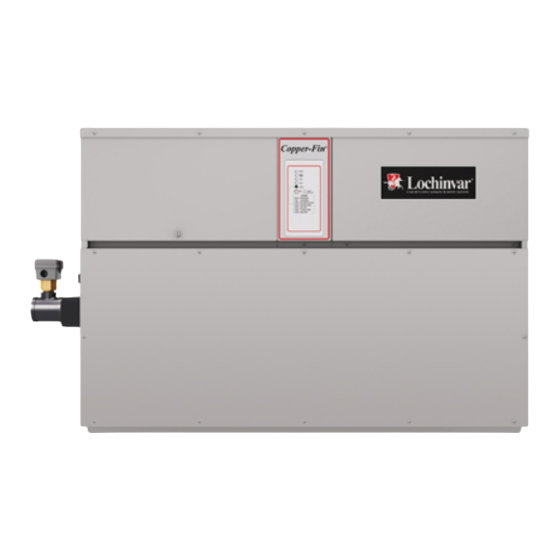
The Copper-fin - How it works... Heat exchanger The heat exchanger allows system water to flow through specially designed tubes for maximum heat transfer. headers and copper fined tubing are encased in a jacket that contains the combustion process. Inner combustion chamber door The inner combustion chamber door is a galvanized steel door which allows access for service, maintenance, and removal of the heat exchanger from inside the combustion chamber. - Page 6 The Copper-fin - How it works... Models 497 - 747 Front View Models 497 - 747 Right Side (inside unit) Models 497 - 747 Rear View Models 497 - 747 Left Side (inside unit) Installation & Service Manual...
-
Page 7: The Copper-Fin -- How It Works
The Copper-fin - How it works... Models 987 - 2067 Front View Models 987 - 2067 Right Side (inside unit) (continued) Models 987 - 2067 Rear View Models 987 - 2067 Left Side (inside unit) Installation & Service Manual... -
Page 8: Ratings
Ratings Copper-fin I=B=R Rating Model Number Input (Note 4) Note: Change “N” to “L” for L.P. gas models. CBN497 CBN647 CBN747 CBN987 CBN1257 CBN1437 CBN1797 CBN2067 Maximum allowed working pressure is located on the rating plate. NOTICE Notes: 1. The ratings are based on standard test procedures prescribed by the United States Department of Energy. - Page 9 Ratings (continued) Model Number Input Note: Change “N” to “L” for L.P. gas models CWN497 CWN647 CWN747 CWN987 CWN1257 1255 CWN1437 1435 CWN1797 1797 CWN2067 2065 Maximum allowed working pressure is located on the rating plate. NOTICE Notes: 1. Copper-fins require special gas venting. Use only the vent materials and methods specified in the Installation and Service Manual.
-
Page 10: Determine Unit Location
Determine unit location Installation This unit meets the safe lighting performance criteria with the gas manifold and control assembly provided, as specifi ed in the ANSI standards for gas-fi red units. ANSI Z21.13/CSA 4.9 and ANSI Z21.10.3/CSA 4.3. Locating the unit Maintain all clearances from combustible construction when locating unit. -
Page 11: Freeze Protection
Determine unit location TABLE 1A COMBUSTIBLE FLOOR KITS Model Freeze protection Although these units certifi ed for outdoor installations, such installations are not recommended in areas where the danger of freezing exists. You must provide proper freeze protection for outdoor installations, units installed in unheated mechanical rooms or where temperatures may drop to the freezing point or lower. -
Page 12: Combustion And Ventilation Air
Determine unit location Freeze Protection for a Heating Boiler System (if required) Do not use undiluted or automotive type WARNING anti-freeze. Use only properly diluted inhibited glycol anti-freeze designed for hydronic systems. Inhibited propylene glycol is recommended for systems where incidental contact with drinking water is possible. - Page 13 Determine unit location Figure 1-3_Combustion air filter_ Models 497 - 747 During construction the air filter should be checked more frequently to ensure it does not become clogged NOTICE with construction dirt and debris. Sustained operation of an appliance with a clogged burner may result in nuisance operational problems, CAUTION bad combustion, and non-warrantable component failures.
-
Page 14: Combustion Air Options
Determine unit location Combustion Air Options Under no circumstances should a mechanical CAUTION room ever be under a negative pressure. Particular care should be taken when exhaust fans, clothes dryers, compressors, air handling units, etc., take away air from the inlet. This unit has four combustion air options. -
Page 15: Exhaust Fans
Determine unit location 3. Combustion Air from an Interior Space You can direct combustion air to this unit using air from an adjoining interior space. You must provide two openings from the boiler room to the adjoining room. Each of the two openings must have a net free area of one square inch per 1000 Btu input (22cm²... -
Page 16: Vertical Vent Termination Clearances And Location
Venting General information You must supply adequate combustion and ventilation air to this unit. You must provide minimum clearances for the vent terminal from adjacent buildings, windows that open, and building openings. Follow all requirements set forth in the latest edition of the National Fuel Gas Code, ANSI Z223.1, in Canada, the latest edition of CAN/CGA Standard B149 Installation Code for Gas Burning Appliances and Equipment or applicable local building codes. -
Page 17: Barometric Damper Location
Venting (continued) Figure 2-3_Vent termination from flat roof - 10 ft. or less from parapet wall Units which are shut down or will not operate may experience freezing due to convective air flow in flue CAUTION pipe, through the air inlet, or from negative pressure in the equipment room. In cold climates, operate pump continuously to help prevent freezing of boiler water. -
Page 18: Conventional Negative Draft Venting
Venting Conventional negative draft venting Before installing a venting system, follow NOTICE all venting clearances and requirements found in the Venting, General Information section, page 16. Figure 2-5_Conventional negative draft vertical venting with combustion air louvers This option uses Type-B double-wall flue outlet piping. The blower brings in combustion air. -
Page 19: Masonry Chimney Installation And Inspection
Venting (continued) Common venting systems may be too large when an existing unit is removed. At the time of removal of an existing appliance, the following steps shall be followed with each appliance remaining connected to the common venting system placed in operation, while other appliances remaining connected to the common venting system are not in operation. -
Page 20: Outdoor Installation Venting
Venting 2. Outdoor installation venting Before installing a venting system, follow NOTICE all venting clearances and requirements found in the Venting, General Information section, page 16. Only install outdoor models outdoors WARNING and only use the vent caps supplied by the appliance manufacturer. - Page 21 Venting (continued) Figure 2-6_Outdoor vent cap installed on Models 497 - 747 Outdoor vent kit The optional outdoor vent kit is available from the appliance manufacturer. The outdoor kit part numbers are listed by unit size. See Table 2B for kit numbers. You can install the outdoor vent cap and combustion air inlet panel(s) on the unit (see FIG.’s 2-6 and 2-7).
-
Page 22: Gas Connections Connecting To Gas Supply
Gas connections Connecting to gas supply Verify that the appliance is supplied with the type of gas specified on the rating plate. This appliance is configured for operation up to 2000 feet altitude. Consult factory for installations above 2000 feet elevation. Inlet gas pressure: Measured at the inlet pressure tap on the appliance gas manifold. -
Page 23: Gas Connections / Gas Train And Controls
Diameter Pipe (inches) Equivalent length of Straight Pipe (feet) Water heater models do not have downstream test valves, but the rest of the gas train is represented by FIG. 3-2. Figure 3-2_Gas train drawing COMBINATION VALVE DOWNSTREAM TEST VALVE TO BURNERS Installation &... -
Page 24: Combination Gas Valves
Gas connections Combination gas valves These units fire in multiple stages of burner input. Each stage of burner operation has a combination gas valve(s) to cycle the gas supply on and off and regulate gas to the burners. Each combination valve consists of a gas regulator and two valve seats to meet the requirements for redundant gas valves. -
Page 25: Gas Manifold Pressure Adjustment
Gas connections 10. If gas supply pressure is within normal range, remove the gas manometer and replace the pressure tap fittings in the gas control as indicated by the following steps. 11. Turn power switch to the “OFF” position. 12. Turn gas valve knob to the “OFF” position. 13. - Page 26 Gas connections 12. If adjustment is necessary, remove the regulator cover screw on the gas valve. Note: If the gas valve under adjustment is located on a manifold assembly monitored by an igniter, the unit may shut down and recycle when the regulator cover screw is removed. This is normal.
-
Page 27: Water Connections
Water connections Inlet and outlet connections For ease of service, install unions on the water inlet and water outlet of the unit. The connection to the unit marked “Inlet” on the header should be used for return from the system. The connection on the header marked “Outlet”... -
Page 28: Pressure Drop Chart
Water connections Water connections (heating boilers only) Inlet and outlet water connections on Models 497 - 747 have 2'' NPT and on Models 987 - 2067 the inlet and outlet connections are 2 1/2'' NPT. Field installed reducing bushings must not CAUTION be used to reduce below the pipe diameters of the models listed above. - Page 29 Water connections Pump Maintenance: Inspect the pump every six (6) months and oil as necessary. Use SAE 30 non-detergent oil or lubricant specified by the pump manufacturer. The boiler is recommended for installation in a primary/ secondary piping system. This type of system uses a separate boiler circulating pump to supply flow to and from the boiler only.
-
Page 30: Low Temperature Return Water Systems
Any non-condensing boiler and venting system will develop operational problems when exposed to inlet water temperatures below 140°F. Lochinvar offers a low temperature protection valve (LTV) that is factory preset to maintain 140°F inlet water to the boiler regardless of the system return water temperature. -
Page 31: Primary/Secondary Piping Of A Single Boiler
Water connections Figure 4-5_Primary/secondary piping of single boiler COMMON MANIFOLD SIZE (Min.) Models: 497 - 747 Diameter Number of Units (in.) 2 1/2 FLOOR DRAIN HEATING SUPPLY LOOP *Please note that these illustrations are meant to show system piping concept only, the installer is responsible NOTICE for all equipment and detailing required by local codes. -
Page 32: Primary/Secondary Piping Of Multiple Boilers
Water connections Figure 4-6_Primary/secondary piping of multiple boilers COMMON MANIFOLD SIZE (Min.) Models: 497 - 747 Diameter Number of Units (in.) 3 1/2 PRESSURE RELIEF VALVE MAKE-UP WATER SEPARATOR 12" OR 4X PIPE DIAMETERS FROM SYSTEM SECONDARY BOILER PUMP *Please note that these illustrations are meant to show system piping concept only, the installer is responsible NOTICE for all equipment and detailing required by local codes. -
Page 33: Boiler W/Low Temperature Bypass Piping
Water connections Figure 4-7_Boiler with low temperature bypass COMMON MANIFOLD SIZE (Min.) Models: 497 - 747 Diameter Number of Units (in.) 2 1/2 FLOOR DRAIN EATI TING SUPPLY LOOP *Please note that these illustrations are meant to show system piping concept only, the installer is responsible NOTICE for all equipment and detailing required by local codes. -
Page 34: Primary/Secondary Piping With Buffer Tank
Water connections Figure 4-8_Primary/secondary piping with buffer tank COMMON MANIFOLD SIZE (Min.) Models: 497 - 747 Diameter Number of Units (in.) 3 1/2 1" TEMPERATURE AND PRESSURE GAUGE AUTOMATIC AIR ELIMINATOR/VENT SYSTEM OUTLET SYSTEM SENSOR LOCATION SYSTEM INLET BUFFER TANK *Please note that these illustrations are meant to show system piping concept only, the installer is responsible NOTICE for all equipment and detailing required by local codes. -
Page 35: Installation With A Chilled Water System
Water connections Installation with a chilled water system Pipe refrigeration systems in parallel. downstream at cooling coil. Where the hot water heating boiler is connected to a heating coil located in the air handling units which may be exposed to refrigeration air circulation, the boiler piping system must be equipped with flow control valves or other automatic means to prevent gravity circulation of the boiler water during the cooling cycle. -
Page 36: Boiler Bypass Requirements
Water connections Boiler bypass requirements The installer must ensure that the boiler is supplied with adequate flow without excessive temperature rise. It is recommended that this boiler be installed with a bypass in the piping if the maximum recommended flow rate is exceeded. The bypass will help to ensure that the boiler can be supplied with adequate water flow. -
Page 37: Electrical Connections Connecting To Electrical Supply
Electrical connections Connecting to electrical supply This unit is wired for 120 VAC service. The unit, when installed, must be electrically grounded in accordance with the requirements of the authority having jurisdiction or in the absence of such requirements, with the latest edition of the National Electrical Code ANSI/NFPA No. -
Page 38: Ems Connections
ON/OFF signal is cancelled. Figure 5-4 shows the connections necessary to operate the unit as a two-stage (High/Low Fire) boiler or water heater from an Energy Management System (EMS). The actual set point temperatures are controlled by the EMS. The... -
Page 39: Temperature Adjustment
Electrical connections Temperature adjustment Note: The temperature controller is preset at the factory with test settings. You may need to adjust the settings to meet your specific needs. Return water temperatures must not be less WARNING than 140°F. If lower return water temperatures are required, follow the instructions for Low Temperature Return Water Systems on page Locating the temperature control... -
Page 40: Outdoor Reset Option
Electrical connections Setpoint The Set Point knob specifies the target water temperature in degrees, Fahrenheit. After the water temperature reaches the set point, the temperature control shuts off the burners. Differential The Differential specifies the number of degrees below the set point that the control will allow the water temperature to drop before it brings the unit back on again. -
Page 41: Temperature Control Sensors
Boilers with the outdoor air reset option also have an outside air temperature sensor. Water heater application Water heater units are shipped with two sensors; the inlet water temperature sensor and the multi-purpose temperature sensor to be used as a tank sensor. -
Page 42: Hot Surface Ignition System
Installation & Service Manual The igniter is extremely fragile, be very careful when removing. A faulty or damaged hot surface igniter MUST BE replaced with a Lochinvar PLT3400 igniter. Do not use general purpose field replacement igniters. - Page 43 Electrical connections Diagnostic Status Indication The ignition module has an LED which indicates the status of the safety circuits. A remote Ignition Module Status indicating light is wired from the ignition module Status LED and mounted on the front diagnostic panel. The flashing operation of this light indicates the diagnostic status of the ignition control module.
-
Page 44: Operation And Diagnostic Lights
Electrical connections Operation and diagnostic lights The diagnostic control panel has up to 6 indicating and diagnostic lights to show all major steps of operation and control sensed malfunctions. This panel is located on the front of the unit. TABLE 5D Status LED Diagnostic Codes Code Condition... -
Page 45: For Your Safety Read Before Operating
Startup Figure 6-1_Operating instructions FOR YOUR SAFETY READ BEFORE OPERATING WARNING: If you do not follow these instructions exactly, a fire or explosion may result causing property damage, personal injury or loss of life. A. This appliance is equipped with an ignition device which automatically lights the burner. -
Page 46: Check Water Chemistry
Startup Check/control water chemistry Do not use petroleum-based cleaning or CAUTION sealing compounds in the boiler system. Damage to elastomer seals and gaskets in the system could occur, resulting in substantial property damage. Hardness less than 7 grains 1. Consult local water treatment companies for hard water areas (above 7 grains hardness). -
Page 47: Check For Gas Leaks / Thermostat Circuit(S)
Startup (continued) Check for gas leaks Before starting the boiler, and during initial WARNING operation, smell near the floor and around the boiler for gas odorant or any unusual odor. Remove the front access panel and smell the interior of the boiler enclosure. Do not proceed with startup if there is any indication of a gas leak. -
Page 48: Domestic Water Heaters
Domestic water heaters This section applies only to those units used to supply potable hot water for domestic use. The water heater must be installed with a storage tank. This section contains specific instructions for those units used to supply domestic hot water. All warnings, cautions, notes and instructions in the general installation and service sections apply to these instructions. -
Page 49: Typical Water Heater Piping W/ Storage Tank
Domestic water heaters Figure 7-1_Typical water heater piping with storage tank COMMON MANIFOLD SIZE (Min.) Models: 497 - 747 Diameter Number of Units (in.) 2 1/2 BUILDING HOT WATER SUPPLY RELIEF VALVE LOCK-TEMP DRAIN STORAGE TANK *Please note that these illustrations are meant to show system piping concept only, the installer is responsible NOTICE for all equipment and detailing required by local codes. -
Page 50: Single Water Heater Piping W/Two Storage Tanks
Domestic water heaters Figure 7-2_Single water heater piping with two storage tanks COMMON MANIFOLD SIZE (Min.) Models: 497 - 747 Diameter Number of Units (in.) 2 1/2 BUILDING HOT WATER SUPPLY RELIEF VALVE LOCK-TEMP STORAGE TANK DRAIN *Please note that these illustrations are meant to show system piping concept only, the installer is responsible NOTICE for all equipment and detailing required by local codes. -
Page 51: Multiple Water Heater Piping W/One Storage Tank
Domestic water heaters Figure 7-3_Multiple water heater piping with a single storage tank COMMON MANIFOLD SIZE (Min.) Models: 497 - 747 Diameter Number of Units (in.) 3 1/2 BUILDING WATER SUPPLY RELIEF VALVE LOCK-TEMP STORAGE TANK DRAIN *Please note that these illustrations are meant to show system piping concept only, the installer is responsible NOTICE for all equipment and detailing required by local codes. - Page 52 Domestic water heaters Figure 7-4_Multiple water heater piping with multiple storage tanks COMMON MANIFOLD SIZE (Min.) Models: 497 - 747 Diameter Number of Units (in.) 3 1/2 BUILDING WATER SUPPLY RELIEF VALVE LOCK-TEMP STORAGE TANK DRAIN *Please note that these illustrations are meant to show system piping concept only, the installer is responsible NOTICE for all equipment and detailing required by local codes.
-
Page 53: Required Temperature Rise
Size (Min.) Units (continued) Circulating pump The water heater must be connected to a properly sized pump that circulates water between the heater and storage tank. The pump is sized to heater input and water hardness. Care should be taken to size the pump correctly. See Water Chemistry, this page. -
Page 54: Minimum Pump Performance
120°F (49°C) or lower temperature hot water to reduce risk of scald injury. Operate this high efficiency hot water heater at a temperature setting high enough to prevent condensing of the products of combustion on the unit’s heat exchanger or in the attached venting system. -
Page 55: Location Of Cold Water Supply Piping Connections
Stage firing can be achieved by adjusting the High-Fire Offset to any value other than zero. Typically, a setting of 3°F is 5°F is suitable for stage firing in a water heater application. Stage firing of a potable water heater is normally only used to replace system standby heat loss. -
Page 56: High Water Temperature Limit Control
High water temperature limit control The unit is equipped with an adjustable setting, auto-reset high water temperature limit control. The hot water heater temperature limit control has a maximum limit setting of 200°F (93°C). If water temperature exceeds the set point, the limit will break the control circuit and shut down the unit. -
Page 57: Maintenance
Maintenance Listed below are items that must be checked to ensure safe, reliable operations. Verify proper installation after servicing. Label all wires prior to disconnection when CAUTION servicing controls. Wiring errors can cause improper and dangerous operation. Appliance area Keep appliance area clear and free from combustible materials, gasoline and other flammable vapors and liquids. -
Page 58: Combustion And Ventilation Air
Maintenance Heat exchanger cleaning While burners are removed, check the heat exchanger surface for sooting. If present, heat exchanger must be cleaned and problem corrected. Proceed as follows. Remove gas manifold(s)/orifice assemblies as described in steps 1 through 5 in Burner Removal and Cleaning, page 57. - Page 59 Maintenance (continued) Figure 8-2_Air pressure switch AIR PRESSURE SWITCH Adjustment procedure Models 497 - 1257: Remove the upper front jacket panels from the unit to access the upper chamber. Locate the air shutter on the side of the fan housing (see FIG.
-
Page 60: Servicing A Hot Surface Igniter / Ignition Module
Maintenance Figure 8-5_Loosening the transition box screws, Models 1437, 1797 and 2067 only TRANSITION BOX SCREWS Figure 8-6_Adjusting the air shutter DECREASE AIR PRESSURE INCREASE AIR PRESSURE Servicing a hot surface igniter and ignition module This unit uses a proven hot surface ignition module and a hot surface igniter. -
Page 61: Heat Transfer Process
Maintenance (continued) 24VAC is supplied to the intermittent alarm field safety contacts, B1 and B2. 10. 24VAC is supplied to the water flow switch. 11. 24VAC is supplied to the TH terminals on the ignition module. 12. As power is applied to the TH terminals on the ignition module, 120VAC is switched from the F2 terminal to start the combustion air fan at full speed on Models 497 - 747 and at low speed on Models 987 - 2067. -
Page 62: Glossary
Glossary Power Supply (AC120VAC/60Hz) 120VAC/60Hz/1PH power connects to black (line) and white (neutral) wires located within an electrical wiring box located on the left side of the unit. A green chassis grounding wire is also provided for connection to earth ground. ON/OFF Rocker Switch The black line voltage wire runs directly to a single pole, single throw On/Off rocker switch located behind the front cover... - Page 63 Glossary (continued) Once the ignition module sees a 24VAC input from the pressure switch, it runs the blower for approximately 15 seconds in order to purge the combustion chamber of any unburned fuel/air mixture. Trial for Ignition (Ignition Module Function) Once the ignition module has completed its prepurge period, it turns on the hot surface igniter.
-
Page 64: Diagrams
Installation & Service Manual Diagrams Ladder diagram... - Page 65 Installation & Service Manual Diagrams (continued) Ladder diagram (continued) 0497-747 0987-2067...
-
Page 66: Connection Diagram
Installation & Service Manual Diagrams Connection diagram... -
Page 67: Diagrams
Installation & Service Manual Diagrams (continued) Connection diagram (continued) -
Page 68: Revision Notes
Revision Notes: Revision A (ECO #C07390) initial release. CBX-CWX-I-S Rev A 3/11...
Need help?
Do you have a question about the COPPER-FIN 497 - 2067 and is the answer not in the manual?
Questions and answers