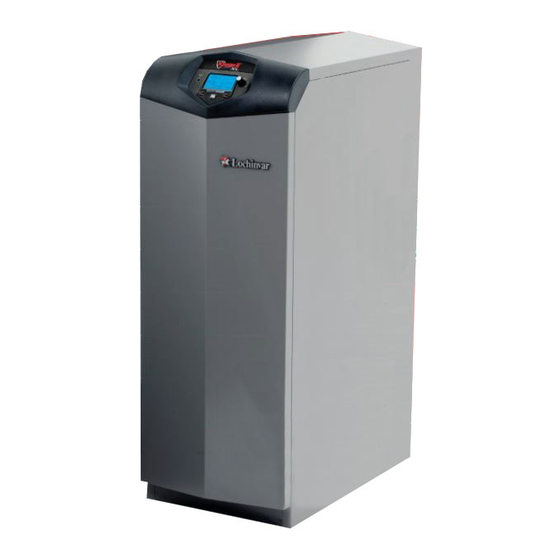
Page 1
KBXII-I-O Rev C Installation & Operation Manual Models: 400 - 801 This manual must only be used by a WARNING qualified heating installer / service technician. Read all instructions, including this manual and the Knight XL Service Manual, before installing. Perform steps in the order given.
Instead, shut off the gas supply at a location external to the appliance. • Do not use this boiler if any part has been under water. The possible damage to a flooded appliance can be extensive and present numerous safety hazards. Any appliance that has been under water must be replaced.
The venturi controls air and gas flow into the burner. Flue gas sensor (limit rated) This sensor monitors the flue gas exit temperature. The control module will modulate and shut down the boiler if the flue gas temperature gets too hot. This protects the flue pipe from overheating.
Device that monitors the outlet water temperature. If the temperature exceeds its setting, the integrated control will break the control circuit, shutting the boiler down. Model 400 Front View - Model 400 Left Side (inside unit) - Model 400 Installation & Operation Manual (continued) Rear View - Model 400...
Page 6
The Knight XL - How it works... Model 501 Rear View - Model 501 Models 601 - 801 Rear View - Models 601 - 801 Installation & Operation Manual Left Side (inside unit) - Model 501 Left Side (inside unit) - Models 601 - 801...
(Note 2) (Note 1) 7. Knight XL boilers comply with the requirements of CSD-1 Section CW-400 requirements as a temperature operation control. The manual reset high limit provided with the Knight XL is listed to UL353. Figure A High Altitude Label Location Installation &...
WARNING Closet and alcove installations A closet is any room the boiler is installed in which is less than 171 cubic feet for KBN400 models, 193 cubic feet for KBN501 models, 223 cubic feet for KBN601 models, 247 cubic feet for KBN701 models and 278 cubic feet for KBN801 models.
Determine boiler location Figure 1-1 Closet Installation - Minimum Required Clearances 1" MINIMUM CLEARANCE AROUND HOT WATER PIPES AND VENT PIPE 12" (305 MM) LEFT 14" (356 MM) REAR RECOMMENDED SERVICE CLEARANCES: FRONT - 30” (762 mm) - 24” (610 mm) LEFT SIDE - 24”...
Do not attempt to install the Knight XL using any other means. Be sure to locate the boiler such that the vent and air piping can be routed through the building and properly terminated. The vent/air piping lengths, routing and termination method must all comply with the methods and limits given in this manual.
• Seal - With prior requirements met, the system should be tested to the procedure listed in parts (c) through (f) of the Removal of an Existing Boiler Section on page 12. With stainless steel vent, seal and connect all pipe and components as specified by the vent manufacturer used;...
At the time of removal of an existing boiler, the following steps shall be followed with each appliance remaining connected to the common venting system placed in operation, while the other appliances remaining connected to the common venting system are not in operation.
4. Locate the propane orifice disk from the conversion kit bag. Verify that the stamping on the orifice disk matches the boiler size (Model 400 - 8.0 LP orifice stamping). 5. Remove the existing orifice from the O-ring in the side of the gas valve and replace it with the orifice from the kit.
(FIG. 2-3). 4. After adjustment is complete, attach the propane conversion label (in the conversion kit bag) next to the boiler rating plate. Attach the LP caution label (in the conversion kit bag) to the left side of the unit in the lower left corner.
General venting Direct venting options - Sidewall Vent PVC/CPVC Two Pipe Stainless Steel See Figure 4-1A Two Pipe Models 400 - 601 Only See Figure 4-1C Models 400 - 601 Only PVC/CPVC Alternate Two Pipe See Figure 4-2A PVC/CPVC Concentric...
Installation & Operation Manual General venting Direct venting options - Vertical Vent PVC/CPVC Stainless Steel PVC/CPVC Two Pipe Two Pipe Concentric See Figure 5-1A See Figure 5-1B See Figure 5-5 Direct venting options - Vertical Vent, Sidewall Air PVC/CPVC Stainless Steel Vertical Vent, Sidewall Air Vertical Vent, Sidewall Air Stainless steel vent/air design and terminations will vary slightly by manufacturer.
U.S. Installing vent or air piping NOTICE Work from the boiler to vent or air termination. Do not exceed the lengths given in this manual for the air or vent piping. Cut pipe to the required lengths and deburr the inside and...
Transition fittings are provided with the unit for final connection. Vent piping must be supported per the National Building Code, Section 305, Table 305.4 or as local codes dictate. Figure 3-9 Near Boiler PVC/CPVC Venting - Models 400 - 601 VENT * 4”...
General venting Air inlet pipe materials: The air inlet pipe(s) must be sealed. combustion air inlet pipe materials from the following list: PVC, CPVC or ABS Dryer Vent or Sealed Flexible Duct (not recommended for rooftop air inlet) Galvanized steel vent pipe with joints and seams sealed as specified in this section.
303888 Only) * = This adapter must be used in addition to the boiler adapter for Saf-T vent pipe as shown in FIG. 3-11, unless approved vent other than standard diameter is used. Consult a Heat Fab representative for questions.
Vent 4 inches (102 mm) 6 inches (152 mm) You must also install air piping from outside to the boiler air intake adapter. The resultant installation is direct vent (sealed combustion). You may use any of the vent/air piping methods covered in this allowable manual.
When these chemicals pass through the boiler, they can form strong acids. The acid can eat through the boiler wall, causing serious damage and presenting a possible threat of flue gas spillage or boiler water leakage into the building.
Vent below when Table 4A Sidewall Vent Kits Model 400 - 601 701 - 801 If using the alternate sidewall termination: 3. The air piping must terminate in a down-turned elbow as shown in FIG. 4-1B. This arrangement avoids recirculation of flue products into the combustion air stream.
Page 24
Sidewall direct venting Vent/air termination – sidewall Figure 4-1C Alternate Stainless Steel Vent Termination - Typical Stainless Steel Sidewall Termination of Air and Vent Models 400 - 601 w/Field Supplied Fittings, Utilizing FasNSeal’s Available Through FasNSeal Only TO BOILER INTAKE AIR...
4. Follow all local codes for isolation of vent pipe when passing through floors or walls. 5. Seal exterior openings thoroughly with exterior caulk. Figure 4-5B A Typical Sidewall Termination Assembly - Models 400 - 801 PVC/CPVC or Stainless Steel GALVANIZED SIDEWALL THIMBLE...
Sidewall direct venting Sidewall termination – optional concentric vent: Models 400 - 601 Only Description and usage Lochinvar offers an optional concentric combustion air and vent pipe termination kit (#CVK3007 for 4" (102 mm) diameter - Models 400 - 601). Both combustion air and vent pipes must attach to the termination kit.
Page 28
Sidewall direct venting Sidewall termination – optional concentric vent: Models 400 - 601 Only Figure 4-9 Concentric Vent Dimensional Drawing - Models 400 - 601 "B" DIA. PVC VENT / EXHAUST 60" (1524 MM) (102 MM) Instead of cementing the smaller pipe to the...
Sidewall direct venting Sidewall termination – optional concentric vent: Models 400 - 601 Only Figure 4-11 Concentric Vent Sidewall Attachment ELBOW (FIELD SUPPLIED) COMBUSTION AIR VENT DO NOT use field-supplied couplings to CAUTION extend pipes. Airflow restriction will occur and may cause intermittent operation.
Vertical direct venting Vent/air termination – vertical Follow instructions WARNING determining vent location to avoid possibility of severe personal injury, death or substantial property damage. Do not connect any other appliance to the WARNING vent pipe or multiple boilers to a common vent pipe.
For Canadian installations, provide clearances required by CSA B149.1 Installation Code. 3. The air inlet of a Knight XL boiler is part of a direct vent connection. It is not classified as a forced air intake with regard to spacing from adjacent boiler vents.
Vertical direct venting Vertical termination – optional concentric vent: Models 400 - 601 Only Description and usage Lochinvar offers an optional concentric combustion air and vent pipe termination kit. Both combustion air and vent pipes must attach to the termination kit. The termination kit must terminate outside the structure and must be installed as shown in FIG.
Vertical direct venting Vertical termination – optional concentric vent: Models 400 - 601 Only Do not operate the appliance with the rain WARNING removed combustion products may occur. Water may also collect inside the larger combustion air pipe and flow to the burner enclosure.
FIG.’s 5-8 and 5-9. Table 5A Alternate Vertical Concentric Vent / Chase Sizes Vent / Air Minimum Existing Model Inlet Size Vent / Chase Size 400 - 601 4" 701 - 801 6" Figure 5-8 Concentric Vent Example 1 AIR INLET W/ SCREEN 12"...
Page 35
Vertical direct venting Existing vent as a chase Follow all existing termination and clearance requirements and allowable pipe lengths. Use only approved venting materials listed in the General Venting Section of this manual. Figure 5-10 Existing Vent as a Chase FLUE EXHAUST AIR INLET SEAL...
For Models 400 - 501 install the close nipple on the outlet connection of the heat exchanger. Install the tee with the 3/4 inch fitting positioned vertically and on the top as shown in FIG.
CLOSED Near boiler piping components 1. Boiler system piping: Boiler system piping MUST be sized per the pipe requirements listed in Table 6B. Reducing the pipe size can restrict the flow rate through the boiler, causing inadvertent high limit shutdowns and poor system performance.
13. System temperature sensor: Lochinvar supplies a system temperature sensor. The sensor is to be installed in the heating loop downstream from the boiler hot water piping and heating loop junction.
Page 40
Hydronic piping Figure 6-5 Pressure Drop vs. Flow - Models 400 and 501 Figure 6-6 Pressure Drop vs. Flow - Models 601 thru 801 Table 6B Sizing Information for Temperature Rise Applications_20°F, 25°F, 30°F and 35°F TEMPERATURE RISE APPLICATIONS MINIMUM...
Page 41
Hydronic piping Figure 6-7 Single Boiler - Multiple Temperatures TEMPERATURE AIR SEPARATOR MAKE UP WATER PRESSURE GAUGE BACK FLOW PREVENTER DRAIN POINT (TYPICAL) BALL VALVE (TYPICAL) PRESSURE EXPANSION REDUCING TANK VALVE INDIRECT DHW HOT WATER OUT ANTI-SCALD MIXING VALVE COLD WATER IN Mixing valves are required for the protection of low temperature loops.
Page 42
Please note that these illustrations are meant to show system piping concept only, the installer is responsible NOTICE for all equipment and detailing required by local codes. System flow should always remain higher than the required flow for the boiler(s) when the boiler(s) is in NOTICE operation to prevent short cycling and high limit issues.
MIXING VALVE COLD WATER IN CIRCULATOR Indirect water heaters are capable of transferring a limited number of Btu’s into the water. Ensure boiler CAUTION output does not not exceed indirect water heater transfer capabilities. Mixing valves are required for the protection of low temperature loops.
Page 44
Please note that these illustrations are meant to show system piping concept only, the installer is responsible NOTICE for all equipment and detailing required by local codes. System flow should always remain higher than the required flow for the boiler(s) when the boiler(s) is in NOTICE operation to prevent short cycling and high limit issues.
Page 45
ANTI-SCALD MIXING VALVE COLD WATER IN Indirect water heaters are capable of transferring a limited number of Btu’s into the water. Ensure boiler CAUTION output does not not exceed indirect water heater transfer capabilities. Mixing valves are required for the protection of low temperature loops.
In Canada – When using manual main shutoff valves, it must be identified by the installer. 2. Install sediment trap / drip leg. Figure 7-1 Gas Supply Piping - Model 400 UNION GAS SUPPLY SEDIMENT TRAP / DRIP LEG...
Natural gas: Pipe sizing for natural gas 1. Refer to Table 7A for pipe length and diameter. Based on rated boiler input (divide by 1,000 to obtain cubic feet per hour). Table 7A is only for natural gas with specific gravity 0.60 inches, with a pressure drop through the gas...
Shut off gas supply at the manual gas valve in the gas piping to the appliance. On Models 400 - 501 loosen the set screw one (1) full turn from inside the pressure tap on top of the gas valve. On Models 601 - 801 remove the 1/8"...
Low voltage connections 1. Route all low voltage wires through the knockouts in the rear of the boiler, as shown in FIG. 8-2. 2. Connect low voltage wiring to the low voltage connection board as shown in FIG. 8-3 on page 53 of this manual and the boiler wiring diagram.
6°F (3°C) below the tank set point, and finishes the call for heat when the tank temperature reaches the tank set point. The tank sensor included with the Lochinvar Squire® indirect DHW tanks ( TST20015) is the only sensor suitable for use with the SMART SYSTEM control.
1 and 3 on connector X5 on the optional ModBus interface module. Flow switch 1. A flow switch is used to guarantee flow through the boiler before allowing it to fire. The flow switch must be installed at the boiler outlet.
Page 53
Installation & Operation Manual Field wiring (continued) Figure 8-3 Low Voltage Field Wiring Connections...
3 to 5). Install a neutralizing filter if required by local codes. A Neutralizer Kit (FIG. 9-1) is available from the factory (KIT3087 for Models 400 - 501 and KIT3046 for Models 601 - 801). 4. Install the 1/2 inch (12.7 mm) PVC tee assembly (shipped with the unit) as shown in FIG.
200 ppm. 2. Filling with chlorinated fresh water should be acceptable since drinking water chlorine levels are much lower. 3. Do not use the boiler to directly heat swimming pool or spa water. Test/replace freeze protection fluid 1.
Check for gas leaks Before starting the boiler, and during WARNING initial operation, smell near the floor and around the boiler for gas odorant or any unusual odor. Remove the top access panel and smell the interior of the boiler enclosure.
Page 57
Check flame and combustion 1. Turn the main power off to the boiler by placing the “On/Off ” switch in the OFF position. 2. Remove the flue temperature sensor from the flue pipe connection.
Start-up Figure 10-2 Operating Instructions FOR YOUR SAFETY READ BEFORE OPERATING WARNING: If you do not follow these instructions exactly, a fire or explosion may result causing property damage, personal injury, or loss of life. A. This appliance does not have a pilot. It is equipped with an ignition device which automatically lights the burner.
(if connected), and the boiler (secondary) pump. When the SMART SYSTEM control receives a space heating call for heat, it turns on the system pump. If the boiler is not heating an indirect DHW (Domestic Hot Water) tank, and the set point is not met, it also turns on the boiler pump.
Page 60
This clock must be set when the boiler is installed, and anytime the boiler has been powered off for more than 4 hours. Use the following procedure to set the clock: Press and hold the LEFT SELECT [MENU] key for at least 5 seconds.
Freeze Protection Mode ends. The system pump will run whenever there is a space heating call for heat, or the boiler goes into Freeze Protection Mode. It will continue to run for a short time after the end of the heat demand or the Freeze Protection Mode.
55°F (13°C) and the minimum off time has expired. Freeze protection DO NOT install the boiler in a room likely to freeze. The following integral feature of the SMART SYSTEM control module provides some protection for the boiler only -- not for the system.
Please note that the brackets ([]) denote NOTICE screen status. Turn ON the main power to the boiler by placing the ON/OFF switch in the ON position. If boiler status reads [SHUTDOWN] place the boiler into the active position by pressing the RIGHT SELECT [ON] key.
For normal mode DHW operation any boiler(s) in the Cascade can be selected to provide heat for a DHW call. Select a boiler to be designated as the DHW boiler. Connect the DHW thermostat or sensor to the terminals on the Low Voltage Connection Board marked for the corresponding device.
On the 501 and larger models, the control will lock out if this second attempt also fails. On the 400 model, the control will perform a total of 4 attempts before locking out.
The control will then modulate to maintain the outlet temperature to the DHW boiler set point. 9. If the boiler is not part of a Cascade, and both the space heating and DHW calls for heat remain active long enough, the boiler will switch back and forth between the two heating modes until one of them is satisfied.
Operating information (continued) Knight XL control module Use the control panel (FIG. 11-1) to set temperatures, operating conditions, and monitor boiler operation. Figure 11-1 Control Panel NAVIGATION DIAL The information on the bottom of the display shows the functions of the two SELECT keys (on either corner), and the...
Installation & Operation Manual Operating information Access modes User The user can adjust space heating and tank target temperatures by pressing the NAVIGATION dial when “ SETPOINTS” is flashing at the bottom of the display. The date and time, and the temperature units can also be changed (see page 60).
(BOILER STATUS) (OPERATIONAL INFORMATION) (LEFT SELECT KEY) Section STANDBY START PREPURGE IGNITION (Boiler Status Bar) POSTPURGE SHUTDOWN BLOCKED (Call for Heat Indicators) (continued) (NAVIGATION DIAL) Status Display Screens Display The unit has not received a call for heat from a remote thermostat nor has it received a call for heat from a DHW thermostat.
Page 70
The status of the DHW pump output. The voltage received from a BMS system. The speed signal sent to a variable speed boiler pump in percent. The speed signal received from a variable speed system pump control. A 0 - 10V signal indicating the firing rate of the boiler.
Page 71
Turning the NAVIGATION dial will increase or decrease the current setting. Press the RIGHT SELECT key to turn the boiler OFF. Press the RIGHT SELECT key to turn the boiler ON. Press the RIGHT SELECT key to cancel the shutdown operation.
The boiler should be inspected annually only by a qualified service technician. In addition, the maintenance WARNING and care of the boiler designated in Table 12A and explained on the following pages must be performed to assure maximum boiler efficiency and reliability. Failure to service and maintain the boiler and system could result in equipment failure.
2. Check the cold fill pressure for the system. Verify it is correct (must be a minimum of 12 psi (82.7 kPa)). 3. Watch the system pressure as the boiler heats up (during testing) to ensure pressure does not rise too high.
3. Remove the burner, reference FIG.’s 12-2 thru 12-4. 4. When replacing the burner, ensure gasket is in good condition and positioned correctly (FIG.’s 12-2 thru 12-4). Figure 12-2 Burner Assembly - Model 400 Adjust settings if Figure 12-3 Burner Assembly - Model 501 Installation &...
• Follow the “To Turn Off Gas to Appliance” instructions for the boiler in Section 10 - Startup. • Do not drain the boiler unless it will be exposed to freezing temperatures. If using freeze prevention fluid in system, do not drain.
Revision Notes: Revision A (ECO #C05747) initial release. Reflects the new model numbers for the Knight XL upgrade. Revision B (ECO #C06188) reflects changes made to FIG. 6-10 (ECR #R03474) remove ghost pipe, changes made to FIG.’s 6-7, 6-9, and 6- 11 (R03563) change the direction of the arrows, and edits made to the ladder and wiring diagrams (ECO #C06158).
Need help?
Do you have a question about the 400 and is the answer not in the manual?
Questions and answers