Advertisement
Quick Links
Advertisement

Related Manuals for Listen Technologies 863 MHz


Summary of Contents for Listen Technologies 863 MHz
- Page 3 Listen products, we are ready to help you in any way we can with prompt, have any comments on how we might improve our products or our +1.801.233.8992 +1.800.330.0891 North America +1.801.233.8995 Fax support@listentech.com www.listentech.com Listen Technologies GmbH Jasminstr. 16 905 22 Oberasbach, Germany +49 911 955159 0 +49 911 955159 40 www.listentech.de info@listentech.de...
-
Page 5: Table Of Contents
Portable FM Table of Contents Design Guide FM Technology Overview System Overview Notes Quick Reference Accessories Notes Quick Reference Accessories Notes Frequency Chart Troubleshooting Frequently Asked Questions Notes... -
Page 9: Fm Technology Overview
Portable FM Design Guide Table of Contents FM Technology Overview System Overview Notes... - Page 11 Frequency Modulation (FM) Technology Overview This same technology is used by local FM radio stations to broadcast voice and music. FM signals can travel frequency. This section of the manual will help you design a system that will get the best range with the least amount of interference.
-
Page 12: System Overview
System Overview Portable Programmable Portable Display FM Portable Display FM Input Source Thus, a person can use a line input source and mic source. 3.5mm Phone Wiring Unbalanced + Tip + Ring Mic input Line input - Sleeve... - Page 13 System Overview Transmitter na on the unit. Portable Display FM Receivers Listen offers two different portable receivers. Portable Display FM Portable Programmable...
-
Page 14: Channel Selection
Key concepts in designing a portable FM system Channel Selection Use this section of the guide to choose the channel settings for the transmitter and receivers. interference free channel. the transmitting antenna. chart on page 61 to determine the appropriate channels. EXAMPLE: 2 channel system use channels 01 &... - Page 15 Key concepts in designing a portable FM system Eliminating Multipath As mentioned on page 5, multipath can occur with portable RF systems. The audio quality of the transmission can decrease with the occurrence of multipath. Here are a few potential improvements that Squelch Squelching the receiver will mute the audio output when the signal from the transmitter is turned off or the signal is too weak to be received.
-
Page 16: Notes
Notes... - Page 17 Notes...
-
Page 21: Quick Reference
LT-700 User’s Manual Table of Contents Quick Reference Accessories Notes LT-700 Package Contents • Quick Reference Card • Warranty Card • FM Manual Card Portable Display FM... - Page 23 mechanically locked. The device shall incorporate an LCD display that indicates battery level, channel, channel lock, low battery, battery charging, programming, and RF signal strength. The portable transmitter shall incorporate automatic battery charging LT-700-863 863.050 - 864.950 MHz 50 PPM...
- Page 24 LT-700 Block Diagram LCD Display Down Power Supply CPU Module Power Universal 7.5 VDC 115/230VAC Power Supply 50/60 Hz Power charge indicator (not included) Red LED Alkaline NiMH (2) AA Batteries ALkaline or NiMH ANTENNA Companding RF Modulation Pre-emphasis Q-Technology 3 VDC Sleeve Line...
-
Page 25: Lt-700 Quick Reference
LT-700 Quick Reference Articulating Flexible Antenna Front Door Loc RF Output the RF transmit level. function is in process. locked on current channel. channel has been locked out. transmit level, channel, programming, battery status, and lock status. the type of batteries being pattern. - Page 26 LT-700 Setup Instructions Unpack the Product contact the dealer from which the product was purchased or Listen Technologies Open the front access door To unlock the door, rotate the lock ¼ turn counterclockwise. Grip the two tabs with your thumb and index Select Battery Type position.
- Page 27 LT-700 Setup Instructions Set Mic Sensitivity Switch The microphone sensitivity switch is located inside the battery compartment, to the left of the another vendor, you may need to experiment with different settings. Part # Description Setting Place Batteries in Unit Place two AA batteries in the compartment, making note of the battery polarity shown in the...
-
Page 28: Connect The Microphone
LT-700 Setup Instructions Connect the Microphone The microphone jack is located on top of the unit. Connect the Line Input Cable (Optional) information. You can use the microphone and the line input at the same time. NOTE: The MUTE switch mutes only the microphone; the line source will continue transmitting when the switch is in the MUTE position. -
Page 29: Antenna Positioning
LT-700 Operating Instructions Turn Unit On Power On/Off Button When you press the power button, the unit turns on. The LED on top of the unit will be illuminated and the LCD display will be visible. Antenna Positioning Raise the antenna to the upright position. When the antenna if fully upright, it will click into position. - Page 30 LT-700 Operating Instructions Using the MUTE / TALK switch Slide the switch to the mute position and the microphone audio is muted. When the Locking the Transmitter on One Channel The unit can be electronically locked on one channel so that it will not change channels even if the channel select or when multiple systems are in the same area.
-
Page 31: Entering Program Mode
LT-700 Programming Instructions Program Mode Overview from high to low power levels. Adjusting the power settings allows you to set the range of the transmission. Entering Program Mode While the unit is ON, press and hold the channel down and up buttons simultaneously for 3 seconds. The “PGM”... - Page 32 LT-700 Programming Instructions channel up or down buttons will scroll through the functions. Pressing the power button will enter that function. When no button is pressed for 10 seconds, the program menu is exited altogether, regardless of whether a the programming menu. Pressing and holding power for a full 4 seconds will exit both programming function and programming menu.
-
Page 33: Resetting To Defaults
LT-700 Programming Instructions Resetting to defaults Reset to default settings Press and hold the Up and Down channel buttons while turning the unit on. Press and hold the Up and Down channel buttons while turning the unit on. This will light up all segments of the display. -
Page 34: Accessories
Accessories for LT-700 Accessories Lavalier Microphone Hand Held Microphone Collar Microphone Conference Microphone High Capacity AA Alkaline Assistive Listening Microphone Rechargeable AA NiMH... - Page 35 Notes...
- Page 36 Notes...
-
Page 41: Accessories Notes
LR-400/500 User’s Manual Table of Contents Quick Reference Accessories Notes LR-400/500 Package Contents • Quick Reference Card • Warranty Card Portable Display FM Receiver Portable Programmable Display FM Receiver... - Page 43 capble of seeking channels. The device shall have an adjustable squelch. The device shall have an that allows the user to plug in either a mono or stereo headset. The device shall incorporate an LCD display that indicates channel, battery level, low battery, battery charging, and RF signal strength. batteries.
- Page 44 The receiver shall be capable of seeking channels. The device shall be able to be locked on a single channel. The device shall have an adjustable squelch. The device shall have an audio frequency user to plug in either a mono or stereo headset. The device shall incorporate an LCD display that indicates channel, battery level, low battery, battery charging, and RF signal strength.
- Page 45 LR-400/500 Block Diagram LCD Display Down Power Supply CPU Module Seek Universal 115/230VAC Power charge indicator Power Supply 50/60 Hz Red LED (not included) Alkaline NiMH (2) AA Batteries ALkaline or NiMH POWER ANTENNA Companding de-emphasis de-modulation Q-Technology VOLUME 3.5 mm Connector Sleeve Ring...
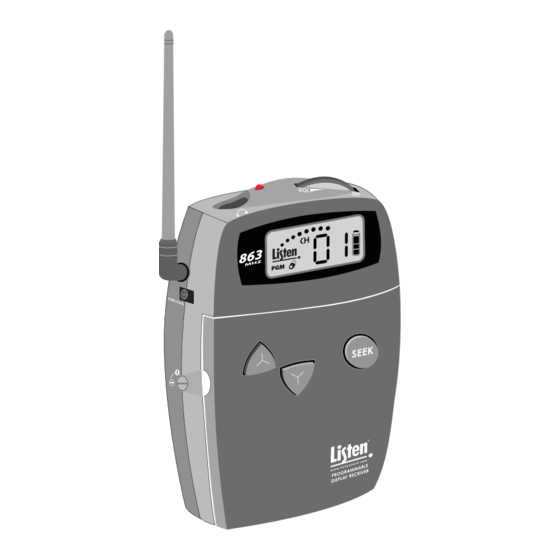
- Page 46 LR-400-863 Quick Reference Articulating Flexible Antenna Front Door Lock level. locked on current channel. receive level, channel, battery status, and lock status. user to change channels or lock on a channel. the type of batteries being used. pattern.
- Page 47 LR-500-863 Quick Reference Articulating Flexible Antenna Front Door Loc RF receive level Function is in process. locked on current channel been locked out. Shows receive level, channel, programming, battery status, and lock status. user to change channels or lock on a channel. the type of batteries being pattern.
- Page 48 LR-400/500 Setup Instructions Remove the product please contact the dealer from which the product was purchased or Listen Technologies Corpora Open the front access door the unit. To unlock the door, rotate the lock ¼ turn counterclockwise. Grip the two tabs with unit at this time.
- Page 49 LR-400/500 Setup Instructions Place Batteries in Unit Place two AA batteries in the compartment, making note of the battery polarity shown in the battery NOTE: Listen provides industrial strength AA alkaline batteries (part number LA-361) and high performance AA Nickel Metal Hydride batteries (part number LA-362). These may be purchased from your Listen dealer.
- Page 50 LR-400/500 Setup Instructions Turn the Unit On Receivers are turned on by rotating the volume dial counterclockwise. The red LED on top of the unit will ies correctly and that you are using fully charged batteries.
-
Page 51: Antenna Placement
LR-400/500 Operating Instructions Turn Unit On Volume knob Rotate the volume knob counterclockwise with an earphone or headset connected to the unit. WARNING: Excessive volume may result in hearing damage. Antenna Placement Antenna Position Raise the antenna to the upright position. When the antenna if fully extended, it will click into position. - Page 52 LR-400/500 Operating Instructions Select the channel using SEEK When you do this, the Listen receiver looks for the next active channel. channel that is close to the actual broadcast channel, in which case the clearest operating channel. Adjust the volume control Use the control dial on the top of the unit to adjust the volume to a comfortable level.
- Page 53 LR-400/500 Operating Instructions Locking the Receiver on One Channel tiple systems are in the same area. To lock on a channel Press and hold the SEEK button for 5 seconds channel. Press and hold the button again to unlock. When locked the LED on top of NOTE: On the LR-400/500, when the channel is locked, a lock icon will appear underneath “Listen”...
-
Page 54: Squelch Programming
LR-400/500 Operating Instructions Squelch Programming Entering Squelch Program Mode Turn unit off the unit on. display is seen. Adjusting the Squelch level page 49 for settings. Lower numbers mean that a less powerful and possibly noisy signal will be heard, but you can have a longer range before the unit will squelch. - Page 55 LR-400/500 Operating Instructions Squelch The purpose of squelch is to mute the audio output of your receiver when the signal from the transmitter is turned off or is too weak to be received. Without squelch you would hear radio noise in your earphone.
- Page 56 LR-400/500 Operating Instructions DX/Local interference in a busy RF environment. This is done by limiting the amount of RF gain in the receiver. When local mode is selected, the range of the receiver is compromised. Depending on your application DX Mode (default) when many frequencies are being used.
-
Page 57: Programming Instructions
Listen may add another programming function in the future, but there is only one programming function (F1) on the 863 MHz receivers. When no button is pressed for 10 seconds, the program menu is exited altogether, regardless of whether a the programming menu. - Page 58 Accessories for LR-400/500 Accessories Neck Loop Ear Speaker Stereo Headphones High Capacity AA Alkaline Assistive Listening Stereo Headphones Rechargeable AA NiMH...
-
Page 59: Notes
Notes... - Page 60 Notes...
- Page 65 Supplementary Information Table of Contents Frequency Chart Troubleshooting Frequently Asked Questions Notes...
-
Page 67: Frequency Chart
Frequency Chart Frequencies... -
Page 68: Battery Charging Information
Battery Charging Information into a Listen charging case, NiMH batteries will be charged. takes about 13 hours. Listen recommends that you allow the charger to complete its full cycle every time for maximum battery life. cycle over again. When not using the receiver, it is recommended to leave the unit on the charger. The charger provides a “maintenance” NOTE: Listen provides 2300 mAH (milli-Amp-hour) constant current (NiMH Nickel Metal Hydride) batteries. -
Page 69: Troubleshooting
Troubleshooting The unit has no power. different set of batteries. Make sure the batteries are installed correctly. There is no audio. at the “ring” of the connector. Also,be sure the receiver is on, volume is turned “up”, and headphones The audio is distorted. Make sure you are using an approved Listen microphone. - Page 70 Troubleshooting My batteries are not charging you are using a Listen charging case. Make sure the charging case is connected to power and the unit is securely pushed into its slot in the case. NOTE: Listen uses 2300 mAh (milli-Amp-hour) constant current NiMH (Nickel Metal Hydride) batteries. These may be purchased from a Listen dealer (ask for part number LA-362).
-
Page 71: Frequently Asked Questions
Frequently Asked Questions Yes. To transmit two different frequencies, there must be two separate transmitters. and can lock out unused channels. As many as you need, the number is endless. programmable to just those channels you need. Fifteen hours alkaline. Eight hours NiMH. Frequently Asked Questions... - Page 72 Frequently Asked Questions Yes. All Listen receivers can be locked on a single channel. 20 hours using alkaline batteries. 10 hours using NiMH batteries. Frequently Asked Questions...
-
Page 73: Compliance, Warranty And Contact Information
Product that is not covered under warranty shall be repaired or replaced with a unit of similar type damaged in shipment, please contact the carrier, then contact Listen for replacement or repair requirements payable by the carrier. more information on Listen solutions, contact Listen Technologies at +1.801.233.8992, +1.800.330.0891 North America, www.listentech.de. 14912 Heritagecrest way +1.801.233.8992... -
Page 74: Notes
Notes... - Page 76 Listen Technologies Corporation 14912 Heritagecrest Way +1.801.233.8992 +1.800.330.0891 North America +1.801.233.8995 www.listentech.com info@listentech.com Listen Technologies GmbH Jasminstr. 16 905 22 Oberasbach, Germany +49 911 955159 0 +49 911 955159 40 www.listentech.de info@listentech.de Printed in the United States of America ®...
Need help?
Do you have a question about the 863 MHz and is the answer not in the manual?
Questions and answers