Table of Contents
Advertisement
Advertisement
Table of Contents

Subscribe to Our Youtube Channel
Related Manuals for Rush MH 5 Profile


Summary of Contents for Rush MH 5 Profile
- Page 1 MH 5 Profile User Manual Professional Entertainment Technology...
- Page 2 The Martin logo, the RUSH by Martin logo, the RUSH by Martin name, the Martin name and all other trademarks in this document pertaining to services or products by Martin Professional or its affiliates and subsidiaries are trademarks owned or licensed by Martin Professional or its affiliates or subsidiaries.
-
Page 3: Table Of Contents
Table of contents Safety information ..................... 5 Introduction ..................... 10 Using the product for the first time ..............10 Physical installation ..................11 Fastening the fixture to a flat surface ............11 Mounting the fixture on a truss ..............11 Securing with a safety cable ............... - Page 4 Strobe effects ....................24 Pan and tilt....................24 Maintenance ....................25 Cleaning ...................... 25 Fuse replacement ..................26 Gobo replacement ..................26 DMX protocol ....................29 Control menus ....................35 Offset adjustment ..................36 Troubleshooting ....................37 Specifications ....................39...
-
Page 5: Safety Information
Install, operate and service RUSH by Martin™ products only as directed in their user manuals, or you may create a safety hazard or cause damage that is not covered by product warranties. - Page 6 Use only Neutrik PowerCon cable connectors to connect to power sockets. Do not connect devices to power in a chain that will exceed the electrical ratings of any cable or connector used in the chain. RUSH MH 5 Profile User Manual...
- Page 7 MAINS OUT throughput socket to MAINS IN input socket, but do not link more than: • eight (8) RUSH MH 5 fixtures in total at 100-120 V, or • eighteen (18) RUSH MH 5 fixtures in total at 200-240 V.
- Page 8 The secondary attachment must be approved by an official body such as TÜV as a safety attachment for the weight that it secures, must comply with EN 60598-2-17 Section 17.6.6 and must be capable of bearing a RUSH MH 5 Profile User Manual...
- Page 9 Do not attempt to use a fixture that is obviously damaged. Do not modify the fixture or install other than genuine RUSH by Martin™ parts. Refer any service operation not described in this manual to a qualified technician.
-
Page 10: Introduction
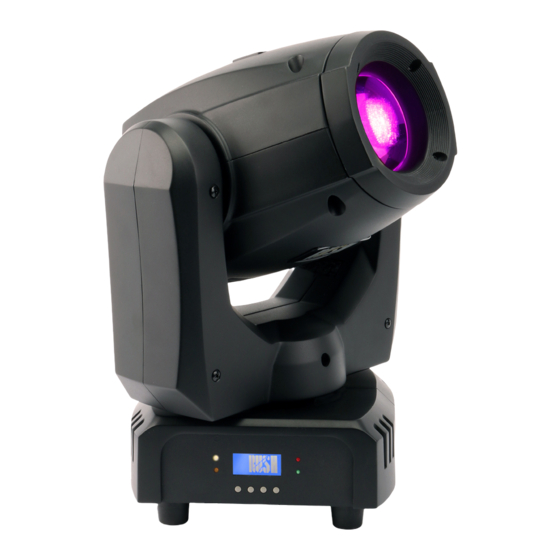
Introduction The MH 5 Profile is a powerful profile fixture with a 75 W long-life LED engine light source. It has two gobo wheels, the first with seven rotating gobos and the second with eight static gobos. The fixture has two color wheels, each with seven colors plus open. -
Page 11: Physical Installation
To clamp the fixture to a truss: 1. Check that the rigging structure can support at least 10 times the weight of all fixtures and equipment to be installed on it. 2. Block access under the work area. RUSH MH 5 Profile User Manual... -
Page 12: Securing With A Safety Cable
See illustration on right. Loop the safety cable through the cutout in the fixture’s baseplate (arrowed) and around a secure anchoring point. Martin™ can supply suitable safety cables and rigging clamps (see ‘Accessories’ on page 41). RUSH MH 5 Profile User Manual... -
Page 13: Ac Power
Yellow/green The fixture has an auto-ranging power supply that accepts AC mains power at 100-240 V at 50/60 Hz. Do not apply AC mains power at any other voltage or frequency to the fixture. RUSH MH 5 Profile User Manual... -
Page 14: Fixture Overview
Using 14 AWG or 1.5mm cables from Martin™, you can link: • Maximum eight (8) RUSH MH 5 fixtures in total at 100-120 V, or • Maximum eighteen (18) RUSH MH 5 fixtures in total at 200-240 V. If you install a power plug on the 14 AWG / 1.5 mm... - Page 15 7 – Mains power throughput The white Neutrik PowerCon socket can be used to supply power to other fixtures only if you respect the safety precautions given in this manual (see ‘Safety information’ on page 5). RUSH MH 5 Profile User Manual...
-
Page 16: Control Data Link
XLR plug with a 120 Ohm, 0.25 W resistor soldered between pins 2 and 3, “soaks up” the control signal so it does not reflect and cause interference. If a splitter is used, terminate each branch of the link. RUSH MH 5 Profile User Manual... -
Page 17: Connecting The Dmx Data Link
10, then it uses channels 10, 11, 12, 13, 14, 15, 16, 17, 18, 19, 20, 21, 22, 23, 24 and 25. The following fixture in the DMX chain can then be set to a DMX address of 26. RUSH MH 5 Profile User Manual... -
Page 18: Standalone Show Mode
DMX signal or another powered on fixture connected to its DMX IN connector) runs a preprogrammed or sound-activated standalone show and the other fixtures run a standalone show that is synchronized with the first fixture. RUSH MH 5 Profile User Manual... - Page 19 To adjust the sensitivity of the sound activation microphone: 1. Play some music at the normal volume for the venue. 2. Select SOUND SENSE and press ENTER to confirm. The current setting will blink on the display. RUSH MH 5 Profile User Manual...
-
Page 20: Pan/Tilt Inversion
1. Select TILT INVERSE and press ENTER to confirm. The present mode will blink on the display. 2. Use the DOWN and UP buttons to select the YES (tilt inversion) or NO (normal) mode. 3. Press ENTER to confirm your selection. RUSH MH 5 Profile User Manual... -
Page 21: Backlight
Dimmer speed Dimmer speed provides two options: • NO is the default setting. It sets the dimmer to exactly follow changes in dimming level sent from the controller. This gives the fastest dimmer response. RUSH MH 5 Profile User Manual... -
Page 22: Auto Test
Factory default settings To return all the settings in the control menu to their factory defaults, cancelling any changes made by users: 1. Select DEFAULTS and press ENTER. 2. Select YES and press ENTER to confirm. RUSH MH 5 Profile User Manual... -
Page 23: Manual Reset
‘DMX protocol’ on page 29 for a full list of DMX channels, DMX values and control options. Electronic dimming Overall intensity can be adjusted 0-100%. Gobos The fixture contains two gobo wheels: Gobo wheel 1 (rotating gobos) Gobo wheel 2 (static gobos) RUSH MH 5 Profile User Manual... -
Page 24: Color Wheels
The fixture incorporates pan and tilt feedback, so that if a pan or tilt position error is detected, the shutter closes and the fixture resets to the correct pan & tilt position. This can be disabled if not required (see ‘Control menus’ on page 35). RUSH MH 5 Profile User Manual... -
Page 25: Maintenance
Refer any service or repair operation not described in this manual to an authorized RUSH by Martin™ service technician. Do not try to carry out such an operation yourself, as doing so may present a health or safety risk. It may also cause damage or malfunction, and it may void your product warranty. -
Page 26: Fuse Replacement
Gobo size: 24 mm (0.94 in.) • Gobo image size: 20 mm (0.79 in.) • Gobo thickness: 0.3 mm Gobos are exposed to thermal stress. Custom gobos must be constructed to the same quality standards as the original items. RUSH MH 5 Profile User Manual... - Page 27 4. See illustration below. The gobo is held in place in the goboholder by a wire clip. Taking care to avoid scratching or applying pressure to the gobo, remove the clip and lift the gobo out of the goboholder. RUSH MH 5 Profile User Manual...
- Page 28 6. Replace the head covers and be ready for the head to move when the product resets when you reapply power. RUSH MH 5 Profile User Manual...
-
Page 29: Dmx Protocol
Light Green Light blue 106-119 Light blue (Color 8) Light blue White 121-134 135-160 White Stepped scrolling 161-163 Color 1 - Red 164-166 Color 2 - Deep Blue 167-169 Color 3 - Lavender RUSH MH 5 Profile User Manual... - Page 30 Blue (Color 8) Blue White 121-134 135-160 White Stepped scrolling 161-163 Color 1 - Pink 164-166 Color 2 - CTO 3200K 167-169 Color 3 – UV Purple 170-172 Color 4 - Light yellow RUSH MH 5 Profile User Manual...
- Page 31 Gobo shake 65-88 Gobo 1 shake 89-112 Gobo 2 shake 113-136 Gobo 3 shake 137-160 Gobo 4 shake 161-184 Gobo 5 shake 185-208 Gobo 6 shake No function Continuous wheel rotation 210-232 clockwise, fast→slow RUSH MH 5 Profile User Manual...
- Page 32 Gobo 7 → Open 120-160 Open Stepped scrolling 161-163 Gobo 1 164-166 Gobo 2 167-169 Gobo 3 170-172 Gobo 4 173-175 Gobo 5 176-178 Gobo 6 179-181 Gobo 7 182-192 Open Continuous wheel rotation 193-214 Clockwise, fast→slow RUSH MH 5 Profile User Manual...
- Page 33 Reset pan/tilt 40-54 No function 55-59 Enable calibration 60-79 No function 80-84 Pan/tilt speed = Normal 85-89 Pan/tilt speed = Fast (default setting) 90-94 Pan/tilt speed = Slow 95-99 Parameter shortcuts = On (default setting) RUSH MH 5 Profile User Manual...
- Page 34 Store gobo wheel 2 calibration 220-224 Store focus calibration 225-229 Store prism calibration 230-234 Store prism rotation calibration 235-239 Store pan calibration 240-244 Store tilt calibration 245-249 Reset all calibration settings to factory defaults 250-255 No function RUSH MH 5 Profile User Manual...
-
Page 35: Control Menus
Gobo wheel 2 focus in standalone Focus 2 Adjust 0–255 mode Dimmer Calibrat. 50–100 Dimmer calibration Dimmer optimized for speed Dimmer Speed Dimmer optimized for smoothness Auto test Automatic test of all functions RUSH MH 5 Profile User Manual... -
Page 36: Offset Adjustment
-127 → 127 position Gobo 2 -127 → 127 Static gobo wheel position Prism 0 → 255 Prism indexed position R prism -127 → 127 Prism rotation position Focus 0 → 255 Focus position RUSH MH 5 Profile User Manual... -
Page 37: Troubleshooting
Try to control fixture with another DMX control device. Move fixture and DMX link if close to an unshielded high-voltage installation. Fixture fault Contact your RUSH by Martin authorized distributor or service center for assistance. RUSH MH 5 Profile User Manual... - Page 38 DMX signal. Sound activation Adjust sound activation sensitivity too low for microphone sensitivity music source. Test microphone by tapping fixture. Fixture should react when in sound activation mode. RUSH MH 5 Profile User Manual...
-
Page 39: Specifications
Electronic 'shutter' effect ........Strobe effect, pulse effects, instant open and blackout Prism ............... Indexing and rotation with variable direction and speed Focus ....................Motorized Electronic dimming ........ 0 - 100%, four dimming curve options RUSH MH 5 Profile User Manual... - Page 40 DMX data in/out ............3-pin & 5-pin locking XLR Electrical AC power ............100-240 V nominal, 50/60 Hz Power consumption ................157 W Fuse ..................... T 3.15 A Power supply unit ........Auto-ranging electronic switch mode RUSH MH 5 Profile User Manual...
- Page 41 Power relay cable, 14 AWG, SJT, 1.5 mm2, H05VV-F, with PowerCon connectors, 2.25 m (7.4 ft.) ......P/N 11541510 Power relay cable, 14 AWG, SJT, 1.5 mm2, H05VV-F, with PowerCon connectors, 3.25 m (10.7 ft.) ......P/N 11541511 RUSH MH 5 Profile User Manual...
- Page 42 RUSH Software Uploader 1™ ........... P/N 91611399 Ordering Information RUSH MH 5 Profile™ in cardboard box, EU ......P/N 90280040 RUSH MH 5 Profile™ in cardboard box, US ......P/N 90280045 Specifications are subject to change without notice. For the latest product specifications, see www.martin.com...
- Page 44 I n n o v a t i o n Q u a l i t y P e r f o r m a n c e...
Need help?
Do you have a question about the MH 5 Profile and is the answer not in the manual?
Questions and answers