Table of Contents
Advertisement
Advertisement
Table of Contents

Related Manuals for Rush MH 3 Beam


Summary of Contents for Rush MH 3 Beam
-
Page 1: User Manual
MH 3 Beam User Manual Professional Entertainment Technology... - Page 2 The Martin logo, the RUSH by Martin logo, the RUSH by Martin name, the Martin name and all other trademarks in this document pertaining to services or products by Martin Professional or its affiliates and subsidiaries are trademarks owned or licensed by Martin Professional or its affiliates or subsidiaries.
-
Page 3: Table Of Contents
Table of contents Safety information ....................5 Introduction ......................10 Before using the product for the first time ............10 Maximizing lamp life ..................11 Physical installation ..................... 12 Fastening the fixture to a flat surface .............. 12 Mounting the fixture on a truss ................ 12 Securing with a safety cable ................ - Page 4 Color wheels ....................28 Maintenance ....................... 29 Cleaning ......................29 Lamp replacement ..................30 Replacing the primary fuse ................31 Other service and repairs ................32 DMX protocol ...................... 33 Control menus ..................... 38 Offset menu ..................... 40 Error messages ....................41 Troubleshooting ....................
-
Page 5: Safety Information
Install, operate and service RUSH by Martin™ products only as directed in their user manuals, or you may create a safety hazard or cause damage that is not covered by product warranties. - Page 6 Before using the fixture, check that all power distribution equipment and cables are in perfect condition and rated for the current requirements of all connected devices. Use only a Neutrik PowerCon cable connector to connect to the power input socket. RUSH MH 3 Beam User Manual...
- Page 7 Monitor hours of lamp use. Replace the lamp when it reaches the limit of its service life as specified in this manual or by the lamp manufacturer. If you exceed the lamp lifetime, the lamp may explode and damage the fixture. RUSH MH 3 Beam User Manual...
- Page 8 EN 60598-2-17 Section 17.6.6 and must be capable of bearing a static suspended load that is ten times the weight of the fixture and all installed accessories. RUSH MH 3 Beam User Manual...
- Page 9 Do not modify the fixture in any way not described in this manual or install other than genuine RUSH by Martin™ parts. Refer any service operation not described in this manual to a qualified technician.
-
Page 10: Introduction
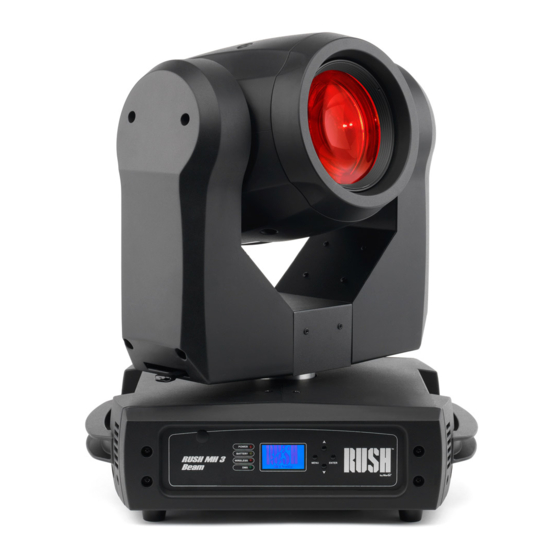
Introduction The MH 3 Beam is a high-performance moving-head lighting fixture equipped with an MSD Platinum 5R lamp. It has a state-of-the-art optical system that incorporates a motorized 1°~ 3.8° zoom. Its compact design makes it ideal for live shows, TV events, stage and concerts. -
Page 11: Maximizing Lamp Life
Before shutting down power completely, power the lamp off but leave power applied to the fixture for a few minutes so that cooling fans can prevent any momentary lamp temperature increase caused by heat from surrounding components. RUSH MH 3 Beam User Manual... -
Page 12: Physical Installation
3. The fixture is supplied with two omega-type brackets to which rigging clamps can be attached. Bolt a rigging clamp securely to each bracket. The bolts used must be M12, grade 8.8 steel minimum, and fastened with self-locking nuts. RUSH MH 3 Beam User Manual... -
Page 13: Securing With A Safety Cable
(arrowed in illustration on right) and around a secure anchoring point. Martin™ can supply suitable safety cables and rigging clamps (see ‘Accessories’ on page 46). RUSH MH 3 Beam User Manual... -
Page 14: Ac Power
Yellow/green The fixture has an auto-ranging power supply that accepts AC mains power at 100-240 V at 50/60 Hz. Do not apply AC mains power at any other voltage or frequency to the fixture. RUSH MH 3 Beam User Manual... -
Page 15: Fixture Overview
3 and 5-pin XLR sockets are provided for DMX input and output (throughput). 5 – AC mains power input A blue Neutrik PowerCon socket is provided to connect the fixture to mains power. 6 – Power on/off switch RUSH MH 3 Beam User Manual... -
Page 16: Pan And Tilt Locks
DMX universe. Note that if independent control of a fixture is required, it must have its own DMX channels. Fixtures that are required to behave identically can share the same DMX address and channels. To add RUSH MH 3 Beam User Manual... -
Page 17: Tips For Reliable Data Transmission
2. Connect the first fixture’s DMX output to the DMX input of the next fixture and continue connecting fixtures output to input. Terminate the last fixture on the link with a DMX termination plug. RUSH MH 3 Beam User Manual... -
Page 18: Fixture Setup
2. Use the UP and DOWN buttons to select DMX ADDRESS and press ENTER to confirm. The present address will blink on the display. 3. Use the UP and DOWN buttons to select the address (1 to 512). RUSH MH 3 Beam User Manual... -
Page 19: Fixture Settings
When pan/tilt feedback is enabled and pan or tilt loses its correct position, the fixture will detect this and reset pan and tilt so that the correct pan/tilt position is restored. To deactivate or activate this function, use the FIXTURE SETTINGS→P/T FEEDBACK menu. RUSH MH 3 Beam User Manual... -
Page 20: Lamp Settings
4. Press ENTER to confirm (or press MENU to exit without making a change). Off via DMX To enable the lamp to be turned off via DMX: 1. Select LAMP SETTINGS and press ENTER to confirm. RUSH MH 3 Beam User Manual... - Page 21 1. Select LAMP SETTINGS and press ENTER to confirm. 2. Use the DOWN and UP buttons to select IGNITION DELAY and press ENTER to confirm. 3. Use the DOWN and UP buttons to scroll to a duration. RUSH MH 3 Beam User Manual...
-
Page 22: Display Settings
ENTER to confirm. 3. Use the DOWN and UP buttons to select YES (auto off) or NO (constant backlight). 4. Press ENTER to confirm (or press MENU to exit without making a change). RUSH MH 3 Beam User Manual... -
Page 23: Fixture Test
1. Select FIXTURE INFORMATION and press ENTER to confirm. 2. Use the DOWN and UP buttons to select FIXTURE USE TIME and press ENTER to confirm. The number of hours is shown in the display. 3. Press MENU to exit. RUSH MH 3 Beam User Manual... -
Page 24: Special Functions
To help you monitor service intervals, the maintenance timer lets you set an interval and display the remaining time in hours before the end of the interval is reached. Reset factory default settings The fixture’s default settings can be restored using SPECIAL FUNCTIONS→FACTORY SETTINGS. RUSH MH 3 Beam User Manual... -
Page 25: Effect Home Position Adjustment
3. The currently indexed home position will blink in the display. Use the DOWN and UP buttons to adjust the home position. 4. Once the correct position has been reached, press ENTER to confirm (or press MENU to exit without making a change). RUSH MH 3 Beam User Manual... -
Page 26: Effects
The dimming curve can be selected on the function channel. Frost filter The frost filter softens and diffuses the projection. Zoom The fixture provides a 1°~ 3.8° zoom. Strobe effects A range of variable speed and random shutter/strobe effects are provided. RUSH MH 3 Beam User Manual... -
Page 27: Gobos
The fixture incorporates an 8-facet prism that can be inserted into the beam to provide split beam effects. The prism can be set to an indexed position or rotated clockwise or counter-clockwise. A range of prism macros and movement effects are provided. RUSH MH 3 Beam User Manual... -
Page 28: Color Wheels
The fixture can be set to automatically blackout during color changes. RUSH MH 3 Beam User Manual... -
Page 29: Maintenance
Check again at frequent intervals. This procedure will allow you to assess cleaning requirements in your particular situation. If in doubt, consult your RUSH by Martin dealer about a suitable maintenance schedule. -
Page 30: Lamp Replacement
1. Disconnect the fixture from power and allow it to cool for two hours. 2. Remove the fixture head covers using a Phillips screwdriver. 3. Position the head as shown below and remove the lamp cooling fan at the rear of the head. RUSH MH 3 Beam User Manual... -
Page 31: Replacing The Primary Fuse
Disconnect the fixture from power and allow it to cool for at least 10 minutes. 1. Unscrew the cap of the fuseholder and remove the fuse. Replace with a fuse of the same size and rating only. 2. Reinstall the fuseholder cap before reapplying power. RUSH MH 3 Beam User Manual... -
Page 32: Other Service And Repairs
Martin™ Global Service organization and its approved agents, giving owners access to Martin’s expertise and product knowledge in a partnership that will ensure the highest level of performance throughout the product’s lifetime. Please contact your RUSH by Martin™ supplier for details. RUSH MH 3 Beam User Manual... -
Page 33: Dmx Protocol
Blackout during pan/tilt or color/gobo change 220-229 Disable blackout during pan/tilt or color/gobo change 230-239 Lamp off 240-255 No function Pan/tilt macros 8-15 Macro 1 16-23 Macro 2 24-31 Macro 3 32-39 Macro 4 40-47 Macro 5 RUSH MH 3 Beam User Manual... - Page 34 Pan/tilt macro speed fast-slow Color Open Split color Split color 9-10 Yellow 11-12 Split color 13-14 Blue 15-16 Split color 17-18 Blue Green 19-21 Split color 22-23 Green 24-25 Split color 26-27 Light blue RUSH MH 3 Beam User Manual...
- Page 35 25-27 Gobo 8 28-30 Gobo 9 31-33 Gobo 10 34-36 Gobo 11 37-39 Gobo 12 40-42 Gobo 13 43-45 Gobo 14 46-48 Gobo 15 49-51 Gobo 16 52-55 Gobo 17 56-59 Open gobo shake RUSH MH 3 Beam User Manual...
- Page 36 Prism rotation effects 12 183-187 Prism rotation effects 13 188-191 Prism rotation effects 14 192-196 Prism rotation effects 15 197-200 Prism rotation effects 16 201-205 Prism rotation effects 17 206-209 Prism rotation effects 18 RUSH MH 3 Beam User Manual...
- Page 37 16-131 Shutter strobe effect, slow-fast 132-167 Fast close, slow open 168-203 Slow close, fast open 204-239 Pulse open and close 240-247 Random shutter 248-255 Open 0-255 Dimmer (coarse control) 0-100% 0-255 Dimmer (fine control) RUSH MH 3 Beam User Manual...
-
Page 38: Control Menus
On if DMX On Lamp power on when fixture receives DMX Off if DMX Off Lamp power off when fixture does not receive DMX Ignition Delay 0~255S Delay lamp ignition: 0 to 255 seconds. RUSH MH 3 Beam User Manual... - Page 39 Reset Pan/Tilt Reset pan and tilt Functions only Shutter/Dimmer Reset shutter/dimmer only Color Reset color wheel only Gobo Reset gobo wheel only Zoom/Frost/Focus Reset zoom, frost and focus only Reset all effects RUSH MH 3 Beam User Manual...
-
Page 40: Offset Menu
Tilt offset Shutter 0~255 Shutter offset Color -128~127 Color offset Gobo -128~127 Gobo offset Prism 0~255 Prism offset R-Prism -128~127 Rotating prism offset Zoom 0~255 Zoom offset Focus 0~255 Focus offset Frost 0~255 Frost offset RUSH MH 3 Beam User Manual... -
Page 41: Error Messages
Tilt Reset Error to sensors or components. Contact authorized Tilt Encode Error Martin™ service agent. Shutter Reset Fail Dimmer Reset Fail Color Reset Fail Gobo Reset Fail Frost Reset Fail RUSH MH 3 Beam User Manual... -
Page 42: Troubleshooting
Check mains voltage. intermittently or internal temperature Check ambient too high. temperature, inspect product to see if cleaning is required. Fan may need replacing. Contact your RUSH by Martin™ authorized distributor or service center for assistance. RUSH MH 3 Beam User Manual... - Page 43 DMX network. Attempt to control the fixture with another DMX control device. Move the fixture if it is being operated very close to an unshielded high- voltage installation. RUSH MH 3 Beam User Manual...
-
Page 44: Specifications
Dimmer ..........0 - 100%, four dimming curve options Pan ......540°, with coarse & fine control and speed, P/T macros Tilt ......270°, with coarse & fine control and speed, P/T macros Optics Beam angle ................... 1°- 3.8° RUSH MH 3 Beam User Manual... - Page 45 Total heat dissipation (calculated, +/- 10%) ........ 1200 BTU/hr. Approvals EU safety ....... EN 60598-2-17 (EN 60598-1), EN 62471, EN 62493 EU EMC ..........EN 55015, EN 55103-1, EN 55103-2, ............EN 61000-3-2, EN 61000-3-3, EN 61547 US safety (pending)................UL 1573 RUSH MH 3 Beam User Manual...
- Page 46 Safety cable, safe working load 50 kg........P/N 91604003 Related Items RUSH Software Uploader 1™ ............ P/N 91611399 Ordering Information RUSH MH 3 Beam™ in cardboard box ........P/N 9 0280010 Specifications are subject to change without notice. For latest product specifications, see www.martin.com Disposing of this product RUSH by Martin™...
- Page 48 I n n o v a t i o n Q u a l i t y P e r f o r m a n c e...
Need help?
Do you have a question about the MH 3 Beam and is the answer not in the manual?
Questions and answers