Advertisement
Available languages
Available languages
Quick Links
Mode d'emploi et installation
FR
Hotte de Cuisine
Instructions for use and installation
GB
Cooker Hood
Bedienungsanleitung und Einrichtung
DE
Dunstabzugshaube
Istruzioni per l'uso e l'installazione
IT
Cappa
Instrucciones de instalacion e utilizacion
E
Campana
Instructies voor het gebruik en installeren
NL
NL
Dampkap
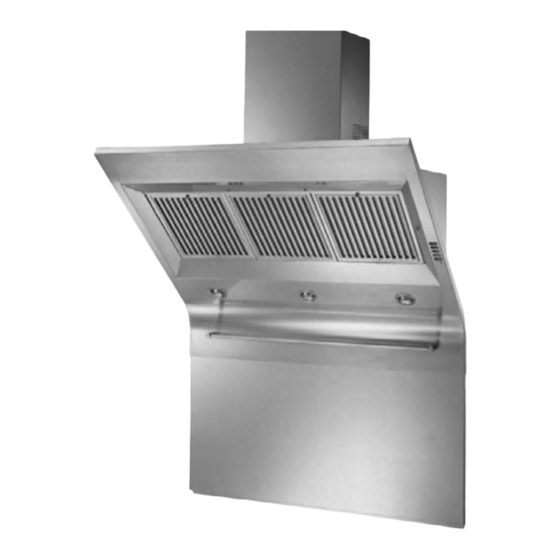
Windy Pro 900 & 1200
Advertisement

Related Manuals for ROBLIN Windy Pro 900


Summary of Contents for ROBLIN Windy Pro 900
- Page 1 Mode d’emploi et installation Hotte de Cuisine Instructions for use and installation Cooker Hood Bedienungsanleitung und Einrichtung Dunstabzugshaube Istruzioni per l’uso e l’installazione Cappa Instrucciones de instalacion e utilizacion Campana Instructies voor het gebruik en installeren Dampkap Windy Pro 900 & 1200...
- Page 2 SOMMAIRE CONTENTS RACCORDEMENT ÉLECTRIQUE ELECTRICAL WIRING CONSEILS D’INSTALLATIONS INSTALLATION ADVICE POSE DE L’APPAREIL FITTING THE APPLIANCE FONCTIONNEMENT OPERATION CONSEILS D’UTILISATIONS USEFUL HINTS ENTRETIEN MAINTENANCE GARANTIE ET SERVICE APRÈS-VENTE GUARANTEE AND AFTER-SALES-SERVICES REMARQUES REMARKS INHALT CONTENUTI NETZANSCHLUSS COLLEGAMENTO ELETTRICO MONTAGEHILFEN CONSIGLI DI INSTALLAZIONE MONTAGE DES GERÄTES POSA DELL’...
- Page 3 Nous vous remercions de la confiance que vous nous avez accordée en choisissant un appareil de la gamme ROBLIN. Celui-ci a fait l’objet de toute notre attention dans sa conception et sa réalisation. Afin qu’il vous donne entière satisfaction, nous vous recommandons de lire avec attention cette notice qui vous expliquera comment l’installer, l’utiliser et l’entretenir dans les meilleures conditions.
- Page 4 POSE DE L’APPAREIL Montage et raccordement doivent être réalisés par un installateur* qualifié. (*) Le non-respect de cette condition entraîne la suppression de la garantie du constructeur et tout recours en cas d’accident. Attention: prendre bien soin d’employer les chevilles adaptées au support, se renseigner au près des fabricants, effectuer un scellement si nécessaire.
- Page 5 FONCTIONNEMENT Tableau de commandes Touche Fonction Affichage Allume et éteint le moteur d’aspiration à la der- Indique la vitesse de réglage. nière vitesse d’utilisation. Réduit la vitesse d’exercice. Augmente la vitesse d’exercice. Active le régime intensif à partir de n’importe Affiche HI et le point en bas à...
- Page 6 CONSEILS D’UTILISATION • Pour obtenir une efficacité maximum d’absorption des fumées ou des vapeurs, faire fonctionner l’appareil 5 minutes environ avant et après la cuisson des aliments; La première vitesse est conseillée pour les cuissons à feu doux et pour les sauces. La deuxième pour les cuissons soutenues, grillades et friteuses.
- Page 7 Lorsque ce symbole d’une poubelle à roue barrée est attaché à un produit, cela signifie que le produit est couvert par la Directive Européenne 2002/96/EC. Votre produit est conçu et fabriqué avec des matériaux et des composants de haute qualité, qui peuvent être recyclés et utilisés de nouveau. Veuillez vous informer du système local de séparation des déchets électriques et électroniques.
- Page 8 Thank you for buying a Roblin product which has been manufactured to the highest quality standards to meet your requirements. We recommend you carefully read this booklet in which you will find instructions for installation, hints for use and maintenance. The Instructions for Use apply to several versions of this appliance. Accordingly, you may find descriptions of individual features that do not apply to your specific appliance.
- Page 9 markings identifying the terminals in your plug, proceed as follows. The wire which is coloured green and yellow must be connected to the terminal in the plug which is marked with the letter E or by the earth symbol or coloured green or green and yellow. The wire which is coloured blue must be connected to the terminal which is marked with the letter N or coloured black.
- Page 10 slightly to allow it to clamp around the brackets item 2. Secure the chimney stack to the brackets using the four self tapping screws provided. Fit the lower chimney section item I by expanding the chimney slightly to allow it to clamp around the upper chimney section item S, and the bracket on top of the canopy item C as illustrated in fig.
-
Page 11: Control Panel
OPERATION Control panel Button Function Display Turns the suction motor on and off at the last Displays the speed set speed used. Decrease the working speed. Increase the working speed. Activates intensive speed from any other Displays HI and the bottom right hand spot speed even with the motor off. - Page 12 USEFUL HINTS • To obtain the best performance it is advisable to switch ‘ON’ the cooker hood a few minutes (in the boost setting) before you start cooking and you should leave it running for approximately 15 minutes after finishing. •...
- Page 13 then it should be replaced with identical replacement. Do not replace with any other type of lamp and do not fit a lamp with a higher rating. GUARANTEE AND AFTER SALES SERVICE • In the event of any malfunction or anomaly, notify your fitter who will have to check the ap- pliance and its connection.
- Page 14 Plaque Signalétique de la hotte Rating plate of the cookerhood Typenschild im Inneren der Dunstesse Etichetta all'interno della cappa Etiqueta de la campana Typeplaatje van de afzuigkap Modèle Model Modell Modello Modelo Model Numéro de série Serial number Seriennummer Numero di serie Numero de serie Serienummer...
- Page 15 Composants Componenti Components Componentes Bauelemente Onderdelen 1 clapet à ventelles 2 fixations murales pour le haut de conduit 1 non-return backflow flaps 2 wall brackets to fix the upper chimney 1 Rückstauklappe 2 Befestigungsbügel oberer Kaminteil 1 flangia 2 staffe per il fissagio del camino 1 válvula anti-rechazo 2 fijaciones murales para la alta chimenea 1 klep...
- Page 17 900 / 1200...
- Page 18 461.5 (1200) 461.5 (1200)
- Page 20 1200...
- Page 21 6 bis Avec recyclage With recirculation Mit Umluftbetrieb Per versione filtrante Con reciclaje Op recyclage...
- Page 22 ACCESSOIRES ACCESSORI ACCESSORIES ACCESORI ZUBEHÖRE ACCESSOIRES 5403004...
- Page 23 LR03 / AAA / 1,5V...
- Page 24 D 200 mm...
- Page 25 HALOGEN BELEUCHTUNG HALOGEN LIGHT 3 x 20 W - 12 V LAMPES HALOGENES TRANSFORMATOR TRANSFORMATEUR TRANSFORMER Brown Blue MULTI-FLACH KABEL LIMANDE COMMANDE FLAT CABLE 1 3 5 FERNBEDIENUNG RECEPTEUR INFRAROUGE REMOTE CONTROL ELEKTRONISCHE STEUERUNG BOITIER COMMANDE PUSCH BUTTON PANEL 1 3 5 Brown Green-Yellow Blue...
-
Page 26: Electrical Connection
TECHNICAL INFORMATION ( UK ) It is dangerous to alter the specifications or attempt to modify this product in any way. VOLTAGE: (50Hz) 230V ELECTRICAL SUPPLY POWER CONSUMPTION: 290W FAN MOTOR: 230W LIGHT BULB: 3 x 20W SPEEDS Electronic PERFORMANCE CAPACITY m 727-903 PRESSURE PA... - Page 27 50800 VILLEDIEU-LES-POËLES - France Tél. 02 33 91 26 50 - Fax 02 33 51 54 79 - e-mail : com.france@roblin.fr For outside France : Tel. +33 (0)2 33 91 26 57 - Fax. : +33 (0)2 33 51 54 79 e-mail : com.export@roblin.fr...
Need help?
Do you have a question about the Windy Pro 900 and is the answer not in the manual?
Questions and answers