
Subscribe to Our Youtube Channel
Related Manuals for Fortress Technologies FW1016B613


Summary of Contents for Fortress Technologies FW1016B613
-
Page 1: User Manual
Washer User Manual Model No.: FW1016B613 *Before operating the appliance, please read this manual thoroughly and retain it for future reference. -
Page 2: Table Of Contents
CONTENT PAGE SAFETY INSTRUCTION INSTALLATION INSTRUCTION OPERATION INSTRUCTION MAINTENANCE INSTRUCTION TROUBLE SHOOTING SPECIFICATION WARRANTY... -
Page 3: Safety Instruction
SAFETY INSTRUCTION To avoid electric shock, fire or injury, please read the user manual carefully before using the appliance and keep it for future reference. This appliance is for household use only. Please use suitable power source (220-240V~/50Hz). Never immerse the appliance in water or other liquids. Do not use the appliance under direct sunshine. -
Page 4: Installation Instruction
INSTALLATION INSTRUCTION Please contact the authorized service agent for installation of the appliance. To make the appliance ready for use, review the user manual and make sure that the electricity, tap water supply and water drainage systems are appropriate before calling the authorized service agent. Otherwise, call a qualified technician and plumber to have any necessary arrangements carried out. -
Page 5: Connecting Water Supply
Connecting water supply The water supply pressure required to run the appliance is between 1 to 10 bars (0.1 – 1 MPa). It is necessary to have 10 – 80 liters of water flowing from the fully open tap in one minute to have the appliance run smoothly. -
Page 6: Adjusting The Feet
Adjusting the feet Warning: In order to ensure that the appliance operates more silently and vibration-free, it must stand level and balanced on its feet. Balance the appliance by adjusting the feet. Otherwise, the appliance may move from its place and cause crushing and vibration problems. Loosen the lock nuts on the feet by hand. -
Page 7: Operation Instruction
OPERATION INSTRUCTION PREPARATION Sorting the laundry Sort laundry according to type of fabric, colour, degree of soiling and allowable water temperature. Always follow the instructions given on the garment tags. Preparing laundry for washing Laundry items with metal attachments such as, underwired bras, belt buckles or metal buttons will damage the appliance. -
Page 8: Correct Load Capacity
Correct load capacity The maximum load capacity depends on the type of laundry, the degree of soiling and the washing programme desired. The appliance automatically adjusts the amount of water according to the weight of the loaded laundry. Warning: Refer to “Programme table”. When overloaded, machine's washing performance will drop. Moreover, noise and vibration problems may occur. - Page 9 Detergent, softener and other cleaning agents Add detergent and softener before starting the washing programme. Never leave the detergent drawer open while the washing programme is running! When using a programme without prewash, do not put any detergent into the prewash compartment (compartment 1).
- Page 10 Oxygen based bleaches can be used together with detergents; however, if its thickness is not the same with the detergent, put the detergent first into compartment 2 in the detergent drawer and wait until the detergent flows while the appliance is taking in water. Add the bleaching agent into the same compartment while the appliance is still taking in water.
-
Page 11: Tips For Efficient Washing
Tips for efficient washing Clothes Light colours and Colours Dark colours Delicates/ whites Woollens/Silks (Recommended (Recommended (Recommended (Recommended temperature range temperature range temperature range temperature range based on soiling level: based on soiling level: based on soiling level: based on soiling level: 40-90ºC) cold-40ºC) cold-40ºC) -
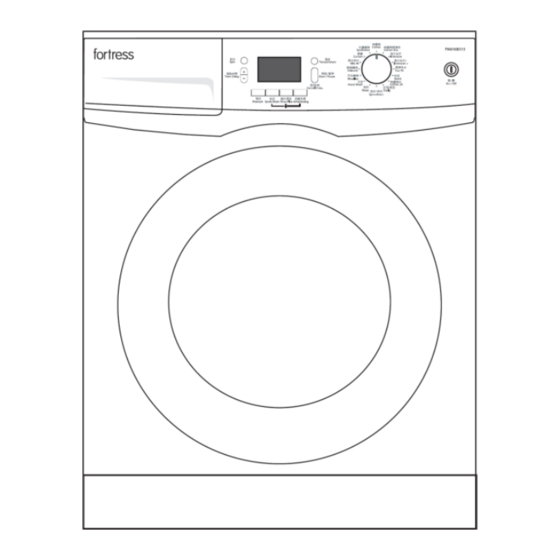
Page 12: Control Panel
Control panel Spin button On / Off button Display Time Delay buttons (+ / -) Temperature button Auxiliary Function buttons Programme Selection knob Start / Pause button Display symbols a) Spin Speed indicator g) Economy symbol b) Temperature indicator h) Time Delay symbol c) Spin symbol Door Locked symbol d) Temperature symbol... -
Page 13: Main Programmes
Main programmes Depending on the type of fabric, use the following main programmes. Cotton Use this programme for the cotton laundry (bed sheets, duvet and pillowcase sets, towels, bathrobes, underwear, etc.). The laundry will be washed with vigorous washing action for a longer washing cycle. Synthetics Use this programme to wash the synthetic clothes (shirts, blouses, synthetic/cotton blends, etc.). -
Page 14: Special Programmes
13. Curtain Use this programme to wash tulles and curtains. Thanks to the special spin profile of the programme, tulles and curtains crease lesser. As their meshed texture causes excessive foaming, wash the veils/tulle by putting little amount of detergent into the main wash compartment. -
Page 15: Programme Table
Programme table Auxiliary functions Selectable Max. Load Quick Rinse Anti- Programme Max. Speed Prewash temperature (kg) Wash Plus creasing range ˚C Cotton 1000 90-Cold Synthetics 1000 60-Cold Woollen 1000 40-Cold Cotton Eco 1000 60-40 ... -
Page 16: Auxiliary Function Selection
Auxiliary function selection Select the desired auxiliary functions before starting the programme. Furthermore, you may also select or cancel auxiliary functions that are suitable to the running programme by pressing the Start / Pause button when the washer is operating. For this, the washer must be in a step before the auxiliary function you are going to select or cancel. -
Page 17: Time Delay
Time delay With the time delay function the startup of the programme may be delayed up to 24 hours. Time delay can be increased by increments of 30 minutes. To avoid the risk of staining of the clothes, do not use liquid detergents when time delay is set! Open the loading door, place the laundry and put detergent, etc. -
Page 18: Loading Door Lock
Spin Appears at the beginning of the final spin step and remains lit during Spin+Drain special programmes. If the washer does not pass to the spinning step, the automatic unbalanced load detection system might be activated due to the unbalanced distribution of the laundry in the washer. Loading door lock There is a locking system on the loading door of the washer that prevents opening of the door in cases when the water level is unsuitable. -
Page 19: Maintenance Instruction
Cancelling the programme Press and hold Start / Pause button for 3 seconds. Start symbol will flash. Programme indicator of the step at which the programme was cancelled will remain lit. "End" will appear on the display and the programme will be cancelled. -
Page 20: Cleaning The Loading Door And The Drum
Cleaning the loading door and the drum Residues of softener, detergent and dirt may accumulate in the washer in time and may cause unpleasant odours and washing complaints. To avoid this, use the Cotton 90°C programme with Rinse Plus auxiliary functions to clean the drum. - Page 21 Warning: Foreign substances left in the pump filter may damage the appliance or may cause noise problem. In order to clean the dirty filter and discharge the water: Unplug the appliance to cut off the supply power. Warning: Temperature of the water inside the appliance may rise up to 90 ºC. To avoid burning risk, filter must be cleaned after the water in the appliance cools down.
-
Page 22: Trouble Shooting
TROUBLE SHOOTING Programme cannot be started or selected Washing machine has switched to self-protection mode due to a supply problem (line voltage, water pressure, etc.). Press and hold Start / Pause button for 3 seconds to reset to factory settings. (See "Cancelling the programme"). -
Page 23: Specification
Warning: If the problem still cannot be eliminated after following the instructions in this section, consult the authorized service agent. Never try to repair a non-functional washer yourself. SPECIFICATION Model FW1016B613 Maximum capacity (dry laundry) 6 kg Height 84 cm... -
Page 24: Warranty
WARRANTY The appliance has 3 years warranty from the date of purchase. The warranty shall not apply: A. to any appliance subjected to misuse, alteration, act of God, improper handling, improper transport, improper testing or unauthorized repair; B. to cosmetic problems or defects which result from normal wear and tear under ordinary use yet not affecting the performance or use of the appliance;...
Need help?
Do you have a question about the FW1016B613 and is the answer not in the manual?
Questions and answers