Digi DT800 Instruction Manual
Lane timer
Hide thumbs
Also See for DT800:
- Operating instructions manual (14 pages) ,
- Instruction manual (15 pages)
Advertisement
Quick Links
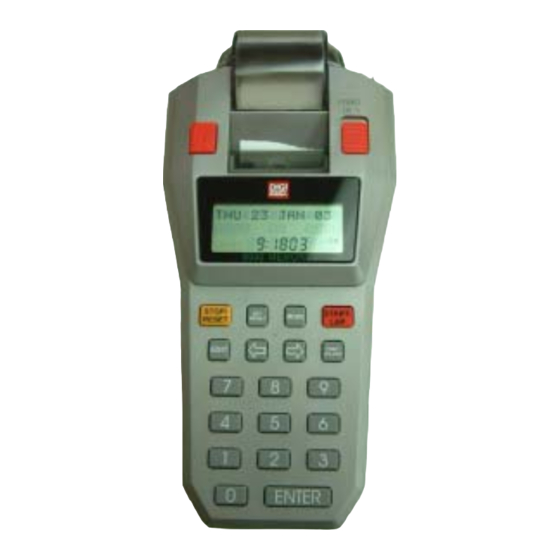
DT800(E75) Lane Timer Instruction Manual
Features:
1) 8000 Memories
2) Built-in PRINTER
3) Up to10 Lane Buttons
4) PC Upload Function
5) 12 / 24Hr User-selectable Clock
6) 4-Digit Bib Number
7) 4-Digit Place Counter
8) 2-Digit Lap Counter
9) Auto Print Out
10) Print Final Result Function
11) Pre-Entry of Bib Numbers in Track Races
12) Single and Multi Start Times for Road Races
13) Maximum 99 Waves
14) Race Recall Function
15) Memory Clear Function
16) Printing Pause Function
17) Key Operation Sound
18) AC or DC operated, AC adaptor enclosed
Battery installation:
In the DT800(E75) Lane Timer two types of batteries are used -- 4 pieces of 1.5V AA size
alkaline battery and 1 piece of CR2032 Lithium battery. The AA size alkaline batteries
supply the power for both printer and CPU. The 3V CR2032 battery is for back up purpose.
Printing is not available when only the CR2032 battery is installed.
To replace batteries remove the battery lid as shown in Fig.1. Replace the AA size
alkaline batteries according to the polarities shown on the case. To replace the CR2032,
unscrew the positive metal contact and replace the battery into the position shown in Fig.
1 with positive side face up. Re-screw the metal contact.
**: Always replace at the same time with all 4 pieces of new AA size high capacity
alkaline batteries.
You do not need to reset the Timer if the clock keeps running after changing of batteries.
If all batteries are dead and the clock is out of order, you need to press the reset key Fig.
1 to reset the Timer after battery replacement. During reset or power up, all display
segments will be turned on for 2 seconds. The timer will then switch to clock mode
automatically. Slide back the battery lid to complete the battery replacement procedure.
**: Remove all the AA size alkaline batteries if the Lane Timer will not be used for a
long time to avoid battery leakage that may damage the timer.
1
Advertisement

Related Manuals for Digi DT800


Summary of Contents for Digi DT800
- Page 1 18) AC or DC operated, AC adaptor enclosed Battery installation: In the DT800(E75) Lane Timer two types of batteries are used -- 4 pieces of 1.5V AA size alkaline battery and 1 piece of CR2032 Lithium battery. The AA size alkaline batteries supply the power for both printer and CPU.
-
Page 2: Reset Key
CR2032 POSITIVE METAL CONTACT RESET KEY Fig. 1 Clock Mode and Display Contrast: Press [MODE] key to switch to clock mode as shown in Fig. 2. The display contrast can be adjusted for your best viewing by pressing [⇐] or [⇒] keys. Week date Date Month... - Page 3 Fig. 3 Fig. 4 The numbers on the top of the Linkgate unit represent the lane number on the track. Insert lane buttons into their respective positions, as shown in Fig. 5. The connections should look like Fig. 6. Fig. 5 Fig.
- Page 4 Fig. 8 Fig.9 lane button # 6 is pressed In the button test mode, the display will show the corresponding lane number when that button is held down (Fig. 9). This is to help to make sure that the right button is used for each lane and that it is well connected.
- Page 5 If other lane buttons were pressed during bib number entry process, those records will be memorized. The last record will be displayed when [ENTER] is pressed. Pressing [STOP/RESET] during a race will stop the timer, pressing [START/LAP] will start it again. To reset, press [STOP/RESET] while the timer is stopping. The timer also allows correcting the bib number or assigning a new bib number, as follows: 1 When the race is stopped, press [EDIT] to enter edit mode and use [⇐] or [⇒] to scroll to the desired lane.
- Page 6 Single Lane Road Race: When Road race is selected by pressing [2] in Race mode (Fig. 7), wave number can be set as in Fig.15. Enter the desired wave number (maximum 99 waves) and press [ENTER] to confirm. The display will be as shown in Fig.16. Press [1] to select Single or [2] to select Multi lane road races.
- Page 7 Recall Mode: Recall mode can be entered only when there is a minimum of 1 race record in the memory. Press [MODE] until the display shows a race number on the first row, as in Fig. 21. Fig. 21 The first row of the display shows the race type i.e. TRACK, SINGLE or MULTI followed by a race number such as 0001, 0002 etc.
- Page 8 Delete Races: Select the race (as in Fig. 21), press and hold [STOP/RESET] for 1 second, the display will show ’ DELETE ? ’, keep holding the key for another 2 seconds, the display will show ‘ DELETED ’ (Fig. 24) At this point the selected race is completely erased. If [STOP/RESET] is continuously held down, ‘...
- Page 9 ‘ PAPER FEED SWITCH ’ until the remaining paper is out completely. **: Do not touch the surface of the paper as it may cause poor printing. **: Always store the paper rolls in a cool, dry place and keep away from direct sunlight.
- Page 10 Fig. 33 AC power supply: Plug the power jack of the adaptor into the DC 9V terminal at the right side of the Lane Timer to use AC power. Please note that the power supply from the AA size alkaline batteries will be cut automatically as soon as the power jack is plugged into the terminal.
- Page 11 B) AU9720 driver setup, Hardware Connections and Settings: The following steps will guide you through all hardware connections and software settings. 1) Double click the CD Rom drive in ‘ MY COMPUTER ’. Then, double click the ‘ SETUP ’ icon in the AU9720 driver setup folder for driver installation. Before the installation completes, a window will pop up and ask you to plug in ‘...
- Page 12 5) From the program pull down menu, click ‘ SETTING ’ and select ‘ PORT ’. A list of COM port numbers (COM1-COM4) will be displayed. Select the port where the USB socket is inserted, and click ‘ OK ’ to accept. If an incorrect port number is selected, nothing will be transferred to the computer.
- Page 13 2) Real time Download: User can transfer data to the computer when operating the timer in racing mode. Please note that the record number in the Multilane program always starts from 0001 every time in this mode. Therefore, the race record number can be different in the Multilane program and the Lane timer.
- Page 14 4) Saving files: When saving files to computer, default file name format will be suggested by the Lane timer, e.g. file name TRACK-0001, will be suggested for track race and 0001 is the number of the record. The user can change the file name if needed. 5) Deleting records: To delete records, first select an unwanted race record by clicking the down arrow button next to it in ‘...
- Page 15 7) Print Setup/Print: Select the printer and print orientation in ‘ PRINT SETUP ’ of the ‘ FILE ’ pull down menu. Click ‘ PRINT ’ in the ‘ FILE ’ pull down menu to print the current race file immediately.
Need help?
Do you have a question about the DT800 and is the answer not in the manual?
Questions and answers