Table of Contents
Advertisement
We recommend that our products be installed and serviced
by professionals who are certifi ed in the U.S. By NFI
(National Fireplace Institute) or in Canada by WETT
(Wood Energy Technical Training).
SAFETY NOTICE: Read this entire manual before you install and use your appliance. If not properly
installed, a house fi re may result. To reduce the risk of fi re, follow the installation instructions. Failure to
follow instructions may result in property damage, bodily injury, or even death. Contact local building, fi re
offi cials or authorities having jurisdiction about permits, restrictions and installation inspection requirements
in your area.
SAVANNAH WOOD INSERT
FOR RESIDENTIAL INSTALLATION
6" (152mm) Flue Required
OWNERS MANUAL
MODEL:
SSI30
Advertisement
Table of Contents

Related Manuals for Lexington Forge SSI30


Summary of Contents for Lexington Forge SSI30
- Page 1 SAVANNAH WOOD INSERT FOR RESIDENTIAL INSTALLATION 6" (152mm) Flue Required MODEL: SSI30 OWNERS MANUAL We recommend that our products be installed and serviced by professionals who are certifi ed in the U.S. By NFI (National Fireplace Institute) or in Canada by WETT (Wood Energy Technical Training).
-
Page 2: Table Of Contents
CONTENTS Chimney clearances ............13 Specifi cations ..............03 Insert and pipe instructions ..........14 Questions? ................. 04 Installing insert ..............15 Pre-installation instructions ..........05 Operation ................16 Unpacking and installation ..........07 Maintenance ..............18 Removing the fl ue collar ........... 08 Replacement parts ............. -
Page 3: Specifi Cations
SPECIFICATIONS OVERALL DIMENSIONS "E" "F" "G" "B" "D" "A" "A" "C" FRONT VIEW SIDE VIEW SURROUND ADJUSTMENT MODEL SSI30 20.50 27.50 22.75 5.50 44" 40" 34" 30" A. 30" x 40" B. 34" x 44" SURROUND OPTIONS 63D4004... -
Page 4: Questions
2. Under specifi c conditions used during EPA emissions testing. NEED TO ASK QUESTIONS? REQUIRE PARTS INFORMATION? First, contact the Lexington Forge Dealer from whom you purchased your insert, for parts and service. Have the following information ready: Model and product serial numbers can be found on the certifi cation label of your insert. -
Page 5: Pre-Installation Instructions
PRE-INSTALLATION INSTRUCTIONS After reading these instructions, if you have any doubt about your ability to complete your installation in a professional like manner, you should obtain the services of an installer versed in all aspects as to the correct and safe installation. DO NOT use temporary, makeshift compromises during installation. BEFORE INSTALLATION OF YOUR APPLIANCE (NOTE: Before installing your appliance be sure to write down the model and serial numbers and keep them in a safe place. - Page 6 PRE-INSTALLATION INSTRUCTIONS PLANNING YOUR INSTALLATION Check with local building offi cial for local code requirements Have your chimney and fi replace cleaned and inspected for serviceability before installing appliance. A professional chimney sweep can provide this service. They can also offer advice or install chimney liners and your insert. Masonary fi...
-
Page 7: Unpacking And Installation
• The SSI30 is shipped with the power cord for the blower on the right side. If you want to move it to the left side now is the best time as you can access it under the insert easily by sliding the insert just off the edge of the pallet. See page 9 for instructions on converting fan wire from left to right. -
Page 8: Removing The Fl Ue Collar
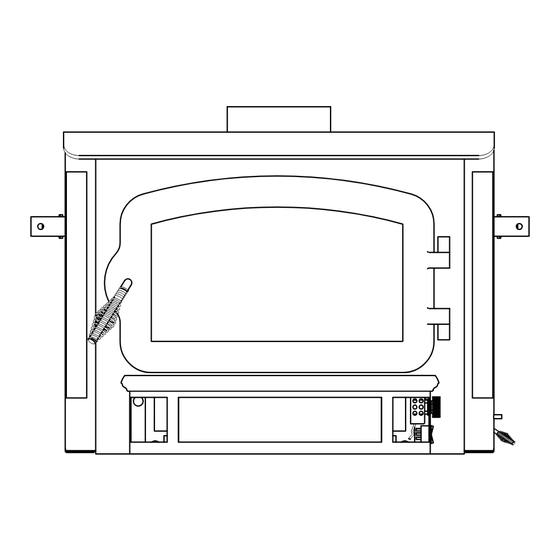
REMOVING FLUE COLLAR C-CAST REMOVING THE FLUE COLLAR SECONDARY BAFFLE AIR TUBES The Savannah insert has a removable fl ue collar to help with tight installations. You should familiarize yourself with it before you install your insert. To remove the fl ue collar you will have to remove the secondary air tubes and the C-cast baffl... -
Page 9: Fan Wiring Conversion
FAN WIRING CONVERSION Figure 12 Figure 11 Figure 13 FAN WIRING CONVERSION FROM RIGHT TO LEFT Remove ash lip and shroud by lifting straight up. NOTE: The ash lip and shroud are held in place by a keyhole slot and bolt system. Lifting up on the ash lip allows the bolt head to slip through the keyhole. -
Page 10: Blower And Ash Lip Assembly
BLOWER AND ASH LIP ASSEMBLY BLOWER AND ASH LIP ASSEMBLY 1. Attach the wires as shown in Diagram 1 making sure you push all connections together tightly 2. Insert the snapstat into its holder as shown in Figure 16, making sure that the connectors are not touching the stove. 3. -
Page 11: Clearances To Combustibles
CLEARANCES TO COMBUSTIBLES CLEARANCE TO COMBUSTIBLES Clearance to Combustibles Min. A. To side wall 11" B. To mantel (12" max) 23" C. To top trim (3/4" max) 16" D. To side trim (3/4" max) 7" Floor Protection E. In front of insert (1/2" min) 18"... -
Page 12: Calculating Alternate Fl Ooring Materials
FLOOR PROTECTION CALCULATING ACCEPTABLE ALTERNATE FLOOR MATERIALS All fl oor protection must be non-combustible (i.e. metal, brick, stone, mineral fi ber, etc.). Any organic materials (i.e. plastics, wood or paper products, etc.) are combustible and must not be used. The fl oor protection specifi ed includes some form of thermal designation such as R-value (thermal resistance) or k-factor (thermal conductivity). -
Page 13: Chimney Clearances
CHIMNEY CLEARANCES CHIMNEY (REFER TO CHIMNEY AND CHIMNEY CONNECTOR MANUFACTURER’S INSTRUCTIONS) Contact your local building authority for approved methods of installation NOTE: Canadian installations require a full reline of the chimney. 1. This appliance requires a masonry or pre-manufactured chimney listed to ULCS629 (Canada) and UL 103 HT (USA) sized correctly. -
Page 14: Insert And Pipe Instructions
INSERT AND PIPE INSTALLATIONS NOTES ON CHIMNEY AND INSERT PIPE INSTALLATIONS: Maintaining a clean chimney is important. Chimneys should be inspected regularly for creosote buildup. A straight chimney is easier to clean than one with 45 or 90 degree bends. A bend requires the pipe to be removed for cleaning. The insert baffl... -
Page 15: Installing Insert
INSTALLATION OF OFFSET FLUE COLLAR Offset fl ue collars are available in two sizes (3" and 6") from your Lexington Forge dealer for your Savannah insert. When installing an offset fl ue collar it is important that the offset adapter be secured with at least three screws into the insert fl... -
Page 16: Operation
OPERATION (Offset Flue Collar Installation continued) WARNING: Never allow the offset fl ue collar to support the weight of the chimney liner. The liner must be supported at the top of the chimney. Towards Flue gas stove direction As with all installations, fi nal approval of this installation type is contingent upon the authority having jurisdiction in your area. - Page 17 OPERATION DO NOT BURN: Treated wood, solvents, trash, coal, garbage, cardboard, colored paper NEVER USE GASOLINE, GASOLINE-TYPE LANTERN FUEL, KEROSENE, CHARCOAL LIGHTER FLUID, OR SIMILAR LIQUIDS TO START OR “FRESHEN UP” A FIRE IN THIS HEATER. KEEP ALL SUCH LIQUIDS WELL AWAY FROM THE HEATER WHILE IT IS IN USE INSTRUCTION FOR FIRST BURN –...
-
Page 18: Maintenance
Figure 25B: Removing Baffl e CLEANING YOUR CHIMNEY The Savannah SSI30 insert has a removable baffl e which allows the chimney to be cleaned without removing the insert from the fi replace. Make sure the stove is cool before proceeding To remove the rear of the baffl... - Page 19 GLASS AND GLASS GASKET REPLACEMENT REPLACE GLASS ONLY WITH HIGH TEMPERATURE CERAMIC AVAILABLE FROM YOUR LOCAL LEXINGTON FORGE DEALER After extensive use, the gasket material which provides glass and door seal may need to be replaced if it fails to sustain its resilience.
- Page 20 MAINTENANCE KEEP UNIT FREE OF CREOSOTE 1. Burn with air control open for several minutes at numerous intervals throughout the day during the heating season, being careful not to over-fi re unit. This removes the slight fi lm of creosote accumulated during low burn periods. 2.
-
Page 21: Replacement Parts
REPLACEMENT PARTS ITEM PART NO. DESCRIPTION 20H2032 5/16" WASHER 26D0619 BLOWER CORD 49D0130 BLOWER THERMO DISC 63D0026 SECONDARY AIR TUBE, MIDDLE 63D0028 SECONDARY AIR TUBE, REAR 63D0065 LEVELER BOLT 63D0112 SECONDARY AIR TUBE, FRONT 63D0185 SPRING HANDLE 63D2004 C-CAST ASSEMBLY 63D2022 TURN TIGHT CAST IRON 63D2040... -
Page 22: Illustrated Parts Breakdown
ILLUSTRATED PARTS BREAKDOWN Figure 25: Parts Breakdown 63D4004... -
Page 23: Faqs
FAQS FREQUENTLY ASKED QUESTIONS 1) What is the correct way to start a fi re? a) You will need small pieces of dry wood (kindling) and paper. Use only newspaper or paper that has not been coated or had unknown materials glued or applied to it. Never use coated (typically advertising fl yers) or colored paper. - Page 24 FAQS 7) Is it normal for soot to cover the glass at the beginning of a fi re? Your insert has been built with an air wash system that will help keep the glass clear when the fi rebox has reached a good operating temperature, and has a good draft.
- Page 25 NOTES 63D4004...
- Page 26 NOTES 63D4004...
- Page 27 NOTES 63D4004...
-
Page 28: Warranty
This warranty is expressly in lieu of other warranties, express or implied, including the warranty of merchantability of fi tness for purpose and of all other obligations or liabilities. Lexington Forge does not assume for it any other obligations or liability in connection with the sale or use of the appliance. In states that do not allow limitations on how long an implied warranty lasts, or do not allow exclusion of indirect damage, those limitations of exclusions may not apply to you.
Need help?
Do you have a question about the SSI30 and is the answer not in the manual?
Questions and answers